No-Bake Peanut Butter Chocolate Oat Bars Delight

If you crave a sweet treat that’s easy to make, you’re in for a treat! My No-Bake Peanut Butter Chocolate Oat Bars are not just delicious; they’re quick to prepare and full of goodness. With just a handful of simple ingredients, you can whip up a snack that’s perfect for any time. Join me as we dive into the world of these delightful bars and discover all the tips, tricks, and variations you can try!

- 2 cups rolled oats - 1 cup creamy peanut butter - 1/2 cup honey or maple syrup - 1/2 cup dark chocolate chips - 1/4 cup chia seeds - 1/4 cup coconut flakes (unsweetened) - 1/2 teaspoon vanilla extract - A pinch of salt I love how simple these ingredients are. Each one plays a role in making these bars taste great. The rolled oats give a nice chewy base. Peanut butter adds creaminess and protein. Honey or maple syrup adds sweetness and binds everything together. Chia seeds bring fiber and healthy fats. Coconut flakes add a touch of tropical flavor. Dark chocolate chips make everything better. Vanilla extract gives a warm hint. The salt brings out all the flavors. You can swap out the peanut butter for almond or sunflower seed butter. If you want a different sweetener, use agave syrup instead of honey. For a nut-free option, try tahini. You can leave out the coconut flakes if you don’t like them. If you prefer milk chocolate, use that instead of dark chocolate. You can also add nuts or dried fruit for extra texture. Each bar has about: - 150 calories - 5 grams protein - 10 grams fat - 15 grams carbs - 2 grams fiber These bars are a good snack choice. They provide energy and help keep you full. They are also rich in protein and healthy fats, which are great for your body. Enjoying these bars means you're treating yourself well! To start, gather all your ingredients. You will need rolled oats, creamy peanut butter, honey or maple syrup, dark chocolate chips, chia seeds, coconut flakes, vanilla extract, and a pinch of salt. This recipe is quick and fun! 1. In a large bowl, add 2 cups of rolled oats, 1/4 cup of chia seeds, and 1/4 cup of coconut flakes. Mix well until everything is combined. 2. Next, take a microwave-safe bowl. Heat 1 cup of peanut butter and 1/2 cup of honey (or maple syrup) in the microwave for about 30 seconds. Mix until it's smooth and warm. 3. Pour the warm peanut butter blend over the dry mixture. Add in 1/2 teaspoon of vanilla extract and a pinch of salt. 4. Now, use a spatula or your hands to mix everything. Make sure the dry ingredients are well coated with the peanut butter mixture. 5. Gently fold in 1/2 cup of dark chocolate chips, but save a few for topping later. 1. Line an 8x8-inch baking dish with parchment paper. Leave some overhang for easy removal. 2. Firmly press the mixture into the dish using your hands or a spatula. 3. Sprinkle the reserved chocolate chips on top and press them down slightly to stick. 4. Place the baking dish in the fridge. Let the bars set for at least 1 hour. 5. Once set, lift the bars out using the parchment paper. Cut them into squares or rectangles. 6. Store any leftovers in an airtight container in the fridge for up to one week. One big mistake is not mixing the dry ingredients well. You need to stir the oats, chia seeds, and coconut flakes until they are even. If they are not mixed, some bites will be dry. Another mistake is not pressing the mixture firmly into the dish. If you don’t press hard enough, the bars will crumble. Lastly, don’t skip the fridge time. Chilling helps the bars hold together. To boost the flavor, try adding a pinch of cinnamon or nutmeg. These spices give a warm taste that mixes well with peanut butter. You can also swap in different nut butters. Almond or cashew butter adds a unique twist. For texture, consider adding more coconut flakes or nuts. These give a nice crunch and flavor. Use a large mixing bowl for easy stirring. A microwave-safe bowl helps melt the peanut butter and honey smoothly. A spatula works best to mix the ingredients. You will need an 8x8-inch baking dish lined with parchment paper. This helps you lift the bars out easily. Lastly, a sharp knife is key to cutting the bars into perfect squares. {{image_2}} You can change up the bars to fit your taste. Try adding nuts for crunch. Walnuts or almonds work well. Dried fruit like raisins or cranberries adds sweetness. You can even add seeds like sunflower or pumpkin for more nutrition. Just keep the total amount similar, so the bars stay firm. If you want to switch the sweetener, use agave syrup instead of honey. Maple syrup gives a nice flavor too. You can even try brown rice syrup. Each sweetener changes the taste a bit, so pick what you like best. Just remember, keep the amount the same for the best texture. You can swap peanut butter for other nut butters. Almond butter gives a milder taste. Cashew butter is creamy and rich. Sunflower seed butter is great for nut-free options. Each choice brings a new flavor. Just make sure the texture stays similar for easy mixing. To keep your no-bake peanut butter chocolate oat bars fresh, use an airtight container. This helps lock in moisture and flavor. Place the bars in the fridge after they set. Make sure to separate layers with parchment paper, so they don’t stick together. This small step keeps each bar intact and ready to enjoy. If you want to save some bars for later, freezing is a great option. Wrap each bar in plastic wrap first, then place them in a freezer-safe bag. This keeps them fresh and prevents freezer burn. To enjoy, take them out and let them thaw in the fridge. They taste just as good after freezing. These tasty bars last about one week in the fridge. After that, they may lose their yummy flavor and texture. If you freeze them, they can last up to three months. Just remember to check for any changes in color or smell before eating. Keeping an eye on freshness ensures you always enjoy the best snacks. Yes, you can make these bars vegan. Just use maple syrup instead of honey. Maple syrup is a great plant-based sweetener. Also, choose vegan dark chocolate chips. This way, you keep the bars delicious and vegan-friendly. If you need a swap for peanut butter, try almond butter or sunflower seed butter. Both options add creaminess and flavor. Almond butter has a nice nutty taste. Sunflower seed butter is a great choice for nut-free diets. Just make sure to pick a creamy version for the best texture. To make these bars gluten-free, use certified gluten-free rolled oats. Regular oats may have gluten from cross-contamination. Most brands offer gluten-free oats, so check the label. This simple swap ensures everyone can enjoy these tasty bars without worry. This blog post covered key points to make tasty bars. We discussed ingredients, substitutions, and nutrition. You learned step-by-step mixing and cutting methods. Tips helped you avoid mistakes and improve flavor. Variations gave you ideas for custom treats. Lastly, we shared smart storage methods and answers to common questions. Whether you're a novice or a pro, these bars can suit any taste. Keep experimenting and enjoy your snack!

Ingredients

List of Ingredients

– 2 cups rolled oats

– 1 cup creamy peanut butter

– 1/2 cup honey or maple syrup

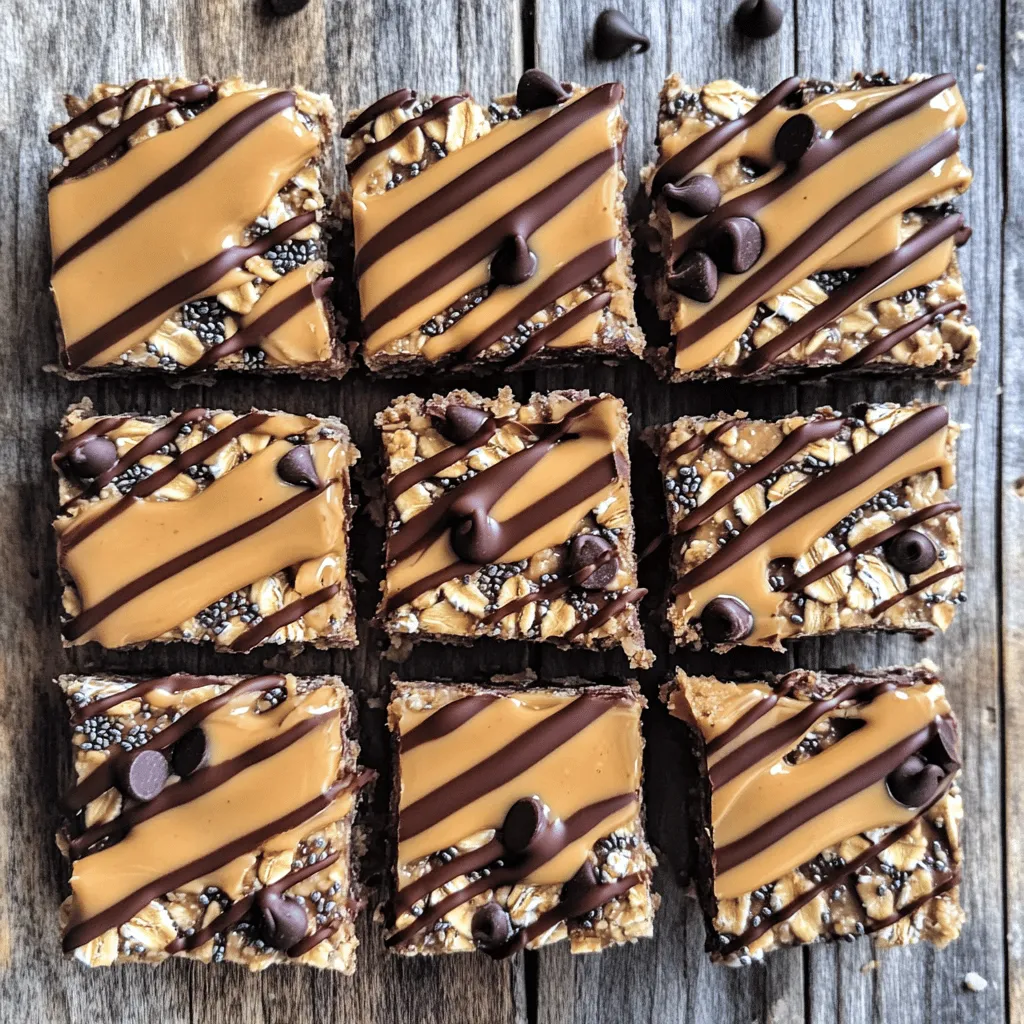
– 1/2 cup dark chocolate chips

– 1/4 cup chia seeds

– 1/4 cup coconut flakes (unsweetened)

– 1/2 teaspoon vanilla extract

– A pinch of salt

I love how simple these ingredients are. Each one plays a role in making these bars taste great. The rolled oats give a nice chewy base. Peanut butter adds creaminess and protein. Honey or maple syrup adds sweetness and binds everything together.

Chia seeds bring fiber and healthy fats. Coconut flakes add a touch of tropical flavor. Dark chocolate chips make everything better. Vanilla extract gives a warm hint. The salt brings out all the flavors.

Suggested Substitutions

You can swap out the peanut butter for almond or sunflower seed butter. If you want a different sweetener, use agave syrup instead of honey. For a nut-free option, try tahini. You can leave out the coconut flakes if you don’t like them.

If you prefer milk chocolate, use that instead of dark chocolate. You can also add nuts or dried fruit for extra texture.

Nutritional Information

Each bar has about:

– 150 calories

– 5 grams protein

– 10 grams fat

– 15 grams carbs

– 2 grams fiber

These bars are a good snack choice. They provide energy and help keep you full. They are also rich in protein and healthy fats, which are great for your body. Enjoying these bars means you’re treating yourself well!

Step-by-Step Instructions

Preparation Steps Overview

To start, gather all your ingredients. You will need rolled oats, creamy peanut butter, honey or maple syrup, dark chocolate chips, chia seeds, coconut flakes, vanilla extract, and a pinch of salt. This recipe is quick and fun!

Detailed Mixing Process

1. In a large bowl, add 2 cups of rolled oats, 1/4 cup of chia seeds, and 1/4 cup of coconut flakes. Mix well until everything is combined.

2. Next, take a microwave-safe bowl. Heat 1 cup of peanut butter and 1/2 cup of honey (or maple syrup) in the microwave for about 30 seconds. Mix until it’s smooth and warm.

3. Pour the warm peanut butter blend over the dry mixture. Add in 1/2 teaspoon of vanilla extract and a pinch of salt.

4. Now, use a spatula or your hands to mix everything. Make sure the dry ingredients are well coated with the peanut butter mixture.

5. Gently fold in 1/2 cup of dark chocolate chips, but save a few for topping later.

Setting and Cutting the Bars

1. Line an 8×8-inch baking dish with parchment paper. Leave some overhang for easy removal.

2. Firmly press the mixture into the dish using your hands or a spatula.

3. Sprinkle the reserved chocolate chips on top and press them down slightly to stick.

4. Place the baking dish in the fridge. Let the bars set for at least 1 hour.

5. Once set, lift the bars out using the parchment paper. Cut them into squares or rectangles.

6. Store any leftovers in an airtight container in the fridge for up to one week.

Tips & Tricks

Common Mistakes to Avoid

One big mistake is not mixing the dry ingredients well. You need to stir the oats, chia seeds, and coconut flakes until they are even. If they are not mixed, some bites will be dry. Another mistake is not pressing the mixture firmly into the dish. If you don’t press hard enough, the bars will crumble. Lastly, don’t skip the fridge time. Chilling helps the bars hold together.

Enhancing Flavor and Texture

To boost the flavor, try adding a pinch of cinnamon or nutmeg. These spices give a warm taste that mixes well with peanut butter. You can also swap in different nut butters. Almond or cashew butter adds a unique twist. For texture, consider adding more coconut flakes or nuts. These give a nice crunch and flavor.

Tools and Equipment Recommendations

Use a large mixing bowl for easy stirring. A microwave-safe bowl helps melt the peanut butter and honey smoothly. A spatula works best to mix the ingredients. You will need an 8×8-inch baking dish lined with parchment paper. This helps you lift the bars out easily. Lastly, a sharp knife is key to cutting the bars into perfect squares.

Variations

Add-Ins and Customizations

You can change up the bars to fit your taste. Try adding nuts for crunch. Walnuts or almonds work well. Dried fruit like raisins or cranberries adds sweetness. You can even add seeds like sunflower or pumpkin for more nutrition. Just keep the total amount similar, so the bars stay firm.

Alternative Sweeteners

If you want to switch the sweetener, use agave syrup instead of honey. Maple syrup gives a nice flavor too. You can even try brown rice syrup. Each sweetener changes the taste a bit, so pick what you like best. Just remember, keep the amount the same for the best texture.

Flavor Swaps (e.g., different nut butters)

You can swap peanut butter for other nut butters. Almond butter gives a milder taste. Cashew butter is creamy and rich. Sunflower seed butter is great for nut-free options. Each choice brings a new flavor. Just make sure the texture stays similar for easy mixing.

Storage Info

How to Store for Freshness

To keep your no-bake peanut butter chocolate oat bars fresh, use an airtight container. This helps lock in moisture and flavor. Place the bars in the fridge after they set. Make sure to separate layers with parchment paper, so they don’t stick together. This small step keeps each bar intact and ready to enjoy.

Freezing Guidelines

If you want to save some bars for later, freezing is a great option. Wrap each bar in plastic wrap first, then place them in a freezer-safe bag. This keeps them fresh and prevents freezer burn. To enjoy, take them out and let them thaw in the fridge. They taste just as good after freezing.

Shelf Life Details

These tasty bars last about one week in the fridge. After that, they may lose their yummy flavor and texture. If you freeze them, they can last up to three months. Just remember to check for any changes in color or smell before eating. Keeping an eye on freshness ensures you always enjoy the best snacks.

FAQs

Can I make these bars vegan?

Yes, you can make these bars vegan. Just use maple syrup instead of honey. Maple syrup is a great plant-based sweetener. Also, choose vegan dark chocolate chips. This way, you keep the bars delicious and vegan-friendly.

What can I use instead of peanut butter?

If you need a swap for peanut butter, try almond butter or sunflower seed butter. Both options add creaminess and flavor. Almond butter has a nice nutty taste. Sunflower seed butter is a great choice for nut-free diets. Just make sure to pick a creamy version for the best texture.

How do I make these bars gluten-free?

To make these bars gluten-free, use certified gluten-free rolled oats. Regular oats may have gluten from cross-contamination. Most brands offer gluten-free oats, so check the label. This simple swap ensures everyone can enjoy these tasty bars without worry.

This blog post covered key points to make tasty bars. We discussed ingredients, substitutions, and nutrition. You learned step-by-step mixing and cutting methods. Tips helped you avoid mistakes and improve flavor. Variations gave you ideas for custom treats. Lastly, we shared smart storage methods and answers to common questions.

Whether you’re a novice or a pro, these bars can suit any taste. Keep experimenting and enjoy your snack!

- 2 cups rolled oats - 1 cup creamy peanut butter - 1/2 cup honey or maple syrup - 1/2 cup dark chocolate chips - 1/4 cup chia seeds - 1/4 cup coconut flakes (unsweetened) - 1/2 teaspoon vanilla extract - A pinch of salt I love how simple these ingredients are. Each one plays a role in making these bars taste great. The rolled oats give a nice chewy base. Peanut butter adds creaminess and protein. Honey or maple syrup adds sweetness and binds everything together. Chia seeds bring fiber and healthy fats. Coconut flakes add a touch of tropical flavor. Dark chocolate chips make everything better. Vanilla extract gives a warm hint. The salt brings out all the flavors. You can swap out the peanut butter for almond or sunflower seed butter. If you want a different sweetener, use agave syrup instead of honey. For a nut-free option, try tahini. You can leave out the coconut flakes if you don’t like them. If you prefer milk chocolate, use that instead of dark chocolate. You can also add nuts or dried fruit for extra texture. Each bar has about: - 150 calories - 5 grams protein - 10 grams fat - 15 grams carbs - 2 grams fiber These bars are a good snack choice. They provide energy and help keep you full. They are also rich in protein and healthy fats, which are great for your body. Enjoying these bars means you're treating yourself well! To start, gather all your ingredients. You will need rolled oats, creamy peanut butter, honey or maple syrup, dark chocolate chips, chia seeds, coconut flakes, vanilla extract, and a pinch of salt. This recipe is quick and fun! 1. In a large bowl, add 2 cups of rolled oats, 1/4 cup of chia seeds, and 1/4 cup of coconut flakes. Mix well until everything is combined. 2. Next, take a microwave-safe bowl. Heat 1 cup of peanut butter and 1/2 cup of honey (or maple syrup) in the microwave for about 30 seconds. Mix until it's smooth and warm. 3. Pour the warm peanut butter blend over the dry mixture. Add in 1/2 teaspoon of vanilla extract and a pinch of salt. 4. Now, use a spatula or your hands to mix everything. Make sure the dry ingredients are well coated with the peanut butter mixture. 5. Gently fold in 1/2 cup of dark chocolate chips, but save a few for topping later. 1. Line an 8x8-inch baking dish with parchment paper. Leave some overhang for easy removal. 2. Firmly press the mixture into the dish using your hands or a spatula. 3. Sprinkle the reserved chocolate chips on top and press them down slightly to stick. 4. Place the baking dish in the fridge. Let the bars set for at least 1 hour. 5. Once set, lift the bars out using the parchment paper. Cut them into squares or rectangles. 6. Store any leftovers in an airtight container in the fridge for up to one week. One big mistake is not mixing the dry ingredients well. You need to stir the oats, chia seeds, and coconut flakes until they are even. If they are not mixed, some bites will be dry. Another mistake is not pressing the mixture firmly into the dish. If you don’t press hard enough, the bars will crumble. Lastly, don’t skip the fridge time. Chilling helps the bars hold together. To boost the flavor, try adding a pinch of cinnamon or nutmeg. These spices give a warm taste that mixes well with peanut butter. You can also swap in different nut butters. Almond or cashew butter adds a unique twist. For texture, consider adding more coconut flakes or nuts. These give a nice crunch and flavor. Use a large mixing bowl for easy stirring. A microwave-safe bowl helps melt the peanut butter and honey smoothly. A spatula works best to mix the ingredients. You will need an 8x8-inch baking dish lined with parchment paper. This helps you lift the bars out easily. Lastly, a sharp knife is key to cutting the bars into perfect squares. {{image_2}} You can change up the bars to fit your taste. Try adding nuts for crunch. Walnuts or almonds work well. Dried fruit like raisins or cranberries adds sweetness. You can even add seeds like sunflower or pumpkin for more nutrition. Just keep the total amount similar, so the bars stay firm. If you want to switch the sweetener, use agave syrup instead of honey. Maple syrup gives a nice flavor too. You can even try brown rice syrup. Each sweetener changes the taste a bit, so pick what you like best. Just remember, keep the amount the same for the best texture. You can swap peanut butter for other nut butters. Almond butter gives a milder taste. Cashew butter is creamy and rich. Sunflower seed butter is great for nut-free options. Each choice brings a new flavor. Just make sure the texture stays similar for easy mixing. To keep your no-bake peanut butter chocolate oat bars fresh, use an airtight container. This helps lock in moisture and flavor. Place the bars in the fridge after they set. Make sure to separate layers with parchment paper, so they don’t stick together. This small step keeps each bar intact and ready to enjoy. If you want to save some bars for later, freezing is a great option. Wrap each bar in plastic wrap first, then place them in a freezer-safe bag. This keeps them fresh and prevents freezer burn. To enjoy, take them out and let them thaw in the fridge. They taste just as good after freezing. These tasty bars last about one week in the fridge. After that, they may lose their yummy flavor and texture. If you freeze them, they can last up to three months. Just remember to check for any changes in color or smell before eating. Keeping an eye on freshness ensures you always enjoy the best snacks. Yes, you can make these bars vegan. Just use maple syrup instead of honey. Maple syrup is a great plant-based sweetener. Also, choose vegan dark chocolate chips. This way, you keep the bars delicious and vegan-friendly. If you need a swap for peanut butter, try almond butter or sunflower seed butter. Both options add creaminess and flavor. Almond butter has a nice nutty taste. Sunflower seed butter is a great choice for nut-free diets. Just make sure to pick a creamy version for the best texture. To make these bars gluten-free, use certified gluten-free rolled oats. Regular oats may have gluten from cross-contamination. Most brands offer gluten-free oats, so check the label. This simple swap ensures everyone can enjoy these tasty bars without worry. This blog post covered key points to make tasty bars. We discussed ingredients, substitutions, and nutrition. You learned step-by-step mixing and cutting methods. Tips helped you avoid mistakes and improve flavor. Variations gave you ideas for custom treats. Lastly, we shared smart storage methods and answers to common questions. Whether you're a novice or a pro, these bars can suit any taste. Keep experimenting and enjoy your snack!

No-Bake Peanut Butter Chocolate Oat Bars

Satisfy your sweet tooth with these easy no-bake peanut butter chocolate oat bars! Made with wholesome ingredients like rolled oats, creamy peanut butter, and dark chocolate chips, these bars are a delicious treat that's simple to prepare. Perfect for snack time or an on-the-go energy boost, you’ll love how quick they are to make. Click through to explore the full recipe and indulge in a guilt-free dessert!

Ingredients
  

2 cups rolled oats

1 cup creamy peanut butter

1/2 cup honey or maple syrup

1/2 cup dark chocolate chips

1/4 cup chia seeds

1/4 cup coconut flakes (unsweetened)

1/2 teaspoon vanilla extract

A pinch of salt

Instructions
 

In a large mixing bowl, combine the rolled oats, chia seeds, and coconut flakes. Stir until the dry ingredients are evenly mixed.

    In a microwave-safe bowl, heat the peanut butter and honey (or maple syrup) together in the microwave for about 30 seconds or until warm and easily mixable. Stir until smooth.

      Pour the warm peanut butter mixture over the dry ingredients in the mixing bowl. Add the vanilla extract and a pinch of salt.

        Using a spatula or your hands, mix everything together until all the dry ingredients are well coated with the peanut butter mixture.

          Fold in the dark chocolate chips, saving a few to sprinkle on top.

            Line an 8x8-inch baking dish with parchment paper, leaving some overhang for easy removal. Press the mixture firmly into the dish using your hands or the back of a spatula.

              Sprinkle the reserved chocolate chips on top and press them down slightly.

                Place the baking dish in the refrigerator and allow the bars to set for at least 1 hour.

                  Once set, remove the bars from the baking dish using the parchment paper overhang, and cut them into squares or rectangles.

                    Store the bars in an airtight container in the fridge for up to one week.

                      Prep Time: 15 minutes | Total Time: 1 hour 15 minutes | Servings: 16 bars