No Bake Biscoff Cookie Butter Bars Deliciously Easy

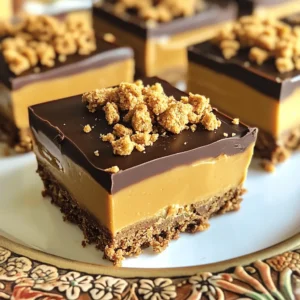
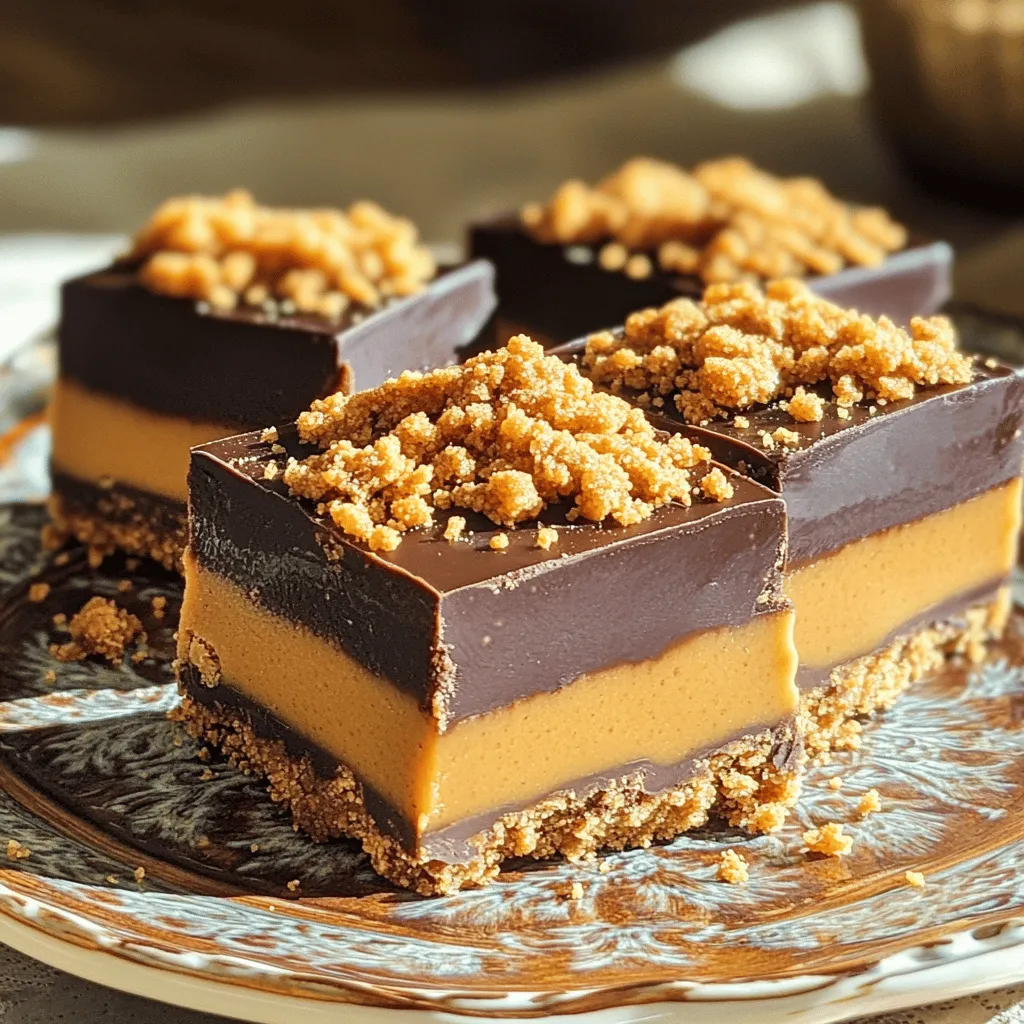
Craving a sweet treat but don’t want to bake? You’re in luck! These No Bake Biscoff Cookie Butter Bars are simple, quick, and oh-so-delicious. With just a few ingredients, you’ll create a rich dessert that delights your taste buds. I’ll guide you step-by-step, sharing tips and variations to make it your own. Let’s dive into the world of creamy cookie butter and chocolate bliss!

To make these No Bake Biscoff Cookie Butter Bars, you'll need: - 1 ½ cups Biscoff cookies, crushed - ½ cup unsalted butter, melted - 1 cup Biscoff cookie butter - ½ cup powdered sugar - 1 teaspoon vanilla extract - 1 cup dark chocolate chips - 2 tablespoons coconut oil (for the chocolate layer) These simple ingredients come together to create a sweet and rich treat. If you don't have Biscoff cookies, you can use any crunchy cookie. Graham crackers work well too. For the butter, you can swap unsalted for salted butter if needed. If you want to go dairy-free, use coconut oil instead of butter. For the Biscoff cookie butter, almond or sunflower seed butter can be a good alternative. Adjust the sugar if your substitute is sweet. To make your bars even more special, consider these fun toppings: - Crushed Biscoff cookies for a crunchy finish - A drizzle of extra cookie butter for added flavor - Sea salt flakes for a salty-sweet contrast - Chopped nuts like pecans or almonds for texture These options can add a personal touch and make your bars even more delicious. First, take your Biscoff cookies and crush them. You can use a food processor or place them in a bag and crush them with a rolling pin. Aim for fine crumbs. Next, melt your unsalted butter in a bowl. Mix the crushed cookies with the melted butter until it looks like wet sand. This mixture will form the base of your bars. Now, take an 8x8 inch baking pan. Press the cookie mixture firmly into the bottom of the pan. Make sure it's even and compact. This step is key for a strong crust. In another bowl, add the Biscoff cookie butter. Then, pour in the powdered sugar and vanilla extract. Use a spatula to mix until the mixture is smooth and well combined. This filling is rich and adds a wonderful flavor to your bars. Once mixed, spread the cookie butter filling evenly over the crust in the baking pan. Use a spatula to smooth it out. This layer is what makes the bars so tasty. For the chocolate layer, gather dark chocolate chips and coconut oil. Place them in a microwave-safe bowl. Heat in the microwave in 30-second intervals. Stir the mixture between each interval until it is melted and smooth. When the chocolate is ready, pour it over the Biscoff layer in the pan. Use a spatula to spread the chocolate evenly. This final layer adds a nice touch and makes the bars look appealing. Now, refrigerate the bars for at least 2 hours or until they are firm. After they set, take them out of the pan and cut them into squares. Enjoy your delicious no-bake Biscoff cookie butter bars! To get the best crust, start with crushed Biscoff cookies. Use a food processor or a rolling pin to crush them finely. Mix the crumbs with melted butter. It should feel like wet sand. Press the mixture firmly into the bottom of your baking pan. Use a flat tool to even it out. A good crust holds the bars together. Chill the crust for 15 minutes before adding the filling. This helps it set well. For a smooth chocolate layer, use quality dark chocolate chips. Combine them with coconut oil in a microwave-safe bowl. Melt them in short bursts of 30 seconds, stirring after each. This keeps the chocolate from burning. Once it’s smooth, pour it over the Biscoff layer. Use a spatula to spread it evenly. Make sure to cover all edges. A smooth layer looks nice and tastes great. When you’re ready to slice, use a sharp knife. Wipe the knife with a damp cloth after each cut. This helps keep the edges clean. If the bars feel too soft, chill them longer. Aim for small squares for easy serving. If you want a special touch, top each slice with a sprinkle of crushed cookies. This makes the bars look even more tempting. {{image_2}} You can make these bars even better by adding nuts. Chopped almonds or walnuts add a nice crunch. You can mix them in with the cookie crust. Just add about half a cup of your chosen nuts. This will add flavor and texture. You can also include mini chocolate chips or even dried fruit. These mix-ins make each bite a fun surprise! If you prefer a sweeter taste, try white chocolate. It gives a creamy touch to the bars. To do this, swap the dark chocolate chips for white ones. Melt the white chocolate the same way. Use coconut oil to keep it smooth. The white chocolate will contrast nicely with the Biscoff layers. You can also drizzle melted white chocolate on top for a pretty finish. You can turn these bars into cookie butter cups! Use cupcake liners in a muffin tin. Press the cookie crust mixture into the bottom of each liner. Add the Biscoff filling and top with chocolate like before. Chill them until set. These cookie butter cups are easy to grab and enjoy. They are perfect for parties or a sweet snack! To keep your No Bake Biscoff Cookie Butter Bars fresh, store them in an airtight container. Place parchment paper between layers to avoid sticking. This helps maintain their texture and flavor. Keep the container in the fridge for the best results. They can last up to one week, but trust me, they won’t last that long! Freezing these bars is easy. First, cut the bars into squares. Wrap each square in plastic wrap or foil. Then, place them in a freezer-safe bag or container. They freeze well for up to three months. When you want to enjoy them, just thaw them in the fridge overnight. Serve these bars chilled for the best taste. They are great for parties or a sweet treat after dinner. If stored properly, they stay fresh for about a week in the fridge. So, you can enjoy a little piece of heaven whenever you want! Yes, you can! You can swap Biscoff cookies for graham crackers, Oreos, or any crisp cookie. Each gives a different taste and texture. Just crush the cookies and mix them with melted butter. The same method works for all types. These bars need at least 2 hours to set in the fridge. This time helps the layers firm up. If you want them extra firm, you can chill them longer. Just keep an eye on them so they don’t freeze solid. You can serve these bars with whipped cream or vanilla ice cream. A drizzle of extra Biscoff cookie butter on top is a great idea too. Fresh fruit like strawberries or bananas also pairs well, adding a nice touch. In this blog post, we explored how to make No Bake Biscoff Cookie Butter Bars. We covered the ingredients, including possible substitutions and tasty toppings. I shared step-by-step instructions for the crust, filling, and chocolate layer. You learned tips for achieving the perfect crust and smooth chocolate. The variations section showed how to mix in nuts or use white chocolate. Finally, we discussed best storage practices and answered key FAQs. These bars are simple yet delicious. Enjoy making them and share with friends!

Ingredients

Complete list of ingredients

To make these No Bake Biscoff Cookie Butter Bars, you’ll need:

– 1 ½ cups Biscoff cookies, crushed

– ½ cup unsalted butter, melted

– 1 cup Biscoff cookie butter

– ½ cup powdered sugar

– 1 teaspoon vanilla extract

– 1 cup dark chocolate chips

– 2 tablespoons coconut oil (for the chocolate layer)

These simple ingredients come together to create a sweet and rich treat.

Ingredient substitutions

If you don’t have Biscoff cookies, you can use any crunchy cookie. Graham crackers work well too. For the butter, you can swap unsalted for salted butter if needed. If you want to go dairy-free, use coconut oil instead of butter.

For the Biscoff cookie butter, almond or sunflower seed butter can be a good alternative. Adjust the sugar if your substitute is sweet.

Optional toppings and enhancements

To make your bars even more special, consider these fun toppings:

– Crushed Biscoff cookies for a crunchy finish

– A drizzle of extra cookie butter for added flavor

– Sea salt flakes for a salty-sweet contrast

– Chopped nuts like pecans or almonds for texture

These options can add a personal touch and make your bars even more delicious.

Step-by-Step Instructions

Preparation of the cookie crust

First, take your Biscoff cookies and crush them. You can use a food processor or place them in a bag and crush them with a rolling pin. Aim for fine crumbs. Next, melt your unsalted butter in a bowl. Mix the crushed cookies with the melted butter until it looks like wet sand. This mixture will form the base of your bars.

Now, take an 8×8 inch baking pan. Press the cookie mixture firmly into the bottom of the pan. Make sure it’s even and compact. This step is key for a strong crust.

Making the Biscoff filling

In another bowl, add the Biscoff cookie butter. Then, pour in the powdered sugar and vanilla extract. Use a spatula to mix until the mixture is smooth and well combined. This filling is rich and adds a wonderful flavor to your bars.

Once mixed, spread the cookie butter filling evenly over the crust in the baking pan. Use a spatula to smooth it out. This layer is what makes the bars so tasty.

Melting and pouring the chocolate layer

For the chocolate layer, gather dark chocolate chips and coconut oil. Place them in a microwave-safe bowl. Heat in the microwave in 30-second intervals. Stir the mixture between each interval until it is melted and smooth.

When the chocolate is ready, pour it over the Biscoff layer in the pan. Use a spatula to spread the chocolate evenly. This final layer adds a nice touch and makes the bars look appealing.

Now, refrigerate the bars for at least 2 hours or until they are firm. After they set, take them out of the pan and cut them into squares. Enjoy your delicious no-bake Biscoff cookie butter bars!

Tips & Tricks

How to achieve the perfect crust

To get the best crust, start with crushed Biscoff cookies. Use a food processor or a rolling pin to crush them finely. Mix the crumbs with melted butter. It should feel like wet sand. Press the mixture firmly into the bottom of your baking pan. Use a flat tool to even it out. A good crust holds the bars together. Chill the crust for 15 minutes before adding the filling. This helps it set well.

Ensuring a smooth chocolate layer

For a smooth chocolate layer, use quality dark chocolate chips. Combine them with coconut oil in a microwave-safe bowl. Melt them in short bursts of 30 seconds, stirring after each. This keeps the chocolate from burning. Once it’s smooth, pour it over the Biscoff layer. Use a spatula to spread it evenly. Make sure to cover all edges. A smooth layer looks nice and tastes great.

Advice for slicing the bars

When you’re ready to slice, use a sharp knife. Wipe the knife with a damp cloth after each cut. This helps keep the edges clean. If the bars feel too soft, chill them longer. Aim for small squares for easy serving. If you want a special touch, top each slice with a sprinkle of crushed cookies. This makes the bars look even more tempting.

Variations

Adding nuts or other mix-ins

You can make these bars even better by adding nuts. Chopped almonds or walnuts add a nice crunch. You can mix them in with the cookie crust. Just add about half a cup of your chosen nuts. This will add flavor and texture. You can also include mini chocolate chips or even dried fruit. These mix-ins make each bite a fun surprise!

Using white chocolate instead of dark chocolate

If you prefer a sweeter taste, try white chocolate. It gives a creamy touch to the bars. To do this, swap the dark chocolate chips for white ones. Melt the white chocolate the same way. Use coconut oil to keep it smooth. The white chocolate will contrast nicely with the Biscoff layers. You can also drizzle melted white chocolate on top for a pretty finish.

Transforming into Biscoff cookie butter cups

You can turn these bars into cookie butter cups! Use cupcake liners in a muffin tin. Press the cookie crust mixture into the bottom of each liner. Add the Biscoff filling and top with chocolate like before. Chill them until set. These cookie butter cups are easy to grab and enjoy. They are perfect for parties or a sweet snack!

Storage Info

Best storage practices for freshness

To keep your No Bake Biscoff Cookie Butter Bars fresh, store them in an airtight container. Place parchment paper between layers to avoid sticking. This helps maintain their texture and flavor. Keep the container in the fridge for the best results. They can last up to one week, but trust me, they won’t last that long!

How to freeze the bars

Freezing these bars is easy. First, cut the bars into squares. Wrap each square in plastic wrap or foil. Then, place them in a freezer-safe bag or container. They freeze well for up to three months. When you want to enjoy them, just thaw them in the fridge overnight.

Recommended serving and shelf life

Serve these bars chilled for the best taste. They are great for parties or a sweet treat after dinner. If stored properly, they stay fresh for about a week in the fridge. So, you can enjoy a little piece of heaven whenever you want!

FAQs

Can I use another type of cookie for the crust?

Yes, you can! You can swap Biscoff cookies for graham crackers, Oreos, or any crisp cookie. Each gives a different taste and texture. Just crush the cookies and mix them with melted butter. The same method works for all types.

How long do these bars take to set?

These bars need at least 2 hours to set in the fridge. This time helps the layers firm up. If you want them extra firm, you can chill them longer. Just keep an eye on them so they don’t freeze solid.

What can I serve with No Bake Biscoff Cookie Butter Bars?

You can serve these bars with whipped cream or vanilla ice cream. A drizzle of extra Biscoff cookie butter on top is a great idea too. Fresh fruit like strawberries or bananas also pairs well, adding a nice touch.

In this blog post, we explored how to make No Bake Biscoff Cookie Butter Bars. We covered the ingredients, including possible substitutions and tasty toppings. I shared step-by-step instructions for the crust, filling, and chocolate layer. You learned tips for achieving the perfect crust and smooth chocolate. The variations section showed how to mix in nuts or use white chocolate. Finally, we discussed best storage practices and answered key FAQs.

These bars are simple yet delicious. Enjoy making them and share with friends!

To make these No Bake Biscoff Cookie Butter Bars, you'll need: - 1 ½ cups Biscoff cookies, crushed - ½ cup unsalted butter, melted - 1 cup Biscoff cookie butter - ½ cup powdered sugar - 1 teaspoon vanilla extract - 1 cup dark chocolate chips - 2 tablespoons coconut oil (for the chocolate layer) These simple ingredients come together to create a sweet and rich treat. If you don't have Biscoff cookies, you can use any crunchy cookie. Graham crackers work well too. For the butter, you can swap unsalted for salted butter if needed. If you want to go dairy-free, use coconut oil instead of butter. For the Biscoff cookie butter, almond or sunflower seed butter can be a good alternative. Adjust the sugar if your substitute is sweet. To make your bars even more special, consider these fun toppings: - Crushed Biscoff cookies for a crunchy finish - A drizzle of extra cookie butter for added flavor - Sea salt flakes for a salty-sweet contrast - Chopped nuts like pecans or almonds for texture These options can add a personal touch and make your bars even more delicious. First, take your Biscoff cookies and crush them. You can use a food processor or place them in a bag and crush them with a rolling pin. Aim for fine crumbs. Next, melt your unsalted butter in a bowl. Mix the crushed cookies with the melted butter until it looks like wet sand. This mixture will form the base of your bars. Now, take an 8x8 inch baking pan. Press the cookie mixture firmly into the bottom of the pan. Make sure it's even and compact. This step is key for a strong crust. In another bowl, add the Biscoff cookie butter. Then, pour in the powdered sugar and vanilla extract. Use a spatula to mix until the mixture is smooth and well combined. This filling is rich and adds a wonderful flavor to your bars. Once mixed, spread the cookie butter filling evenly over the crust in the baking pan. Use a spatula to smooth it out. This layer is what makes the bars so tasty. For the chocolate layer, gather dark chocolate chips and coconut oil. Place them in a microwave-safe bowl. Heat in the microwave in 30-second intervals. Stir the mixture between each interval until it is melted and smooth. When the chocolate is ready, pour it over the Biscoff layer in the pan. Use a spatula to spread the chocolate evenly. This final layer adds a nice touch and makes the bars look appealing. Now, refrigerate the bars for at least 2 hours or until they are firm. After they set, take them out of the pan and cut them into squares. Enjoy your delicious no-bake Biscoff cookie butter bars! To get the best crust, start with crushed Biscoff cookies. Use a food processor or a rolling pin to crush them finely. Mix the crumbs with melted butter. It should feel like wet sand. Press the mixture firmly into the bottom of your baking pan. Use a flat tool to even it out. A good crust holds the bars together. Chill the crust for 15 minutes before adding the filling. This helps it set well. For a smooth chocolate layer, use quality dark chocolate chips. Combine them with coconut oil in a microwave-safe bowl. Melt them in short bursts of 30 seconds, stirring after each. This keeps the chocolate from burning. Once it’s smooth, pour it over the Biscoff layer. Use a spatula to spread it evenly. Make sure to cover all edges. A smooth layer looks nice and tastes great. When you’re ready to slice, use a sharp knife. Wipe the knife with a damp cloth after each cut. This helps keep the edges clean. If the bars feel too soft, chill them longer. Aim for small squares for easy serving. If you want a special touch, top each slice with a sprinkle of crushed cookies. This makes the bars look even more tempting. {{image_2}} You can make these bars even better by adding nuts. Chopped almonds or walnuts add a nice crunch. You can mix them in with the cookie crust. Just add about half a cup of your chosen nuts. This will add flavor and texture. You can also include mini chocolate chips or even dried fruit. These mix-ins make each bite a fun surprise! If you prefer a sweeter taste, try white chocolate. It gives a creamy touch to the bars. To do this, swap the dark chocolate chips for white ones. Melt the white chocolate the same way. Use coconut oil to keep it smooth. The white chocolate will contrast nicely with the Biscoff layers. You can also drizzle melted white chocolate on top for a pretty finish. You can turn these bars into cookie butter cups! Use cupcake liners in a muffin tin. Press the cookie crust mixture into the bottom of each liner. Add the Biscoff filling and top with chocolate like before. Chill them until set. These cookie butter cups are easy to grab and enjoy. They are perfect for parties or a sweet snack! To keep your No Bake Biscoff Cookie Butter Bars fresh, store them in an airtight container. Place parchment paper between layers to avoid sticking. This helps maintain their texture and flavor. Keep the container in the fridge for the best results. They can last up to one week, but trust me, they won’t last that long! Freezing these bars is easy. First, cut the bars into squares. Wrap each square in plastic wrap or foil. Then, place them in a freezer-safe bag or container. They freeze well for up to three months. When you want to enjoy them, just thaw them in the fridge overnight. Serve these bars chilled for the best taste. They are great for parties or a sweet treat after dinner. If stored properly, they stay fresh for about a week in the fridge. So, you can enjoy a little piece of heaven whenever you want! Yes, you can! You can swap Biscoff cookies for graham crackers, Oreos, or any crisp cookie. Each gives a different taste and texture. Just crush the cookies and mix them with melted butter. The same method works for all types. These bars need at least 2 hours to set in the fridge. This time helps the layers firm up. If you want them extra firm, you can chill them longer. Just keep an eye on them so they don’t freeze solid. You can serve these bars with whipped cream or vanilla ice cream. A drizzle of extra Biscoff cookie butter on top is a great idea too. Fresh fruit like strawberries or bananas also pairs well, adding a nice touch. In this blog post, we explored how to make No Bake Biscoff Cookie Butter Bars. We covered the ingredients, including possible substitutions and tasty toppings. I shared step-by-step instructions for the crust, filling, and chocolate layer. You learned tips for achieving the perfect crust and smooth chocolate. The variations section showed how to mix in nuts or use white chocolate. Finally, we discussed best storage practices and answered key FAQs. These bars are simple yet delicious. Enjoy making them and share with friends!

No Bake Biscoff Cookie Butter Bars

Indulge in a sweet treat with these No Bake Biscoff Cookie Butter Bars! With just a few simple ingredients, you can create a delicious dessert that's perfect for any occasion. From a buttery cookie crust to a creamy Biscoff filling topped with rich chocolate, these bars are sure to impress. Ready in just 15 minutes of prep time, click through to explore the full recipe and indulge in this no-bake delight!

Ingredients
  

1 ½ cups Biscoff cookies, crushed

½ cup unsalted butter, melted

1 cup Biscoff cookie butter

½ cup powdered sugar

1 teaspoon vanilla extract

1 cup dark chocolate chips

2 tablespoons coconut oil (for the chocolate layer)

Instructions
 

In a mixing bowl, combine the crushed Biscoff cookies and melted butter. Mix until the mixture resembles wet sand.

    Press the cookie mixture firmly into the bottom of an 8x8 inch baking pan to create an even crust layer.

      In another bowl, mix together the Biscoff cookie butter, powdered sugar, and vanilla extract until smooth and well combined.

        Spread the cookie butter mixture evenly over the crust layer in the baking pan.

          In a microwave-safe bowl, combine the dark chocolate chips and coconut oil. Microwave in 30-second intervals, stirring in between, until melted and smooth.

            Pour the melted chocolate over the Biscoff layer and spread evenly.

              Refrigerate the bars for at least 2 hours or until firm.

                Once set, remove from the pan and cut into squares or bars.

                  Prep Time: 15 minutes | Total Time: 2 hours 15 minutes | Servings: 16 squares

                    - Presentation Tips: Serve the bars on a decorative platter and sprinkle some crushed Biscoff cookies on top for a beautiful finish. Optionally, drizzle some extra cookie butter over the bars before serving for added richness.