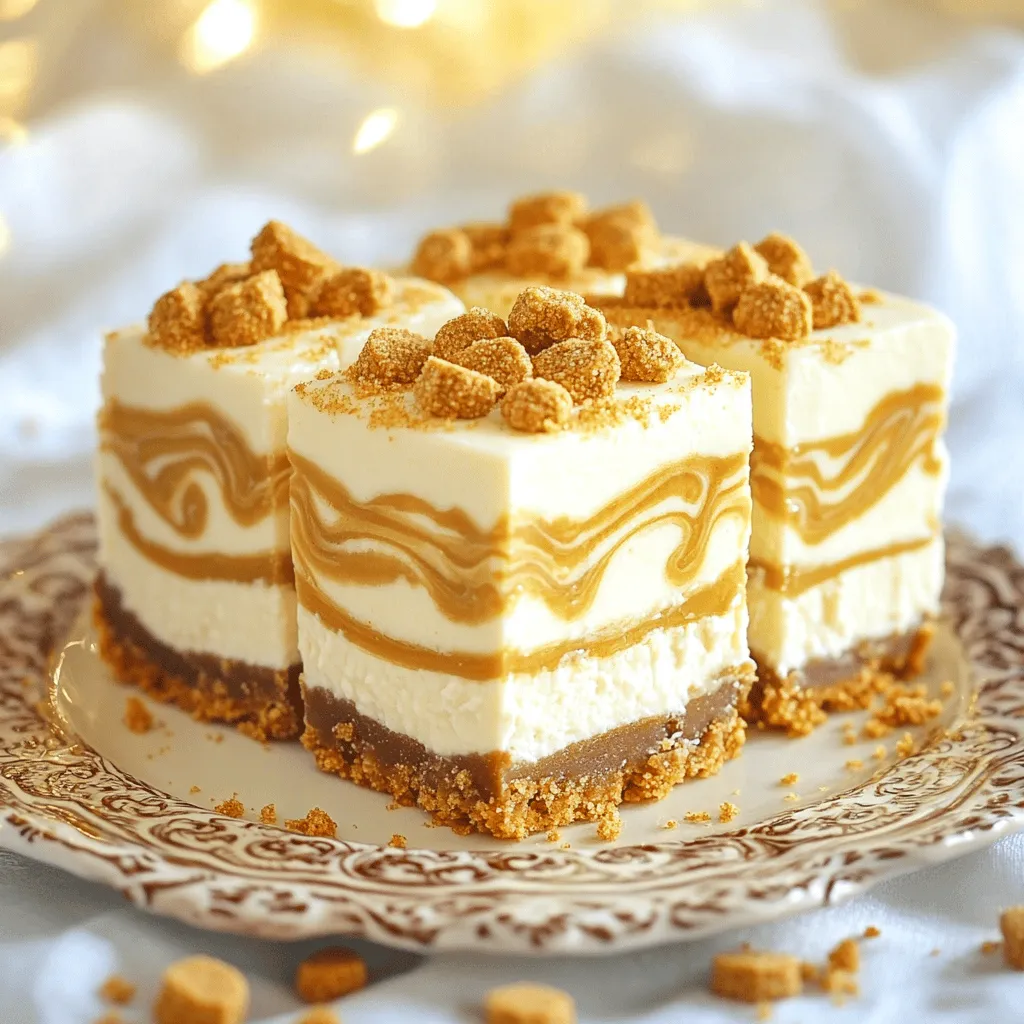
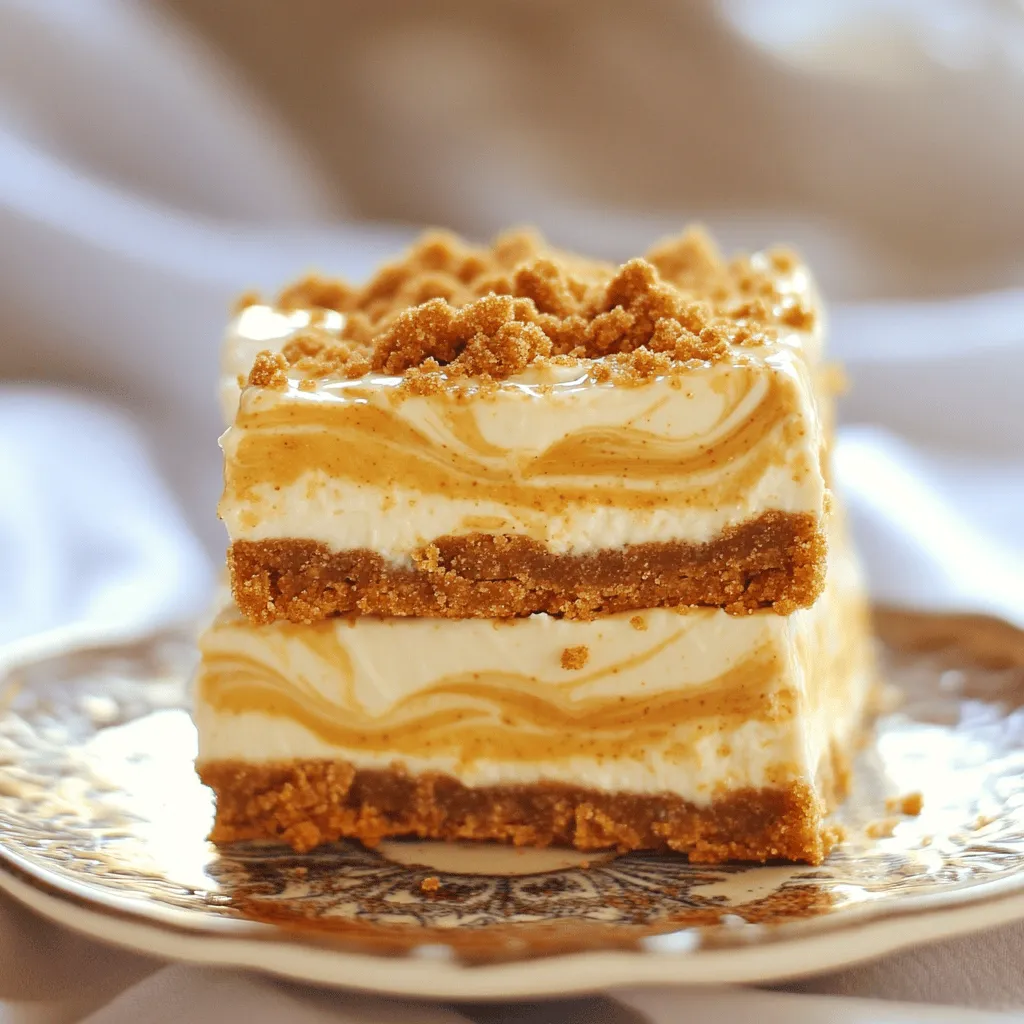
Are you ready to treat yourself to a heavenly dessert? These No Bake Biscoff Cheesecake Bars are simple and oh-so-delicious! With creamy layers, a crunchy crust, and that irresistible Biscoff flavor, you won’t be able to resist. I’ll guide you through each step, so you can whip up this easy treat with confidence. Let’s dive into making these delightful bars that will impress your friends and family!

Ingredients
To make the No Bake Biscoff Cheesecake Bars, you need the following ingredients:
– 200g Biscoff cookies, crushed
– 100g unsalted butter, melted
– 400g cream cheese, softened
– 100g powdered sugar
– 150g Biscoff spread
– 200ml heavy cream
– A pinch of salt
– Additional Biscoff cookies for garnish
These ingredients come together to create a rich and creamy dessert. Biscoff cookies bring a unique flavor to the crust, while the cream cheese adds a smooth texture. The Biscoff spread enhances the taste, making each bite a delight.
Make sure your cream cheese is softened for easy mixing. The heavy cream needs to be whipped until stiff peaks form, which gives the cheesecake its light and airy feel. Don’t forget the pinch of salt; it helps balance the sweetness.
When it comes to garnishes, crushed Biscoff cookies on top not only look great but also add extra crunch. You can also drizzle more Biscoff spread to make it even more indulgent. Each ingredient plays a role, so use fresh and quality products for the best results.
Step-by-Step Instructions
Preparation of the Crust
Start by mixing the crushed Biscoff cookies with the melted butter. Use a bowl and combine them well. You want the cookie crumbs to stick together nicely. Then, press this mixture firmly into the bottom of an 8×8 inch baking dish. Make sure it is even and flat. This forms the crust. Next, chill the crust in the refrigerator for 15 minutes. This helps it set up before you add the filling.
Preparing the Cheesecake Filling
In a separate bowl, whip the heavy cream until it forms stiff peaks. This means it should hold its shape well. Set the whipped cream aside for now. In another bowl, beat the softened cream cheese and powdered sugar together until smooth and creamy. This step is key for a good texture. Next, gently fold in the Biscoff spread into the cream cheese mixture. Make sure it is mixed evenly. Then, carefully fold in the whipped cream. This keeps the filling light and fluffy.
Assembling the Bars
Now it’s time to spread the cheesecake filling over the chilled crust. Use a spatula to smooth the top evenly. For a special touch, drizzle some extra Biscoff spread on top. Use a knife to swirl it gently for a marbled look. Finally, chill the cheesecake bars in the refrigerator for at least 4 hours or until they are set. When ready, cut into bars and garnish with extra crushed Biscoff cookies on top for a nice finish. Enjoy your delicious treat!
Tips & Tricks
Achieving the Perfect Texture
Softened cream cheese is key for a smooth filling. If it’s too cold, the mix will be lumpy. Let it sit out for about 30 minutes before use. This helps it blend well with the other ingredients.
When whipping the heavy cream, use a cold bowl and beaters. Start on low speed to avoid splatter, then increase to medium. Whip until you see stiff peaks. This will make your cheesecake light and fluffy.
Presentation Ideas
For a lovely finish, garnish with crushed Biscoff cookies on top. You can also drizzle extra Biscoff spread for a fancy touch. Use a knife to create a pretty swirl in the spread.
Serve the bars on a decorative plate. This adds style and makes them look more inviting. You can even add fresh fruits, like berries, for a pop of color and flavor.
Troubleshooting Common Issues
If your filling is runny, you might not have whipped the cream enough. Whip it longer until it holds stiff peaks. You can also add a bit more softened cream cheese to thicken it.
To cut the bars neatly, use a sharp knife. Dip the knife in hot water, then wipe it dry. This helps make clean cuts. You can cut them into squares or rectangles, depending on your preference.

Variations
Flavor Modifications
You can easily switch up the flavors in your No Bake Biscoff Cheesecake Bars.
– Adding chocolate or caramel layers: Try spreading a layer of warm chocolate sauce or caramel on top of the crust before adding the cheesecake filling. This adds a rich, sweet layer to each bite.
– Using different flavored spreads: Swap Biscoff spread with Nutella or peanut butter for a new twist. Each spread brings its own unique taste, making the bars fun and exciting.
Dietary Adaptations
You can make these cheesecake bars fit various diets.
– Gluten-free alternatives: Use gluten-free cookies for the crust. Look for brands that offer gluten-free Biscoff-style cookies. This way, everyone can enjoy the dessert.
– Vegan version suggestions: Replace cream cheese with vegan cream cheese and use coconut cream instead of heavy cream. Just make sure to use dairy-free cookies for the base.
Serving Suggestions
Serving these cheesecake bars can enhance your dessert experience.
– Pairing with fruits: Fresh fruits like berries or sliced bananas add a bright flavor. They contrast nicely with the creamy cheesecake.
– Serving with sauces: Drizzle extra Biscoff spread or chocolate sauce over the bars before serving. This adds a lovely finish and makes your presentation pop.
Feel free to get creative! These variations allow you to make the bars your own.
Storage Info
Best Storage Practices
To keep your no bake Biscoff cheesecake bars fresh, store them in the refrigerator. Use an airtight container to prevent them from drying out. If you need to keep them longer, freezing is also an option. Just wrap the bars tightly in plastic wrap and then in aluminum foil. This will help keep them safe from freezer burn.
Shelf Life
In the fridge, these cheesecake bars last about 5 days. Make sure to check for signs of spoilage before eating. If the bars smell odd or have a change in color, it’s best to toss them.
Thawing Instructions
If you freeze your bars, thaw them in the fridge for a few hours before serving. Avoid using a microwave, as it can ruin the texture. Let them sit at room temperature for about 10 minutes before enjoying for the best taste and consistency.
FAQs
How can I make these bars gluten-free?
To make these bars gluten-free, use gluten-free Biscoff cookies. Many brands make gluten-free versions. Just check the label to be sure. The rest of the ingredients are naturally gluten-free.
Can I use low-fat cream cheese?
Yes, you can use low-fat cream cheese. It will change the texture a bit. The bars may be less rich but still tasty. Be sure to mix it well for a smooth filling.
What’s the best way to serve leftovers?
For leftovers, store the bars in an airtight container. Keep them in the fridge for up to five days. Serve them cold for the best flavor. You can drizzle more Biscoff spread on top for extra taste.
Can I make this recipe ahead of time?
Absolutely! You can make these bars a day ahead. Just chill them well in the fridge. This allows the flavors to blend nicely. They will be ready to serve when you need them.
How do I adjust for a different baking dish size?
If you use a different baking dish, change the recipe amount. For a larger dish, double the ingredients. For a smaller dish, use half. Keep an eye on the chilling time, as it may change based on size.
You now have a complete guide to making delicious Biscoff cheesecake bars. We covered the key ingredients and shared each step from crust to filling. Remember the tips for texture and presentation. Don’t hesitate to try variations or dietary adaptations!
These bars are easy to store and last well. Keep them in the fridge or freeze for later. Enjoy these sweet treats at your next gathering or as a personal dessert. Try your hand at this recipe and savor every bite!

