FREE DINNER EBOOK! Get your copy!
  • Cookie Policy
  • GDPR Policy
  • Disclaimer
  • Terms Of Use
  • Visit my other site: Fun Cookie Recipes
go kitchen now
  • Home
  • Dinner
  • Desserts
  • Drinks
  • Appetizers
  • Contact
  • About
  • Privacy Policy
  • Home
  • Dinner
  • Desserts
  • Drinks
  • Appetizers
  • Contact
  • About
  • Privacy Policy
  • Cookie Policy
  • GDPR Policy
  • Disclaimer
  • Terms Of Use
Visit my other site: Fun Cookie Recipes

HOME / CATEGORIES /

Latest

The main stars of this dish are simple and tasty. Here’s what you need: - 1 lb ground chicken - 2 tablespoons Sriracha sauce - 2 tablespoons honey - 1 tablespoon soy sauce - 1 tablespoon sesame oil - 2 green onions, finely chopped - 1 carrot, grated - 1 small red bell pepper, diced - 1 cup water chestnuts, diced - 1 tablespoon minced fresh ginger - Salt and pepper to taste - 1 head of iceberg lettuce or butter lettuce (for wrapping) Each ingredient plays a role. The chicken gives protein, while Sriracha adds heat. Honey balances with sweetness, making it a perfect blend. You can make your wraps even better with these extras: - Chopped cilantro - Lime wedges for squeezing Cilantro adds fresh flavor, and lime gives a zesty kick. These toppings make your wraps exciting and tasty. You will find these staples in most kitchens: - Soy sauce - Sesame oil - Salt - Pepper These basics help enhance the flavors of the chicken. They bring everything together, making each bite delicious. First, gather your ingredients. You need ground chicken, ginger, carrots, bell pepper, and water chestnuts. In a large skillet, heat sesame oil over medium-high heat. Once hot, add the ground chicken. Break it apart with a spatula. Cook it until it turns brown, around 5 to 7 minutes. Next, add minced ginger, grated carrots, diced bell pepper, and diced water chestnuts. Cook them for 3 to 4 minutes. This helps the veggies soften and mix well with the chicken. While the chicken and veggies cook, grab a small bowl. Combine Sriracha sauce, honey, and soy sauce. Stir it well until mixed. Once the chicken and veggies are ready, pour this sauce over the mixture in the skillet. Stir everything together. Cook for an extra 2 minutes to heat it through. Don’t forget to season with salt and pepper to taste. This step adds a nice flavor boost. Now, it’s time to build your wraps! Take a leaf of iceberg or butter lettuce. Spoon some of the chicken mixture into the center. Top it with chopped green onions and a sprinkle of cilantro for freshness. Serve with lime wedges on the side. Squeeze the lime over the wraps for a zesty kick. Enjoy your flavorful creation! For the best flavor, start with fresh ground chicken. Cook it in sesame oil until it turns brown. This will give it a nice depth. Add ginger early for a bold taste. The chicken needs seasoning. Don’t forget salt and pepper to enhance every bite. Try not to rush the cooking time; it should take about 5-7 minutes. This allows the flavors to blend well. Lettuce for wraps should be crisp and sturdy. I recommend iceberg or butter lettuce. Iceberg has a nice crunch and holds the filling well. Butter lettuce is soft and adds a sweet flavor. Look for bright green leaves and avoid any that are brown or wilted. You want full, large leaves for wrapping, so choose a nice head. Meal prep is easy with these wraps. You can cook the chicken mix ahead of time. Store it in the fridge for up to three days. When ready to eat, just warm it up. Serve with fresh lettuce leaves and toppings like green onions or cilantro. For a fun twist, add lime wedges on the side. This adds a zesty kick to each bite. {{image_2}} You can easily swap the ground chicken for ground turkey. Turkey gives a lighter taste but still packs protein. If you prefer beef, use ground beef for a richer flavor. For a plant-based option, try crumbled tofu. Press the tofu to remove extra moisture, then sauté until golden. Each protein brings its own twist to the dish. To make this recipe gluten-free, choose a gluten-free soy sauce or tamari. This keeps the same great flavor without the gluten. For low-carb diets, skip the honey or use a sugar substitute. You can also wrap the filling in cabbage leaves instead of lettuce. This keeps it fresh and light while cutting down on carbs. If you like it spicy, add more Sriracha to the mix. For less heat, reduce the Sriracha or remove it entirely. You can also balance the spice with more honey if you like it sweet. Mixing in sesame seeds or chopped nuts can add crunch and extra flavor. Adjust these ingredients to fit your taste buds. To keep your Sriracha honey chicken fresh, store leftovers in an airtight container. Make sure to cool the chicken mixture first. It will stay good in the fridge for 3-4 days. If you want to save the lettuce, store it separately. This way, it stays crisp and fresh. When ready to enjoy your leftovers, reheat the chicken in a skillet over medium heat. Stir often until it's hot throughout. You can add a splash of water or a bit of sesame oil for extra moisture. Avoid microwaving if possible, as it can make the chicken dry. If you want to keep the chicken longer, freezing is a great option. Place the cooled chicken in a freezer-safe bag. Remove as much air as you can. It will stay good in the freezer for about 2-3 months. When you're ready to eat it, thaw it in the fridge overnight before reheating. Do not freeze lettuce, as it will become soggy. Yes, you can prepare the chicken mixture ahead of time. Cook it as directed and cool it down. Store in an airtight container in the fridge for up to three days. When ready to eat, simply reheat it in a skillet until warm. Assemble the wraps right before serving for the best taste. These wraps pair well with many sides. Consider serving them with: - Steamed rice - Quinoa - A side salad - Crispy spring rolls Each of these options adds a nice touch to your meal. They complement the wraps and make it more filling. To make the wraps kid-friendly, reduce the Sriracha sauce. Start with just one teaspoon. Alternatively, you can replace Sriracha with a mild sauce or omit it entirely. You can always serve some Sriracha on the side for those who want more heat. This way, everyone enjoys the meal! In this blog post, we explored how to make Sriracha Honey Chicken Lettuce Wraps. I shared detailed steps for cooking the chicken and veggies, making the sauce, and assembling the wraps. You also learned tips for seasoning, selecting lettuce, and meal prep. We discussed variations with different proteins and dietary needs. Finally, I covered storage and reheating tips. This recipe is tasty and easy to customize. Enjoy making these wraps for a fun meal!

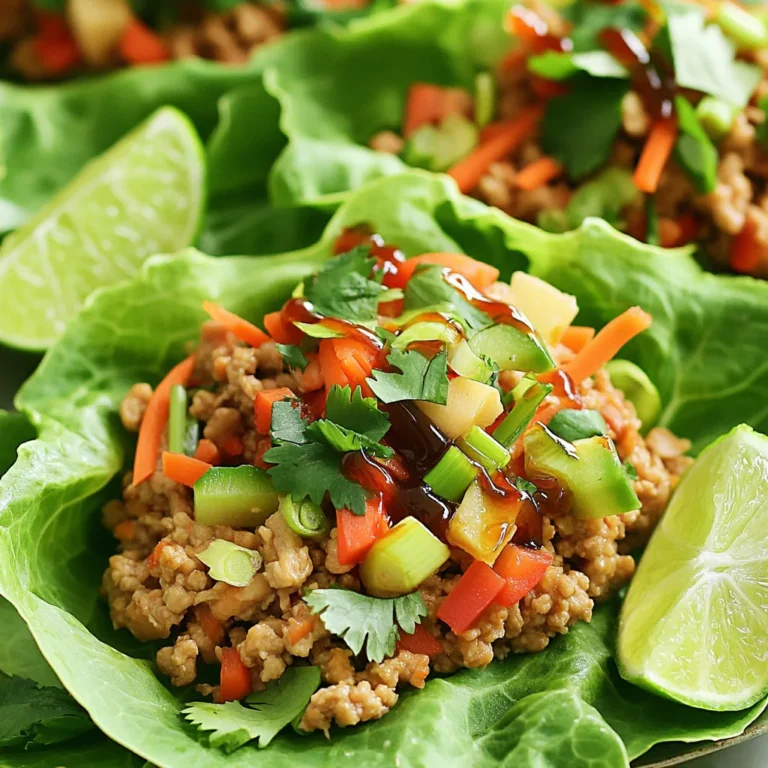
Sriracha Honey Chicken Lettuce Wraps Flavorful Delight

To make delicious pumpkin streusel muffins, gather these simple ingredients: - 1 cup canned pumpkin puree - 1/2 cup granulated sugar - 1/2 cup brown sugar, packed - 1/2 cup vegetable oil - 2 large eggs - 1 teaspoon vanilla extract - 2 cups all-purpose flour - 1 teaspoon baking soda - 1 teaspoon baking powder - 1 teaspoon pumpkin pie spice - 1/2 teaspoon salt - 1/2 cup chopped nuts (walnuts or pecans) For the streusel topping: - 1/3 cup all-purpose flour - 1/3 cup brown sugar, packed - 1/2 teaspoon ground cinnamon - 2 tablespoons unsalted butter, melted You can swap ingredients if needed. Here are some easy options: - Use coconut oil or melted butter instead of vegetable oil. - Substitute brown sugar with more granulated sugar, if you prefer. - For nuts, you might use almonds or leave them out entirely. - You can replace eggs with flaxseed meal mixed with water for vegan muffins. When picking pumpkin puree, look for these tips: - Check the label for 100% pumpkin with no added sugars. - Organic brands often have better flavor and fewer additives. - Avoid pumpkin pie filling, as it has added spices and sugar. - If you want a fresher taste, consider roasting your own pumpkin. Start by preheating your oven to 350°F (175°C). This step is key for even baking. Next, line a muffin tin with paper liners or lightly grease it. In a large bowl, whisk together the canned pumpkin puree, granulated sugar, brown sugar, vegetable oil, eggs, and vanilla extract. Mix them well until they are smooth and blended. In another bowl, sift the all-purpose flour, baking soda, baking powder, pumpkin pie spice, and salt. Gradually fold this dry mix into the wet pumpkin mixture. Be gentle; overmixing can make your muffins tough. Finally, stir in the chopped nuts, like walnuts or pecans, for a nice crunch. In a small bowl, combine the all-purpose flour, brown sugar, and ground cinnamon. Mixing these three ingredients gives your muffins a sweet and spicy kick. Pour in the melted butter and stir until the mixture becomes crumbly. This streusel topping adds a delightful texture and flavor to your muffins. Set this bowl aside while you finish the batter. Now, it’s time to bake. Fill each muffin cup two-thirds full with the batter. Make sure to sprinkle a generous amount of the streusel topping on each muffin. This will create a beautiful, crunchy crust. Place the muffin tin in the oven and bake for 18 to 22 minutes. You can check for doneness by inserting a toothpick into the center. If it comes out clean, they are ready. Once done, let them cool in the pan for about 5 minutes. Then, transfer the muffins to a wire rack to cool completely. Enjoy your warm, delicious Pumpkin Streusel Muffins! To keep your muffins light, mix the batter gently. After adding the dry ingredients, use a spatula to fold them in. Stop mixing once you see no dry flour. A few lumps are fine. Overmixing can make the muffins tough. Trust me, soft muffins are the goal! For even baking, fill each muffin cup about two-thirds full. This helps them rise well. Rotate the muffin tin halfway through baking. My oven can have hot spots. This little trick makes sure every muffin bakes evenly. Always check for doneness with a toothpick. If it comes out clean, they are ready! These muffins shine at breakfast or as a snack. Serve them warm with butter or cream cheese. A drizzle of honey adds a sweet touch. Pair them with coffee or chai tea for a cozy moment. Want something fun? Try serving them with a scoop of vanilla ice cream! {{image_2}} You can make these muffins even more fun by adding chocolate chips. Simply stir in one cup of semi-sweet chocolate chips into the batter after mixing in the nuts. The chocolate melts beautifully during baking. It adds a rich flavor that pairs well with the pumpkin spice. If you want to make gluten-free muffins, swap the all-purpose flour for a gluten-free blend. You can find many good options in stores. Just make sure the blend includes xanthan gum for better texture. Follow the same steps in the recipe for a tasty treat without gluten. You can use different nuts or seeds to change the flavor and texture. Try using almonds, hazelnuts, or even sunflower seeds. Chop them finely and mix them into the batter. Each nut or seed brings its unique taste and crunch, making every muffin special. To store leftover muffins, let them cool first. Place them in an airtight container. You can keep them at room temperature for up to three days. If you want to keep them longer, store them in the fridge. This will help them last up to one week. Just make sure they are sealed well to prevent drying out. If you want to freeze your muffins, wrap each one tightly in plastic wrap. Then, place them in a freezer bag. They can last up to three months in the freezer. When you're ready to eat them, simply take out the muffins and let them thaw at room temperature. This keeps them fresh and tasty. To reheat your muffins, you can use the microwave or the oven. If using the microwave, heat them for about 15-20 seconds. If you prefer the oven, preheat it to 350°F (175°C). Place the muffins on a baking sheet and heat for about 5-10 minutes. This helps restore their soft texture and warm flavor. Enjoy your muffins fresh! Yes, you can use fresh pumpkin. First, cook and puree the pumpkin. You will need about 1 cup of fresh pumpkin puree. Make sure to drain any excess water to avoid a soggy muffin. Fresh pumpkin adds a lovely, natural flavor. It might take a bit more time to prepare, but the taste is worth it. You can use several substitutes for eggs. Here are some options: - 1/4 cup unsweetened applesauce for each egg. - 1/4 cup plain yogurt can work too. - A flax egg made from 1 tablespoon of ground flaxseed mixed with 2.5 tablespoons of water is a great choice. These options keep the muffins moist and tasty. Pumpkin muffins can last for about 3 to 4 days at room temperature. Store them in an airtight container to keep them fresh. If you want them to last longer, you can freeze them. They will stay good for about 2 to 3 months in the freezer. Just thaw them at room temperature or warm them in the microwave before enjoying! In this post, we covered key ingredients for pumpkin muffins, how to prepare them, and tips for baking. We explored variations, storage methods, and answered common questions. Pumpkin muffins offer great flavor and can fit many diets. Try making them with different add-ins or enjoy them fresh. Remember, quality ingredients make a big difference. With these tips, you'll bake delicious muffins every time. Enjoy the process and share them with friends. Happy baking!

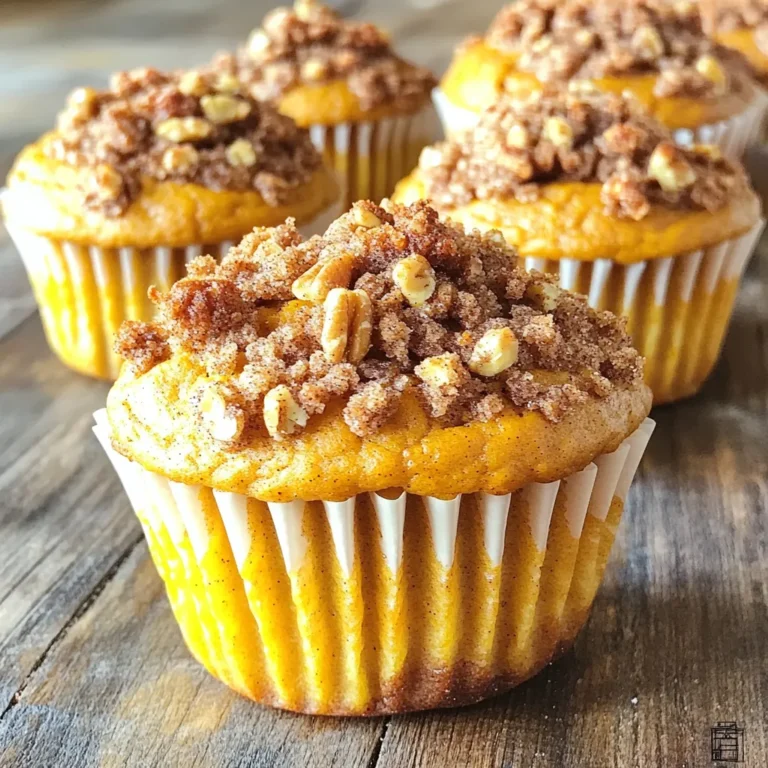
Pumpkin Streusel Muffins Simple and Tasty Delight

- 2 cans (15 oz each) white beans, drained and rinsed (cannellini or great northern) - 1 cup cherry tomatoes, halved - 1 cup spinach leaves, roughly chopped - 1 small red onion, diced - 3 cloves garlic, minced The main ingredients are simple but full of flavor. White beans give a creamy texture. Cherry tomatoes add a sweet burst. Spinach brings color and nutrients. Red onion adds a nice crunch. Garlic gives that hearty, aromatic kick. - 1 teaspoon dried oregano - 1 teaspoon dried basil - 1/2 teaspoon red pepper flakes (adjust for heat preference) - 2 tablespoons olive oil - Zest and juice of 1 lemon Using the right seasonings is key. Dried oregano and basil bring out the classic Tuscan taste. Red pepper flakes add heat, so adjust it to your liking. Olive oil is essential for cooking and flavor. Lemon zest and juice brighten the dish. - Fresh basil leaves - Salt and pepper to taste Garnishing is a fun step. Fresh basil leaves give a lovely aroma and color. Salt and pepper help balance all the flavors. Make sure to taste and adjust before serving. This dish looks as good as it tastes! 1. Start by heating the olive oil in a large skillet over medium heat. 2. Add the diced red onion to the skillet. Sauté it for about 3 to 4 minutes. You want the onion to soften and become clear. 3. Next, stir in the minced garlic. Cook it for another minute. Be careful not to let it burn; it can turn bitter fast. 1. Now, add the halved cherry tomatoes to the skillet. 2. Sprinkle in the dried oregano, dried basil, and red pepper flakes. Cook this mix for about 5 minutes. You want the tomatoes to soften and release their juices. 3. This is where the magic happens! The herbs will fill your kitchen with a lovely aroma. 1. Gently fold in the drained white beans. Mix them well with the other ingredients. Cook for another 3 to 4 minutes until everything heats through. 2. Stir in the chopped spinach. Cook it just until it wilts. This adds a nice color and nutrients. 3. Remove the skillet from heat. Add the lemon zest and juice. Season with salt and pepper to taste. Adjust the flavors to your liking. 4. For a finishing touch, garnish with fresh basil leaves before serving. This adds flavor and a pop of color. To avoid burning garlic, add it to the pan after the onion softens. Stir it well and watch closely. Garlic cooks fast and can turn bitter if overcooked. For perfect spinach texture, add it last. Cook it just until it wilts, about one minute. This keeps it vibrant and tender, not soggy. Adjust the seasoning to suit your taste. Start with a pinch of salt and pepper, then taste. If it needs more flavor, add more herbs or lemon juice. You can boost flavor with extra spices. Try adding smoked paprika for warmth or a dash of cumin for depth. These spices add layers to the dish. Choose a large skillet for this recipe. A wide skillet allows even cooking and enough space for all ingredients. Non-stick or cast iron works well. Using a lid is important. It traps steam, helping the spinach cook faster. It also keeps moisture in, making the dish juicy and flavorful. {{image_2}} If you want to mix things up, you can swap the white beans. Try black beans or chickpeas instead. Both give a unique taste and texture. You can also use seasonal veggies. In summer, add zucchini or bell peppers. In fall, consider adding kale or squash. These changes keep the dish fresh and fun. For a vegan option, this dish is already a winner. All ingredients are plant-based. Just ensure your olive oil is vegan. If you need gluten-free options, you’re safe with this recipe. All the ingredients, including the spices, are gluten-free. For a low-sodium version, rinse the canned beans well. You can also skip added salt and use herbs for flavor. This dish pairs well with grains like rice or quinoa. These grains soak up the flavors nicely. You can also serve it with grilled chicken or fish for added protein. For a creative serving idea, try it on toasted bread. This makes a great bruschetta-style appetizer. You can also top it with a dollop of yogurt for extra creaminess. To store your One Pan Tuscan White Bean Skillet, let it cool first. Place the dish in an airtight container. It can stay in the fridge for up to four days. Make sure to label the container with the date. This helps you remember when to eat it. When reheating, the best method is to use the stove. Add a splash of water or broth to keep it moist. Heat it over medium heat until warmed through. You can also use the microwave. Just cover the dish and heat in short bursts. Stir between each burst to ensure even heating. This keeps the flavors fresh and bright. Yes, you can freeze this dish! To freeze, cool it completely first. Transfer it to a freezer-safe container. Make sure to leave some space for expansion. You can freeze it for up to three months. To thaw, place it in the fridge overnight. Reheat it on the stove or microwave as mentioned. This way, you’ll enjoy a tasty meal later. To make this dish vegetarian or vegan, simply check the ingredients you use. The main ingredients are already plant-based. Use vegetable broth instead of chicken broth if you add any. You can also add a splash of soy sauce for extra flavor. Just make sure all your ingredients are vegan-friendly. Yes, you can use dry beans. First, soak them overnight in water. Drain and rinse them before cooking. You will need to cook them until soft. This may take one to two hours. After cooking, follow the rest of the recipe as usual. You have many options for side dishes. Serve it with crusty bread for dipping. A green salad pairs well too. You could also add cooked quinoa or rice for extra texture. For a heartier meal, try grilled chicken or fish on the side. In this article, we explored how to make a delicious One Pan Tuscan White Bean Skillet. We covered the main ingredients like white beans, cherry tomatoes, and spinach. I shared tips for cooking and storage, along with variations to fit your needs. Remember, cooking can be fun and creative. Use fresh ingredients and adjust spices to suit your taste. Enjoy this easy dish any day of the week!

One Pan Tuscan White Bean Skillet Simple Delight

To make Peanut Butter Cup Overnight Oats, you need these key items: - 1 cup rolled oats - 2 tablespoons chia seeds - 2 cups almond milk (or any milk of choice) - 3 tablespoons natural peanut butter - 2 tablespoons maple syrup (or honey) - 1 teaspoon vanilla extract - A pinch of salt - 3 tablespoons cocoa powder - Chopped dark chocolate or chocolate chips (for topping) - Sliced bananas or strawberries (for garnish) These ingredients work together to create a creamy and rich flavor. The oats provide a great base, while the peanut butter and cocoa give that yummy chocolatey taste. You can easily swap out some ingredients to fit your needs: - Use oat milk or coconut milk instead of almond milk for a different flavor. - Try sunflower seed butter if you're allergic to nuts. - Replace maple syrup with agave nectar for a vegan option. - Choose unsweetened cocoa powder for a less sweet taste. These options keep your oats tasty and friendly for many diets. Want to make your oats even better? Here are some fun toppings: - Chopped nuts like almonds or walnuts for crunch. - Dried fruits like raisins or cranberries for sweetness. - A sprinkle of cinnamon for warmth and spice. - A drizzle of extra peanut butter for that extra kick. These toppings add flavor and texture, making your breakfast even more exciting! Start by gathering your dry ingredients. In a large mixing bowl, add: - 1 cup rolled oats - 2 tablespoons chia seeds - 3 tablespoons cocoa powder Mix these ingredients well. This step is key! You want all the flavors to blend before adding the wet ingredients. In a separate bowl, combine your wet ingredients. Add: - 2 cups almond milk (or any milk of choice) - 3 tablespoons natural peanut butter - 2 tablespoons maple syrup (or honey) - 1 teaspoon vanilla extract - A pinch of salt Stir them together until smooth and creamy. This mixture should be rich and inviting. Now, pour the wet mixture into the bowl with the dry ingredients. Stir well. Make sure all the oats and chia seeds are coated. This step ensures every bite is full of flavor. Next, divide the mixture into two jars. Press down slightly to remove air pockets. Seal the jars and place them in the refrigerator overnight. This soaking makes the oats soft and creamy. In the morning, stir the oats, and add your favorite toppings! Enjoy the deliciousness! To get the best texture, use rolled oats. They soak up the liquid well. Chia seeds also help create a nice thickness. Make sure to stir the mixture well. This helps the oats and chia seeds absorb the almond milk evenly. After mixing, press down lightly in the jars. This removes air pockets and keeps the oats creamy. Store your overnight oats in airtight jars. This keeps them fresh and tasty. Place them in the fridge right after you prepare them. They can last up to five days. Just remember to give them a good stir before eating. If you notice any separation, don't worry; it's normal. Feel free to get creative with flavors! You can swap almond milk for your favorite milk. Try adding spices like cinnamon or nutmeg for warmth. You can also mix in different fruits. Berries, apples, or even mango can add a fun twist. Don’t be afraid to experiment with toppings too! Each time you make it, you can create something new and exciting. {{image_2}} If you want a nut-free option, you can use sun butter or soy nut butter. Both spread options taste great and still give you that creamy texture. You can also swap almond milk for oat milk or coconut milk. These substitutes keep your oats rich and delicious without nuts. To make this recipe vegan, start by ensuring your chocolate chips are dairy-free. You can use maple syrup instead of honey, which keeps it plant-based. Oats and chia seeds are already vegan, so you’re halfway there! Just focus on your toppings and choose fresh fruits or nuts that fit a vegan diet. You can make your overnight oats even more fun with add-ins. Think about tossing in some cinnamon or a scoop of protein powder for added nutrition. You might also try different fruits, like blueberries or diced apples. Want a chocolate boost? Add an extra tablespoon of cocoa powder to the mix! Each twist gives your meal a new taste adventure. To keep your Peanut Butter Cup Overnight Oats fresh, store them in airtight containers. Glass jars work great for this. They help you see the layers and make it easy to grab in the morning. Before sealing, push the mixture down a bit. This removes air pockets and helps the oats absorb the liquid better. When stored properly in the fridge, your overnight oats will last for up to five days. This means you can prepare a few jars in advance. Just remember to add fresh toppings like fruit right before you eat. This keeps them looking and tasting great. You can also freeze your overnight oats for longer storage. Use freezer-safe jars and fill them, leaving space at the top. This way, they can expand as they freeze. To eat, thaw them in the fridge overnight. A little stirring may be needed in the morning to bring back the creamy texture. Yes, you can use quick oats. They cook faster and absorb liquid quickly. This makes them softer. However, the texture will be different. Rolled oats give a heartier bite. If you prefer a creamy feel, quick oats work well. To add more protein, include Greek yogurt or protein powder. Mix in a scoop of your favorite protein powder in the wet mix. You can also add nuts or seeds. Try adding a handful of almonds or sunflower seeds for extra crunch and protein. Yes, overnight oats are safe for up to five days in the fridge. Store them in airtight containers. Check for any off smells or strange textures before eating. If they look good, they are likely good to eat. You’ve explored the key ingredients, step-by-step instructions, and helpful tips for making overnight oats. You learned about substitutions, variations, and storage methods to keep your oats fresh. Remember to experiment with flavors to find what you love. Overnight oats are flexible and nutritious, fitting any diet. Feel free to try new toppings and mix-ins. With these insights, you can create delicious overnight oats that suit your taste. Enjoy the process and happy snacking!

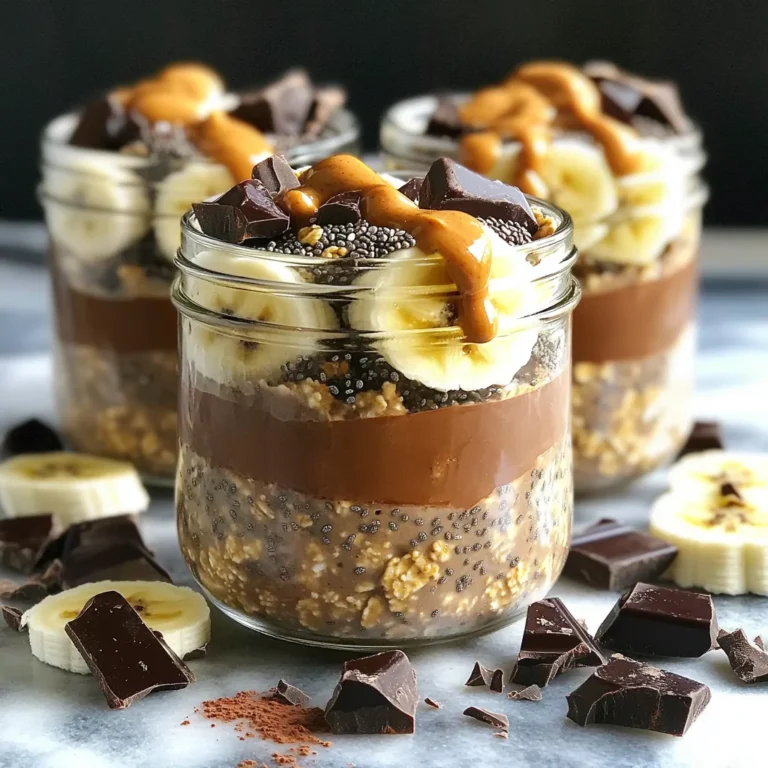
Peanut Butter Cup Overnight Oats Easy Healthy Breakfast

- 2 cups all-purpose flour - 1 teaspoon baking powder - 1 teaspoon baking soda - 1 teaspoon ground cinnamon - 1/2 teaspoon ground nutmeg - 1/4 teaspoon salt - 1 cup granulated sugar - 1 cup brown sugar, packed For our Maple Glazed Carrot Cake Bars, we start with dry ingredients. The all-purpose flour gives structure. Baking powder and baking soda help the cake rise. Cinnamon and nutmeg add warmth and spice. Salt enhances sweetness, while granulated and brown sugars provide rich sweetness. - 1 cup vegetable oil - 4 large eggs - 2 cups grated carrots (about 4 medium carrots) - 1/2 cup crushed pineapples, drained - 1 teaspoon vanilla extract Next, we focus on the wet ingredients. Vegetable oil keeps our bars moist. Eggs bind everything together and add richness. Grated carrots bring natural sweetness and texture. Crushed pineapples add moisture and a hint of tang. Vanilla extract rounds out the flavors. - 1/2 cup chopped walnuts or pecans (optional) - For the Maple Glaze: - 1/2 cup powdered sugar - 2 tablespoons maple syrup - 1 tablespoon milk (or dairy-free alternative) You can add nuts for crunch and flavor. Walnuts or pecans work well. For the maple glaze, mix powdered sugar, maple syrup, and milk until smooth. This glaze adds a sweet finish to your bars. First, preheat your oven to 350°F (175°C). This ensures even baking. Next, grab a 9x13-inch baking pan. Grease the pan with a little oil or butter. Then, line it with parchment paper. This helps with easy removal later. In a big bowl, whisk together the dry ingredients. Combine 2 cups of all-purpose flour, 1 teaspoon of baking powder, and 1 teaspoon of baking soda. Add 1 teaspoon of ground cinnamon, 1/2 teaspoon of ground nutmeg, and 1/4 teaspoon of salt. Mixing these well makes sure you get all the flavors. Set this bowl aside for now. In another bowl, mix the wet ingredients. Start with 1 cup of granulated sugar and 1 cup of packed brown sugar. Add 1 cup of vegetable oil and whisk until smooth. Now, add 4 large eggs one at a time. Mix well after each egg. Stir in 2 cups of grated carrots, 1/2 cup of drained crushed pineapples, and 1 teaspoon of vanilla extract. If you like nuts, feel free to add 1/2 cup of chopped walnuts or pecans. Next, take your dry mix and add it to the wet mix. Stir gently until just combined. Be careful not to overmix. Pour the batter into your prepared pan, spreading it evenly. Bake this in your preheated oven for about 25-30 minutes. To check if it’s done, insert a toothpick into the center. It should come out clean. Once baked, take it out and let it cool in the pan for about 10 minutes. After that, transfer the cake to a wire rack to cool completely before adding the glaze. To ensure even baking, spread the batter flat in the pan. Use a spatula to smooth the top. This helps the bars bake evenly. Always preheat your oven to 350°F (175°C). This step is key for proper rising. To test for doneness, insert a toothpick into the center. If it comes out clean, your bars are ready. If not, bake for a few more minutes. Remember, each oven is different. Adjusting the maple glaze is simple. If it’s too thick, add a bit more milk. If it’s too thin, add more powdered sugar. Aim for a drizzle that holds its shape but flows nicely. For drizzling, use a spoon or a squeeze bottle. Start at the center and move outward. This technique creates a lovely pattern on your bars. For presentation, cut the bars into squares. Serve them on a rustic wooden board. A sprinkle of chopped nuts adds texture and looks appealing. You can also garnish with carrot curls or edible flowers. These add a pop of color and make your dish stand out. Pair the bars with a cup of tea or coffee for a delightful treat. {{image_2}} You can change oils in this recipe. Try using melted coconut oil or apple sauce. These swaps can add unique flavors. For sweeteners, use honey or agave syrup instead of sugar. This will create a different taste and texture. You can also add fruits like raisins or dried cranberries. These will give a sweet burst in each bite. Try using diced apples or pears for a fresh twist. These options keep the bars moist and tasty. For a gluten-free option, use almond flour or a gluten-free blend. This makes the cake bars safe for those avoiding gluten. Ensure that all other ingredients are also gluten-free. You can replace milk in the glaze with almond or oat milk. This keeps the recipe dairy-free. Coconut cream also works well for a creamy texture. To boost flavor, add spices like ginger or cloves. A pinch can make a big difference. You can also use extracts like almond or orange for a unique taste. This adds depth to the carrot cake bars. If you like nuts, try using pecans or hazelnuts. Chopped nuts can add crunch and richness. You could even toast the nuts for extra flavor. These simple changes can elevate the dish. To keep your Maple Glazed Carrot Cake Bars fresh, store them at room temperature. Place the bars in an airtight container. This helps prevent them from drying out. They can last up to three days this way. If you want to keep them longer, consider refrigerating. For longer storage, you can refrigerate the bars. Wrap them well in plastic wrap or foil. This keeps moisture in and prevents the bars from absorbing odors. When stored in the fridge, they last up to a week. Just remember to bring them to room temperature before serving. Freezing your carrot cake bars is easy! First, let them cool completely. Then, cut them into squares. Wrap each piece in plastic wrap, then place them in a freezer bag. They can stay in the freezer for up to three months. To thaw, simply move them to the fridge overnight or let them sit at room temperature for a few hours. Enjoy them later without any fuss! These bars can last up to five days. Store them in an airtight container. Keep them at room temperature for the best taste. If you want them to last longer, refrigerate them. They may dry out slightly in the fridge, so add a slice of bread to keep them moist. Yes, you can make these bars ahead of time. Bake them a day or two in advance. Just cover them well and store them at room temperature. The flavors will meld together, making them even tastier. You can make a vegan version of these bars. Substitute the eggs with flax eggs or applesauce. Use a plant-based milk for the glaze. The rest of the ingredients work well as is. This way, you still enjoy the same great taste without animal products. If you do not have crushed pineapples, you can use applesauce. It adds moisture and sweetness. You may also use grated zucchini, which works well. Just make sure to drain any excess liquid before adding it to the mix. To make a thicker glaze, add more powdered sugar. Start with a tablespoon at a time until you reach the desired thickness. You can also reduce the amount of milk in the glaze recipe. This will help it stick better to the bars when you drizzle it. You learned about making delicious Maple Glazed Carrot Cake Bars. We covered the ingredients, from dry to wet, and optional add-ins. Next, I shared step-by-step instructions for baking these treats. I included helpful tips for perfecting your bars and ideas for variations and storage. Finally, the FAQs answered common questions. In the end, these bars are fun to make and share. Enjoy trying different flavors, and don’t forget to store leftovers properly! Your baking journey can lead to sweet rewards.

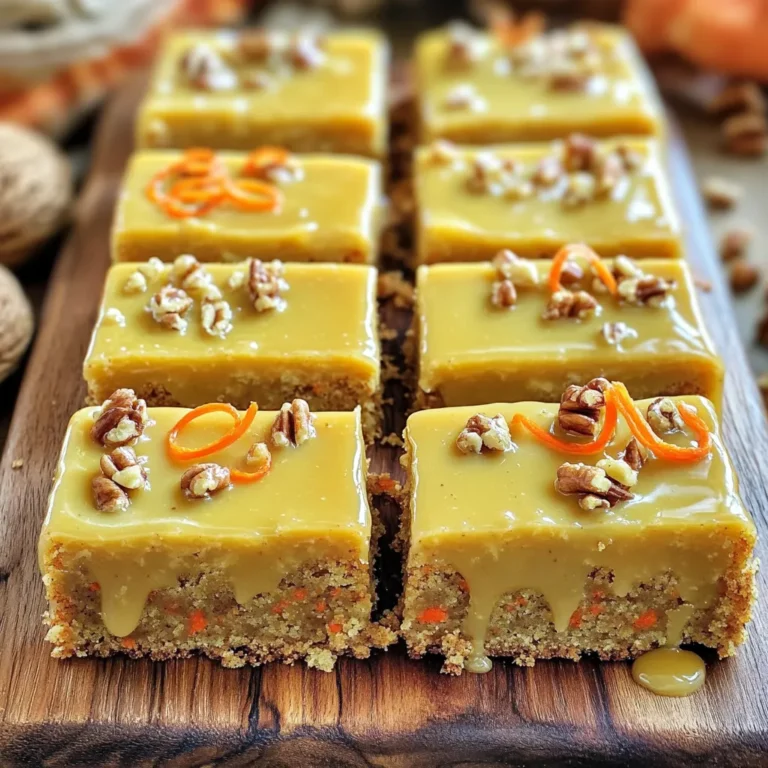
Maple Glazed Carrot Cake Bars Simple and Tasty Treat

- 2 boneless, skinless chicken breasts - 1 cup jasmine rice - 1 tablespoon sesame oil - 1 tablespoon vegetable oil - ½ cup soy sauce - 2 tablespoons honey or maple syrup - 1 tablespoon rice vinegar - 1 tablespoon grated ginger - 2 cloves garlic, minced - 1 cup broccoli florets - ½ cup carrots, julienned - 2 green onions, chopped - Sesame seeds Gathering the right ingredients is key to making teriyaki chicken rice bowls. Start with boneless, skinless chicken breasts. They cook quickly and stay juicy. You also need jasmine rice for a perfect base. The rice absorbs flavors well and adds a fragrant touch. For the cooking oils, sesame oil gives a rich taste. Vegetable oil is great for cooking the chicken. Soy sauce is essential for that savory flavor. Choose low-sodium if you prefer a lighter touch. To sweeten your sauce, use honey or maple syrup. Both add a nice glaze. Rice vinegar brightens the flavor, while ginger and garlic add depth. For veggies, broccoli and carrots provide crunch and color. Green onions add freshness, and sesame seeds give a lovely finish. These ingredients make your teriyaki chicken rice bowls both tasty and colorful. - Rinse jasmine rice under cold water. This removes excess starch. - In a medium saucepan, combine the rice with 2 cups of water or chicken broth. Bring it to a boil. - Once boiling, reduce the heat to low. Cover and simmer for about 15 minutes. - After 15 minutes, remove from heat and let it sit, covered, for 5 minutes. Fluff the rice with a fork. - While the rice cooks, heat 1 tablespoon of sesame oil and 1 tablespoon of vegetable oil in a skillet over medium-high heat. - Add 2 boneless, skinless chicken breasts, sliced into thin strips. Cook for about 5-7 minutes. - Stir the chicken occasionally until it turns golden brown and is fully cooked. - In a separate bowl, whisk together ½ cup of soy sauce, 2 tablespoons of honey or maple syrup, 1 tablespoon of rice vinegar, 1 tablespoon of grated ginger, and 2 cloves of minced garlic. - Pour this sauce over the cooked chicken in the skillet. - Bring the sauce to a gentle boil. This helps to enhance the flavors. - Add 1 tablespoon of cornstarch mixed with 2 tablespoons of water. Stir well. - Cook for an additional 2-3 minutes, stirring constantly to thicken the sauce. - Incorporate 1 cup of broccoli florets and ½ cup of julienned carrots into the skillet. - Cover the skillet and steam the vegetables for about 3-4 minutes. They should be tender yet vibrant. - In serving bowls, place a generous scoop of jasmine rice. - Top the rice with the teriyaki chicken and the steamed vegetables. - For a final touch, sprinkle with chopped green onions and sesame seeds. - Ideal chicken cooking time: Cook the chicken for about 5-7 minutes. Look for golden brown color to know it’s done. This ensures it stays juicy and tender. - Perfect rice texture tips: Rinse jasmine rice until the water is clear. This removes excess starch. Cook it with a 1:2 ratio of rice to water or broth. Let it sit covered after cooking for 5 minutes. This helps the rice fluff up nicely. - Sweetness level modifications: Adjust the sweetness by changing the honey or maple syrup. Use less for a less sweet dish, or add more for a sweeter flavor. - Sauce thickness variations: If you want a thicker sauce, add more cornstarch mixed with water. For a thinner sauce, use less cornstarch or add a splash of water. - Adding spices or additional ingredients: Try adding a pinch of red pepper flakes for heat. You can also mix in sesame seeds or chopped nuts for extra flavor and crunch. - Recommended marinades before cooking: Marinate the chicken for 30 minutes in soy sauce and ginger. This adds depth and richness to the dish. {{image_2}} For a tasty vegetarian option, you can swap chicken for tofu or tempeh. These ingredients soak up flavors well. - Substitutes for chicken: Use firm tofu or tempeh, cut into strips. - Alternate vegetables: Try bell peppers, snap peas, or mushrooms for extra flavor and color. Making this dish gluten-free is easy. Just choose the right soy sauce. - Gluten-free soy sauce alternatives: Use tamari or coconut aminos instead of regular soy sauce. - Adjusting additional ingredients: Check other ingredients for hidden gluten, like certain broths or sauces. If you want more protein, shrimp or chicken can be great choices. - Using shrimp or tofu: If using shrimp, cook them for about 3-4 minutes. Tofu takes longer, around 5-7 minutes. - Cooking times for different proteins: Adjust cooking time based on the protein you choose to ensure it cooks evenly and is safe to eat. To store leftover teriyaki chicken rice bowls, place them in an airtight container. This keeps the food fresh and prevents spills. Always let the meal cool to room temperature before sealing the container. The rice bowls can last up to 3 days in the fridge. To freeze teriyaki chicken rice bowls, portion them into freezer-safe containers. Make sure to separate the chicken from the rice and vegetables. This helps maintain texture. They can last up to 2 months in the freezer. For defrosting, place the container in the fridge overnight. When ready to eat, reheat in the microwave or on the stove until hot. For easy meals, you can prep the chicken, rice, and vegetables ahead of time. Cook the rice and chicken on one day, then store them separately. You can mix and match the veggies too. Portion everything into containers. This way, you have quick meals ready for busy days. Teriyaki sauce is a blend of simple ingredients. It usually has soy sauce, honey or maple syrup, rice vinegar, ginger, and garlic. Each ingredient plays a key role. Soy sauce gives a salty base. Honey adds sweetness, while rice vinegar gives a slight tang. Ginger and garlic add depth and warmth to the flavor. This mix creates a rich and savory sauce that coats the chicken beautifully. Yes, you can prepare teriyaki chicken rice bowls in advance. Cook the chicken and sauce, then store them separately from the rice. You can keep them in the fridge for about 3 days. When ready to eat, reheat the chicken and sauce on the stove. Cook the rice just before serving for the best taste. This method saves time and keeps your meal fresh. Cooking teriyaki chicken is quick. It takes about 5 to 7 minutes in a skillet. Heat the oil, add the chicken, and stir occasionally. Cook until the chicken turns golden brown and reaches an internal temperature of 165°F (75°C). This ensures it is safe to eat and keeps the chicken juicy. You can serve many tasty sides with your teriyaki chicken rice bowls. Try steamed broccoli or snap peas for crunch. Sautéed bok choy or bell peppers add color and flavor. You can also sprinkle sesame seeds or add sliced radishes for extra texture. These options enhance the meal and make it even more delicious. Teriyaki chicken can be a healthy choice. It contains lean protein from chicken and vitamins from the vegetables. Using low-sodium soy sauce helps reduce salt intake. Honey, while sweet, has antioxidants. Pair it with brown rice for added fiber. This way, you enjoy a balanced meal that is both nutritious and tasty. This blog post covered a simple and tasty Teriyaki Chicken Rice Bowl. We highlighted key ingredients, detailed cooking steps, and provided helpful tips. You can easily adapt the recipe to meet dietary needs and enjoy variations like vegetarian or gluten-free options. Understanding storage methods ensures your meals stay fresh. Use these insights to create your own delicious bowls at home. Cooking can be fun and rewarding, so try it out! Enjoy your tasty creation!

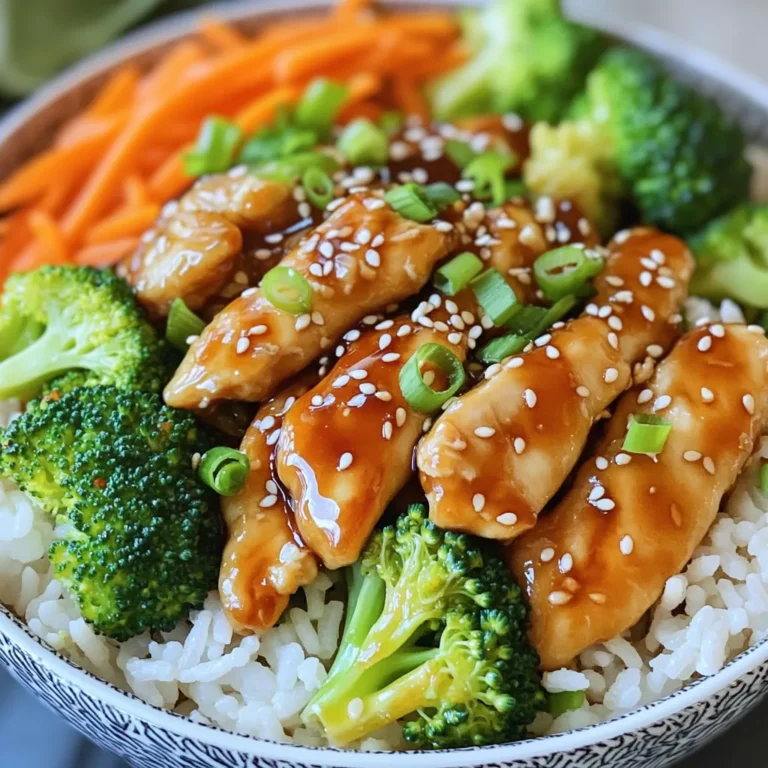
Teriyaki Chicken Rice Bowls Flavorful and Simple Recipe

- 2 lbs beef stew meat, cut into bite-sized pieces - 1 onion, finely chopped - 3 cloves garlic, minced - 8 oz mushrooms, sliced (cremini or button) - 1 cup beef broth - 1 cup sour cream - 2 tablespoons Worcestershire sauce - 1 tablespoon Dijon mustard - 2 teaspoons paprika - Salt and pepper to taste - 3 tablespoons olive oil For my slow cooker mushroom beef stroganoff, I start with beef stew meat. It is tender and perfect for slow cooking. I chop one onion finely and mince three cloves of garlic. These add flavor to the dish. Next, I slice eight ounces of mushrooms. You can use cremini or button mushrooms, depending on your taste. Then, I measure one cup of beef broth. This gives moisture and depth to the dish. I also need one cup of sour cream for creaminess. Two tablespoons of Worcestershire sauce add umami. One tablespoon of Dijon mustard gives a nice tang. I season with two teaspoons of paprika, salt, and pepper to taste. Lastly, I use three tablespoons of olive oil for sautéing. - 2 tablespoons cornstarch (for thickening) - Fresh parsley, chopped (for garnish) - Cooked egg noodles or rice (for serving) If I want a thicker sauce, I can add two tablespoons of cornstarch mixed with water. This helps to give the stroganoff a nice texture. Fresh parsley is a great garnish for color and freshness. For a complete meal, I serve it over cooked egg noodles or rice. These options soak up the sauce well and make the dish heartier. 1. Heat 3 tablespoons of olive oil in a large skillet over medium heat. 2. Add 1 finely chopped onion and 3 minced garlic cloves. 3. Sauté until the onion is soft and clear, about 3-4 minutes. 4. Next, add 2 lbs of beef stew meat to the skillet. 5. Brown the beef on all sides for about 5-7 minutes. This step is key for flavor. 1. Transfer the beef, onion, and garlic mix into the slow cooker. 2. Add 8 oz of sliced mushrooms, 1 cup of beef broth, 2 tablespoons of Worcestershire sauce, and 1 tablespoon of Dijon mustard. 3. Sprinkle in 2 teaspoons of paprika, along with salt and pepper to taste. 4. Stir everything well to combine. 5. Cover the slow cooker. Cook on low for 6-8 hours or on high for 3-4 hours. The beef should be tender. 1. About 30 minutes before serving, stir in 1 cup of sour cream into the slow cooker. This makes the sauce creamy. 2. If you like a thicker sauce, mix 2 tablespoons of cornstarch with cold water. Stir this mix into the stroganoff. 3. Cook for an extra 30 minutes to thicken it up. 4. Before serving, taste the stroganoff. Adjust the seasoning if needed. - Browning meat for depth of flavor: Start by browning the beef in olive oil. This step brings out rich flavors and adds color. Aim for a nice sear on all sides. It takes about 5-7 minutes. Don't rush this step; it makes a big difference in taste. - Adjusting seasoning to taste: After cooking, always taste the stroganoff. You can add salt, pepper, or more paprika if needed. This step ensures the dish fits your flavor preferences. - Best sides to pair with stroganoff: I love serving this dish over cooked egg noodles or rice. Both soak up the creamy sauce well. You can also pair it with steamed veggies or a fresh salad for balance. - Presentation tips for an attractive meal: Sprinkle chopped parsley on top for a pop of green. Serve it in deep bowls to make it feel cozy. A good presentation enhances the meal experience. - Avoiding overcooked beef: To keep the beef tender, do not cook it too long. For low settings, aim for 6-8 hours. On high, cook for 3-4 hours. Check the beef for tenderness toward the end. - Ideal cooking times for different slow cooker settings: If your slow cooker runs hot, check your dish earlier. Always use a meat thermometer if unsure. The beef should reach at least 145°F to be safe and delicious. {{image_2}} You can switch up the meat in this recipe. Chicken or turkey work well. Both meats absorb flavors nicely. They create a lighter dish but still taste great. If you want to try different mushrooms, go for shiitake or portobello. These mushrooms add a rich, earthy flavor. Mixing mushroom types can create a fun taste experience. For gluten-free options, use gluten-free Worcestershire sauce. Also, make sure your beef broth is gluten-free. This way, you keep the dish safe for those with gluten sensitivities. If you want to skip dairy, use coconut cream instead of sour cream. It gives a creamy texture and a hint of sweetness. You can also try cashew cream for a nutty taste. To add Asian-inspired flavors, include soy sauce and ginger. This twist can change the whole dish. Add sesame oil for a nutty touch. You can also explore different spices and herbs. Try adding cumin or thyme for a new flavor profile. Fresh dill gives a nice pop, too. These tweaks can make the dish unique and fun. To store leftovers, cool the mushroom beef stroganoff first. Place it in airtight containers. Glass or plastic containers work well for this. Make sure to seal them tightly to keep out air. You can freeze this dish for future meals. Let it cool completely before putting it in freezer-safe bags. Squeeze out as much air as possible. For reheating, thaw it in the fridge overnight. Then, heat it gently on the stove or in the microwave. In the fridge, this dish lasts about 3 to 4 days. Always check for signs of spoilage. If it smells sour or has a strange color, it’s best to throw it away. To make this dish vegan, swap the beef for plant-based meat. Use mushrooms as the main flavor. You can try lentils or chickpeas too. For the broth, use vegetable broth instead of beef broth. Instead of sour cream, use a dairy-free option like cashew cream or coconut cream. This way, you keep the creamy texture without animal products. Yes, you can use the stovetop. First, brown the beef in a large pot. Then, add the onion, garlic, and mushrooms. Cook until soft. Next, stir in the broth and seasonings. Cover and simmer on low for about 1.5 to 2 hours. Add sour cream towards the end, just like in the slow cooker method. This gives you a warm, hearty meal fast. To check beef doneness, look for tenderness. The meat should fall apart easily when you poke it with a fork. You can also cut a piece in half. It should be brown inside with no red. Cooking for 6-8 hours on low in the slow cooker usually makes it tender. Always trust your taste buds; if it’s soft, it's ready! This blog post explored how to make a delicious Slow Cooker Mushroom Beef Stroganoff. We covered the key ingredients, preparation steps, and cooking methods. You learned about tips for enhancing flavor and serving suggestions. We also discussed variations to suit different diets and storage methods for leftovers. In cooking, enjoy exploring new flavors while keeping it simple. Slow cooker meals offer great taste with little effort. Try it today, and enjoy every bite!

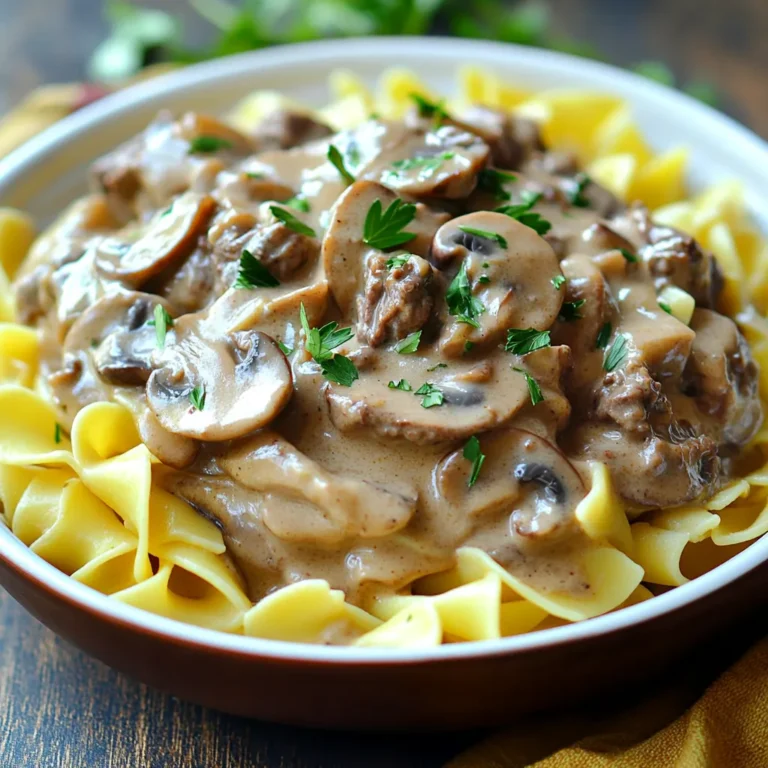
Slow Cooker Mushroom Beef Stroganoff Rich and Hearty

- 1 lb (450g) gnocchi - 1 lb (450g) cooked shredded chicken - 1 cup (240ml) chicken broth - 1 cup (240g) cream cheese, softened - 1 cup (240ml) heavy cream - 1 cup (100g) shredded cheddar cheese - 1 cup (150g) frozen peas - 2 cloves garlic, minced - 1 teaspoon onion powder - 1 teaspoon garlic powder - 1 teaspoon paprika - 1 teaspoon Italian seasoning - Salt and pepper to taste - 2 tablespoons chopped fresh parsley for garnish This dish is all about comfort, and the ingredients make it shine. First, we have gnocchi, which are soft potato dumplings. They soak up all the sauce and add a fluffy texture. Next, the cooked shredded chicken is key. It adds protein and a savory flavor. You can use leftover chicken or rotisserie chicken for ease. Then, we need chicken broth. It brings richness and depth. Cream cheese and heavy cream create a creamy sauce that hugs each piece of gnocchi. The cheese adds tang, while the cream makes it smooth. Shredded cheddar cheese adds a nice sharpness to the dish. Frozen peas bring a pop of color and sweetness. Garlic gives a wonderful aroma. The onion powder and garlic powder boost the flavor without much fuss. Paprika adds a hint of smokiness. Italian seasoning brings herbs into play for added depth. Finally, adjust with salt and pepper to balance all the flavors. The fresh parsley not only makes the dish look pretty; it also adds a fresh taste. Gather these ingredients, and you are ready to make a meal that warms the heart! {{ingredient_image_1}} Start by boiling water in a large pot. Add salt to the water. Once it’s boiling, add 1 lb of gnocchi. Cook according to the package directions. When the gnocchi float to the top, they are done. This usually takes about 2-3 minutes. Drain them carefully and set them aside. In a big skillet, heat over medium. Add 1 lb of cooked, shredded chicken. Pour in 1 cup of chicken broth. Then, add 1 cup of softened cream cheese. Stir it well until it melts into the broth. This will form a creamy base for your sauce. Next, pour in 1 cup of heavy cream. Mix until the sauce is smooth. Add 2 cloves of minced garlic, 1 teaspoon of onion powder, 1 teaspoon of garlic powder, 1 teaspoon of paprika, and 1 teaspoon of Italian seasoning. Let it simmer for about 5 minutes. This helps the flavors blend and the sauce thicken slightly. After that, stir in 1 cup of shredded cheddar cheese. Keep stirring until it melts. Then, add 1 cup of frozen peas. Cook for another 2-3 minutes until the peas are warmed through. Now it’s time to bring it all together. Gently fold the cooked gnocchi into the sauce. Make sure every piece is coated well. Taste and season with salt and pepper as needed. Remove the skillet from heat. Garnish your dish with 2 tablespoons of chopped fresh parsley. This adds a nice color and fresh flavor. Serve this creamy comfort food warm. Enjoy every bite! To cook gnocchi right, start with a big pot. Fill it with salted water and bring it to a boil. Add the gnocchi and watch closely. When they float, they are done. This usually takes about two to three minutes. Drain them well and set aside. Do not rinse, as this washes away the flavor. To store leftover Crack Chicken Gnocchi, let it cool first. Use an airtight container to keep it fresh. You can keep it in the fridge for up to three days. If you want to store it longer, freeze it. Just make sure to use a freezer-safe container. It will last for up to three months in the freezer. If you need to adjust the recipe, here are some smart swaps: - Use plant-based cream cheese for a dairy-free option. - Swap heavy cream for coconut cream for a lighter choice. - For gluten-free gnocchi, look for brands made with rice or corn flour. - Use vegetable broth instead of chicken broth for a vegetarian version. These swaps will help you enjoy a tasty meal that fits your needs. Pro Tips Cook Gnocchi Al Dente: To achieve the perfect texture, make sure to cook the gnocchi just until they float in the boiling water. This ensures they remain tender yet firm, providing the ideal bite in your dish. Use Rotisserie Chicken: For a quick and easy preparation, consider using store-bought rotisserie chicken. This saves time and adds extra flavor to your dish without the need for cooking raw chicken. Experiment with Cheese: While cheddar is delicious, feel free to mix in other cheeses like mozzarella or gouda for a unique flavor profile. This can elevate the creaminess and overall taste of the sauce. Add Fresh Herbs: Along with parsley, try incorporating fresh basil or thyme for added freshness and depth of flavor. A sprinkle just before serving can enhance the aroma and visual appeal of the dish. {{image_2}} You can boost the nutrition by adding more veggies. Try spinach or kale for a pop of color and taste. You can also add bell peppers or carrots for extra crunch. Simply chop them up and add them when you mix in the peas. This makes your meal brighter and more fun to eat. If you like heat, add some spice! Red pepper flakes or diced jalapeños can bring a kick. Start with a little, taste, and then add more if you want. You can also swap some of the paprika for cayenne pepper for a smoky flavor with heat. This way, you can make the dish fit your taste buds. You can create a lighter version of this dish too. Instead of heavy cream, use half-and-half or a plant-based milk. You can also cut back on the cream cheese. This keeps the dish creamy but lowers the calories. A lighter version is still rich and tasty, making it perfect for any meal. You can store leftover Crack Chicken Gnocchi in your fridge. Place it in an airtight container. It will stay fresh for up to three days. When you are ready to eat, check for any changes in smell or color. If it seems okay, you can reheat it. To freeze this dish, first let it cool completely. Then, transfer it to a freezer-safe container or bag. Make sure to remove as much air as possible. You can freeze it for up to three months. When you want to eat it again, thaw it in the fridge overnight before reheating. To reheat, you can use the stovetop or microwave. If using the stovetop, add a splash of chicken broth. Heat it over low heat, stirring gently. If you prefer the microwave, place it in a microwave-safe bowl. Heat in short bursts, stirring in between. This helps it heat evenly. Always check that it's hot throughout before serving. Yes, you can use store-bought gnocchi. It saves time and is very easy. Look for fresh or frozen gnocchi at your store. They cook quickly and taste great in this dish. Just follow the package instructions for cooking. I recommend using cooked and shredded chicken breast. It’s lean and has a mild taste. You can use leftover rotisserie chicken too. This option adds flavor and makes prep faster. Just shred it and mix it into the sauce. To make Crack Chicken Gnocchi gluten-free, choose gluten-free gnocchi. Many brands offer this option now. Be sure to check the label. The other ingredients are naturally gluten-free, so you are mostly set! Yes, you can make it in advance! Prepare the dish and store it in the fridge. When you are ready to eat, just reheat it. Add a splash of cream if it seems too thick. This makes it creamy and fresh again. This dish pairs well with a light salad. A simple green salad adds freshness. You can also serve garlic bread for a tasty side. The bread soaks up the creamy sauce perfectly! In this article, we explored a tasty Crack Chicken Gnocchi recipe. You learned about key ingredients, from gnocchi to fresh parsley. The step-by-step instructions made cooking simple, and our tips will help you improve your dish. Don’t be afraid to experiment with variations to fit your taste. Remember, cooking should be fun! Now, grab those ingredients and enjoy making this hearty meal. You’ll impress your family and friends with your skills. Happy cooking!

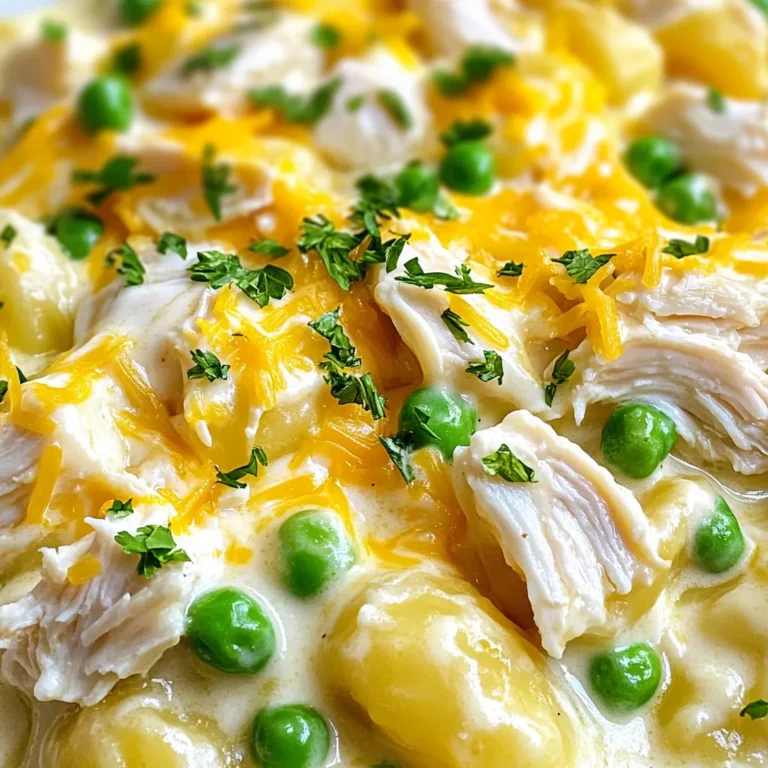
Crack Chicken Gnocchi Creamy Comfort Food Recipe

To make churro stuffed French toast, you need some basic ingredients. Gather these: - 4 slices of thick bread (like brioche or challah) - 2 large eggs - 1/2 cup milk - 1 teaspoon vanilla extract - 1 tablespoon cinnamon - 1 tablespoon sugar - 1/2 cup cream cheese, softened - 1/4 cup brown sugar - 1/4 cup flour - 1 teaspoon ground cinnamon - 2 tablespoons butter (for grilling) These ingredients create a tasty and rich breakfast. The cream cheese filling brings a creamy texture, while the cinnamon adds warmth. You can enhance your churro stuffed French toast with a few optional ingredients. Consider adding: - Powdered sugar (for dusting) - Extra cinnamon (for dusting) - Caramel sauce (for drizzling) These extras add sweetness and make your dish look beautiful. The type of bread you choose matters. For the best flavor and texture, I recommend using: - Brioche: This bread is soft and buttery. - Challah: This bread has a slightly sweet flavor and a nice crust. - Texas toast: This thicker bread holds up well and absorbs the egg mixture. Choosing the right bread helps create a perfect base for your delicious stuffed French toast. {{ingredient_image_1}} To start, grab a bowl. Mix the softened cream cheese, brown sugar, flour, and a teaspoon of cinnamon. Stir until the mixture is smooth and creamy. This filling gives your French toast a delightful churro taste. Set it aside for now. Next, take two slices of thick bread. Spread the churro filling evenly on each slice. Then, place the other two slices on top to make sandwiches. Make sure the filling is in the middle. This will keep the filling warm and tasty as it cooks. Now, let’s make the egg batter. In a clean bowl, whisk together the eggs, milk, vanilla extract, one tablespoon of cinnamon, and sugar. Mix well until everything blends smoothly. This batter will coat our sandwiches and give them a rich flavor. Heat a large skillet over medium heat. Add a tablespoon of butter to the pan. Dip each sandwich into the egg mixture, coating both sides. Be careful not to soak them too much. Place the sandwiches in the skillet and cook for about 3-4 minutes on each side. You want them golden brown and crispy. Add more butter if needed for a nice finish. To make great French toast, you need the right technique. Start with thick bread, like brioche or challah. These types soak up the egg mixture well without getting too soggy. Whisk the eggs, milk, vanilla, sugar, and cinnamon until smooth. Make sure each slice of bread is coated evenly. Avoid soaking too long; just a quick dip is best. Cook on medium heat so the toast cooks through. Use enough butter in the pan to get that nice golden color. For the churro filling, mix cream cheese, brown sugar, flour, and cinnamon until smooth. This mixture should be creamy but not runny. Using softened cream cheese helps it blend well. Spread the filling evenly on the bread. This way, each bite has a nice balance of flavors. If the filling is too thick, add a touch of milk to loosen it. This will help you spread it easily without tearing the bread. To serve, cut the French toast in half. This shows off the lovely churro filling inside. Dust with powdered sugar and extra cinnamon for a sweet touch. You can add a drizzle of caramel sauce for extra flavor. Fresh fruit or whipped cream makes a great garnish, too. These small details make your dish look fancy and inviting. Pro Tips Choose the Right Bread: Opt for thick slices of brioche or challah to ensure the French toast remains fluffy and holds the churro filling well. Control the Heat: Cook the sandwiches on medium heat to achieve a golden brown exterior without burning, ensuring the inside is cooked through. Customize the Filling: Feel free to add chocolate chips or nuts to the churro filling for extra texture and flavor. Presentation Matters: Cut the French toast diagonally and serve it with a drizzle of caramel sauce and a sprinkle of powdered sugar for an eye-catching dish. {{image_2}} You can get creative with fillings. Nutella is a great choice. Just spread a layer on your bread. You can also add fresh fruit like sliced strawberries or bananas for a fruity twist. Cream cheese can mix well with berries too. Try using flavored cream cheese for added fun. If you need a gluten-free option, use gluten-free bread. Many brands offer great-tasting varieties. Check the ingredients for gluten-free certification. You can also swap normal flour with almond or coconut flour in the filling. This keeps the taste rich and yummy. Want to add some flair? Mix in a bit of cocoa powder to the filling for a chocolate kick. You can also add a pinch of nutmeg or cardamom for warmth. If you love spice, sprinkle cayenne pepper into the batter. This gives a surprising kick to each bite! Storing your churro stuffed French toast is easy. First, let the toast cool down. Then, place any leftovers in an airtight container. This helps keep them fresh. You can store them in the fridge for up to three days. Make sure to separate layers with parchment paper to avoid sticking. To reheat your churro stuffed French toast, use a skillet or a toaster oven. Heat the skillet on low and add a little butter. Place the toast in the pan and warm each side for about two minutes. This method keeps the outside crisp. If using a toaster oven, set it to 350°F (175°C) and heat for about five minutes. This way, the filling warms up nicely without getting soggy. If you want to save some for later, freezing is a great option. Wrap each piece tightly in plastic wrap. Place the wrapped pieces in a freezer bag or container. This keeps them fresh for up to three months. When you’re ready to enjoy, thaw in the fridge overnight. Reheat using the tips above for the best taste. For Churro Stuffed French Toast, I recommend using thick bread like brioche or challah. These breads soak up the egg mixture well without falling apart. Their rich texture and slight sweetness pair perfectly with the churro filling. If you want something different, you can try sourdough or even cinnamon raisin bread for added flavor. Yes, you can make the churro filling ahead of time. Just mix the cream cheese, brown sugar, cinnamon, and flour in a bowl. Store it in the fridge until you are ready to assemble the French toast. This makes the process faster and lets the flavors meld together for a richer taste. To customize this recipe, consider these swaps: - Use gluten-free bread to make it gluten-free. - Substitute eggs with flax eggs or silken tofu for a vegan option. - Replace cream cheese with a vegan cream cheese or nut butter for dairy-free. These changes keep the dish tasty while meeting your needs. French toast dates back to ancient times. The Romans soaked bread in milk and eggs. It became popular in many cultures, each adding their twist. In France, it’s called "pain perdu," meaning lost bread. Variations include adding spices, fruits, or different types of bread. Each country has a unique take, making it a beloved dish worldwide. Churro stuffed French toast is a fun and tasty twist on breakfast. We explored essential ingredients and fun variations to enhance flavors. I shared step-by-step instructions for making it easy. Tips and tricks can help you achieve the perfect texture and presentation. With a bit of creativity, you can customize this dish to fit your taste. Enjoy experimenting with flavors and impressing your family and friends. This breakfast treat will surely become a favorite in your home.

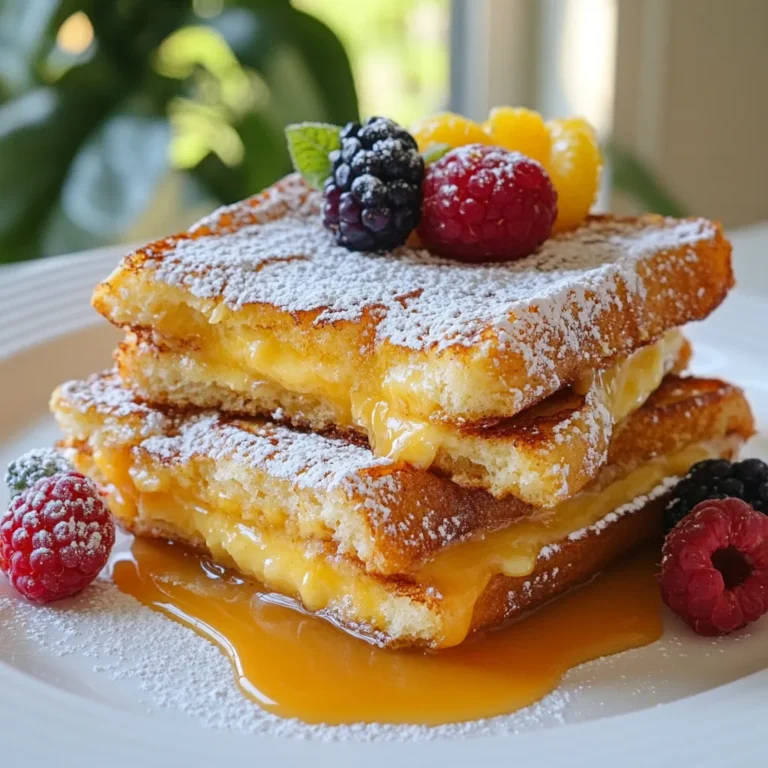
Churro Stuffed French Toast Delightful Breakfast Treat

- 1 pound Brussels sprouts, trimmed and halved - 1 cup apple cider - 2 tablespoons olive oil - 2 tablespoons maple syrup - 1 teaspoon Dijon mustard - 1/2 teaspoon cinnamon - Salt and pepper to taste - 1/4 cup chopped walnuts - 1/4 cup dried cranberries The first step in making Apple Cider Glazed Brussels Sprouts is to gather your ingredients. You'll need fresh Brussels sprouts, which bring a nice crunch. The apple cider adds sweetness and tang. Olive oil is key for sautéing and enhances the flavors. For the glaze, maple syrup gives a rich sweetness. Dijon mustard adds a slight kick, while cinnamon gives warmth and depth. Don't forget the garnishes! Salt and pepper help balance the dish. Walnuts add a crunchy texture, and dried cranberries bring a pop of color and sweetness. Each part of these ingredients works together to create a rich, layered flavor that makes this dish shine. - Trim and halve the Brussels sprouts. Start by cutting off the stem end. Slice each sprout in half. This helps them cook evenly. - Rinse and pat dry. Place the halved sprouts under cold water. This removes any dirt. After rinsing, use a clean towel to dry them. - Heat olive oil in a skillet. Use a large skillet over medium heat. Let the oil warm up for a minute. - Sauté until golden brown and tender. Add the sprouts cut side down. Cook for 5-7 minutes. They should turn a nice golden color. Stir them and cook for another 3-4 minutes until they are tender but still crisp. - Combine apple cider, maple syrup, Dijon mustard, and cinnamon. In a small saucepan, mix all four ingredients. This will create a sweet and tangy glaze. - Simmer until reduced and thickened. Heat this mixture over medium heat. Let it cook for about 10 minutes. Stir occasionally until the glaze reduces by half and thickens slightly. - Coat Brussels sprouts with glaze. Pour the glaze over the cooked sprouts in the skillet. Toss them gently to coat evenly. - Season and garnish before serving. Add salt and pepper to taste. Transfer to a serving dish. Sprinkle with chopped walnuts and dried cranberries for extra crunch and sweetness. To cook Brussels sprouts well, use a wide skillet. A cast-iron or non-stick pan works best. The flat surface helps the sprouts brown nicely. Start on medium heat. This will give you a nice golden color. Don’t rush; let them cook for about 5-7 minutes cut side down. After that, stir and cook for a few more minutes. You want them tender but still crisp. To boost the taste, try adding a pinch of nutmeg or some garlic powder. Fresh herbs like thyme or rosemary can also add a nice touch. When measuring spices, use measuring spoons for accuracy. Too much spice can overpower the dish. Balance is key, so taste as you go. For an eye-catching dish, serve the Brussels sprouts on a white plate. This makes the colors pop. Arrange them in a circle and sprinkle walnuts and cranberries on top. This adds crunch and sweetness. For main courses, these glazed sprouts pair well with roasted chicken or pork. They add a lovely contrast to hearty meats. {{image_2}} You can switch up some ingredients to fit your taste. Instead of maple syrup, try honey or agave syrup for a different sweetness. If you want a richer flavor, use brown sugar. For the nuts, walnuts work great, but pecans or almonds are tasty too. You can also swap dried cranberries for raisins or chopped apples. This keeps the dish fresh and fun! If you want a vegan dish, skip the honey. Use maple syrup for sweetness. You can also replace the Dijon mustard with a vegan version. For those with gluten issues, check your mustard and apple cider for gluten-free labels. Most are safe, but it’s good to check. This way, everyone can enjoy your meal! Using seasonal produce makes this dish shine. In fall, add roasted pumpkin or squash for extra color and flavor. In spring, toss in some fresh peas or asparagus for a bright touch. For holiday meals, sprinkle pomegranate seeds on top for a festive look. These small changes keep your dish exciting and in tune with the seasons! To store leftovers, let your Brussels sprouts cool down. Place them in a clean bowl. Cover the bowl with plastic wrap or use a tight lid. This keeps them fresh and tasty. You can store them in the fridge for about 3 to 5 days. For best results, use glass containers or airtight plastic ones. They help keep moisture in and odors out. When you reheat your Brussels sprouts, use the stovetop for the best texture. Heat a skillet over medium-low heat. Add a splash of water or olive oil to keep them moist. Stir often for about 5 minutes until they are hot. This method helps keep their crunch. You can also use the microwave. Place them in a microwave-safe dish. Cover it with a lid or microwave-safe wrap. Heat for 1 to 2 minutes, stirring halfway. Yes, you can freeze Apple Cider Glazed Brussels Sprouts! First, let them cool completely. Then, place them in a freezer-safe bag. Remove as much air as you can before sealing. They can last in the freezer for up to 3 months. To thaw, move them to the fridge overnight. For a quicker option, use the microwave on defrost. After thawing, reheat them on the stovetop to restore their texture. It takes about 30 minutes to make this dish. You spend 10 minutes on prep and 20 minutes cooking. Start by trimming and halving the Brussels sprouts. This step is quick but key for even cooking. Sauté them until they are golden brown. Then, you simmer the apple cider glaze for about 10 minutes. The timing is easy to follow and perfect for a weeknight meal. Yes, you can prepare this dish ahead of time. Cook the Brussels sprouts and make the glaze. Store them separately in the fridge. When you're ready to serve, simply reheat them together in a skillet. This keeps the sprouts crisp and the glaze fresh. You can also prep the sprouts earlier in the day. Just remember to toss them with the glaze right before serving. Apple Cider Glazed Brussels Sprouts pair well with many dishes. Here are some great options: - Roasted chicken or turkey - Grilled pork chops - Quinoa salad - Mashed potatoes - Rice pilaf These sides add variety and balance to your meal. You can mix and match based on your taste and diet. Enjoy the sweet and savory flavors together! This blog covered how to make delicious Apple Cider Glazed Brussels Sprouts. You learned about key ingredients, like sprouts, cider, and spices. I shared step-by-step cooking tips to achieve the best flavor. Exploring variations and storage also helps you adapt the dish to fit your needs. Try this easy recipe for your next meal. It's tasty, simple, and perfect for any occasion. Enjoy your cooking!

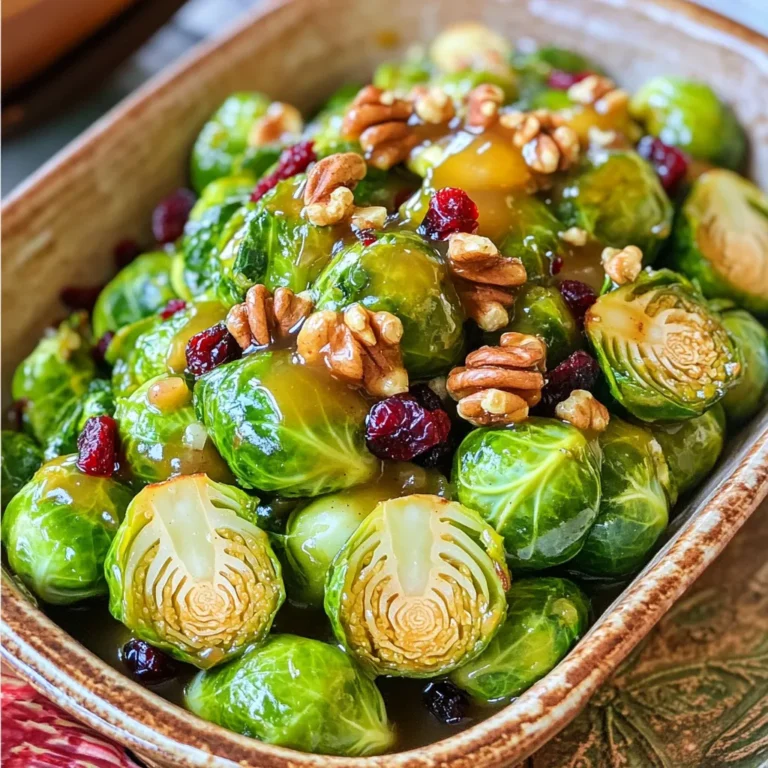
Apple Cider Glazed Brussels Sprouts Flavor Boost Guide

PREV 1 … 11 12 13 … 56 NEXT
go kitchen now

explore

DessertsDinnerAppetizersDrinks

Our Policies

  • Cookie Policy
  • Copyright Policy
  • Disclaimer
  • GDPR Policy
  • Terms Of Use
Back to Top
  • About
  • Contact Us
  • Privacy Policy
© 2025 go kitchen now