FREE DINNER EBOOK! Get your copy!
  • Cookie Policy
  • GDPR Policy
  • Disclaimer
  • Terms Of Use
  • Visit my other site: Fun Cookie Recipes
go kitchen now
  • Home
  • Dinner
  • Desserts
  • Drinks
  • Appetizers
  • Contact
  • About
  • Privacy Policy
  • Home
  • Dinner
  • Desserts
  • Drinks
  • Appetizers
  • Contact
  • About
  • Privacy Policy
  • Cookie Policy
  • GDPR Policy
  • Disclaimer
  • Terms Of Use
Visit my other site: Fun Cookie Recipes

HOME / CATEGORIES /

Latest

- 4 salmon fillets - 1 cup teriyaki sauce (store-bought or homemade) - 2 cups broccoli florets - 1 red bell pepper, sliced - 1 carrot, julienned - 2 tablespoons sesame oil The main ingredients for this dish are simple yet delicious. The salmon fillets are the star of the show. They add rich flavor and healthy fats. Teriyaki sauce gives the fish a sweet and savory glaze. Fresh vegetables like broccoli, bell pepper, and carrot add color and crunch. Sesame oil enhances the overall flavor with its nutty aroma. - 2 cups cooked rice (white, brown, or cauliflower rice) - 2 green onions, sliced (for garnish) - 1 tablespoon sesame seeds (for garnish) Rice serves as a hearty base for your meal. You can use white, brown, or even cauliflower rice for a low-carb option. Green onions add a fresh touch, while sesame seeds give a nice crunch. These garnishes make your dish look inviting and tasty. - Salt and pepper - Additional flavorings for teriyaki sauce While the teriyaki sauce is flavorful, you can enhance it with salt and pepper. Feel free to add other seasonings too. A dash of garlic powder or ginger can make the sauce even better. Just remember to adjust the flavors to your liking. - Preheat the oven to 400°F (200°C). - Line a large sheet pan with parchment paper. This helps with easy cleanup. - Place the salmon fillets on one side of the sheet pan, skin-side down. - Brush the salmon fillets with teriyaki sauce. Add a pinch of salt and pepper for flavor. - In a bowl, combine broccoli florets, sliced red bell pepper, and julienned carrot. - Drizzle the veggies with sesame oil and toss to coat them evenly. - Arrange the mixed vegetables on the sheet pan next to the salmon. - Bake in the preheated oven for about 15-18 minutes. - Check for doneness; the salmon should flake easily with a fork, and the veggies should be tender. - While the salmon and vegetables bake, prepare the rice as per the package instructions. - Once done, remove the sheet pan from the oven. - To assemble the bowls, place a scoop of rice at the bottom. - Top with a salmon fillet and add a generous portion of roasted vegetables. - Drizzle any remaining teriyaki sauce from the pan over the bowls. - Garnish with sliced green onions and a sprinkle of sesame seeds before serving. When you buy salmon, look for bright color. Fresh salmon should have a vibrant hue. Avoid any fillets with gray or dull spots. The flesh should be firm and moist. If it has a fishy smell, skip it. Ask your fishmonger for the freshest catch. They can help you pick the best fillets. To get the best results, cook salmon for 15-18 minutes. Check it at the 15-minute mark to avoid overcooking. The salmon should flake easily with a fork. For the veggies, they can cook faster. Keep an eye on the broccoli, bell pepper, and carrot. They should be tender but still bright and crisp. Want to add more flavor? Try mixing in ginger or garlic with the teriyaki sauce. You can also use a splash of sriracha for heat. Pair your meal with a light salad or steamed edamame for a fresh touch. For drinks, green tea or a light beer pairs well with teriyaki salmon. {{image_2}} You can swap salmon for chicken or tofu. Using chicken, I recommend boneless thighs for juiciness. Simply season and cook them the same way as the salmon. Tofu is a great plant-based choice. Make sure to press the tofu to remove excess water. This helps it absorb more flavor. Cut it into cubes and season it well with teriyaki sauce before baking. Feel free to use seasonal vegetables. Zucchini, snap peas, or bell peppers add nice colors and flavors. You can also try mushrooms or asparagus for a different taste. The key is to choose veggies that roast well. Just ensure they are cut into uniform sizes for even cooking. This way, they all finish at the same time. Want to change the flavor? You can add spices or fresh herbs. A pinch of red pepper flakes gives a nice kick. Fresh ginger or garlic can add depth to your teriyaki. You can also try adding a squeeze of lime or lemon for a fresh twist. Experiment with different sauces for a unique touch, like hoisin or sriracha. To keep your salmon bowls fresh, store them in airtight containers. Divide the salmon, veggies, and rice into separate portions. This way, they stay fresh longer. You can keep them in the fridge for up to three days. If you use a glass container, it helps avoid any unwanted smells. When you want to enjoy your leftovers, avoid drying them out. The best way is to reheat in the oven. Preheat your oven to 350°F (175°C). Place the salmon and veggies on a baking sheet. Cover them with foil to trap moisture. Heat for about 10-15 minutes. If you prefer the microwave, use a microwave-safe dish. Add a bit of water to keep things moist. Heat for 1-2 minutes, checking often. Yes, you can freeze your sheet pan teriyaki salmon bowls! Wrap each portion tightly in plastic wrap, then place them in a freezer bag. Label the bags with the date. They can last up to three months in the freezer. When ready to eat, thaw in the fridge overnight. Reheat as mentioned above for best results. To make a quick teriyaki sauce, you need just a few ingredients. Here’s what you’ll need: - 1/2 cup soy sauce - 1/4 cup honey or brown sugar - 1/4 cup rice vinegar - 1 tablespoon minced garlic - 1 tablespoon minced ginger - 1 teaspoon cornstarch (optional, for thickness) - 1 tablespoon water (if using cornstarch) To prepare, mix the soy sauce, honey, rice vinegar, garlic, and ginger in a small pot. Heat it on medium until it simmers. If you want it thicker, mix cornstarch and water in a small bowl, then add it to the sauce. Stir until it thickens. This sauce is sweet, savory, and perfect for your salmon bowls. Yes, you can use frozen salmon! Just make sure to thaw it first. Place the salmon in the fridge overnight or use the cold water method. To do this, seal the salmon in a bag and submerge it in cold water for about an hour. Once thawed, pat it dry with a paper towel before seasoning and baking. This way, your salmon will cook evenly and soak up all that tasty teriyaki sauce. You have many options for sides that pair nicely with teriyaki salmon. Here are some ideas: - Steamed edamame - Cucumber salad with sesame dressing - Roasted sweet potatoes - Miso soup - Seaweed salad These sides add freshness and balance to the flavors in your salmon bowls. Feel free to mix and match based on what you love! In this blog post, we covered how to make delicious sheet pan teriyaki salmon bowls. We discussed the key ingredients, like fresh salmon, vibrant vegetables, and flavorful sauces. You learned step-by-step instructions for cooking, tips for selecting and preparing ingredients, and storage methods for leftovers. Creating your own teriyaki salmon bowls is simple and fun. I hope you enjoy experimenting with flavors and variations to make the dish your own. Now, gather your ingredients and start cooking!

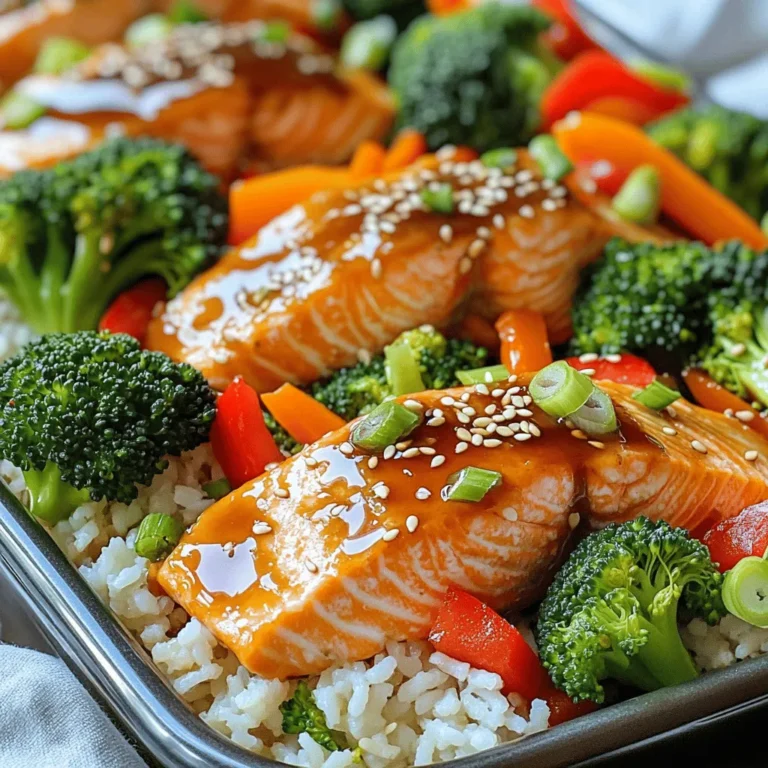
Sheet Pan Teriyaki Salmon Bowls Quick and Tasty Meal

- 2 lbs chicken wings, separated into flats and drumettes - 2 tablespoons olive oil - 1 teaspoon garlic powder - 1 teaspoon onion powder - 1 teaspoon smoked paprika - Salt and pepper to taste - ½ cup grated Parmesan cheese - 2 tablespoons fresh parsley, chopped - 2 tablespoons minced garlic - 1 tablespoon butter, melted Gather these ingredients to make your Air Fryer Garlic Parmesan Wings. The chicken wings form the base of this dish. Use fresh wings for the best flavor. Olive oil helps the wings crisp up nicely. Garlic and onion powders add a bold taste. Smoked paprika gives a hint of smokiness. Next, season with salt and pepper to enhance the flavors. Grated Parmesan cheese is key for that cheesy goodness. For garnish, fresh parsley adds color and freshness. Minced garlic in the sauce gives a punch. The melted butter ties it all together, making each bite rich and tasty. This simple list creates wings that are flavorful and crispy. Start by preparing your chicken wings. In a large bowl, combine the chicken wings, olive oil, garlic powder, onion powder, smoked paprika, salt, and pepper. Toss the wings until they are evenly coated with the seasonings. This step is key for flavor. Next, preheat your air fryer to 400°F (200°C) for about 5 minutes. Preheating helps ensure the wings cook evenly and become crispy. Now it’s time to air fry the wings. Arrange the wings in a single layer in the air fryer basket. Make sure they are not overcrowded. If you have a lot of wings, cook them in batches. Set your timer for 25-30 minutes. Flip the wings halfway through the cooking time. This helps them brown evenly on both sides. You want them to be golden brown and crispy. While the wings cook, prepare the garlic Parmesan sauce. In a small bowl, mix the melted butter, minced garlic, and half of the grated Parmesan cheese. This sauce adds rich flavor and a creamy texture to the wings. Once the wings finish cooking, transfer them to a large mixing bowl. Pour the garlic Parmesan sauce over them. Toss well to coat every wing. Finally, sprinkle the remaining Parmesan cheese and chopped parsley over the wings before serving. Enjoy your tasty creation! To get crispy wings, avoid overcrowding the basket. If you pile wings together, they won’t cook evenly. Cook in batches if needed. This way, each wing gets enough hot air to crisp up. The air fryer works best with space around the food. You can add more flavors to your wings. Try cayenne pepper for heat. If you want a milder taste, stick with garlic powder and onion powder. Always taste your mix before cooking. This helps you adjust the spice levels to your liking. Wings taste great with dipping sauces. Consider ranch or blue cheese for a classic pairing. For sides, serve with celery sticks or a light salad. These add a refreshing crunch to your meal. Try to keep the focus on the wings while enjoying tasty sides. {{image_2}} You can spice up your garlic Parmesan wings with a few fun twists. - Spicy garlic Parmesan wings: Add 1-2 teaspoons of cayenne pepper or hot sauce to the mix. This gives a nice kick while keeping the garlic and Parmesan flavors intact. - Lemon herb variation: Add the zest of one lemon and a teaspoon of dried oregano or thyme. This adds freshness and a bright taste to your wings. If you don’t have an air fryer, don’t worry! You can still enjoy these wings. - Oven-baking wings vs. air frying: Baking is a great option. Preheat your oven to 425°F (220°C). Line a baking sheet with foil, place the wings on it, and bake for 30-35 minutes. Flip them halfway for even cooking. - Grilling for a smoky flavor: Grill your wings for about 20 minutes on medium heat. Turn them every few minutes to get that smoky char. It adds a different depth to the flavor. Want to make your wings fit your diet? Here are some easy swaps. - Gluten-free wing options: Use gluten-free soy sauce instead of regular. It keeps the flavor while being safe for gluten-sensitive folks. - Using skinless wings for healthier choices: Skinless wings are lower in fat. Just toss them in the same seasoning mix. They’ll still taste great! Store your leftover wings in an airtight container. This helps keep them fresh. Place them in the fridge right after they cool. They stay good for about 3 to 4 days. If you want the best taste, eat them sooner rather than later. To freeze your cooked wings, first let them cool down completely. Next, place them in a single layer on a baking sheet. Freeze them for about 1 to 2 hours. Once solid, transfer the wings to a freezer bag. This helps save space. You can store them for up to 3 months. To reheat, bake them in the oven at 375°F (190°C) for about 20 minutes, or until heated through. Check your wings for any off smells. If they smell sour, it's time to toss them out. Look for any signs of freezer burn if frozen. To keep wings crispy, reheat them in the air fryer or oven. Avoid using the microwave, as it makes them soggy. To get the best crispiness, air fry the wings for 25-30 minutes at 400°F (200°C). This high heat cooks them fast and keeps them crispy. Flip the wings halfway to ensure even cooking. You want them golden brown and crunchy on all sides. Yes, you can prep garlic Parmesan wings ahead of time. Marinate the wings in olive oil, garlic powder, onion powder, smoked paprika, salt, and pepper. Store them in the fridge for up to 24 hours. Just remember to cook them fresh for the best taste. Several side dishes go great with garlic Parmesan wings. Here are a few ideas: - Celery sticks with ranch dressing - French fries or sweet potato fries - A fresh garden salad - Coleslaw for a crunchy contrast These sides complement the rich flavors of the wings and add a nice balance to your meal. This article shared how to make tasty garlic Parmesan chicken wings. You learned about the key ingredients, like chicken wings, garlic, and Parmesan. I provided clear steps to prepare and cook the wings in an air fryer. You discovered tips for perfect crispiness and flavor, as well as easy variations. Now you can enjoy delicious wings at home or share with friends. With these simple methods, you’ll impress everyone with your cooking skills. Enjoy your cooking adventure!

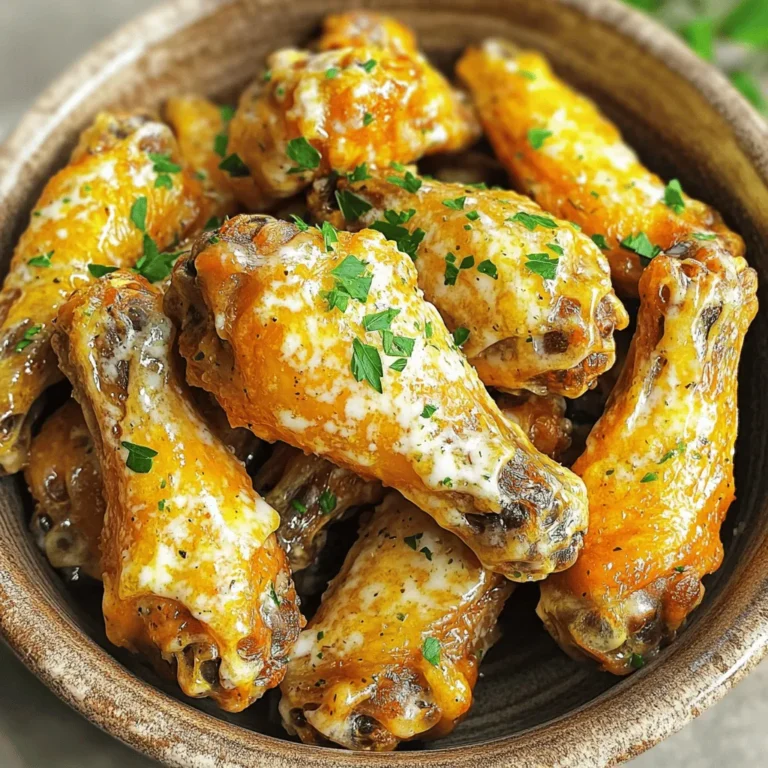
Air Fryer Garlic Parmesan Wings Flavorful and Crispy

- 2 cups all-purpose flour - 1 cup granulated sugar - 1/2 cup unsalted butter, softened - 1 cup sour cream - 2 large eggs The main ingredients in this cake create a rich and moist base. The all-purpose flour gives structure, while granulated sugar adds sweetness. Unsalted butter brings creaminess, and sour cream keeps the cake tender. Eggs bind everything together for a perfect texture. - 2 medium Granny Smith apples, peeled and diced - 1 tbsp lemon juice - 1 tsp ground cinnamon Granny Smith apples work best for this recipe. Their tartness balances the sweet cake. Lemon juice helps keep the apples fresh and bright. Ground cinnamon adds warmth and spice, making each bite a treat. - 1/2 cup all-purpose flour - 1/2 cup brown sugar - 1/3 cup cold unsalted butter, cubed - 1 tsp ground cinnamon - 1/4 cup chopped walnuts or pecans (optional) The streusel topping gives a crunchy contrast to the soft cake. Brown sugar adds a deep flavor. Cold butter creates that crumbly texture we love. Adding nuts is optional, but they give extra crunch and flavor. First, peel and dice two medium Granny Smith apples. In a bowl, toss them with one tablespoon of lemon juice and one teaspoon of cinnamon. This adds flavor and keeps the apples fresh. Set the apples aside to marinate while you prepare the other parts of the cake. In a medium bowl, combine half a cup of all-purpose flour, half a cup of brown sugar, and one teaspoon of ground cinnamon. If you like, add a quarter cup of chopped walnuts or pecans for extra crunch. Then, take one-third cup of cold, cubed unsalted butter. Use your fingers or a fork to mix until the mixture looks crumbly. Set this aside for later. In a large mixing bowl, cream together half a cup of softened unsalted butter and one cup of granulated sugar. Mix until it looks light and fluffy. Next, beat in two large eggs, one cup of sour cream, and one teaspoon of vanilla extract. Keep mixing until everything is smooth. In a separate bowl, whisk together two cups of all-purpose flour, one tablespoon of baking powder, half a teaspoon of baking soda, and a quarter teaspoon of salt. Gradually add this dry mixture to the wet batter. Stir until just combined. Then, gently fold in the marinated apples from earlier. Pour half of the cake batter into a greased and floured 9-inch round cake pan. Sprinkle half of the streusel topping over the batter. Then, add the remaining batter on top, followed by the rest of the streusel. Bake in a preheated oven at 350°F (175°C) for about 35 to 40 minutes. Check with a toothpick; it should come out clean when the cake is done. Once baked, let the cake cool in the pan for around 10 minutes. Then, carefully transfer it to a wire rack to cool completely. This step is key to keeping the cake moist and fluffy. Enjoy the delicious aroma as it cools! - Choosing the right apples: I love using Granny Smith apples. They are tart and firm. This helps balance the sweetness of the cake. You could use Honeycrisp or Fuji apples too. Just make sure they are crisp and fresh. - Measuring ingredients accurately: Always use the right tools. A kitchen scale or dry measuring cups works best. Spoon flour into your cup, then level it off. This gives you the right amount, which is key for a good rise. - Serving suggestions: Serve your cake on a bright plate. I like to cut it into nice slices. Pair it with a hot cup of coffee or tea. This makes for a cozy treat. - Adding garnishes: A light dusting of powdered sugar adds charm. You can also sprinkle some extra cinnamon on top. If you want to be fancy, add some fresh apple slices or nuts for a pop of color. - Gluten-free substitutes: You can use a gluten-free flour blend. Just make sure it’s a cup-for-cup substitute. This way, your cake will still be soft and tasty. - Reducing sugar content: If you want less sugar, try using applesauce. Replace half of the sugar with applesauce. This keeps the cake moist and sweet. You can also cut down the sugar in the streusel topping for a healthier twist. {{image_2}} To make your apple streusel coffee cake even better, try adding spices! Nutmeg adds a warm, cozy flavor. Just use a pinch for a nice touch. You can also mix in other fruits. Chopped pears or berries can add fresh tastes and colors. Get creative with what you have! If you want vegan options, swap the eggs for flaxseed meal. This works well to bind the cake. Use a plant-based yogurt instead of sour cream. For nut-free alternatives, leave out the walnuts or pecans in the streusel. You can replace them with sunflower seeds or just skip them altogether. During autumn, add spices like cloves or allspice to the batter. These spices bring the essence of fall to your cake. For holiday-themed variations, try adding a splash of orange zest. This gives a festive vibe and brightens the flavors. You can also use cranberries for a tart surprise. To keep your apple streusel coffee cake fresh, store it properly. You can leave it at room temperature for a day or two. Just wrap it in plastic wrap or place it in an airtight container. This keeps it soft and moist. If you want it to last longer, refrigerate it. In the fridge, it stays good for up to a week. Just remember to cover it well to avoid drying. Freezing the cake is a great way to save some for later. To freeze it, let the cake cool completely. Slice it into pieces and wrap each slice in plastic wrap. Then, put the slices in a freezer bag or container. This keeps the air out and the cake fresh. It can last up to three months in the freezer. When you’re ready to enjoy it, take a slice out and place it in the fridge overnight to thaw. To reheat your cake, use the oven or microwave. If using the oven, preheat it to 350°F (175°C). Place the cake slice on a baking sheet and warm it for about 10 minutes. This method keeps it moist and tasty. If you’re in a hurry, the microwave works too. Heat it for 10 to 15 seconds. Warm cake pairs perfectly with coffee or tea, but cold cake is still delightful. Enjoy it however you like! To keep your cake moist, use sour cream. This ingredient adds richness. Make sure not to overmix the batter. Mixing too much can lead to a dry cake. Another tip is to bake it just right. You want it firm but not dry. Yes, you can use different apples. Granny Smith apples work well for their tartness. Other options include Honeycrisp or Fuji apples. Each type will give a unique flavor. Just remember to peel and dice them. To check if the cake is done, insert a toothpick in the center. If it comes out clean, the cake is ready. You can also lightly press the top. If it springs back, it's done baking. This cake pairs well with coffee or tea. You can also serve it with whipped cream or vanilla ice cream. A dusting of powdered sugar on top adds a nice touch too. The cake lasts about three days at room temperature. Store it in an airtight container. If you keep it in the fridge, it can last up to a week. For longer storage, freeze it for up to three months. This article covers apple streusel coffee cake from ingredients to storage tips. You learned how to pick the best apples, prepare the batter, and make a tasty streusel topping. Remember, you can change flavors and make it suit your needs. Fresh and warm is the way to serve it. Following these steps helps to ensure a delicious cake every time. Enjoy your baking and sharing it with family or friends.

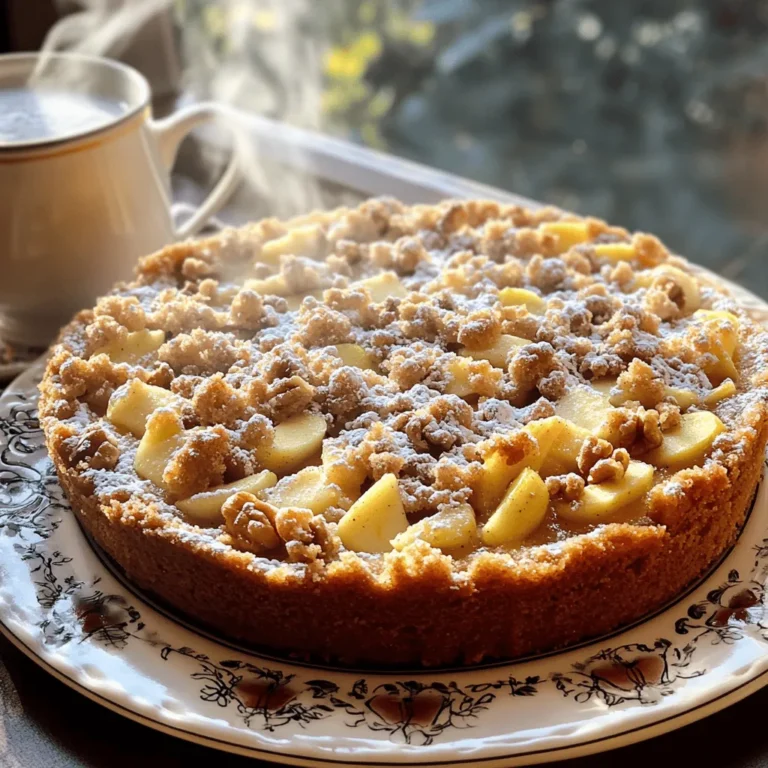
Apple Streusel Coffee Cake Bakery Style Delight

To make Pasta Primavera, you need fresh ingredients. Here’s what you need: - 8 oz spaghetti or fettuccine - 1 cup cherry tomatoes, halved - 1 medium zucchini, sliced - 1 bell pepper (any color), sliced - 1 cup asparagus, trimmed and cut into 2-inch pieces - 1 cup broccoli florets - 2 cloves garlic, minced - 1/4 cup extra virgin olive oil - 1 teaspoon Italian seasoning - Salt and pepper to taste - Fresh basil leaves, for garnish - Grated Parmesan cheese (optional) Fresh vegetables make the dish bright and tasty. Use cherry tomatoes for sweetness. The zucchini adds a nice crunch. Bell peppers bring color and flavor. Asparagus and broccoli add nutrition and texture. Mix and match these veggies as you like! You can choose between spaghetti or fettuccine. Spaghetti is thin and long, great for twirling. Fettuccine is wider and flat, perfect for holding sauce. Both are delicious in this dish. Pick the one you love! Garnish your Pasta Primavera with fresh basil leaves. They add a fragrant touch. You can also sprinkle grated Parmesan cheese on top. This adds a creamy, salty flavor. Feel free to get creative with your toppings! {{ingredient_image_1}} Start by boiling a large pot of salted water. This helps the pasta taste better. Once the water boils, add your spaghetti or fettuccine. Cook it according to the package instructions. Aim for that perfect al dente texture. When it's done, reserve half a cup of pasta water. This water helps with the sauce later. After that, drain the pasta and set it aside. Next, heat a large skillet over medium heat. Pour in the extra virgin olive oil. Let it warm up for a minute. Now add the minced garlic. Cook it until it smells amazing, about one minute. Then, toss in the cherry tomatoes, zucchini, bell pepper, asparagus, and broccoli. Stir in the Italian seasoning, salt, and pepper. Cook everything for about five to seven minutes. You want the veggies to be tender but still colorful. Now it’s time to bring it all together. Add the drained pasta to the skillet. Toss everything gently to mix. If it seems too dry, add some of the reserved pasta water. Do this one tablespoon at a time until you like the sauce's thickness. Once everything is well combined, take the skillet off the heat. Your vibrant Pasta Primavera is ready to serve! You can easily make this dish your own. Try adding protein options like grilled chicken or shrimp. Both add flavor and make the dish more filling. If you want a vegetarian twist, try chickpeas or tofu. You can also swap out vegetables based on what you have. If zucchini is not in season, use bell peppers or snap peas. Carrots, mushrooms, or even spinach work well too. Just keep the colors bright for a beautiful dish. To avoid overcooked noodles, watch the time closely. Cook your pasta until it is al dente. This means it should still have a slight bite. Remember to taste it a minute or two before the package time ends. Using reserved pasta water can be a game changer. This water is starchy and helps sauces stick. When mixing your pasta and veggies, add a little pasta water at a time. Stir until you reach the right sauce consistency. This keeps your dish creamy without being too heavy. Pro Tips Choose Fresh Vegetables: Opt for seasonal, fresh vegetables for the best flavor and nutritional value. Don't Overcook the Pasta: Cook the pasta al dente to ensure it maintains a slight bite and holds up well with the sauce. Customize Your Veggies: Feel free to substitute or add your favorite vegetables to make this dish your own. Use Pasta Water Wisely: The reserved pasta water is starchy and helps to create a smooth, cohesive sauce. {{image_2}} You can change the vegetables in Pasta Primavera based on the season. In spring, use fresh asparagus and peas. Summer brings sweet corn and colorful bell peppers. In fall, try roasted butternut squash and kale. Winter calls for hearty veggies like carrots and Brussels sprouts. The key is to pick what is fresh and in season. This will make your dish taste bright and lively. If you need gluten-free pasta, look for rice or quinoa pasta. Both options work well in this recipe. For a vegan version, swap the Parmesan cheese with nutritional yeast or a vegan cheese. You can add beans or lentils for protein. These swaps keep the dish tasty while fitting your diet. Adjust the recipe to match your needs and enjoy every bite! To keep your leftover Pasta Primavera fresh, first let it cool down. Place it in an airtight container. Make sure to seal it tightly. Store the container in the refrigerator. It can last for up to three days. If you want to keep it longer, consider freezing it. Use a freezer-safe container, and it can last for up to two months. Just remember to label the container with the date. When it’s time to eat your leftovers, you have a few options to reheat. The stovetop is great for keeping texture. Add a splash of water or olive oil to a pan. Heat it on low and stir often. This helps the pasta stay moist. You can also use the microwave. Place the pasta in a bowl with a little water. Cover it with a damp paper towel. Heat in short bursts, stirring in between. Both methods keep your dish tasty and fresh. Pasta Primavera is a fresh, colorful dish that highlights spring vegetables. The name means "spring pasta" in Italian. This dish first appeared in the 1970s in America. It often features pasta, olive oil, garlic, and a mix of seasonal veggies. The goal is to bring out the bright flavors of the vegetables. You can use any pasta you like, but spaghetti or fettuccine works well. Yes, you can prepare Pasta Primavera ahead of time! Cook the pasta and veggies separately. Store them in the fridge. When you're ready to eat, just reheat them together in a skillet. Add a bit of pasta water to keep it moist. This method saves time and keeps your meal fresh. Pasta Primavera pairs well with many side dishes. A simple green salad adds freshness. Garlic bread is also a great choice for a satisfying meal. You might even serve it with grilled chicken or shrimp for added protein. Each option enhances the flavors of the pasta. Pasta Primavera is a fresh, colorful dish that’s easy to make. We explored key ingredients and how to prepare them step by step. Customize it with your favorite proteins or seasonal veggies. Remember to keep the pasta firm and use reserved water for the best texture. Store leftovers properly and follow reheating tips to enjoy another meal. Pasta Primavera shines as a versatile, healthy option for any time of year. Enjoy creating your own version!

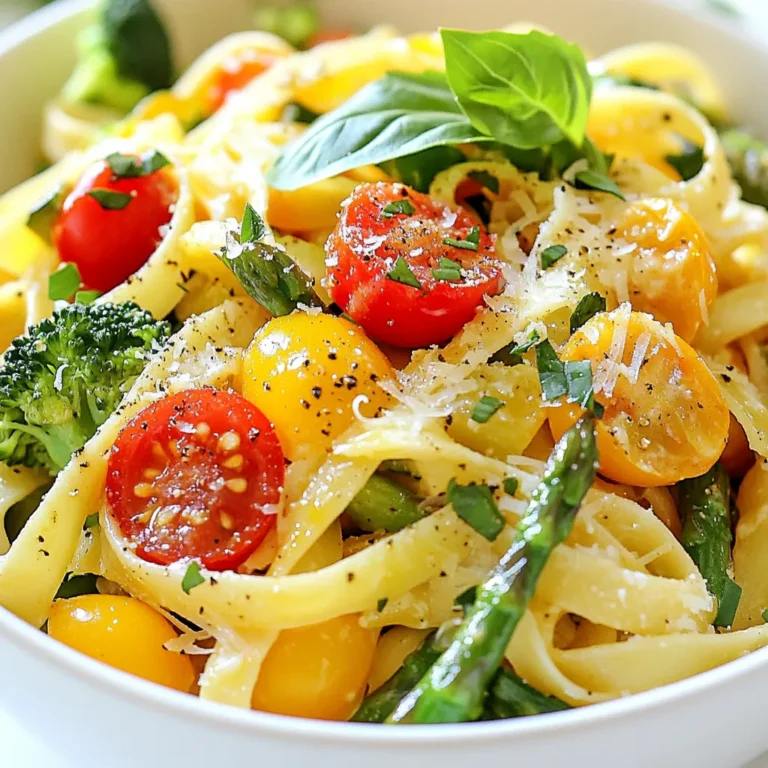
Pasta Primavera Flavorful Dish for Fresh Spring Meals

- 1 pound chicken breast - 2 bell peppers (red and yellow) - 1 medium red onion - 3 tablespoons olive oil - 2 tablespoons lime juice - 1 tablespoon chipotle powder - 1 teaspoon cumin - 1 teaspoon garlic powder - 1 teaspoon onion powder - 1 teaspoon smoked paprika - Salt and pepper to taste - Small tortillas - Fresh cilantro and lime wedges For this recipe, I focus on fresh, vibrant ingredients. Start with 1 pound of chicken breast. Slice it into strips for easy cooking. Next, grab 2 bell peppers—one red and one yellow. Slice them to add color and sweetness. A medium red onion adds flavor and crunch. Now, let’s talk about the marinade. Combine 3 tablespoons of olive oil with 2 tablespoons of fresh lime juice. This mix brings brightness to the dish. Add 1 tablespoon of chipotle powder for a smoky kick. For the spices, use: - 1 teaspoon cumin - 1 teaspoon garlic powder - 1 teaspoon onion powder - 1 teaspoon smoked paprika - Salt and pepper to taste This blend enhances every bite. You can adjust the seasonings to your taste, but this mix gives a great balance. When serving, small tortillas work best. They hold all the flavors without falling apart. Don't forget fresh cilantro and lime wedges. They add a fresh touch and extra zing. 1. Preheat your oven to 425°F (220°C). This step gets your oven ready for cooking. 2. Prepare the chicken and vegetables. Slice 1 pound of chicken breast into strips. Then, slice the red and yellow bell peppers and the red onion. Keep the slices even for uniform cooking. 1. Mix the ingredients together. In a large bowl, combine 3 tablespoons of olive oil, 2 tablespoons of lime juice, 1 tablespoon of chipotle powder, 1 teaspoon each of cumin, garlic powder, onion powder, and smoked paprika. Don’t forget to add salt and pepper to taste. Stir well to blend all the flavors. 1. Spread on a baking sheet. Take the chicken and vegetables, pour the marinade over them, and toss until everything is coated. Spread the mixture out in a single layer on a large baking sheet. 2. Cooking time and tips for checking doneness. Bake in the preheated oven for 20-25 minutes. Stir the mixture halfway through to ensure even cooking. Check the chicken for doneness; it should reach an internal temperature of 165°F (74°C). The vegetables should be tender and slightly caramelized. - Ensuring even cooking: Spread the chicken and veggies in a single layer on the baking sheet. Make sure they are not crowded. This helps them cook evenly and get a nice char. - Tips for marinating chicken: For best flavor, let the chicken sit in the marinade for at least 30 minutes. If you have time, marinate overnight in the fridge. This allows the spices to soak in deeply. - Best tortillas to use: Small flour tortillas work best for these fajitas. They are soft and hold the filling well. You can also use corn tortillas if you prefer a gluten-free option. - Pairing with sides or dips: Serve with guacamole, salsa, or sour cream. A side of Mexican rice or black beans complements the meal nicely. Fresh corn salad also adds a bright touch. - Adding more spices: If you want a bolder flavor, try adding chili powder or cayenne pepper. Fresh herbs like cilantro or parsley add freshness, too. - Adjusting heat level: For more heat, increase the chipotle powder or add jalapeños to the mix. If you prefer less heat, cut back on the chipotle. You can also add a touch of honey to balance the spice. {{image_2}} You can swap the chicken for other proteins. Shrimp or beef works great. Just adjust the cooking time based on what you choose. For shrimp, cook for 10-15 minutes. For beef, 20-25 minutes is good. You can also change the veggies. Zucchini or mushrooms add nice flavors. They will roast well with the other ingredients. Mix and match to find your favorite combo! Fajitas are fun to serve in different ways. You can make a fajita bowl. Use cooked rice or quinoa as a base. Top it with the chicken and veggies. Add your favorite toppings like cheese or sour cream. If you want a taco twist, use larger tortillas. Fill them with the chicken and veggies. Add lime wedges and cilantro for freshness. Both styles are tasty and easy to enjoy! You can get creative with your seasonings. Try adding fresh herbs like cilantro or parsley. They will brighten up the dish. You can also play with different spice blends. For a smoky taste, use smoked paprika. If you want more heat, add cayenne pepper. Experiment to find the flavor you love most! To keep your fajitas fresh, follow these steps. First, let the fajitas cool to room temperature. Place them in an airtight container for best results. Use a glass or plastic container that seals well. This will help maintain the taste and texture. You can store them in the fridge for up to three days. When you're ready to eat your leftovers, there are quick ways to reheat them. The microwave works well for a fast method. Place fajitas on a microwave-safe plate and cover with a damp paper towel. Heat in short bursts of 30 seconds until they are warm. For a crispier option, use the oven. Preheat it to 350°F (175°C). Spread the fajitas on a baking sheet. Heat them for about 10 minutes, stirring halfway through. To keep the fajitas moist, add a splash of water or broth before reheating. This prevents them from drying out. If you want to save fajitas for later, freezing is easy. First, let them cool completely. Next, wrap individual portions in plastic wrap. Then, place them in a freezer-safe bag or container. Remove as much air as possible to avoid freezer burn. They can last up to three months in the freezer. When you're ready to eat them, thaw in the fridge overnight. For a quicker option, you can use the microwave's defrost setting. After thawing, reheat using the methods mentioned above. This way, you can enjoy your delicious fajitas anytime! It takes about 35 minutes to cook sheet-pan fajitas. You spend 10 minutes prepping the ingredients. The baking time is 20-25 minutes. Make sure to check the chicken for doneness. It should reach an internal temperature of 165°F (75°C). Stir halfway through to ensure even cooking. Yes, you can make chicken fajitas ahead of time. You can marinate the chicken and vegetables a few hours before cooking. Just keep them in the fridge until you’re ready. You can also cook the fajitas and store them in the fridge. They stay good for up to three days. Just reheat them before serving. You can serve chicken fajitas with many sides. Here are some tasty options: - Mexican rice - Refried beans - Corn on the cob - Guacamole - Salsa - A fresh salad These sides complement the flavors of the fajitas well. You can also serve extra lime wedges and cilantro for a fresh touch. This blog covered how to make tasty sheet-pan chicken fajitas. You learned about the right ingredients, marinade, and cooking steps. I shared tips for even cooking and serving ideas, like using fresh tortillas. You can switch up ingredients for fun variations. Store and reheat leftovers the right way to keep them fresh. Now, you have the tools to enjoy delicious fajitas anytime. Get cooking and savor every bite!

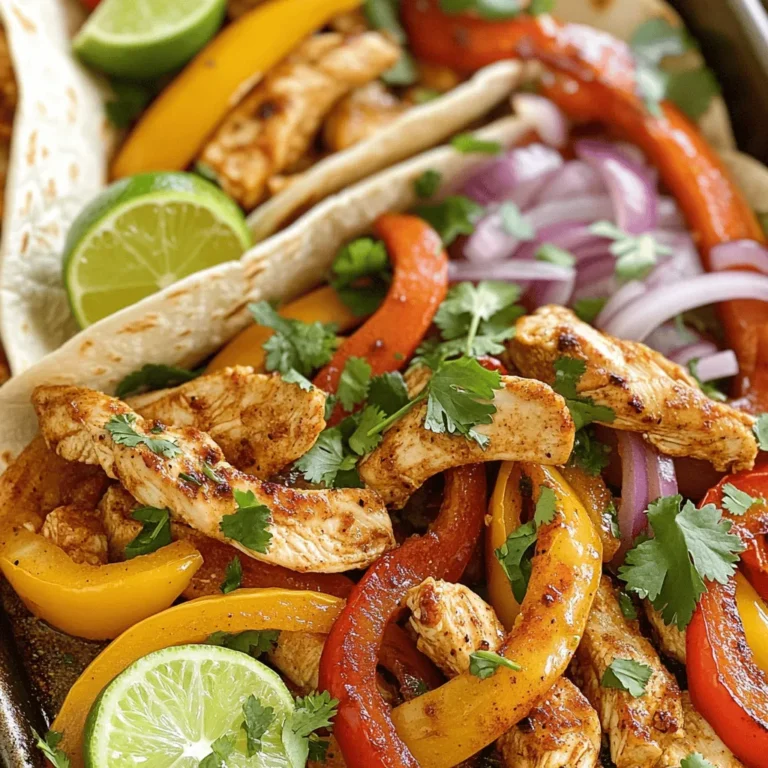
Sheet-Pan Chipotle Lime Chicken Fajitas Recipe

- Butternut squash - Onion - Garlic - Vegetable broth - Coconut milk For my butternut squash soup, I start with one medium butternut squash. I peel and cube it into small pieces. This helps it cook evenly and blend well. Next, I chop one medium onion. The onion adds sweetness and depth to the soup. Two cloves of minced garlic bring a lovely aroma and flavor. I use four cups of vegetable broth as the soup base. This broth gives the soup its rich flavor. Finally, I add half a cup of coconut milk. The coconut milk makes the soup creamy and adds a hint of sweetness. - Ground cumin - Ground nutmeg - Salt and pepper For spices, I use one teaspoon of ground cumin. Cumin adds warmth to the soup. I also use half a teaspoon of ground nutmeg for a subtle nutty flavor. To finish, I season with salt and pepper to taste. Adjusting the seasoning is key to a well-balanced soup. - Olive oil - Crusty bread - Fresh sage leaves For my crispy sage croutons, I need two tablespoons of olive oil. Olive oil helps the bread crisp up nicely. I use one cup of crusty bread, cut into small cubes. The bread adds a nice crunch. I also use ten fresh sage leaves, finely chopped. Sage gives the croutons a fragrant, earthy taste that pairs perfectly with the soup. To start, heat 1 tablespoon of olive oil in a large pot over medium heat. Add your cubed butternut squash, chopped onion, and minced garlic. Sauté these veggies for about 5 to 7 minutes. You want the onion to turn translucent and soft. This step builds a great base of flavor for your soup. Next, stir in the ground cumin and nutmeg. Cook this mix for another minute. This blooms the spices and adds depth. The aroma will be inviting! Now, it’s time to add the vegetable broth. Pour it in and bring it to a boil. Once boiling, reduce the heat to low. Cover the pot and let it simmer for 20 to 25 minutes. This helps the squash become tender. After simmering, use an immersion blender to puree the soup until it’s smooth. If you don’t have one, you can transfer the soup to a regular blender in batches. Stir in the coconut milk and heat it through. Season with salt and pepper to your liking for that perfect taste. For the croutons, heat the remaining tablespoon of olive oil in a separate pan over medium heat. Add your cubed bread and sauté it until golden brown and crispy. This should take just a few minutes. Now, mix in the finely chopped sage leaves. Cook for 1 to 2 more minutes until the sage becomes fragrant. These crispy sage croutons will add a lovely crunch to your soup! You can add different milk for creaminess. Try almond or oat milk. They work well. If you want a richer taste, use more coconut milk. Always taste your soup. You may need more salt or pepper. Adjust the flavor to your liking. Change the herbs for a new flavor. Thyme or rosemary can be good choices. You can also use garlic bread for croutons. It adds a nice twist. Just cut it into cubes and toast until crisp. Serve the soup in deep bowls for warmth. Drizzle some coconut milk on top for a swirl. Add a sprinkle of crispy sage for crunch. You can also use a few whole sage leaves as a garnish. This makes your dish look fancy. {{image_2}} If you want to make this soup dairy-free, use almond milk or oat milk instead of coconut milk. These options add creaminess without the dairy. Almond milk has a light, nutty flavor. Oat milk offers a smooth texture that blends well. Both work great in this recipe. To boost the protein in your soup, try adding cooked lentils or chickpeas. They blend well and add texture. You can also stir in shredded rotisserie chicken for a hearty meal. Tofu is another great choice; it soaks up the flavors nicely. You can mix in seasonal veggies to enhance the soup. Carrots add sweetness and color. Sweet potatoes offer a nice creaminess. Kale or spinach can add greens and nutrients. Each vegetable brings its own flavor and makes the soup more vibrant. To keep your butternut squash soup fresh, use airtight containers. Glass or plastic containers work well. Make sure to cool the soup first. This way, it stays tasty and safe. Label the containers with the date. Your soup will last about three to five days in the fridge. When reheating, the stove is best. Pour the soup into a pot and warm it over low heat. Stir often to avoid burning. You can also use the microwave. Heat in short bursts, stirring in between. This keeps the soup smooth and hot. To freeze the soup, let it cool completely. Then, pour it into freezer-safe bags or containers. Leave some space at the top for expansion. It can stay good for up to three months. When ready to eat, transfer it to the fridge overnight. Then, reheat it on the stove or microwave. Enjoy your cozy meal! Butternut squash soup can last about 4 to 5 days in the fridge. Make sure to store it in an airtight container. This keeps it fresh and safe to eat. Yes, you can make this soup ahead of time. It tastes even better the next day as the flavors meld. Just reheat it on the stove when you are ready to serve. You can use almond milk or oat milk if you want a nutty flavor. For a creamier texture, try using heavy cream or half-and-half. Each option gives a unique twist to the soup. Yes, butternut squash soup is healthy. It is low in calories and high in vitamins. This soup has fiber and antioxidants, making it a nutritious choice. You can prepare the croutons ahead of time. Just store them in an airtight container after they cool. They should stay crispy for about 2 days. This blog post covers how to make a delicious butternut squash soup. It details the main ingredients, spices, and croutons, providing step-by-step instructions. You can customize the soup with tips on creaminess, crouton variations, and presentation ideas. For added convenience, it shares storage info and answers common questions. Enjoy creating your soup masterpiece! Feel free to experiment with flavors and share your results. Your kitchen journey awaits!

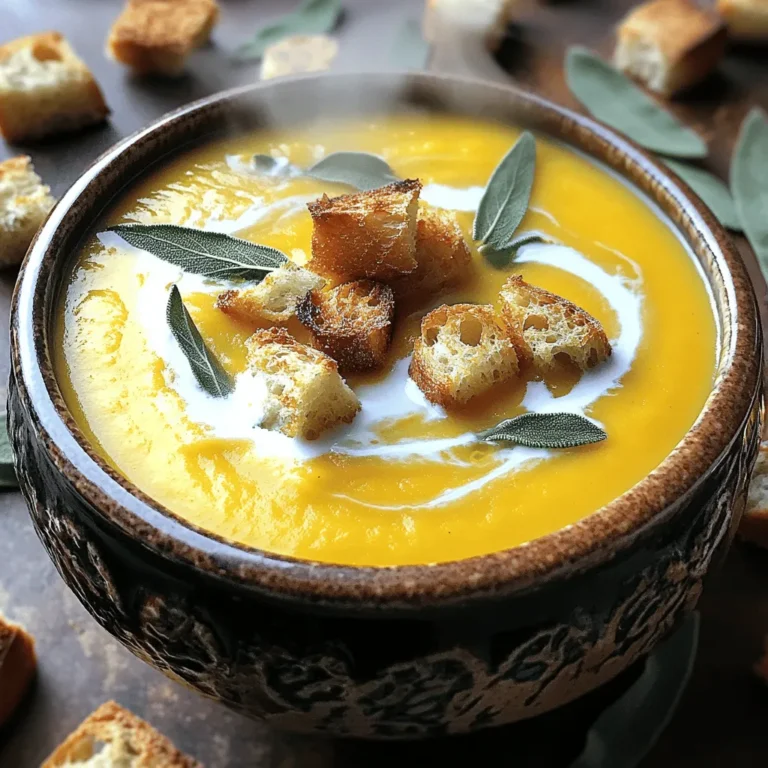
Butternut Squash Soup with Crispy Sage Croutons Delight

- 2 cups all-purpose flour - 1/3 cup granulated sugar - 1 tablespoon baking powder - 1/2 teaspoon salt - 1/2 cup unsalted butter, cold and cubed - 1 cup fresh cranberries, roughly chopped - Zest of 1 orange - 1/2 cup heavy cream - 1 large egg - 1 teaspoon vanilla extract - 1 cup powdered sugar - 2 tablespoons fresh orange juice - Zest of 1/2 orange (for garnish) Gathering the right ingredients is key to making these scones truly shine. The all-purpose flour gives the scones structure. Granulated sugar adds sweetness, while baking powder helps them rise. Salt balances the flavors. The cold butter is essential. It creates flakiness in the scones. Fresh cranberries bring a tart burst, and orange zest adds bright flavor. Heavy cream gives richness, while the egg binds everything together. Vanilla extract rounds out the taste nicely. For the glaze, use powdered sugar and fresh orange juice. This combination creates a sweet and tangy finish. The extra orange zest on top adds a nice touch. These ingredients pair well together, making each bite delightful. - Preheat your oven to 400°F (200°C) and line a baking sheet with parchment paper. - In a large bowl, mix together 2 cups of flour, 1/3 cup of sugar, 1 tablespoon of baking powder, and 1/2 teaspoon of salt. - Add 1/2 cup of cold, cubed butter to the dry mix. Use a pastry cutter or your fingers to blend it until it looks like coarse crumbs. - Stir in 1 cup of chopped cranberries and the zest of 1 orange into the dry mix. - In a separate small bowl, whisk together 1/2 cup of heavy cream, 1 large egg, and 1 teaspoon of vanilla extract. - Pour the wet mixture into the dry mix. Stir until just combined; lumps are okay. - Turn the dough onto a floured surface. Pat it into a circle about 1 inch thick. Cut into 8 wedges or use a round cutter for circles. Place them on the baking sheet. - Bake for 15-20 minutes until the tops are lightly golden. Watch them closely! - While the scones bake, mix 1 cup of powdered sugar with 2 tablespoons of fresh orange juice in a small bowl until smooth. - After baking, let the scones cool for about 10 minutes. Drizzle the glaze over them. - For a pretty touch, garnish with the zest of 1/2 orange. Enjoy your tasty treats! - Importance of cold butter: Cold butter is key. It helps scones rise and stay flaky. Use a pastry cutter or your fingers to mix it in. Aim for coarse crumbs. This step creates those tender layers we love. - Avoiding over-mixing: Mix just until combined. If you over-mix, your scones will turn tough. Remember, lumps are okay. A gentle hand makes a big difference. - Keeping scones fresh for longer: To store scones, place them in an airtight container. Keep them at room temperature for up to two days. For longer storage, freeze them. Just wrap each scone in plastic wrap. - Reheating instructions: To reheat, use the oven. Preheat it to 350°F (175°C). Place scones on a baking sheet for about 5-10 minutes. This restores their warmth and texture. - Stylish serving suggestions: Arrange the scones on a wooden platter for a rustic look. Drizzle glaze over each one. It adds a lovely shine and makes them look tempting. - Using garnishes effectively: Sprinkle extra orange zest on top for added flavor. Whole cranberries also make a fun garnish. These touch-ups make your scones pop and impress guests. {{image_2}} You can switch up the fruit in these scones. If fresh cranberries are out of season, try using dried cranberries. They add a sweet and chewy bite. Just chop them into smaller pieces for even mixing. You can also incorporate blueberries or raspberries. These fruits provide a nice flavor twist. Blueberries add a burst of sweetness, while raspberries bring a tart kick. Mix and match these fruits to find your favorite combo. For added warmth, consider adding spices like cinnamon or nutmeg. A dash of cinnamon pairs well with the orange flavor. Nutmeg adds a cozy touch, perfect for chilly mornings. You can also swap vanilla for almond extract. This change brings a nutty taste that enhances the scones. Just a teaspoon is enough to make a difference. If you need gluten-free options, you can use gluten-free flour blends. They work just as well in this recipe. Make sure the blend includes a binding agent for the best texture. For dairy-free needs, you can replace the heavy cream with coconut cream or a nut milk. Use a dairy-free butter alternative in the dough. This way, everyone can enjoy these tasty scones without worry. To keep your scones fresh, store them correctly. You can leave them at room temperature for a short time. Make sure they stay in an airtight container. This helps keep the moisture in and prevents them from drying out. If you plan to eat them later, refrigerate them. Just remember that refrigeration can change the texture a bit. You can freeze scones both before and after baking. To freeze unbaked scones, shape them and place them on a baking sheet. Put the sheet in the freezer until the scones are firm. Then, transfer them to a freezer bag. This way, they stay fresh for about three months. To freeze baked scones, let them cool completely first. Then, wrap each one in plastic wrap and place them in a freezer bag. When you want to enjoy them, take out a scone and let it thaw. You can reheat it in the oven at 350°F for about 10 minutes. This brings back their warmth and flavor. Can I use dried cranberries instead of fresh? Yes, you can use dried cranberries. They will add sweetness and chewiness. If using dried cranberries, soak them in warm water for 10 minutes. This helps soften them and keeps your scones moist. What if I don’t have heavy cream on hand? If you don't have heavy cream, you can use milk. Whole milk or buttermilk works well. Mix in a bit of melted butter to mimic the fat content of heavy cream. This will help keep your scones tender. Why are my scones dense? Dense scones may come from over-mixing the dough. When you combine wet and dry ingredients, mix just until you see no dry flour. Also, make sure your baking powder is fresh. Old baking powder can fail to rise. How can I make my scones sweeter? To add sweetness, increase the sugar in the dough. You can also add a touch of honey or maple syrup. Drizzling more glaze on top after baking will also boost sweetness and flavor. Can I make the glaze in advance? Yes, the glaze can be made ahead. Store it in the fridge for up to three days. Just whisk it again before using to restore its smooth texture. What can I use as a substitute for orange juice in the glaze? If you lack orange juice, lemon juice works. It adds a nice tangy flavor. You can also use apple juice or even water if you need to. Just remember to adjust the sweetness if needed. Making scones is a fun and rewarding process. You learned the key ingredients, step-by-step instructions, and tips for perfect scones. Don’t forget the delicious glaze that adds a sweet touch. Experiment with flavors and different fruits to find your favorite twist. Store your scones properly so they stay fresh. By following these tips, your scones will impress anyone who tries them. Enjoy your baking journey and share these tasty treats with friends!

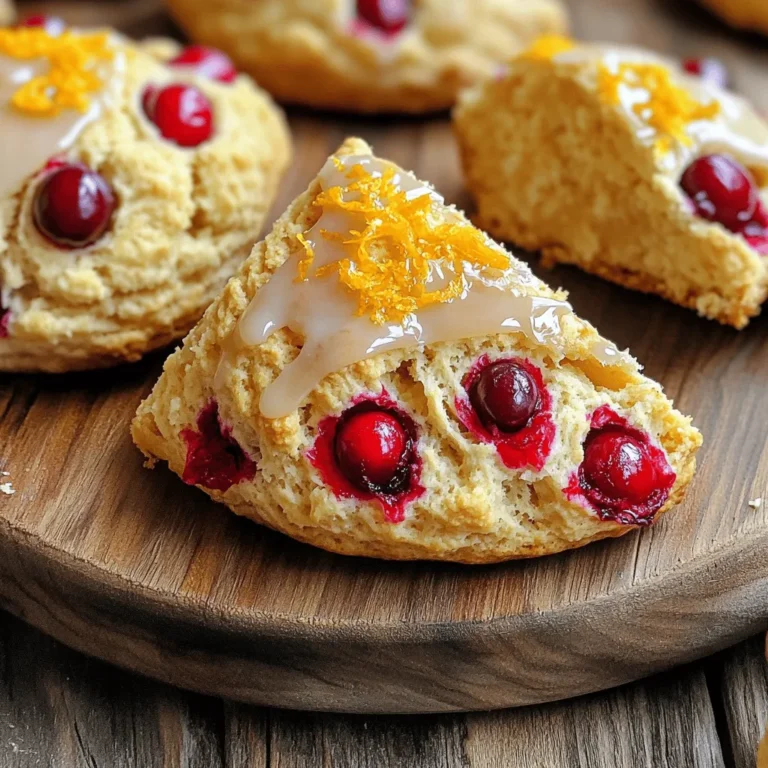
Cranberry Orange Breakfast Scones with Glaze Delight

- 1 medium head of cauliflower - 1 cup all-purpose flour - 1 cup water - 1 teaspoon garlic powder - 1 teaspoon onion powder - 1 teaspoon smoked paprika - Salt and black pepper - 1/2 cup honey - 1/2 cup sriracha sauce - 2 tablespoons sesame oil - 1 tablespoon rice vinegar - 1 tablespoon chopped fresh cilantro (for garnish) You start with a fresh head of cauliflower. Cut it into bite-sized florets. This makes the wings easy to eat. Next, the batter is key. Mix one cup of flour with one cup of water. Add the garlic powder, onion powder, smoked paprika, salt, and pepper. Whisk it all together until smooth. For the honey sriracha sauce, combine half a cup of honey and half a cup of sriracha sauce in a small pot. Add two tablespoons of sesame oil and one tablespoon of rice vinegar. Heat it gently on the stove, stirring until mixed well. This sauce gives a sweet and spicy kick to the wings. Finally, you’ll garnish with fresh cilantro. It adds color and a fresh taste. This simple list of ingredients makes a dish that is packed with flavor and fun to make! Set your air fryer to 375°F (190°C). Preheating helps cook the wings evenly. In a large bowl, whisk together: - 1 cup all-purpose flour - 1 cup water - 1 teaspoon garlic powder - 1 teaspoon onion powder - 1 teaspoon smoked paprika - Salt and black pepper to taste Mix until the batter is smooth. A good batter sticks well to the cauliflower. Take each cauliflower floret and dip it into the batter. Make sure to coat it well. Shake off any extra batter. This step is key to a crispy texture. Place the coated florets in a single layer in the air fryer basket. Cook them in batches for 12-15 minutes. Don’t forget to shake the basket halfway. This helps them cook evenly and get crispy. While the wings cook, prepare your sauce. In a small saucepan, combine: - 1/2 cup honey - 1/2 cup sriracha sauce - 2 tablespoons sesame oil - 1 tablespoon rice vinegar Heat over medium heat. Stir until everything is well mixed and heated through. Once the cauliflower wings are done, transfer them to a bowl. Drizzle the honey sriracha sauce over the wings. Toss gently to coat them well. Garnish with chopped fresh cilantro for a touch of color and flavor. Enjoy your delicious and spicy cauliflower wings! To get that perfect crunch, do not overcrowd the air fryer. When you add too many cauliflower wings at once, they steam instead of crisp. It’s best to cook in batches. This keeps the hot air flowing around each piece, making them golden and crunchy. You can change the heat to suit your taste. If you prefer a milder flavor, reduce the amount of sriracha. Start with a smaller amount and add more if needed. This way, you control the heat and ensure everyone enjoys them. These wings shine when paired with a tasty dip. You can serve them with ranch or blue cheese dressing. Fresh veggies on the side also make a great complement. For a full meal, consider serving them with rice or a green salad. This adds balance and makes your dish even more delicious. {{image_2}} You can easily make these wings vegan. Just swap out the honey for agave syrup. Agave syrup has a similar sweetness level and works well with the heat of sriracha. This change keeps the same great taste while making it plant-based. For a gluten-free version, you can use almond flour or a gluten-free flour blend. Almond flour gives a nice nutty flavor and a great texture. This way, everyone can enjoy these crispy wings without worry. Feel free to be creative with your flavors. You can try adding spices like cayenne or smoked paprika for more heat. You could also mix in sauces like soy sauce or lime juice for a different twist. Experiment and find your favorite combo! Store any leftover honey sriracha cauliflower wings in an airtight container. This keeps them fresh. You can place them in the fridge for up to three days. Make sure they cool down before sealing the container. This helps prevent moisture buildup. For the best taste, reheat the wings in an air fryer or oven. Preheat the air fryer to 350°F (175°C). Heat for about 5-7 minutes. This keeps them crispy and warm. If using an oven, preheat to 350°F (175°C) and bake for 10-15 minutes. Check to ensure they do not dry out. You can freeze the wings before or after cooking. If freezing before cooking, coat the florets in batter. Then, place them on a baking sheet and freeze until solid. Once frozen, transfer them to a freezer bag. If freezing after cooking, let them cool first. Then, store them in an airtight container. Enjoy them later for a quick meal! Yes, you can use frozen cauliflower. Just keep a few tips in mind: - Thaw first: Thaw the florets completely. This helps the batter stick better. - Pat dry: Use a paper towel to remove excess moisture. This helps achieve crispiness. - Adjust cooking time: Frozen florets may need a bit longer in the air fryer. If you need an alternative to sriracha, try these options: - Hot sauce: Use your favorite hot sauce instead. - Chili paste: This adds a similar heat and flavor. - Buffalo sauce: For a different spin, buffalo sauce works well. To kick up the heat, consider these tips: - Add more sriracha: Increase the amount of sriracha in the sauce. - Include red pepper flakes: Sprinkle some in the batter or sauce. - Mix in hot chili oil: A small amount can add a nice kick. Yes, these wings are great for meal prep! Here are some insights: - Store in an airtight container: This keeps them fresh for several days. - Reheat in the air fryer: This helps maintain their crispiness. - Pair with sides: Add healthy veggies or grains to complete your meals. You learned how to make tasty air fryer cauliflower wings. We covered the main ingredients, seasonings, and the flavorful honey sriracha sauce. The step-by-step guide showed you how to air fry these wings perfectly. Remember, crispiness counts, so don’t overcrowd your air fryer. Consider the variations for dietary needs, and use the storage tips for leftovers. Enjoy these wings at your next meal or snack. They are easy to make and delicious!

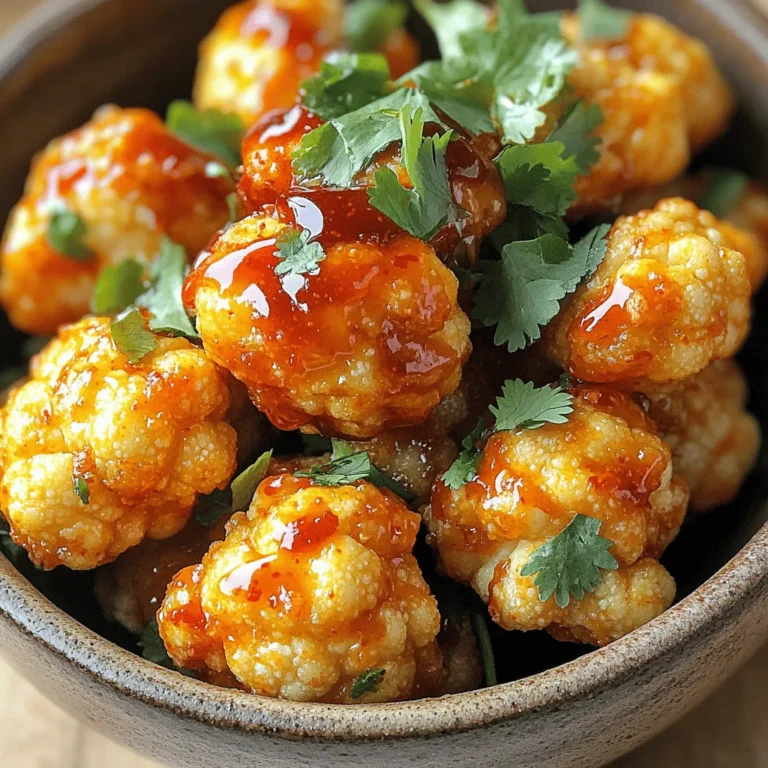
Air Fryer Honey Sriracha Cauliflower Wings Delight

- Carrots - Olive Oil - Pure Maple Syrup - Quinoa - Vegetable Broth or Water To make the Maple Roasted Carrot and Quinoa Salad, you need a few key items. Start with fresh, vibrant carrots. These will give your salad great flavor and color. Use a good-quality olive oil to help the carrots roast nicely. Pure maple syrup adds natural sweetness that pairs beautifully with the carrots. Quinoa is your base. It’s healthy and full of protein. Choose vegetable broth or water to cook the quinoa. Vegetable broth adds more flavor, while water is simple and quick. - Dried Cranberries - Chopped Pecans - Feta Cheese (or Vegan Alternative) - Fresh Parsley - Apple Cider Vinegar For extra flavor and texture, try these optional ingredients. Dried cranberries add a sweet and chewy bite. Chopped pecans bring a nice crunch and nutty taste. Feta cheese (or a vegan alternative) gives a creamy touch and salty flavor. Fresh parsley brightens the dish with color and freshness. A splash of apple cider vinegar adds a tangy kick that ties everything together. - Salt and Pepper Seasoning is key to making your salad standout. Salt and pepper enhance all the flavors. They make the sweet and savory notes of the salad shine. Use them to taste, adjusting as you go. This way, you can make the dish just right for your palate. First, we need to preheat the oven to 400°F (200°C). This heat will help the carrots roast perfectly. Next, peel your four large carrots. Cut them into sticks, about the size of your finger. In a bowl, mix the carrot sticks with one tablespoon of olive oil, two tablespoons of pure maple syrup, and a pinch of salt and pepper. Toss the carrots well, so they are evenly coated. Spread them on a baking sheet lined with parchment paper in a single layer. While the carrots roast, let's cook the quinoa. Start by rinsing one cup of quinoa under cold water. This step removes the bitter coating called saponin. In a medium saucepan, add the rinsed quinoa and two cups of vegetable broth or water. Bring this mixture to a boil over medium heat. Once it boils, reduce the heat to low, cover the pot, and let it simmer for about 15 minutes. The quinoa will absorb the liquid and become fluffy. After 15 minutes, remove it from the heat and let it sit for five minutes. Fluff it with a fork for the best texture. Now, it’s time to bring everything together. In a large bowl, combine the cooked quinoa and the roasted carrots. Add in half a cup of dried cranberries, a quarter cup of chopped pecans, and a quarter cup of feta cheese, or a vegan alternative if you prefer. For some freshness, toss in two tablespoons of chopped fresh parsley. Drizzle two tablespoons of apple cider vinegar for some tang. Gently mix everything until it is well combined. Taste the salad and adjust the seasoning if needed. You can add more salt, pepper, or maple syrup for extra sweetness. To roast your carrots just right, aim for 25-30 minutes in a hot oven. This time gives them a nice caramel color. Make sure to turn them halfway through. This helps them cook evenly. The right amount of olive oil and maple syrup helps caramelization. A light coating works best. This keeps them sweet and tender. To keep quinoa fluffy, rinse it under cold water. This removes the bitter coating. When cooking, use two cups of vegetable broth or water for one cup of quinoa. Bring it to a boil, then lower the heat. A tight lid is key for even cooking. After 15 minutes, check if all the water is absorbed. If it looks fluffy and soft, it’s done. You can boost flavor with spices like cumin or smoked paprika. Try adding a pinch of cayenne for heat. For texture, use different nuts like walnuts or almonds. Cheese lovers can swap feta for goat cheese or skip it entirely for a vegan option. Dried fruits like apricots or raisins can add sweetness too. {{image_2}} You can easily swap carrots for other root veggies. Try parsnips, sweet potatoes, or beets. Each adds a unique taste and color. Adding greens like spinach or kale brightens the salad. Toss in fresh greens just before serving. This adds crunch and freshness, making it even better. For a gluten-free option, use quinoa, which is naturally gluten-free. Ensure all other ingredients, like broth and seasonings, are also gluten-free. You can easily make this salad vegan. Simply skip the feta cheese or use a vegan cheese alternative. This keeps the dish tasty for everyone. Want a kick? Add spices like cayenne or smoked paprika. These create a warm and spicy flavor that enhances the sweetness of the maple syrup. You can also try different sweeteners. Honey, agave, or coconut sugar can replace maple syrup. Each will change the taste, so feel free to experiment! To store the salad short-term, place it in an airtight container. Keep it in the fridge. This keeps the salad fresh for up to three days. Make sure to stir the salad before serving. This helps mix the flavors again. You can freeze the maple roasted carrot and quinoa salad. However, the texture may change. The carrots might become softer, and the quinoa may lose some bite. To freeze, place the salad in a freezer-safe container. It can last for up to three months. When you're ready to eat it, thaw it in the fridge overnight. To reheat the salad, add a splash of water or broth. This helps keep the salad moist. Heat it in the microwave for about one to two minutes. Stir halfway through to ensure even heating. If you prefer to keep it cold, enjoy it straight from the fridge. Yes, you can make this salad ahead of time. To store it, keep it in an airtight container. The salad will stay fresh for about 3 days in the fridge. Just add the dressing right before serving. This way, the salad stays crisp and tasty. If you want to switch quinoa, try brown rice or farro. Both add a nice texture and flavor. You could also use couscous or bulgur for a quick and easy option. Just remember to adjust cooking times based on the grain you choose. This salad can be gluten-free, depending on your ingredients. Quinoa is naturally gluten-free. Make sure to check the labels on your vegetable broth and any cheese you use. If you choose to add grains, confirm they are gluten-free as well. The maple roasted carrot and quinoa salad lasts about 3 days in the fridge. After that, the veggies may get soft. To keep it fresh, store it in an airtight container. If you notice any changes in smell or color, it’s best to toss it out. This blog post covered a delicious maple roasted carrot and quinoa salad. We discussed the key ingredients, like carrots, quinoa, and optional add-ins. I shared tips for perfect roasting and cooking quinoa. You can swap ingredients based on seasons and diets. Remember, this salad is easy to store and reheat, making it great for meal prep. Enjoy trying this recipe and making it your own. Happy cooking!

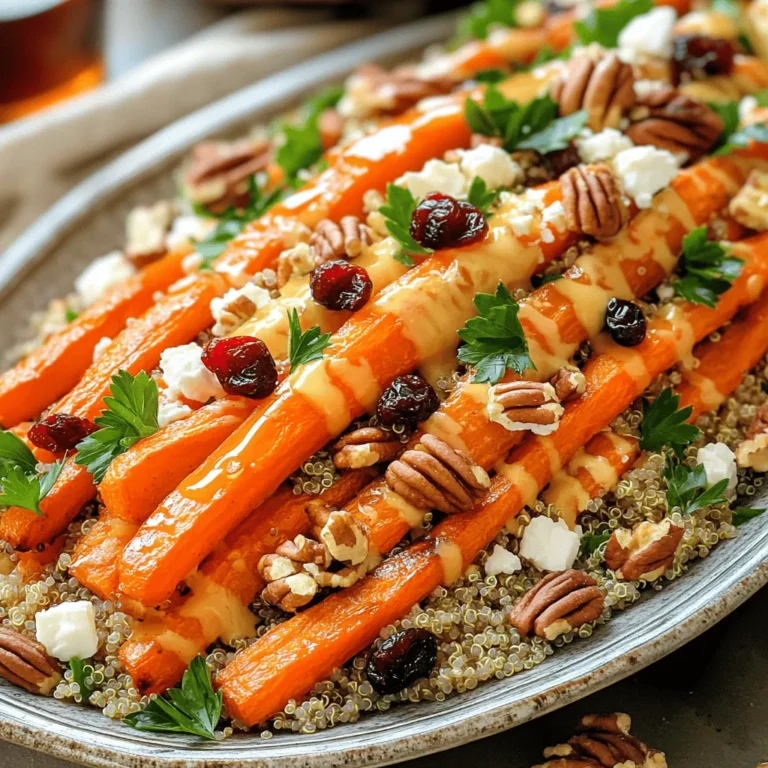
Maple Roasted Carrot and Quinoa Salad Delight

For this Slow Cooker Pumpkin Lentil Curry, you need a few key items. First, we have lentils. I like to use 1 cup of dried green or brown lentils. They add protein and texture. Next, 2 cups of pumpkin puree give the dish a creamy base. You can use canned or homemade pumpkin. Then, 1 can of coconut milk adds richness and a hint of sweetness. You also need a medium onion, diced. It adds flavor and aroma. Three cloves of garlic, minced, bring in a nice punch. Grated ginger, about 1 tablespoon, gives warmth. Spices are vital. You will need 1 tablespoon of curry powder, 1 teaspoon of ground cumin, 1 teaspoon of turmeric powder, and 1 teaspoon of chili powder. Finally, 2 cups of vegetable broth and 1 cup of diced tomatoes help create a saucy curry. Don't forget salt and black pepper to taste. Fresh cilantro is great for garnish, and a squeeze of lime juice brightens the dish. I often use green or brown lentils in this recipe. They hold their shape well. However, you can also try red lentils. They cook faster and become softer. If you choose red lentils, reduce the cooking time slightly. Black lentils can work as well, adding a unique flavor. Each type of lentil will change the texture of your curry, so feel free to experiment. If you don't have coconut milk, you can use other options. Almond milk or soy milk can be good substitutes, though they lack the creaminess. For a richer flavor, try using heavy cream or cashew cream. Both will make the dish very creamy. Just remember to adjust the other liquids in the recipe to keep the right consistency. Start by rinsing 1 cup of dried lentils. This step helps remove dirt and dust. Next, gather your pumpkin puree. You can use 2 cups from a can or make it fresh. If using fresh pumpkin, peel, seed, and cut it into small pieces before cooking. In your slow cooker, add the rinsed lentils and pumpkin puree. Pour in 1 can of coconut milk and stir to combine. Next, add 1 diced medium onion, 3 minced garlic cloves, and 1 tablespoon of grated ginger. Now, sprinkle in the spices. Use 1 tablespoon of curry powder, 1 teaspoon of ground cumin, 1 teaspoon of turmeric, and 1 teaspoon of chili powder. Mix everything well. Pour in 2 cups of vegetable broth and add 1 cup of diced tomatoes. Stir until all the ingredients blend together. After cooking for 6-8 hours on low or 4-5 hours on high, your lentils should be tender. Before serving, taste the curry. Add salt and freshly ground black pepper to your liking. For a bright finish, squeeze in lime juice. Ladle the curry into bowls and top with fresh cilantro. To make your slow cooker pumpkin lentil curry even better, try these ideas: - Add fresh herbs: Toss in chopped cilantro or parsley right before serving. - Citrus zest: Add a little lime or lemon zest for a bright twist. - Extra spices: If you like heat, add more chili powder or even cayenne pepper. - Sweetness: A spoonful of brown sugar can balance the spices nicely. - Umami: A splash of soy sauce or tamari deepens the flavor. These tips will help you create a dish full of rich taste. Using a slow cooker is easy, but safety is key. Follow these tips: - Don’t overfill: Fill your slow cooker only halfway. This helps food cook evenly. - Keep it clean: Wash and dry the cooker before each use. This avoids cross-contamination. - Use the right setting: Cook on low for 6-8 hours or high for 4-5 hours. - Check the lid: Always use the lid while cooking to keep heat in. - Let it cool: Allow the cooker to cool before cleaning to avoid burns. These steps keep your cooking safe and fun. Pair your curry with these tasty sides for a full meal: - Basmati rice: The fluffy texture soaks up the curry well. - Naan bread: Perfect for scooping up the delicious curry. - Quinoa: A nutty option that adds protein and fiber. - Simple salad: A fresh salad with cucumbers and tomatoes adds crunch. - Yogurt: A dollop of plain yogurt cools the spice and adds creaminess. These sides will complement your pumpkin lentil curry perfectly. {{image_2}} You can boost the curry's protein by adding cooked chicken, shrimp, or tofu. If you want to keep it simple, try using canned chickpeas or cooked black beans. These options mix well with lentils and pumpkin. If you add meat, put it in during the last hour of cooking. For tofu, add it in the last 30 minutes. This way, it absorbs the great flavors. This recipe is already vegetarian and vegan-friendly. To keep it that way, use vegetable broth and coconut milk, which are both plant-based. If you want more texture, add vegetables like spinach, mushrooms, or bell peppers. These add vitamins and crunch. You can also sprinkle in some nuts or seeds for a nice bite. If you like heat, add more chili powder or fresh chilies to the mix. You can also try a pinch of cayenne pepper for an extra kick. For those who prefer mild flavors, cut back on the chili powder. Use sweet spices instead, like cinnamon or cardamom, to keep the dish warm and cozy without the heat. Adjust the spices to fit your taste! After cooking, let the curry cool. Place it in an airtight container. It stays fresh in the fridge for about 4-5 days. Make sure to label it with the date. This helps you know when to eat it. You can freeze the curry for later use. Pour it into freezer-safe bags or containers. Leave some space at the top for expansion. The curry can last up to 3 months in the freezer. When you’re ready to eat it, just thaw it in the fridge overnight. To reheat, you can use the microwave or stove. If using a microwave, heat in short bursts. Stir it well to avoid hot spots. On the stove, warm it over low heat. Add a splash of water or broth if it seems thick. Make sure it’s hot all the way through before serving. Enjoy your delicious pumpkin lentil curry! Yes, you can use fresh pumpkin. Start by peeling and dicing the pumpkin. Cook it until soft, then mash it or blend it for a smooth texture. This adds a fresh taste to your curry. Fresh pumpkin may need a bit more cooking time. Lentils typically take about 6 to 8 hours on low heat. If you set the slow cooker on high, it takes about 4 to 5 hours. Make sure the lentils are tender before serving. Cooking times can vary slightly based on the type of lentils used. You can serve this curry with basmati rice or warm naan bread. Both pair well with the rich flavors of the curry. Adding a dollop of yogurt can also balance the spice. Fresh lime wedges add a nice touch too! In this blog post, we covered key ingredients, steps, and tips for making pumpkin lentil curry. You learned about lentil types, substitutes for coconut milk, and how to prepare your dish safely. We discussed ways to enhance flavor, adjust spice levels, and pair sides. Remember to follow storage tips for the best taste later. Enjoy experimenting with different variations! Cooking can be fun and rewarding, so dive in and make this dish your own.

Slow Cooker Pumpkin Lentil Curry with Coconut Milk Delight

PREV 1 … 24 25 26 … 56 NEXT
go kitchen now

explore

DessertsDinnerAppetizersDrinks

Our Policies

  • Cookie Policy
  • Copyright Policy
  • Disclaimer
  • GDPR Policy
  • Terms Of Use
Back to Top
  • About
  • Contact Us
  • Privacy Policy
© 2025 go kitchen now