FREE DINNER EBOOK! Get your copy!
  • Cookie Policy
  • GDPR Policy
  • Disclaimer
  • Terms Of Use
  • Visit my other site: Fun Cookie Recipes
go kitchen now
  • Home
  • Dinner
  • Desserts
  • Drinks
  • Appetizers
  • Contact
  • About
  • Privacy Policy
  • Home
  • Dinner
  • Desserts
  • Drinks
  • Appetizers
  • Contact
  • About
  • Privacy Policy
  • Cookie Policy
  • GDPR Policy
  • Disclaimer
  • Terms Of Use
Visit my other site: Fun Cookie Recipes

HOME / CATEGORIES /

Latest

To make easy chicken lo mein, gather these tasty ingredients: - 8 oz lo mein noodles - 1 tbsp vegetable oil - 1 lb chicken breast, thinly sliced - 2 cloves garlic, minced - 1-inch piece ginger, grated - 1 bell pepper, thinly sliced (any color) - 1 cup broccoli florets - 1 cup snap peas - 3 green onions, chopped - 3 tbsp soy sauce - 1 tbsp oyster sauce (optional) - 1 tbsp sesame oil - Salt and pepper to taste - Sesame seeds, for garnish If you can't find lo mein noodles, use spaghetti or rice noodles instead. Chicken breast works well, but you can swap it for shrimp or beef. For the veggies, feel free to use carrots, cabbage, or zucchini. If you want a vegan touch, replace chicken with tofu. You can also skip oyster sauce for a vegetarian option. Want to mix it up? Try adding these for extra flavor: - Sliced mushrooms for earthiness - Baby corn for a sweet crunch - Spinach for a boost of nutrients - Chili paste for heat Add these as you stir-fry the veggies for a colorful meal. {{ingredient_image_1}} Start by boiling water in a large pot. Add 8 oz of lo mein noodles. Cook them according to the package instructions. This usually takes about 4-5 minutes. Stir occasionally to keep them from sticking. Once they are tender, drain the noodles in a colander and set them aside. Next, grab a large skillet or wok. Heat 1 tablespoon of vegetable oil over medium-high heat. Once hot, add 1 lb of thinly sliced chicken breast. Season it with salt and pepper. Stir-fry the chicken for about 5-7 minutes. You want it to be cooked all the way through. When the chicken is done, add 2 cloves of minced garlic and 1-inch piece of grated ginger. Stir this mixture for 1-2 minutes until it smells great. Now it's time to add some color and crunch. Toss in 1 thinly sliced bell pepper, 1 cup of broccoli florets, and 1 cup of snap peas. Stir-fry these veggies for 4-5 minutes. They should be tender but still crisp. After that, add your cooked lo mein noodles to the pan. Pour in 3 tablespoons of soy sauce, 1 tablespoon of oyster sauce (if you like), and 1 tablespoon of sesame oil. Toss everything together until well coated and heated through. Finally, stir in 3 chopped green onions for extra flavor. Serve hot, and sprinkle sesame seeds on top for a nice finish. To stir-fry well, keep your pan hot. Heat it before adding oil. Use a good amount of oil to coat the pan. Add your chicken in batches. This helps it cook evenly. Stir the chicken often to avoid burning. Once it turns golden, add the garlic and ginger. They add nice flavor and smell. Cook them for just a short time. You want them fragrant, not burnt. Prep all your ingredients before you start cooking. Slice your chicken into thin strips. This helps it cook fast. Chop your vegetables into small pieces. This way, they cook evenly. Mince your garlic and grate your ginger right before use. Fresh ingredients give the best taste. Measure out sauces in advance for quick addition. Clean and organize your workspace for a smooth cooking flow. To make the dish less spicy, skip the ginger. You can also cut back on garlic if you want. For more flavor, add a splash of sesame oil. It brings out a nutty taste. Try adding more vegetables like carrots or mushrooms. They can enhance the dish without making it spicy. Taste as you go to find your perfect balance. Pro Tips Tip Title 1: For extra flavor, marinate the chicken in soy sauce, ginger, and garlic for at least 30 minutes before cooking. Tip Title 2: To keep the vegetables crisp, make sure not to overcook them. Stir-fry on high heat for a short time. Tip Title 3: Use a mix of colorful bell peppers to enhance the visual appeal and nutritional value of your dish. Tip Title 4: For a spicy kick, add red pepper flakes or Sriracha sauce when tossing the noodles. {{image_2}} You can make a tasty vegetarian lo mein easily. Replace the chicken with tofu or tempeh. Use the same cooking steps. Add more veggies like carrots, mushrooms, or bok choy. Toss in some extra garlic for flavor. This keeps the dish light and healthy. If you need gluten-free options, swap the lo mein noodles. Use rice noodles or gluten-free noodles. Check the labels to be sure. For sauces, choose gluten-free soy sauce. This way, you keep all the great taste without gluten. You can also change the protein in this dish. Shrimp or beef works well too. Cook shrimp for just a few minutes until pink. Slice beef thinly and stir-fry like chicken. This gives you more choices for your meal. Let your chicken lo mein cool down before storing. Use an airtight container to keep it fresh. This will help maintain the flavors and texture. Place the container in your fridge. It can stay good for 3 to 4 days. To reheat, you can use a skillet or microwave. If using a skillet, add a splash of water. This will help steam the noodles. Heat on medium until hot, stirring often. For the microwave, cover the bowl with a lid. Heat for about 1-2 minutes, then stir. Check if it's warm enough before enjoying again. You can freeze chicken lo mein for up to 3 months. First, let it cool completely. Then, place it in a freezer-safe bag or container. Remove as much air as possible to prevent freezer burn. When ready to eat, thaw it overnight in the fridge. Reheat as mentioned above. It’s like a quick meal waiting for you! Lo Mein is a popular Chinese dish. It features soft, chewy noodles and tasty veggies. You often find it in takeout menus. The dish gets its flavor from soy sauce and sesame oil. In this recipe, chicken adds protein and makes it filling. Yes, you can use other noodles! If you can't find lo mein noodles, try spaghetti or egg noodles. Both options work well in this dish. Just remember to cook them according to the package instructions. This keeps the texture nice and chewy. You can easily customize this chicken lo mein. Add your favorite veggies like carrots, mushrooms, or bok choy. If you want a spicier kick, add some red pepper flakes or chili paste. For a vegetarian option, swap chicken for tofu or tempeh. Feel free to mix sauces too. You might try adding hoisin sauce for a sweet touch! This article covered everything you need for making Lo Mein. We discussed ingredients, cooking steps, and tips for perfecting your dish. You learned how to store leftovers and freeze meals for later. Remember, Lo Mein is flexible. You can swap ingredients and customize for your taste. Don’t hesitate to try different options, like vegetarian or gluten-free. Cooking should be fun. Experiment and enjoy creating your own delicious version of Lo Mein!

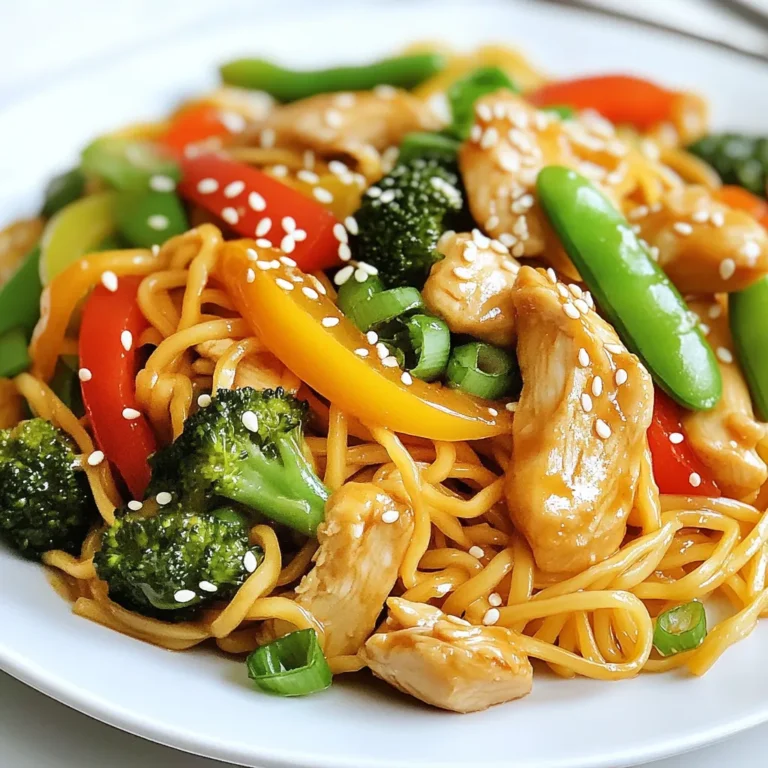
Easy Chicken Lo Mein Quick and Flavorful Meal

To make delicious cinnamon sugar churro bites, gather these key items: - 1 cup all-purpose flour - 1 cup water - 1/4 cup unsalted butter - 1 tablespoon granulated sugar - 1/4 teaspoon salt - 2 large eggs - 1 teaspoon vanilla extract - Oil for frying - 1 cup granulated sugar (for coating) - 2 tablespoons ground cinnamon These ingredients create a soft dough with a sweet, cinnamon outer layer. Want to take your churro bites up a notch? Here are some fun options: - A pinch of nutmeg for warmth - Zest from a lemon or orange for brightness - A splash of almond extract for a nutty twist These flavors can add depth and make your churros stand out. Don't have all the ingredients? No problem! Here are some swaps you can use: - Substitute coconut oil for butter for a dairy-free option. - Use whole wheat flour instead of all-purpose flour for a healthier choice. - If you lack eggs, try 1/4 cup of unsweetened applesauce as a binder. These substitutions can help you make churro bites with what you have on hand. To start, grab a medium saucepan. Add 1 cup of water, 1/4 cup of unsalted butter, 1 tablespoon of granulated sugar, and 1/4 teaspoon of salt. Place it over medium heat and bring it to a boil. Once boiling, take it off the heat. Now, stir in 1 cup of all-purpose flour. Mix until a dough forms. Let it cool for about 5 minutes. This cooling step helps the dough bind well. Next, add 2 large eggs, one at a time. Mix well after each egg. This ensures a smooth dough. Finally, stir in 1 teaspoon of vanilla extract for a lovely flavor. Now, heat oil in a deep skillet or pot. Aim for medium-high heat, about 360°F or 180°C. While the oil is heating, prepare the cinnamon sugar. In a bowl, mix 1 cup of granulated sugar with 2 tablespoons of ground cinnamon. Set this aside for later. Once the oil is hot, transfer the dough to a piping bag fitted with a star-shaped nozzle. This makes shaping easier. Pipe small pieces of dough directly into the hot oil. Use scissors to cut the dough off for bite-sized churros. Fry them in batches for 2-3 minutes, or until they turn golden brown. When they are ready, use a slotted spoon to remove the churro bites. Let them drain on paper towels to get rid of excess oil. While the churro bites are still warm, toss them in the cinnamon sugar mixture. Make sure each piece is fully coated. This step adds sweetness and flavor. For an extra treat, serve your churro bites warm with chocolate sauce or dulce de leche for dipping. Enjoy the crunchy, sweet bites! The best frying temperature for churro bites is 360°F (180°C). This heat gives them a golden color and keeps them fluffy inside. If the oil is too cool, they soak up too much oil. If it's too hot, they burn quickly. Use a candy thermometer for best results. To get a light and airy churro, mix your dough well. Add eggs one at a time and stir until smooth. Let the dough rest for five minutes before piping. This helps the churro bites puff up nicely in the oil. Fry them in small batches. This keeps the oil temperature steady, which is key for a perfect texture. Serve your churro bites warm for the best taste. They pair well with chocolate sauce or dulce de leche. You can also try a simple vanilla glaze or caramel sauce. For a twist, sprinkle some sea salt on top for a sweet and salty treat. Enjoy sharing these with friends or family! {{image_2}} You can make churro bites even more fun by adding chocolate or Nutella. To do this, fill the piping bag with the dough first. Then, pipe a small piece of dough into the hot oil. After a few seconds, gently push some chocolate or Nutella into the center of the dough. Then, cover it with a bit more dough before frying. This way, you get a warm, gooey center. These stuffed bites are a hit with kids and adults alike! When fall rolls around, try pumpkin spice churro bites. To make these, add 1 teaspoon of pumpkin pie spice to your dough. You can also mix a little pumpkin puree into the dough for added flavor. Fry them just like regular churro bites. Once cooked, toss them in a mix of cinnamon, sugar, and a pinch of nutmeg. These treats capture the taste of fall and are perfect for cozy gatherings. If you want to make vegan churro bites, it’s easy! Replace the eggs with flaxseed meal. Mix 1 tablespoon of flaxseed meal with 2.5 tablespoons of water. Let it sit for a few minutes until it thickens. Use this mix in place of eggs in your dough. For the butter, you can use coconut oil or a vegan butter substitute. This way, everyone can enjoy delicious churro bites, no matter their diet! After enjoying your churro bites, store any leftovers in an airtight container. This keeps them fresh and soft. Place the container at room temperature for up to two days. If you want to keep them longer, refrigeration is a good option. Just remember, the churros might lose some of their crispness. To enjoy warm churro bites again, reheat them in the oven. Preheat your oven to 350°F (175°C). Spread the churros on a baking sheet. Heat for about 5-7 minutes. This method helps restore their crisp texture. Avoid using the microwave, as it can make them soggy. If you have extra churro bites, freezing is a smart choice. Place the cooled bites in a freezer-safe bag. Remove as much air as you can before sealing. They can stay in the freezer for up to three months. When ready to eat, thaw them in the fridge overnight. Then, reheat in the oven as mentioned above for the best results. Yes, you can make churro bites in advance. Prepare the dough and fry them later. This helps keep them fresh. Store uncooked dough in the fridge for up to a day. Cook them when you're ready. The best way to fry churros is to use a deep skillet or pot. Heat the oil to about 360°F (180°C). This temperature ensures they cook evenly. Fry in small batches to avoid overcrowding. Golden brown churros are the goal! You can find pre-made churro bites at some grocery stores. Look in the frozen or bakery section. Some specialty dessert shops also offer them. Check local markets for fresh churros too! Yes, you can use different oils for frying churros. Canola oil, peanut oil, or vegetable oil will work well. Each oil has a high smoke point, making them good for frying. Choose one that fits your taste! You can test the oil's heat with a small piece of dough. If it sizzles and rises, it's ready! Another method is to use a thermometer. Aim for 360°F (180°C) for perfect churro bites. In this blog post, we explored the world of churro bites. I shared essential ingredients and optional ones for extra flavor. You learned how to prepare the dough and fry each bite to perfection. I offered tips for ideal frying and serving ideas to elevate your dish. Variations, like pumpkin spice and vegan options, added more fun. Finally, I covered storage and reheating so you can enjoy them later. Now, you have all the tools to make delicious churro bites at home! Enjoy every crunchy, sweet bite.

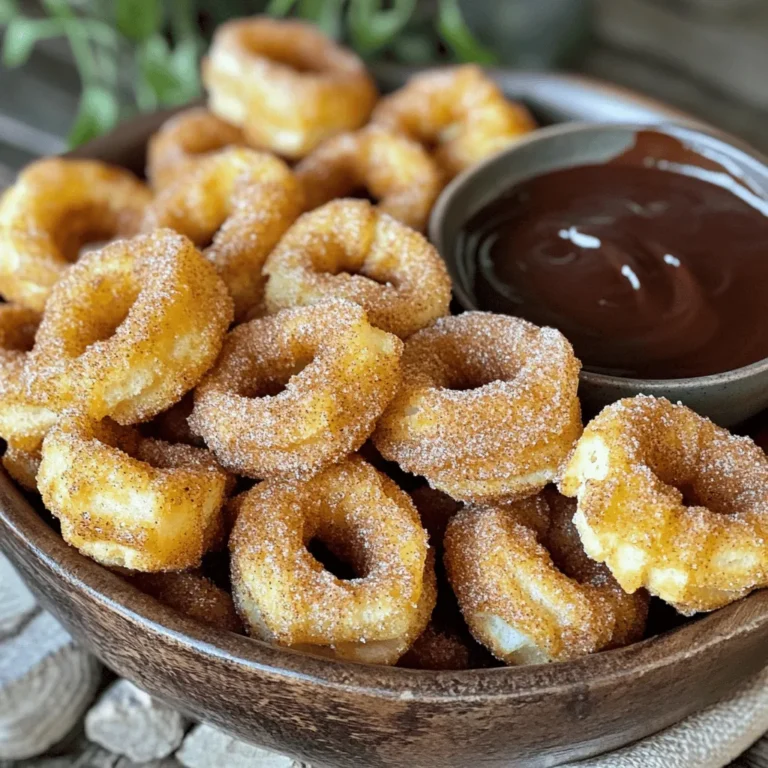
Cinnamon Sugar Churro Bites Quick and Easy Recipe

- 2 pounds beef chuck roast, cut into 1-inch cubes - 1 onion, finely chopped - 3 cloves garlic, minced - 8 ounces mushrooms, sliced - 4 cups beef broth - 1 tablespoon Worcestershire sauce - 1 teaspoon Dijon mustard - 1 teaspoon dried thyme - 1/2 teaspoon black pepper - 1 tablespoon olive oil - 1 cup sour cream - Salt to taste - 1 package egg noodles, for serving The heart of this dish is the beef. Chuck roast works best as it becomes really tender. The onion and garlic bring flavor. Mushrooms add a nice earthiness that balances the dish. Beef broth gives depth, while Worcestershire sauce and Dijon mustard add a slight zing. Thyme and black pepper enhance the taste, and sour cream creates creaminess. Finally, the egg noodles serve as a perfect base for the stroganoff. - 2 tablespoons cornstarch (optional, for thickening) - Fresh parsley, chopped (for garnish) Cornstarch helps to thicken the sauce if you want it richer. Fresh parsley adds color and freshness on top. - Slow cooker - Skillet - Cutting board and knife You need a slow cooker to make this dish easy and hands-off. A skillet is great for searing the beef and cooking the veggies. A cutting board and knife help you prep all your ingredients. Start by cutting your beef chuck roast into 1-inch cubes. This size helps it cook evenly. Heat 1 tablespoon of olive oil in a large skillet over medium-high heat. Once the oil is hot, add the beef cubes. Sear them until they are browned on all sides. This step adds a rich flavor. After browning, transfer the beef to your slow cooker. In the same skillet, add the finely chopped onion and minced garlic. Cook these for about 3 minutes until they are translucent. Then, add the sliced mushrooms. Sauté them for another 3-4 minutes until they are soft. This will bring out their natural sweetness. Once done, add the sautéed vegetables to the slow cooker with the beef. Pour in 4 cups of beef broth, then add 1 tablespoon of Worcestershire sauce, 1 teaspoon of Dijon mustard, 1 teaspoon of dried thyme, and 1/2 teaspoon of black pepper. Stir well to combine all the ingredients. Cover the slow cooker and set it on low for 7-8 hours or on high for 4-5 hours. You want the beef to be nice and tender. If you want a thicker sauce, mix 2 tablespoons of cornstarch with some cold water to make a slurry. Stir this into the slow cooker about 30 minutes before serving. Just before serving, mix in 1 cup of sour cream for creaminess. Adjust the salt to taste. For beef stroganoff, I prefer beef chuck roast. This cut is tender and flavorful. It has enough fat to stay juicy during slow cooking. Other good options include brisket or round steak. These cuts will also work well and give you a rich taste. To thicken the sauce, you can use cornstarch. Mix two tablespoons of cornstarch with a little cold water. This makes a slurry. Stir the slurry into the slow cooker about 30 minutes before serving. This will give your sauce a nice, thick texture. When serving, place the stroganoff over cooked egg noodles. This helps soak up the sauce. Garnish with freshly chopped parsley for color. You can also serve crusty bread on the side. This is great for dipping into the sauce. Enjoy your meal! {{image_2}} You can use different cuts of meat for beef stroganoff. Cuts like sirloin or brisket work well. These cuts can give you a unique flavor and texture. If you want a lighter dish, try vegetarian options. You can use mushrooms, tempeh, or lentils instead of beef. These ingredients soak up the flavors and create a hearty meal. To make your stroganoff even tastier, add more spices. A pinch of paprika gives warmth. Try adding a dash of garlic powder for extra zing. Fresh herbs like thyme or rosemary can brighten your dish. You can also add a splash of red wine for depth. These enhancements make your stroganoff stand out. Serving beef stroganoff over egg noodles is classic, but you can mix it up. Try serving it with fluffy rice for a different texture. Mashed potatoes are another great option. They hold the sauce well and add comfort. You can also serve it with crusty bread. This helps soak up the tasty sauce and makes every bite delicious. To store leftovers, let the beef stroganoff cool down first. Transfer it to an airtight container. This keeps the dish fresh and tasty. It can last in the fridge for about 3 to 4 days. When ready to eat, check for any off smells or changes in color. If you want to freeze beef stroganoff, use a freezer-safe container. Leave some space at the top for expansion. It can freeze well for up to 3 months. Make sure to label your container with the date. This helps you keep track of how long it’s been in the freezer. To reheat, you have a few options. The best way is on the stove. Put it in a pot over low heat. Stir it often to prevent it from sticking or drying out. You can add a splash of beef broth or water for moisture. Microwaving works too. Use a microwave-safe bowl and cover it loosely to keep the steam in. Heat it in short bursts, stirring in between. This keeps the beef tender and creamy. Yes, you can make beef stroganoff without sour cream. If you want to skip it, use plain Greek yogurt or cream cheese instead. Both will add creaminess and flavor. You can also try a mix of milk and cornstarch for a lighter option. This will keep your dish rich and tasty. To make this beef stroganoff faster, use a pressure cooker instead of a slow cooker. Cook on high for about 45 minutes. Another option is to cut the beef into smaller pieces. Smaller chunks cook faster. You can also skip browning the beef first. This saves time, but browning adds flavor. Beef stroganoff pairs well with several side dishes. Here are some great options: - Egg noodles (the classic choice) - Mashed potatoes - Rice - Crusty bread for dipping - Steamed vegetables like green beans or broccoli These sides enhance the meal and soak up the savory sauce. Enjoy! In this post, I covered the key ingredients and steps for making beef stroganoff. You saw how to choose the right beef and the importance of sautéing vegetables. I shared tips for thickening sauces and how to serve this dish. Remember, you can play with different cuts of meat or flavors to make it your own. Enjoy experimenting with your version of beef stroganoff, and don't forget to store leftovers safely for future meals!

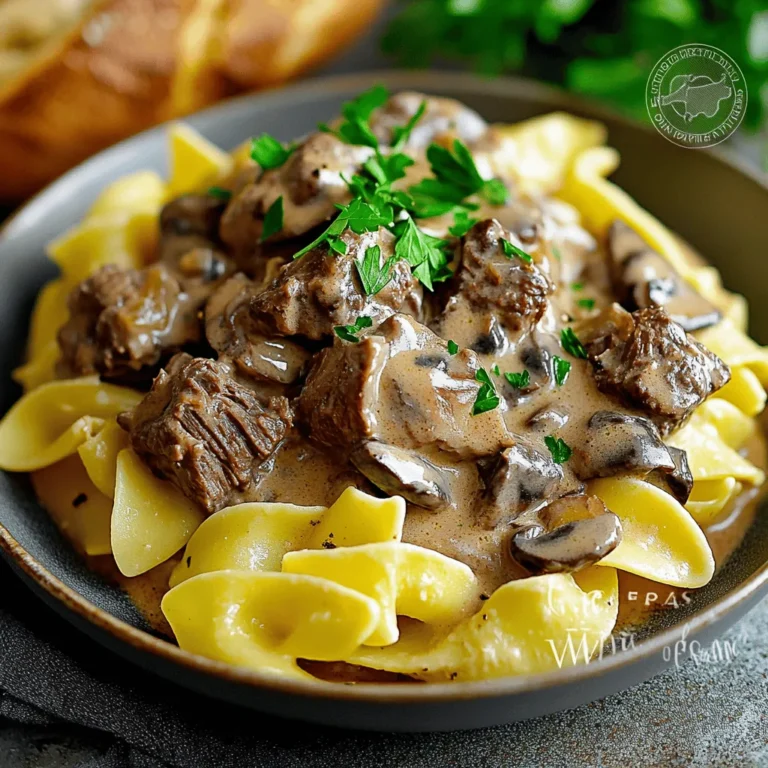
Slow Cooker Beef Stroganoff Simple and Tasty Recipe

- 14 oz firm tofu, pressed and cubed - 2 tablespoons cornstarch - 2 tablespoons vegetable oil - 1 red bell pepper, sliced - 1 cup broccoli florets - 1 carrot, julienned - 1 zucchini, sliced - 3 green onions, chopped - 2 cloves garlic, minced - 1 tablespoon ginger, grated - 3 tablespoons soy sauce - 1 tablespoon sesame oil - 1 tablespoon rice vinegar - 1 teaspoon chili paste (optional) - Sesame seeds for garnish To start, I always choose firm tofu for the best texture. It holds up well during cooking. Pressing the tofu helps remove water. This step is key to achieving that crispy outer layer. Next, let’s talk about fresh vegetables. I love adding vibrant colors to my stir-fry. Red bell pepper, broccoli, carrot, and zucchini bring not just color but also great taste and crunch. Finally, sauces and seasonings tie the dish together. Soy sauce adds saltiness, while sesame oil brings a nutty flavor. Rice vinegar adds a little tang. If you like heat, add chili paste for a kick. Using fresh, quality ingredients makes a big difference. The right flavors can elevate your dish from good to amazing. Pressing the tofu First, take the firm tofu and drain it. Wrap it in a clean towel. Place something heavy on top. Let it sit for 15-20 minutes. This step removes excess moisture, which helps make the tofu crispy. Coating with cornstarch After pressing, cut the tofu into 1-inch cubes. In a bowl, add 2 tablespoons of cornstarch. Toss the tofu cubes in the cornstarch until they are evenly coated. This coating helps create that perfect crunch when cooking. Frying method In a large non-stick skillet or wok, heat 2 tablespoons of vegetable oil. Make sure the oil is hot but not smoking. Carefully add the coated tofu cubes into the skillet. Achieving crispy texture Fry the tofu for 8-10 minutes. Turn the cubes occasionally. Look for a golden brown color on all sides. Once done, remove the tofu from the pan and set it aside. This method ensures the tofu stays crispy. Garlic and ginger preparation In the same skillet, add a bit more oil if needed. Add 2 cloves of minced garlic and 1 tablespoon of grated ginger. Sauté for about 30 seconds until you smell the lovely aroma. Stir-frying techniques Next, toss in the veggies: 1 sliced red bell pepper, 1 cup of broccoli florets, 1 julienned carrot, and 1 sliced zucchini. Stir-fry these for 5-7 minutes. They should be vibrant and still slightly crisp. Mixing tofu and veggies Now, add the crispy tofu back into the skillet with the vegetables. Then, pour in 3 tablespoons of soy sauce, 1 tablespoon of sesame oil, and 1 tablespoon of rice vinegar. Include chili paste if you like it spicy. Finishing touches Gently stir everything to coat it in the sauce. Cook for another 2-3 minutes. This allows all the flavors to blend. Finally, remove from heat. Sprinkle chopped green onions and sesame seeds on top. Enjoy your crispy tofu veggie stir-fry! - Choosing the right tofu: Use firm or extra-firm tofu. This type has less water, which helps it stay crispy. Soft tofu breaks apart easily during cooking. - Coating tips: Coat the tofu cubes well with cornstarch. This gives them a nice crunch when fried. Make sure every piece is covered. - Optimal veggie combinations: Use a mix of colorful veggies. Red bell pepper, broccoli, carrots, and zucchini work great. This mix adds both flavor and nutrition. - Substitutions for dietary preferences: If you don’t like a veggie, swap it for another. Try snap peas or bell peppers. You can also use mushrooms for a different texture. - Side dish pairings: Serve this stir-fry with jasmine rice or quinoa. These sides soak up the tasty sauce and make a filling meal. - Garnishing ideas: Top your dish with green onions and sesame seeds. This adds a nice touch and extra flavor. You can also add a drizzle of chili oil for heat. {{image_2}} If you want to change the protein, try these options: - Chickpeas: These add a nice crunch and are plant-based. - Shrimp: Cook shrimp for about 3-4 minutes until pink and tender. - Chicken: Use bite-sized pieces and cook until no longer pink. Each choice gives a new flavor and texture to your stir-fry. You can mix and match sauces to suit your taste. Here are some ideas: - Teriyaki Sauce: Sweet and savory, it pairs well with veggies. - Peanut Sauce: This adds creaminess and a nutty flavor. - Sweet Chili Sauce: Perfect for a hint of sweetness and spice. Adjust the spice levels by adding more chili paste or using less. Using seasonal produce can enhance your dish. Here are some swaps: - Spring: Use asparagus or snap peas for a fresh crunch. - Summer: Add corn or bell peppers for sweetness. - Fall: Try butternut squash or Brussels sprouts for richness. These swaps keep your stir-fry exciting and fresh throughout the year. - Store leftovers in an airtight container. This helps keep the tofu crispy. - Place the container in the fridge. Enjoy leftovers within 3 days for the best taste. - If you want to freeze, pack the tofu and veggies separately. - Use a freezer-safe bag or container. This keeps the flavors fresh for up to 2 months. - To reheat, use a skillet on medium heat. This method keeps the tofu crispy. - Add a touch of oil to help revive the texture. - Stir-fry for about 5 minutes or until heated through. - Avoid using the microwave. It can make the tofu chewy and soggy. - Enjoy your stir-fry just like day one! To get crispy tofu, start by pressing it. Press the tofu for 15-20 minutes. This removes excess water. Next, cut the tofu into 1-inch cubes. Toss the cubes in cornstarch. This coating helps create a crunchy outer layer. Fry the coated tofu in hot oil. Cook until golden brown on all sides. Flip the cubes gently to avoid breaking them. Yes, you can use other oils. Olive oil or canola oil works well. Each oil adds a unique flavor. Just make sure the oil can handle high heat. This helps achieve a crispy texture without burning the tofu. You can swap veggies based on your taste. Try bell peppers, snap peas, or cauliflower. Mushrooms add a nice umami flavor. Feel free to use any fresh vegetables you enjoy. Just ensure they are cut into similar sizes for even cooking. You can store this stir-fry in the fridge for up to three days. Place it in an airtight container for best results. Reheat it on the stove or in the microwave. This keeps the flavors fresh and the veggies crisp. Yes, this recipe can be gluten-free. Use gluten-free soy sauce or tamari instead. Check all other ingredients for gluten content. This makes it safe for those with gluten sensitivities. Enjoy your tasty stir-fry without worry! In this post, we explored how to create a tasty and crispy tofu stir-fry. We covered key ingredients like tofu, fresh veggies, and sauces. You learned how to prepare and cook tofu for the right texture and sauté veggies perfectly. We shared tips for enhancing crispiness and serving ideas. You can also try variations with different proteins and sauces. Finally, we discussed proper storage and reheating to keep meals fresh. Enjoy making this healthy dish!

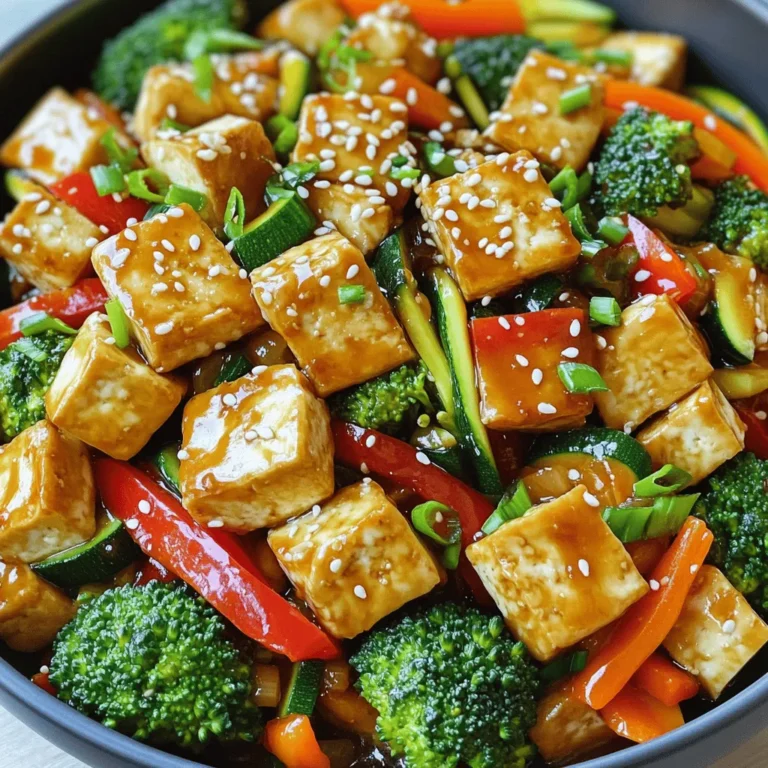
Crispy Tofu Veggie Stir-Fry in 15 Simple Steps

- 1 cup pumpkin puree - 8 oz cream cheese, softened - 1 cup heavy whipping cream For this recipe, pumpkin puree gives a rich, warm flavor. I love using 100% pure pumpkin puree. Cream cheese adds a smooth and creamy texture, making the mousse delightful. Heavy whipping cream is crucial for that light and airy feel. - 1/2 cup powdered sugar - 1 teaspoon vanilla extract - 1 teaspoon pumpkin pie spice To sweeten, I use powdered sugar. It blends well and is easy to mix. Vanilla extract adds a lovely aroma, enhancing the overall taste. Pumpkin pie spice gives the dessert that classic fall flavor, making it feel cozy. - 1/4 cup crushed graham crackers - Whipped cream - 1/2 teaspoon cinnamon For a crunchy topping, I sprinkle crushed graham crackers on top. They add a nice texture contrast. A dollop of whipped cream makes it extra special. A light dusting of cinnamon on top completes the look and flavor. Start by taking a large mixing bowl. In this bowl, combine 8 ounces of softened cream cheese, 1/2 cup of powdered sugar, 1 teaspoon of vanilla extract, and 1 teaspoon of pumpkin pie spice. Use a hand mixer and beat the mixture. Keep mixing until it becomes smooth and creamy. This step is key for a rich texture. Next, grab another bowl for the heavy cream. Pour in 1 cup of heavy whipping cream. Use a mixer to whip it until stiff peaks form. This means when you lift the beaters, the cream stands tall without falling. Stiff peaks give your mousse a light and airy feel. Now it's time to bring it all together. Gently fold the whipped cream into your pumpkin cream cheese mixture. Be careful not to deflate the whipped cream. Use a spatula and mix until it is fully combined. Once mixed, spoon the mousse evenly into small cups or glasses. Place your mousse cups in the fridge. They need at least 2 hours to chill and set properly. This time allows the flavors to blend beautifully. For the best texture, make sure your mousse is well-chilled before serving. After chilling, sprinkle each cup with crushed graham crackers and a hint of cinnamon for extra flavor. Add a dollop of whipped cream on top before serving. Enjoy your delightful treat! To get the best mousse, start with softened cream cheese. This helps it blend smoothly. If the cream cheese is too cold, it won’t mix well. You can leave it out for about 30 minutes before you start. For whipped cream, aim for stiff peaks. When you whip it, use a cold bowl and cold beaters. This helps the cream whip faster. Watch closely, as overwhipping can turn it into butter. You want it fluffy, not grainy. Serving your mousse cups in clear glasses looks great. It shows off the lovely layers. You can also use small jars for a rustic touch. For garnishing, sprinkle crushed graham crackers on top. This adds texture and a sweet crunch. A dash of cinnamon gives a warm flavor. Finish with a dollop of whipped cream for a beautiful look. One common mistake is overmixing the cream. Be gentle when folding in the whipped cream. If you mix too hard, the mousse loses its lightness. Another pitfall is not refrigerating long enough. Chilling the mousse for at least 2 hours allows it to set properly. If you skip this step, it might be too runny. Always plan ahead to ensure perfect results. {{image_2}} You can play with flavors in your pumpkin cheesecake mousse cups. Try adding chocolate or caramel for a sweet twist. Just drizzle some melted chocolate on top or mix in caramel sauce for extra richness. You can also swap spices. Use nutmeg or allspice in place of pumpkin pie spice. This change will give your cups a unique taste. If you need gluten-free options, use crushed nuts or gluten-free cookies instead of graham crackers. This small change still gives you a tasty topping. For a vegan version, use plant-based cream cheese and whipped cream. These substitutes keep the creamy texture and flavor while making it plant-friendly. Pair these mousse cups with fresh fruits like berries or slices of pear. The fruit adds a nice contrast to the creamy dessert. You can also combine them with other desserts for a fun party platter. Serve them alongside brownies or mini tarts for a delightful dessert spread. How long can mousse cups be kept? You can store Pumpkin Cheesecake Mousse Cups in the fridge for up to four days. After that, they may lose their creamy texture and flavor. Best practices for covering and storing? Make sure to cover the mousse cups tightly with plastic wrap or a lid. This keeps them fresh and prevents them from absorbing other smells in the fridge. Can they be frozen? Yes, you can freeze these mousse cups! Just make sure to use freezer-safe containers. Thawing instructions? To thaw, place the mousse cups in the fridge overnight. This keeps them from getting runny. Avoid thawing at room temperature to keep the texture smooth. Pumpkin Cheesecake Mousse Cups last for about 3 to 4 days in the fridge. Store them in an airtight container to keep them fresh. The flavors will blend and deepen over time, making each bite even tastier. Yes, you can make these mousse cups ahead of time! Prepare them up to two days in advance. Just remember to let them chill in the fridge for at least 2 hours before serving. This gives the mousse time to set and helps it achieve the right texture. If you need a cream cheese substitute, try using Greek yogurt or mascarpone cheese. Both options will give you a creamy texture. For a dairy-free choice, use a plant-based cream cheese. This will keep the mousse rich and tasty. You can make a vegan version of these mousse cups! Use plant-based cream cheese and coconut cream instead of heavy cream. This keeps the mousse light and fluffy while being completely dairy-free. Add a bit of maple syrup for sweetness, if desired. This blog post covered how to make delicious Pumpkin Cheesecake Mousse Cups. We explored key ingredients, step-by-step instructions, and tips for perfecting your mousse. Remember to avoid common mistakes and try variations to suit your taste. Whether you enjoy them as a dessert or pair them with fruit, these mousse cups are sure to impress. Keep them stored correctly for fresh enjoyment later. Enjoy creating your sweet treat!

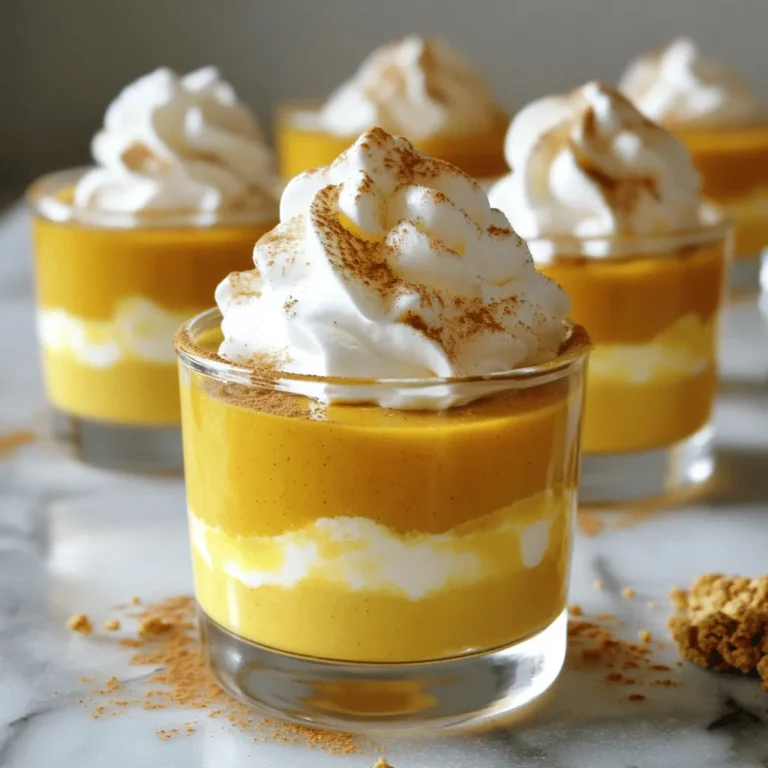
Pumpkin Cheesecake Mousse Cups Irresistible Delight

To make Garlic Parmesan Sweet Potato Wedges in the air fryer, you need to gather a few key ingredients. Each ingredient plays an important role in creating a delicious dish. Here’s what you’ll need: - 2 large sweet potatoes, cut into wedges - 3 tablespoons olive oil - 4 cloves garlic, minced - 1 teaspoon smoked paprika - 1 teaspoon garlic powder - ½ teaspoon onion powder - ½ teaspoon salt - ¼ teaspoon black pepper - 1 cup grated Parmesan cheese - 2 tablespoons fresh parsley, chopped (for garnish) Sweet potatoes bring a natural sweetness and a creamy texture. Olive oil helps achieve that crispy exterior. Garlic adds depth of flavor, while smoked paprika gives a nice kick. The blend of garlic powder, onion powder, salt, and pepper rounds out the seasoning. Parmesan cheese offers a cheesy, salty finish, and the fresh parsley gives a bright touch. Each item is important for the final taste. 1. Preheating the air fryer: Start by setting your air fryer to 400°F (200°C). Let it heat for about 5 minutes. This step ensures your sweet potato wedges cook evenly and become crispy. 2. Preparing the sweet potatoes: Take 2 large sweet potatoes and wash them well. Cut them into wedges. Aim for pieces that are similar in size. This way, they cook at the same rate. 3. Mixing the seasoning and cheese: In a large bowl, combine the sweet potato wedges with 3 tablespoons of olive oil, 4 cloves of minced garlic, 1 teaspoon of smoked paprika, 1 teaspoon of garlic powder, ½ teaspoon of onion powder, ½ teaspoon of salt, and ¼ teaspoon of black pepper. Toss everything until the wedges are fully coated. Then, add 1 cup of grated Parmesan cheese and toss again until the cheese sticks to the wedges. 1. Air frying at the right temperature: Place the seasoned sweet potato wedges in your air fryer basket. Make sure they are in a single layer, not crowded. This helps them get crispy. 2. Cooking in batches if necessary: If your air fryer is small, you may need to cook in batches. This way, each wedge gets enough hot air to crisp up nicely. Cook for 15 to 20 minutes. Shake the basket halfway through cooking to ensure even browning. 1. Garnishing with parsley: Once the wedges are golden brown, remove them from the air fryer and place them on a serving platter. Garnish with 2 tablespoons of chopped fresh parsley for a splash of color and added flavor. 2. Serving suggestions: Serve these sweet potato wedges warm. You can sprinkle some extra Parmesan on top for extra flavor. Pair them with your choice of dipping sauce, like zesty spicy mayo or garlic aioli. Enjoy your crunchy, cheesy delight! To make your sweet potato wedges crispy, oil is key. Use just enough olive oil to coat each wedge. Too much oil will make them soggy. Aim for about 3 tablespoons for two large sweet potatoes. Spacing is also vital in the air fryer. Place the wedges in a single layer. If they overlap, they won’t crisp well. Cook them in batches if your air fryer is small. To boost flavors, add spices like chili powder or cayenne for heat. You can also try smoked paprika for a deeper taste. These small changes can make a big difference. For cheese lovers, explore different cheeses. Try cheddar or feta for a unique twist. Each cheese brings its own flavor to the dish. Cooking times may change based on your model of air fryer. Start with 15 minutes, then check for doneness. You want the wedges golden brown and crispy. To check doneness, pierce a wedge with a fork. It should feel tender inside. If it isn’t, give them a few more minutes. Remember, cooking times can vary, so keep an eye on them. {{image_2}} You can change the taste of your sweet potato wedges easily. For a spicy kick, add chili powder or cayenne. This gives the wedges a nice heat. If you prefer sweet flavors, sprinkle some cinnamon and brown sugar on the wedges. The mix of sweet and savory makes each bite special. If you want a vegan version, you can swap the Parmesan cheese. Nutritional yeast is a great choice. It gives a cheesy flavor without dairy. For those who need gluten-free options, you are in luck! This recipe is already gluten-free, so you can enjoy it without worry. These wedges are great on their own, but you can pair them with dips. Try spicy mayo or garlic aioli for a tasty twist. You can also add them to salads or grain bowls. They add a nice crunch and flavor, making your meal more exciting. To keep your leftover garlic Parmesan sweet potato wedges tasty, store them right. Place them in an airtight container. Make sure they cool down first. You can store them in the fridge for up to three days. If you need to stack them, put parchment paper between layers. This keeps them from sticking together. To enjoy your wedges again, reheating is key. The air fryer works best for this. Set it to 350°F (175°C). Heat the wedges for about 5-8 minutes. This helps them regain their crispiness. You can also use an oven. Set it to 375°F (190°C) and warm for 10-15 minutes. You can freeze sweet potato wedges, but timing matters. For the best results, freeze them before cooking. Lay the wedges on a tray and freeze until solid. Then place them in a freezer bag. They can stay fresh for up to three months. If you freeze them after cooking, just note they may lose some texture. To make your sweet potato wedges crispy, start by cutting them evenly. This helps them cook at the same rate. Use a good amount of olive oil. About three tablespoons is perfect. Toss the wedges well with oil and seasonings. Don't overcrowd your air fryer basket. Cook in batches if needed. This allows hot air to circulate. Shake the basket halfway through cooking. This helps all sides get golden and crisp. Yes, you can use regular potatoes! They will have a different taste but will still be delicious. Just cut them into wedges like sweet potatoes. You might need to adjust the cook time. Regular potatoes can take a bit longer. Keep an eye on them to get that nice golden color. There are many tasty dipping sauces you can try! Here are a few ideas: - Zesty spicy mayo - Garlic aioli - Ranch dressing - Honey mustard - Chipotle sauce All these add great flavor and pair well with the sweet potato wedges. To serve more people, simply double the ingredients. Use four large sweet potatoes instead of two. Make sure to keep the cooking method the same. Cook in batches if your air fryer is small. This way, each batch stays crispy and delicious. You can also prepare the seasoning mix ahead of time. This saves you time when cooking for a crowd. This article guided you through making delicious sweet potato wedges in the air fryer. We explored each ingredient, from sweet potatoes to fresh parsley. You learned key steps for preparation, cooking, and finishing touches for the perfect dish. Useful tips helped you achieve crispy textures and introduced flavor variations. With storage and reheating guidance, these wedges remain tasty later. Remember, experimenting with spices or cheese can lead to exciting new flavors. Enjoy your delicious creation today!

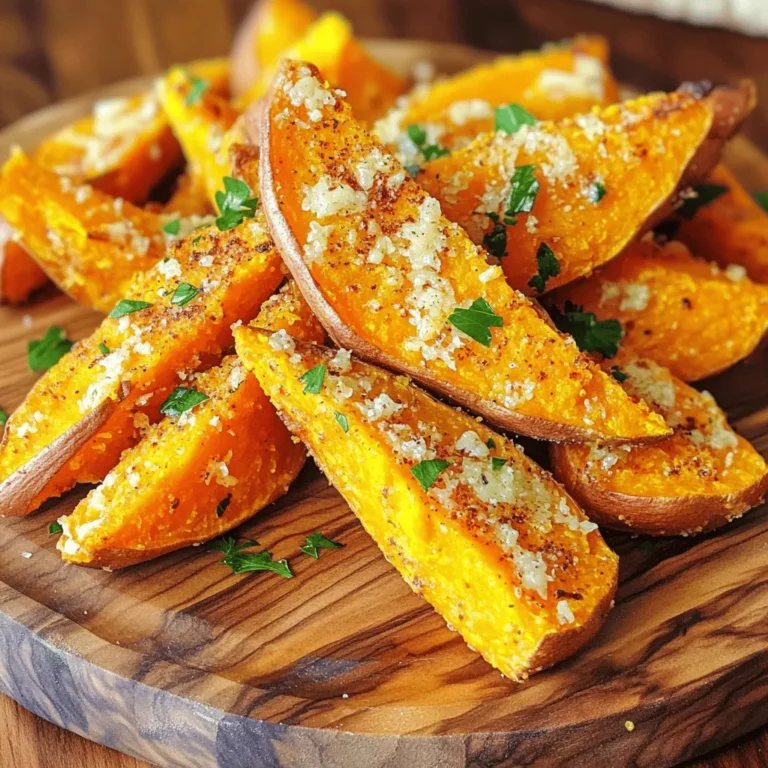
Garlic Parmesan Sweet Potato Wedges Air Fryer Delight

- 2 cups cooked shredded chicken - 1 cup BBQ sauce - 1 bag (12 oz) tortilla chips - 2 cups shredded cheese (cheddar, mozzarella, or a blend) - 1 cup black beans, rinsed and drained - 1 jalapeño, sliced - 1 cup corn (fresh, canned, or frozen) - 1/2 red onion, diced - 1 avocado, diced - Fresh cilantro, for garnish - Sour cream and lime wedges, for serving The main ingredients bring the heart of the dish. I love using cooked, shredded chicken. It’s easy to prepare and mixes well with BBQ sauce. Just toss the chicken in a bowl with the sauce. The tortilla chips serve as a crunchy base. They hold everything together and soak up all the tasty flavors. For toppings, I like to layer on cheese. Cheddar or mozzarella works well. You can even mix them for a flavor boost. Black beans add protein and texture. The jalapeño gives heat, while corn adds sweetness. Diced red onion brings a nice crunch. Don't forget the avocado! It adds creaminess and freshness. Finally, fresh cilantro adds a pop of color and flavor. Sour cream and lime wedges are perfect for serving. They give a nice balance to the dish. Each bite is a burst of flavor and texture that everyone will love! First, I preheat my oven to 400°F (200°C). This step is key for crispy nachos. While the oven heats up, I mix 2 cups of cooked shredded chicken with 1 cup of BBQ sauce in a bowl. I make sure the chicken is well-coated. This mix adds great flavor to the nachos. Next, I layer 1 bag (12 oz) of tortilla chips on a large sheet pan. I spread them out in an even layer. Then, I distribute the BBQ chicken evenly over the chips. After that, I sprinkle black beans, corn, diced red onion, and jalapeño slices over the top. Finally, I generously cover the whole thing with 2 cups of shredded cheese. This will melt beautifully in the oven. I place the sheet pan in the preheated oven and bake for 10-15 minutes. I keep an eye on it to watch the cheese melt and become bubbly. Once it looks perfect, I remove the pan from the oven. I let it cool slightly before serving. This cooling time helps avoid burns. After that, I top the nachos with diced avocado and sprinkle fresh cilantro over them. For serving, I add dollops of sour cream and lime wedges on the side. This adds extra flavor and makes it even more fun to eat. Choosing the right cheese blend is key to great nachos. I love a mix of cheddar and mozzarella. Cheddar adds rich flavor, while mozzarella melts beautifully. You can even try pepper jack for a spicy kick. Even distribution of ingredients makes each bite great. Start by spreading the tortilla chips evenly. Then, add the BBQ chicken across the chips. This way, everyone gets a taste of that sweet and smoky flavor. Next, sprinkle black beans, corn, and jalapeños evenly. Finally, cover it all with cheese. This method ensures you have gooey cheese on every chip. You can adjust the spice level with jalapeños. If you like heat, add more slices. For a milder flavor, skip them or use pickled jalapeños instead. Adding other veggies or proteins can make your nachos unique. Try bell peppers, diced tomatoes, or even spinach for a fresh twist. You can also use pulled pork or beef instead of chicken. This dish is all about making it your own! {{image_2}} You can make a tasty vegetarian version of BBQ chicken nachos. Replace the chicken with plant-based options. Some great choices include shredded jackfruit or store-bought meat alternatives. They mimic the texture of chicken well. You can also use seasoned tofu for protein and flavor. Add your favorite BBQ sauce to keep that rich taste. This way, everyone can enjoy this dish. There are many BBQ sauce options to explore. Each sauce brings a unique twist to your nachos. For a sweet flavor, try a honey BBQ sauce. If you like spicy food, a chipotle BBQ sauce will work well. You can also use a tangy vinegar-based sauce for a different vibe. Feel free to mix sauces for a fun flavor. This keeps the nachos exciting at every party. Incorporating regional ingredients can make your nachos special. For a southwestern twist, add diced green chiles or roasted peppers. If you want a Tex-Mex touch, use spicy salsa or guacamole. In the Midwest, try adding corn and black bean salsa for a hearty flavor. Each region has its own flair that can enhance your dish. Get creative with what you have on hand for unique flavors. To keep your BBQ Chicken Nacho Sheet Pan fresh, store leftovers right away. Place them in an airtight container. Make sure to cool the nachos first. This helps to avoid soggy chips. You can keep them in the fridge for up to three days. If you want to save them longer, consider freezing. Just remember, freezing may change the texture of the chips. When it's time to enjoy your leftovers, you want them to taste great. The best way to reheat nachos is in the oven. Preheat your oven to 350°F (175°C). Spread the nachos on a baking sheet. Heat them for about 10 minutes. This method keeps the chips crispy and the cheese melty. Avoid using the microwave, as it can make the chips chewy. If you must use a microwave, heat in short bursts. This way, you can control the texture better. Yes, you can! While tortilla chips are the classic choice, you can try other options. Pita chips add a nice crunch. You can also use potato chips for a salty twist. If you prefer a healthier option, baked chips work well too. Just make sure your chips can hold the toppings. You want them to stay crispy and not get soggy. If you want to swap out the chicken, consider using black beans or chickpeas. They both add protein and flavor. For meat lovers, pulled pork or beef also make great options. If you want a vegetarian option, try mushrooms. They add a hearty texture and soak up the BBQ sauce well. Just make sure to season them to enhance their taste. Scaling up this recipe is easy! Just double or triple the ingredients based on your needs. Use a bigger sheet pan or two pans for more space. Make sure to adjust cooking time if you add more toppings. Check the cheese for melting. It should be bubbly and golden. This way, everyone at your gathering can enjoy the delicious BBQ Chicken Nacho Sheet Pan! This article detailed a tasty nacho recipe using chicken and BBQ sauce. You learned how to prep, assemble, and bake your dish to perfection. Don’t forget the fun toppings to add flavor and color. You can customize your nachos with veggies or different proteins. Enjoy experimenting with sauces and regional twists too. Remember, nachos are a great shareable snack. They are perfect for parties or cozy nights in. Now, grab your ingredients and start cooking! You will enjoy every bite.

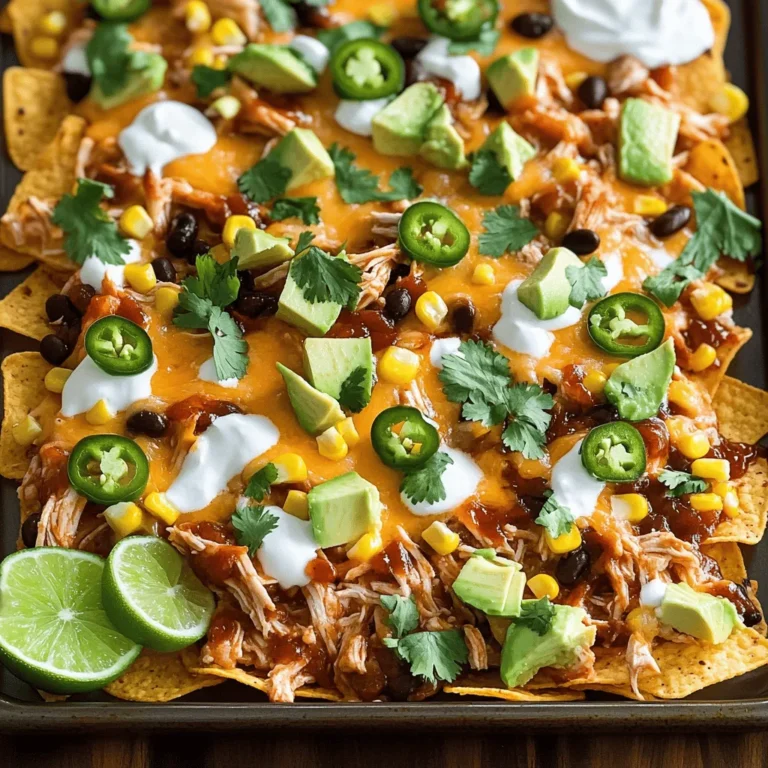
BBQ Chicken Nacho Sheet Pan Flavorful Party Dish

- 20 large pasta shells - 1 pound ground beef or turkey - 1 cup ricotta cheese - 1 cup shredded mozzarella cheese - ½ cup grated Parmesan cheese - 1 small onion, finely chopped - 2 cloves garlic, minced - 1 teaspoon Italian seasoning - 1 jar (24 oz) marinara sauce - Salt and pepper to taste - Fresh basil leaves for garnish (optional) Meaty stuffed shells need the right mix of ingredients. Start with the pasta shells. Choose large shells for easy filling. Ground beef or turkey adds protein and flavor. I enjoy using turkey for a lighter meal. The cheeses create a creamy filling. Ricotta makes it rich, while mozzarella adds meltiness. Parmesan gives a nice salty touch. Next, you need aromatics like onion and garlic. They bring depth to the dish. Italian seasoning addsHerbs that enhance the flavor. Marinara sauce ties it all together. Use your favorite brand or homemade sauce for the best taste. Don’t forget salt and pepper! They balance the flavors. For a final touch, fresh basil leaves look pretty and taste great. They brighten up the dish. Gather these ingredients before you start cooking. It makes the process smooth and fun. Enjoy making your meaty stuffed shells! {{ingredient_image_1}} Set your oven to 375°F (190°C). Preheating helps cook the dish evenly. Cook 20 large pasta shells as per the package instructions. Make sure they are al dente. Once cooked, drain and set them aside to cool a bit. In a large skillet over medium heat, add one finely chopped onion and two cloves of minced garlic. Sauté until the onion looks clear. Then, add one pound of ground beef or turkey. Cook until it turns brown. Drain any excess fat to keep it light. In a large bowl, mix the cooked meat with one cup of ricotta cheese, one cup of shredded mozzarella cheese, and half a cup of grated Parmesan cheese. Add one teaspoon of Italian seasoning, salt, and pepper. Stir until everything blends well. Use a spoon or a piping bag to fill each pasta shell with the meat and cheese mix. Be careful not to overfill them. Start by spreading a thin layer of marinara sauce on the bottom of your baking dish. Place the stuffed shells seam side up in the dish. Pour the remaining marinara sauce over the shells, making sure they are all covered. Add some extra mozzarella cheese on top. Cover the dish with aluminum foil and bake for 25 minutes. After that, take off the foil and bake for another 10 minutes. You want the cheese to be bubbly and golden. Once out of the oven, let the dish cool for a few minutes. If you like, add fresh basil leaves for a nice touch. Serve hot and enjoy! You can use ground beef or ground turkey for this dish. Both give great flavor. Ground beef adds richness, while ground turkey is lighter. You can even try ground chicken or plant-based meat for a twist. Each choice will change the taste a bit, so pick what you like best. After cooking the pasta shells, let them cool for a few minutes. This step helps prevent burns when you fill them. Use a spoon or a piping bag to stuff the shells. This tool makes it easy and keeps things clean. Don’t overstuff them! Fill them enough so they hold together but not too much that they burst. Cheese is key in stuffed shells. Ricotta is classic, but you can mix it up. Try adding goat cheese for tang or cottage cheese for a lighter option. You could also mix in some feta for a salty kick. For the topping, mozzarella is great, but you can use provolone or a mix of cheeses for extra flavor. Pro Tips Perfect Pasta Shells: Make sure to cook the pasta shells just until al dente. They will continue cooking in the oven, so you want them to be firm enough to hold the filling without breaking. Flavorful Filling: For an extra flavor boost, consider adding some chopped spinach or mushrooms to the meat mixture. This adds a delicious depth to your filling and increases the nutritional value. Cheese Variations: Feel free to experiment with different types of cheese in your filling. Adding some feta or goat cheese can give a tangy twist that complements the sauces beautifully. Make Ahead: You can prepare the stuffed shells ahead of time and refrigerate them before baking. Just add a few extra minutes to the baking time if they go in cold. {{image_2}} You can easily make vegetarian stuffed shells. Swap out the meat for plant-based options. Try using lentils, mushrooms, or even tofu. Each adds a unique flavor and texture. You can also load the filling with extra veggies. Spinach, zucchini, or bell peppers work great. Mix these with ricotta and mozzarella for a hearty bite. Want some heat? Add spices to your filling. Red pepper flakes or cayenne pepper can do the trick. For a fresh kick, chop up some jalapeños and mix them in. You can also top the stuffed shells with a spicy marinara sauce. Just look for sauces that say "spicy" or "arrabbiata." Your taste buds will thank you for the extra flare! If you need gluten-free options, don't worry. Many brands offer gluten-free pasta shells. Look for those made from brown rice or quinoa. They cook up just like regular pasta. You can use the same filling and sauce for a delicious meal. Your gluten-free friends will love you for it! To keep your stuffed shells fresh, store them in an airtight container. Make sure they cool down first. Place a layer of plastic wrap over the dish before sealing. This helps prevent drying out. You can keep them in the fridge for up to three days. When ready to eat, check for any signs of spoilage. Freezing stuffed shells is easy and great for future meals. First, let them cool completely. Then, place them in a single layer on a baking sheet. Freeze until they are firm, about two hours. After that, transfer them to a freezer-safe bag or container. Be sure to label them with the date. They will stay good for about three months. When reheating stuffed shells, avoid drying them out. Preheat your oven to 350°F (175°C). Place the shells in a baking dish and cover with foil. Bake for 20-25 minutes until heated through. If you want, add a splash of marinara sauce on top to keep them moist. You can also reheat in the microwave but they may not taste as good. Always check for even heating. Yes, you can prepare Meaty Stuffed Shells ahead of time. You can assemble the dish, then cover it tightly. Keep it in the fridge for up to 24 hours before baking. If you want to freeze it, wrap it well in plastic wrap and foil. It can last for up to three months in the freezer. To bake, just add a few extra minutes to the cooking time if frozen. You can tell when the stuffed shells are done by looking for a few signs. The cheese on top should be bubbly and golden. The sauce should be hot and steaming. Also, when you insert a knife into the center, it should feel warm. Use a food thermometer; it should read 165°F (74°C) in the center. Meaty Stuffed Shells pair well with several sides. A fresh green salad adds a nice crunch. Garlic bread is great for scooping up sauce. Roasted vegetables can bring extra flavor. You might also enjoy steamed broccoli or a light pasta salad. Each side balances the rich flavors of the shells. Definitely! You can mix in different ingredients to make your filling special. Try adding spinach or mushrooms for extra veggies. You can use chicken or sausage instead of beef or turkey. Herbs like parsley or oregano can add fresh notes. Even different cheeses like goat cheese or feta can change the flavor profile. If you need a ricotta substitute, there are good options. Cottage cheese is a great choice; it has a similar texture. Cream cheese can work too, but it has a richer taste. For a lighter option, try Greek yogurt. You can even make a homemade version by blending tofu with a bit of lemon juice for a dairy-free choice. This blog post detailed a tasty recipe for stuffed pasta shells. We covered all the ingredients, from large pasta shells to flavorful ground beef, and even some tasty cheese options. I shared tips for cooking and stuffing the shells with ease. You learned about delicious variations and how to store leftovers. Overall, stuffed shells are a great meal choice. They are fun to make and loved by many. Try this recipe, and enjoy every bite!

Meaty Stuffed Shells Savory and Satisfying Meal

To make these tasty burger bowls, you need some key ingredients. Here’s what you will need: - 1 lb ground beef (80/20) - 4 medium potatoes, diced into cubes - 1 cup cherry tomatoes, halved - 1 cup lettuce, chopped - 1/2 cup shredded cheddar cheese - 1/4 cup pickles, sliced - 1/2 cup burger sauce (ketchup mixed with mayonnaise and a splash of mustard) These ingredients create a strong base for your meal. The ground beef gives it richness and flavor, while the potatoes add crunch. To make the burger patties pop with flavor, you will use a few spices: - 1 teaspoon garlic powder - 1 teaspoon onion powder - 1 teaspoon smoked paprika - Salt and pepper to taste - 1 teaspoon dried oregano These spices bring out the best in your beef. Garlic and onion powder add depth, while smoked paprika gives a subtle smokiness. You can customize your burger bowls with various toppings and sauces. Here are a few ideas: - Avocado slices for creaminess - Sliced jalapeños for heat - Ranch dressing or your favorite vinaigrette These optional toppings let you play around with flavors. Feel free to mix and match to suit your taste. Enjoy the process of building your perfect burger bowl! {{ingredient_image_1}} First, preheat your oven to 425°F (220°C). This heat helps the potatoes crisp up nicely. Grab a large bowl for the potatoes. You will need to dice 4 medium potatoes into cubes. In your bowl, mix the diced potatoes with 2 tablespoons of olive oil, 1 teaspoon of dried oregano, salt, and pepper. Toss everything well. Spread the potatoes out on a baking sheet in a single layer. Roast them in the oven for about 25-30 minutes. Flip the potatoes halfway through cooking. Look for a golden and crispy texture when they are done. While the potatoes roast, get your ground beef. You need 1 pound of ground beef (80/20) in a mixing bowl. Add 1 teaspoon each of garlic powder, onion powder, and smoked paprika. Also, add salt and pepper to taste. Mix gently until everything blends well. Form this mixture into 4 patties. Heat a skillet over medium-high heat. Once hot, add the burger patties. Cook them for about 4-5 minutes on each side. If you want cheese, add a slice to each burger during the last minute of cooking. This will give you that melty, cheesy goodness. Now it's time to build your burger bowls. Start with a base of chopped lettuce in each serving bowl. Next, add the crispy roasted potatoes, halved cherry tomatoes, and burger patties on top. Don’t forget the sliced pickles and a sprinkle of shredded cheddar cheese. Finish off your bowls by drizzling the burger sauce over everything. This sauce combines ketchup, mayonnaise, and a splash of mustard. It adds the perfect zing. Enjoy your warm burger bowls right away! To make great roasted potatoes, start with fresh, firm potatoes. Cut them into even cubes. This helps them cook evenly. Toss them in a bowl with olive oil. Add garlic powder, oregano, salt, and pepper. This mix gives them flavor. Spread the cubes on a baking sheet. Make sure they are not crowded. This way, they get crispy. Roast them at 425°F (220°C) for about 25-30 minutes. Flip them halfway for even browning. Watch for a golden color; that’s when they are ready! Cooking burgers is simple, but there are tricks to make them perfect. Use ground beef with a good fat content, like 80/20. It keeps them juicy. Mix in spices gently. Don’t overwork the meat. Form patties that are slightly larger than your buns. This accounts for shrinkage while cooking. Heat a skillet to medium-high. Cook patties for about 4-5 minutes on each side. You can add cheese in the last minute for melting goodness. Check for doneness with a meat thermometer if you want to be sure. One great thing about burger bowls is how easy they are to customize. Start with a base of chopped lettuce. This adds a nice crunch. Next, layer in the roasted potatoes, cherry tomatoes, and the burger patties. Add your favorite toppings like pickles and cheese. Don’t forget the sauce! A mix of ketchup, mayonnaise, and mustard works great. Want to switch it up? Try different veggies or even fruits like avocado. The options are endless, so get creative! Pro Tips Use Quality Beef: Choose a ground beef with a good fat content, like 80/20, to ensure juicy and flavorful patties. Season Generously: Don’t skimp on the seasoning for both the burger patties and the potatoes to enhance the overall flavor of the dish. Perfectly Cooked Burgers: Use a meat thermometer to check for doneness; 160°F (71°C) is the ideal internal temperature for ground beef. Add Fresh Herbs: Incorporate fresh herbs, like parsley or basil, into your burger bowls for an extra layer of flavor and freshness. {{image_2}} You can make these burger bowls vegetarian easily. Swap the ground beef for a plant-based meat alternative. Options like lentils, black beans, or chickpeas also work well. Use your favorite veggie burger patties too. Just season them like you would the beef. You can still enjoy all the tasty toppings, like cheese and sauce. If you want to switch things up, try different meats. Ground turkey or chicken can be great substitutes. They offer a lighter taste. Just remember to spice them up with garlic powder, onion powder, and smoked paprika. You can also use lamb or pork for a richer flavor. Each meat gives a unique taste to your burger bowl. The sauce can change the whole dish. Instead of the classic burger sauce, try ranch dressing or a spicy aioli. You can mix Greek yogurt with herbs for a fresh twist too. A balsamic glaze adds sweetness and tang. Explore different flavors to find your perfect match. Each sauce adds a new layer to your burger bowl. You can store leftover burger bowls in the fridge. Use airtight containers for best results. They will stay fresh for about 3 to 4 days. Make sure to separate the sauce if possible. This keeps the lettuce crisp. When you are ready to eat, reheat the bowls gently. Use a microwave or an oven. If using a microwave, heat for about 1 to 2 minutes. Stir halfway through to warm evenly. If you prefer the oven, set it to 350°F (175°C) and heat for 10-15 minutes. This helps keep the potatoes crispy. You can freeze the components, but not the entire bowl. Freeze the cooked beef and potatoes separately. Use freezer bags or containers. They last for about one month. To use, thaw them overnight in the fridge. Reheat as needed for a quick meal. To cook burger bowls, you'll need about 50 minutes in total. First, roast the potatoes for 25-30 minutes at 425°F (220°C). While they roast, you can cook the burger patties for about 8-10 minutes. This timing gives you a warm and tasty meal. Yes, you can use sweet potatoes! They add a nice sweetness to the dish. Just cut them into cubes like regular potatoes. Roast them in the same way for a yummy twist. Sweet potatoes also have extra nutrients, making your burger bowl even healthier. You can serve burger bowls with several sides. A simple side salad adds freshness. You might also enjoy corn on the cob or garlic bread. For a crunchy snack, try serving some tortilla chips. These sides make your meal even more fun and tasty! To sum up, we explored key ingredients for burger bowls, like spices and toppings. I shared step-by-step instructions to make your dish, from roasting potatoes to cooking patties. Tips helped you perfect your method and customize your bowls. We covered variations for vegetarians and different sauces too. Lastly, I included storage info for leftovers and answers to common questions. Enjoy creating delicious burger bowls that fit your taste and keep your family happy!

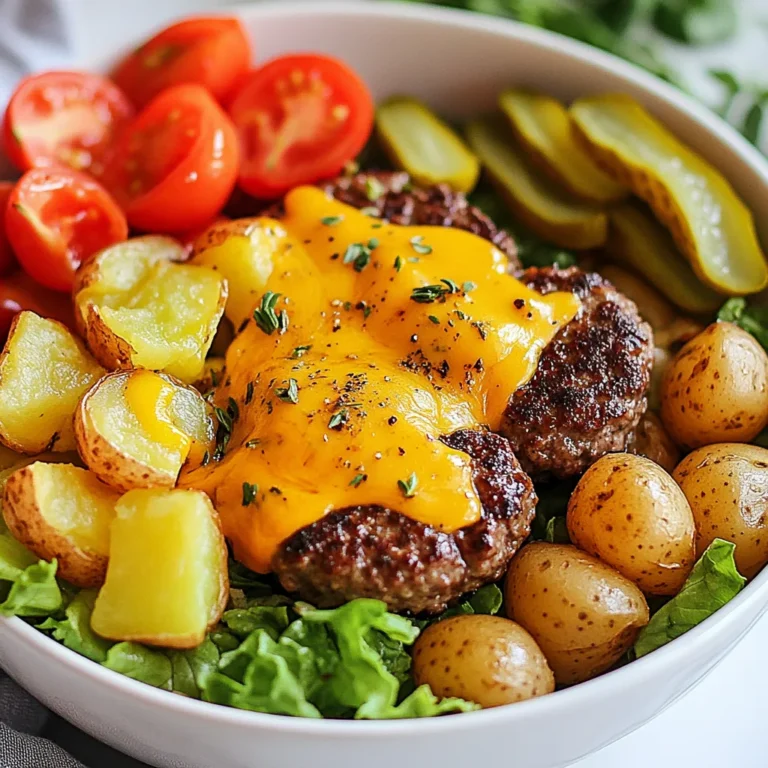
Burger Bowls with Roasted Potatoes Flavorful Meal Idea

- 2 cups milk (dairy or non-dairy) - 1/4 cup pumpkin puree - 2 tablespoons cocoa powder - 2 tablespoons sugar (adjust to taste) - 1/2 teaspoon pumpkin spice blend (or adjust to taste) - 1/4 teaspoon vanilla extract - A pinch of salt - Whipped cream for topping - Ground cinnamon for garnish To make pumpkin spice hot chocolate, you need simple ingredients. Start with milk, which can be dairy or non-dairy. I love using almond milk for a nutty flavor. Next, you need pumpkin puree. This adds creamy texture and a rich taste. Cocoa powder gives the drink its chocolatey essence. Sweeten it with sugar, but adjust it to your liking. The pumpkin spice blend brings that warm, cozy flavor. This usually includes cinnamon, nutmeg, and clove. A dash of vanilla extract enhances the overall taste. Lastly, just a pinch of salt balances the sweetness. Don't forget the whipped cream and ground cinnamon for topping! These make the drink look and taste even better. Start by pouring 2 cups of milk into a medium saucepan. You can use dairy or non-dairy milk for this recipe. Next, add 1/4 cup of pumpkin puree. Whisk the two together well. Heat the mixture over medium heat for about 3-5 minutes. Watch closely; you want it warm, not boiling. Once your base is warm, add 2 tablespoons of cocoa powder and 2 tablespoons of sugar. You can adjust the sugar to your taste. Don't forget to add 1/2 teaspoon of pumpkin spice blend and 1/4 teaspoon of vanilla extract. A pinch of salt will boost the flavors. Stir continuously. This step is crucial; it helps dissolve the cocoa and sugar fully while keeping it smooth. After mixing, take a moment to taste your hot chocolate. If you want it sweeter, add more sugar. For a stronger spice flavor, increase the pumpkin spice blend. Remember, small changes can make a big difference. Adjust slowly, tasting as you go, to find the perfect balance for your cozy drink. To make your hot chocolate smooth, focus on texture. Use a whisk to blend the milk and pumpkin puree. Whisk vigorously for about three to five minutes. This helps create a creamy base. Once you add other ingredients, whisk continuously. This keeps the cocoa and sugar from clumping. For toppings, think whipped cream and ground cinnamon. They add flavor and a festive look. You can also try marshmallows or chocolate shavings. Pair your drink with seasonal treats like cookies or pumpkin bread. This makes for a cozy snack time. You will need a medium saucepan for heating. A whisk is key for mixing. If you don’t have a whisk, use a fork. A ladle helps pour hot chocolate into mugs. For a fun twist, use a frother to whip up your milk. This gives your drink a special touch. {{image_2}} You can make pumpkin spice hot chocolate without dairy. Use non-dairy milk like almond, oat, or coconut. Each option gives a different flavor. Almond milk adds a nutty taste. Oat milk makes it creamy, while coconut milk gives a tropical twist. If you have allergies, check labels. Some non-dairy milks may have added sugars or flavors. To make your hot chocolate more festive, try adding peppermint. Peppermint pairs well with pumpkin and cocoa. Just add a few drops of peppermint extract. You can also explore other spices. Nutmeg and ginger can add warmth. A dash of cayenne can bring heat. Experiment with what you like best! If you want a healthier option, use natural sweeteners. Maple syrup or honey can replace regular sugar. Adjust the amount to fit your taste. If you prefer less sweet hot chocolate, cut back on sugar. You can always taste and adjust. This way, your drink is just right for you! To store leftover hot chocolate, let it cool first. Pour it into a clean container. I recommend using an airtight jar or a glass bottle. This keeps it fresh for later. You can put it in the fridge for up to 3 days. Just remember to shake it before you drink it again. For long-term storage, you can freeze pumpkin spice hot chocolate. Use a freezer-safe container or ice cube trays for smaller portions. When you want some, take it out and thaw it in the fridge overnight. To reheat, pour it into a saucepan. Heat it gently on low. Stir it well to mix everything smoothly again. In the fridge, pumpkin spice hot chocolate stays fresh for about 3 days. If you see any changes in color or smell, it’s best to toss it. Also, if it separates or develops lumps, don’t drink it. Always trust your senses! To make pumpkin spice hot chocolate from scratch, start with simple steps. First, heat 2 cups of milk and 1/4 cup pumpkin puree in a pan. Whisk them together until warm, about 3-5 minutes. Next, mix in 2 tablespoons cocoa powder, 2 tablespoons sugar, and 1/2 teaspoon pumpkin spice blend. Add 1/4 teaspoon vanilla extract and a pinch of salt. Stir until everything is hot but not boiling. Taste and adjust if needed. Pour it into mugs and top with whipped cream and cinnamon. Yes, you can make this recipe vegan! Use non-dairy milk like almond, oat, or coconut milk instead of regular milk. For the whipped cream, choose a vegan option. The rest of the ingredients, like pumpkin puree and cocoa powder, are already vegan-friendly. This way, you can enjoy the same rich flavor without dairy. To adjust sweetness, taste your hot chocolate before serving. If it’s not sweet enough, add more sugar, one teaspoon at a time. Stir well after each addition to blend it in. For a different approach, try using honey or maple syrup for natural sweetness. Adjusting sweetness lets you make the drink perfect for your taste. You can find pumpkin spice hot chocolate at many cafes and stores during fall. Popular cafes like Starbucks offer seasonal drinks. You can also look for brands like Ghirardelli or Land O' Lakes in grocery stores. These options let you enjoy the flavor without making it at home. Be sure to check local shops for unique blends, too! This blog covered making pumpkin spice hot chocolate from scratch. We explored ingredients, step-by-step instructions, and helpful tips. You learned about dairy-free options and how to store leftovers. Now, enjoy crafting your perfect cup. Experiment with flavors to find your unique twist. This drink warms you up while celebrating fall. Dive into this tasty treat and share it with friends. You’ll love how simple and delightful it can be!

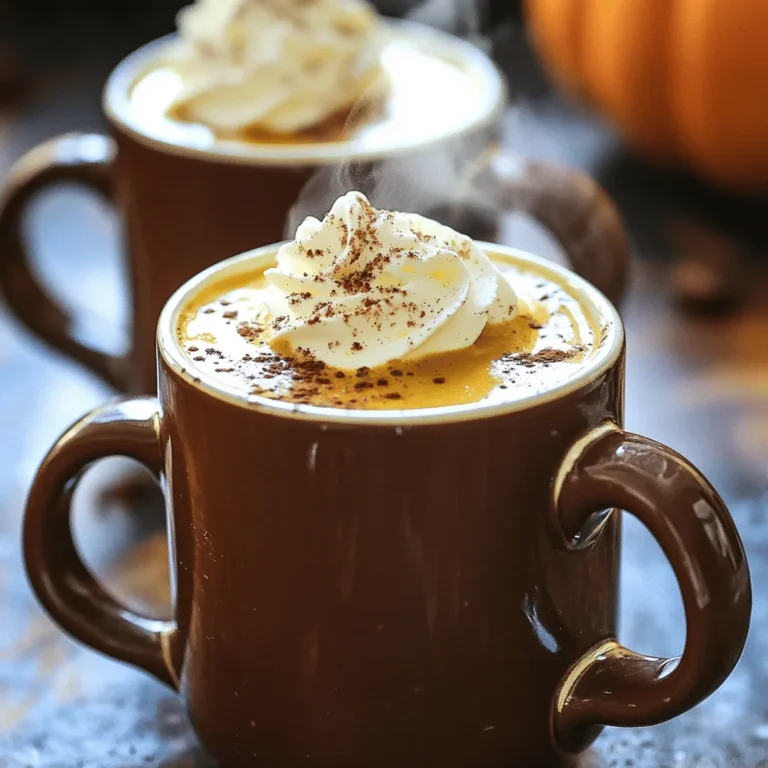
Pumpkin Spice Hot Chocolate Decadent Cozy Treat

PREV 1 … 25 26 27 … 56 NEXT
go kitchen now

explore

DessertsDinnerAppetizersDrinks

Our Policies

  • Cookie Policy
  • Copyright Policy
  • Disclaimer
  • GDPR Policy
  • Terms Of Use
Back to Top
  • About
  • Contact Us
  • Privacy Policy
© 2025 go kitchen now