FREE DINNER EBOOK! Get your copy!
  • Cookie Policy
  • GDPR Policy
  • Disclaimer
  • Terms Of Use
  • Visit my other site: Fun Cookie Recipes
go kitchen now
  • Home
  • Dinner
  • Desserts
  • Drinks
  • Appetizers
  • Contact
  • About
  • Privacy Policy
  • Home
  • Dinner
  • Desserts
  • Drinks
  • Appetizers
  • Contact
  • About
  • Privacy Policy
  • Cookie Policy
  • GDPR Policy
  • Disclaimer
  • Terms Of Use
Visit my other site: Fun Cookie Recipes

HOME / CATEGORIES /

Latest

To make bakery-style lemon poppy seed muffins, you will need fresh and flavorful ingredients. Here’s what to gather: - 2 cups all-purpose flour - 1 cup granulated sugar - 1 tablespoon baking powder - 1/2 teaspoon baking soda - 1/2 teaspoon salt - 1/4 cup poppy seeds - 1/2 cup unsalted butter, melted - 1 cup buttermilk - 2 large eggs - Zest of 2 lemons - 1/4 cup freshly squeezed lemon juice - 1 teaspoon vanilla extract - Optional: Powdered sugar for dusting Each ingredient plays a key role in building flavor and texture. The all-purpose flour provides structure, while granulated sugar adds sweetness. Baking powder and baking soda help the muffins rise, making them light and fluffy. Poppy seeds add a nice crunch and a unique taste. The melted butter brings richness, and buttermilk keeps the muffins moist. Eggs bind the mixture together. The lemon zest and juice bring a bright flavor that pairs perfectly with the poppy seeds. Lastly, vanilla extract enhances the overall taste. If you want a sweet finish, you can dust the muffins with powdered sugar before serving. This adds a charming touch and makes your muffins look even more delightful. - Preheat the oven to 350°F (175°C). - Prepare the muffin tin by using paper liners or non-stick spray. Start by heating your oven. It needs to be hot for the muffins to rise well. While it warms, get your muffin tin ready. You can use liners or spray it with non-stick spray. Both work great. - Combine flour, sugar, baking powder, baking soda, salt, and poppy seeds. Next, grab a large bowl. Add two cups of all-purpose flour. Then, mix in one cup of granulated sugar. Add one tablespoon of baking powder, half a teaspoon of baking soda, and half a teaspoon of salt. Finally, sprinkle in a quarter cup of poppy seeds. Whisk everything together until it looks fluffy and mixed well. - Mix melted butter, buttermilk, eggs, lemon zest, lemon juice, and vanilla extract. Now, take another bowl for the wet ingredients. Pour in half a cup of melted butter. Then, add one cup of buttermilk. Crack in two large eggs. Grate the zest from two lemons and squeeze in a quarter cup of lemon juice. Add one teaspoon of vanilla extract. Whisk until it’s smooth. - Fold wet ingredients into dry ingredients without overmixing. Pour the wet mixture into the bowl with the dry ingredients. Use a spatula to fold them together. Be gentle. You want to mix until just combined. A few lumps are fine. Overmixing can make the muffins tough. - Portion batter into muffin cups. Take a spoon or an ice cream scoop and fill each muffin cup about two-thirds full. This gives them room to rise without spilling over. - Bake muffins for 18-22 minutes and cool on a wire rack. Now, place your muffin tin in the oven. Set a timer for 18 to 22 minutes. Check with a toothpick. It should come out clean when the muffins are done. Once baked, let them cool in the tin for five minutes. Then, move them to a wire rack to cool completely. To get soft and fluffy muffins, do not overmix the batter. When you combine the wet and dry ingredients, stir until just combined. It's okay to have a few lumps. Overmixing makes the muffins tough. Also, use room temperature ingredients. This helps the batter mix well and rise nicely. Want more zing? Add extra lemon zest or juice. This makes the flavor pop! You can also choose high-quality vanilla extract. A good extract adds depth and richness to your muffins. For a lovely finish, dust the muffins with powdered sugar. It makes them look fancy and adds a sweet touch. You can also try adding a simple glaze for extra sweetness. A lemon glaze made from icing sugar and lemon juice works great! {{image_2}} For a gluten-free version, you can use a gluten-free flour blend. Look for a blend that includes xanthan gum. This helps mimic the elasticity of wheat flour. You can also try almond flour or coconut flour, but these may change the texture. Always check the packaging for best results. You can make your muffins even more fun by adding fruits. Try folding in fresh blueberries or raspberries into the batter. They add a burst of flavor and color. Another twist is to substitute almond extract for vanilla. This will give a nutty flavor that pairs well with lemon. If you want to change the sweetness, consider using honey or maple syrup. These natural sweeteners add a unique flavor. You may need to adjust the liquid in your recipe when using these alternatives. Start by reducing the buttermilk slightly to keep the right texture. Store your bakery-style lemon poppy seed muffins at room temperature. Place them in an airtight container. This keeps them soft and fresh. If you live in a hot climate, consider refrigeration. Cold air can dry out muffins, so wrap them tightly in plastic wrap before placing them in the fridge. To freeze muffins, first let them cool completely. Then, wrap each muffin in plastic wrap. Place wrapped muffins in a freezer-safe bag. Squeeze out as much air as possible. They can last up to three months in the freezer. When you want one, just take it out and let it thaw at room temperature. To reheat your muffins, preheat your oven to 350°F (175°C). Place muffins on a baking sheet. Heat them for about 10 minutes. You can also use the microwave. Microwave each muffin for about 15-20 seconds. Enjoy them warm to bring back that fresh-baked taste! To keep your muffins moist, use buttermilk. It adds moisture and flavor. Also, do not overbake them. Baking them just until a toothpick comes out clean helps. Let them cool in the pan for a few minutes. This helps keep some moisture in. Yes, you can make these muffins ahead of time. Bake them and let them cool completely. Store them in an airtight container. They will stay fresh for about three days at room temperature. You can also freeze them for up to three months. Just wrap them well in plastic wrap. If your muffins are too dense, check your mixing method. Overmixing can lead to dense muffins. Make sure to fold the wet and dry ingredients gently. Also, check your baking powder. If it is old, it may not work well. Fresh baking powder helps create light, fluffy muffins. Yes, you can make these muffins without poppy seeds. Just leave them out of the recipe. You can add other flavors instead, like blueberries or nuts. This allows you to enjoy the lemon flavor without the poppy seeds. These muffins last about three days at room temperature. Keep them in an airtight container. This helps prevent them from drying out. Enjoy them fresh for the best flavor and texture. In this post, we explored how to make lemon poppy seed muffins from scratch. You learned about the ingredients, clear steps, and useful tips for great results. Remember, not overmixing your batter is key for the perfect texture. You can also add your favorite flavors or sweeteners for a fun twist. With proper storage, these muffins can last longer and stay fresh. Enjoy baking, and treat yourself to these delicious muffins!

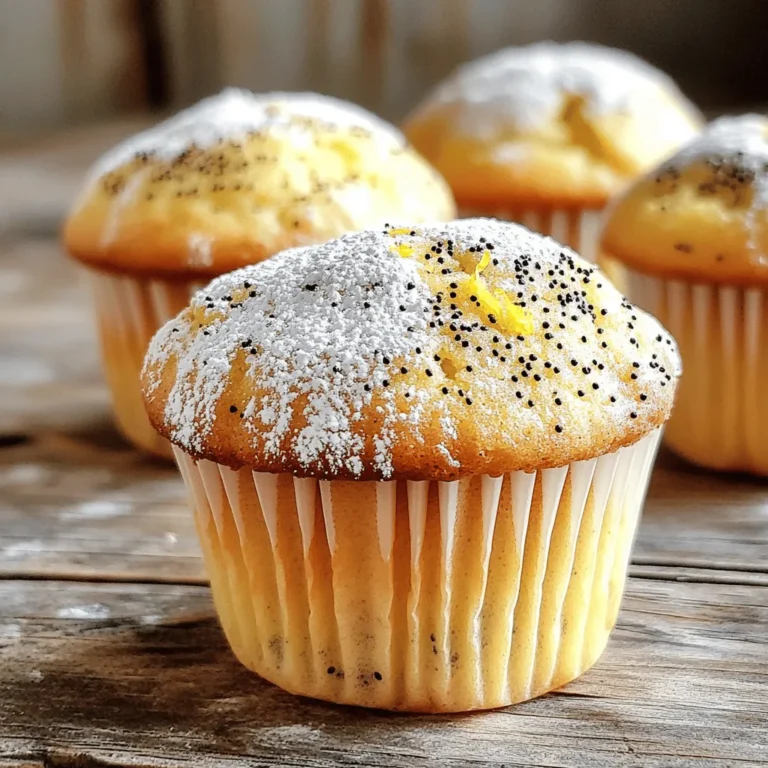
Bakery-Style Lemon Poppy Seed Muffins Delightful Treat

For this creamy pesto tortellini soup, you need a few key items. Here’s what you'll need: - 1 tablespoon olive oil - 1 small onion, diced - 2 cloves garlic, minced - 4 cups vegetable broth - 1 cup heavy cream - 1 cup basil pesto - 1 package (9 oz) cheese tortellini (fresh or frozen) - 1 cup cherry tomatoes, halved - 2 cups fresh spinach - Salt and pepper to taste - Grated Parmesan cheese for serving - Fresh basil leaves for garnish The olive oil helps to sauté the onion and garlic. The onion adds sweetness, while the garlic brings flavor. Vegetable broth gives the soup a rich base. Heavy cream makes it creamy and smooth. Basil pesto adds a fresh, herbaceous taste. Tortellini is the star of the dish, providing a delightful bite. Cherry tomatoes offer sweetness and color. Fresh spinach adds nutrition and a pop of green. Garnishes can elevate your soup. Here are some options to consider: - Grated Parmesan cheese - Fresh basil leaves - Crushed red pepper flakes for heat - A drizzle of olive oil for richness These toppings add flavor and texture. Parmesan gives a salty kick. Fresh basil enhances the herb taste. Red pepper flakes can spice things up. You can easily modify this recipe for different diets. Here are some ideas: - Use coconut milk instead of heavy cream for a dairy-free option. - Swap cheese tortellini for gluten-free tortellini. - For a vegan version, use vegetable broth, coconut milk, and vegan pesto. These changes keep the soup tasty while fitting your needs. Feel free to mix and match based on what you have. Start by heating the olive oil in a large pot over medium heat. Once hot, add the diced onion. Cook it for about 3-4 minutes until it turns soft and clear. This step builds the soup's flavor. Next, add the minced garlic and stir it for 1 minute. Keep an eye on it so it doesn’t burn. The smell will be amazing! Pour in the vegetable broth and bring it to a boil. This will create a rich base for your soup. When it starts boiling, add the heavy cream and basil pesto. Stir them together well. The creamy texture and basil flavor mix perfectly. This is where the magic happens, and your soup starts to look delicious! Now it’s time to add the tortellini. Follow the package instructions for cooking time, usually about 5-7 minutes. When the tortellini is soft, stir in the halved cherry tomatoes and fresh spinach. Cook for another 2-3 minutes until the spinach wilts. This adds color and nutrition to your soup. Lastly, season with salt and pepper to taste. Serve it hot with grated Parmesan cheese and fresh basil on top. Enjoy! To keep your soup nice and creamy, use heavy cream. It blends well with the pesto. You can also add a bit more pesto for extra flavor. If you want a lighter option, try half-and-half instead. Just remember, it may not be as thick. Stir the cream in slowly to prevent curdling. Fresh ingredients make a big difference in flavor. Use fresh spinach instead of frozen for better taste and texture. Look for vibrant cherry tomatoes; they should feel firm and look shiny. When choosing tortellini, go for fresh if you can find it. It cooks faster and tastes better. If your soup is too thick, add more vegetable broth or cream. Stir well and let it heat up. If you find it too salty, add a sliced potato. Let it cook for a few minutes, then remove the potato. It will soak up some salt. For a bland taste, add more pesto or a splash of lemon juice. This will brighten the flavors. {{image_2}} You can switch up your pasta in this soup. Instead of tortellini, try using small shells or bowtie pasta. These shapes hold the creamy broth well. You can also use whole wheat or gluten-free pasta for a healthier option. Just keep an eye on cooking times. Fresh pasta cooks faster than dried pasta. Want to make your soup heartier? Add some protein! Cooked chicken, shrimp, or sausage can fit right in. If you want a vegetarian option, try chickpeas or white beans. Just add them in when the tortellini is cooking. This way, they warm up nicely and blend with the flavors. Spice up your soup with extra flavors. Consider adding a pinch of red pepper flakes for heat. Lemon zest can add a fresh pop. You could also throw in some Italian herbs like oregano or thyme. For a twist, try sun-dried tomatoes or artichoke hearts. These additions can really boost the taste and make your soup unique! After enjoying your creamy pesto tortellini soup, let it cool first. Then, pour it into an airtight container. Make sure it is sealed well to keep out air. You can keep leftovers in the fridge for up to three days. If you want to enjoy it later, freezing is a great option. To reheat, pour the soup into a pot. Heat it on low to medium heat. Stir often to avoid burning. You can also use the microwave. Place the soup in a microwave-safe bowl. Heat it in short bursts, stirring in between. Add a splash of broth or cream if it gets too thick. If you want to freeze the soup, use a freezer-safe container. Leave some space at the top, as the soup will expand when frozen. It can last for up to three months in the freezer. To enjoy it later, thaw it in the fridge overnight before reheating. Yes, you can skip the cream. Use a non-dairy milk like almond or oat milk instead. This will keep the soup creamy without the dairy. If you want, add a little more pesto for extra flavor. You can also blend cashews or silken tofu for creaminess. If you don't have pesto, try using spinach or arugula. Blend them with olive oil, nuts, and garlic for a quick sauce. You can also use sun-dried tomatoes for a nice twist. A mix of herbs like basil and parsley can work too. Just add olive oil to make it smooth. This recipe is almost vegetarian. Just make sure to use vegetable broth instead of chicken broth. The tortellini should also be cheese-filled and not contain meat. This way, you’ll have a tasty vegetarian soup full of flavor. This blog post covered essential ingredients for the soup, step-by-step instructions, and helpful tips. We explored ways to customize the recipe with variations and storage methods. Remember, cooking should be fun and flexible. You can change ingredients based on your taste and needs. Whether you want something classic or creative, you now have options. Enjoy making this soup your way and share your results!

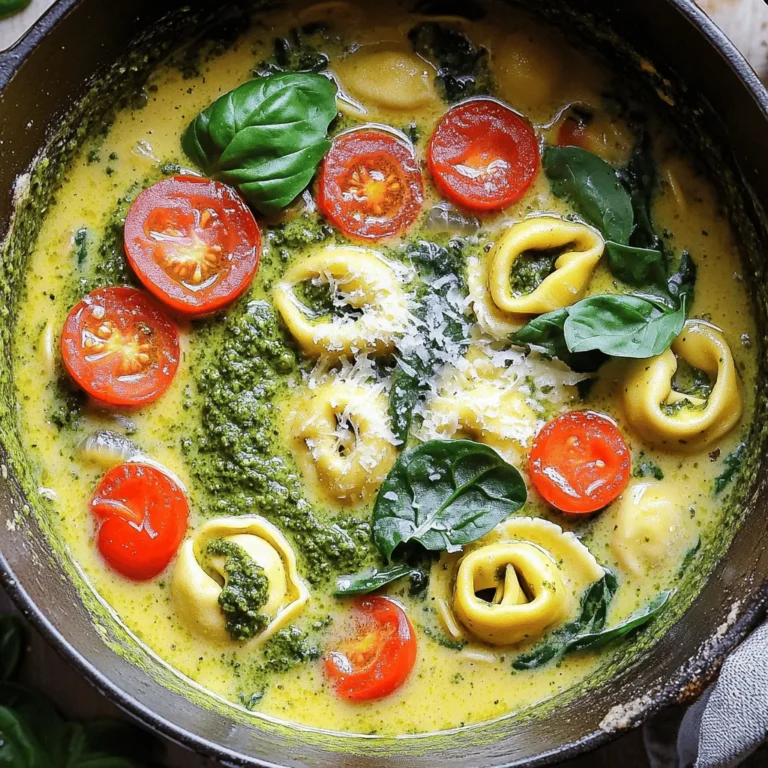
Creamy Pesto Tortellini Soup Easy One-Pot Recipe

- 2 cups sushi rice - 2 ½ cups water - 1 cup coconut milk - 1 cup granulated sugar - 1 teaspoon vanilla extract - 1 tablespoon rice vinegar - 1 tablespoon gelatin powder - 1 cup diced mango - 1 cup diced kiwi - 1 cup diced strawberries - 1 cup shredded coconut (unsweetened) - ½ cup toasted sesame seeds - Edible flowers (for garnish, optional) Sushi Rice: This rice is sticky and helps hold the cake together. Rinsing it removes extra starch. This step keeps the rice from getting gummy. Coconut Milk: This milk adds creaminess and a tropical flavor. It makes the cake moist and rich. Granulated Sugar: Sugar sweetens the cake. It balances the flavors from the fruit and coconut milk. Gelatin Powder: This helps the cake set firmly. It gives the cake a nice shape when you flip it out of the pan. Rice Vinegar: This adds a hint of tang. It brightens the overall flavor of the cake. Diced Fruits: Mango, kiwi, and strawberries give the cake color and freshness. They provide a burst of flavor with each bite. Shredded Coconut: This adds texture and a fun look. You can choose unsweetened for a more natural taste. Toasted Sesame Seeds: These seeds add a nutty crunch. They also make a great garnish on top of the cake. Edible Flowers: These are optional but can make your cake beautiful. They add color and a touch of elegance. This unique dessert is full of flavor and fun. Each bite brings a taste of sushi in cake form! {{ingredient_image_1}} Start by rinsing the sushi rice. Use cold water until it runs clear. This step removes excess starch. It helps the rice stay fluffy. In a medium pot, mix the rinsed rice with water. Heat until it boils, then cover and reduce the heat. Let it simmer for 20 minutes. After that, remove it from heat and let it sit for 10 minutes. Do not lift the lid during this time. This resting helps the rice firm up nicely. While the rice rests, prepare the coconut mixture. In a bowl, combine coconut milk, sugar, vanilla, rice vinegar, and gelatin. Mix well until the gelatin dissolves completely. This mixture will add sweetness and creaminess to your cake. Once the rice has cooled, fluff it with a fork. Gently fold the rice into the coconut mixture. Make sure each grain of rice gets coated well. This is what makes the cake moist and flavorful. Grease a Bundt pan with non-stick spray or coconut oil. Press one-third of the rice mixture into the bottom. This forms the base layer. Next, add a layer of diced mango on top. Then, add another third of the rice mixture. Press it down firmly for a good shape. Repeat this process with diced kiwi, followed by the last third of the rice mixture on top. Ensure all the fruit is covered completely. This layering gives the cake its beautiful look. Once assembled, chill the cake in the fridge. Let it set for at least 4 hours, but overnight is best. When ready, carefully invert the Bundt pan onto a serving plate. Tap or shake the pan gently to release the cake. It should come out easily. To garnish, sprinkle shredded coconut and toasted sesame seeds on top. For a colorful touch, add edible flowers if you like. Slice the cake and serve it chilled. Enjoy this fun and unique treat! To cook sushi rice well, rinse it first. Wash the rice under cold water. Keep rinsing until the water runs clear. This step takes away extra starch. It helps the rice stay fluffy. Use a medium saucepan for cooking. Combine 2 cups of rice with 2 ½ cups of water. Bring this mix to a boil. Once boiling, turn the heat low. Cover and let it simmer for 20 minutes. After cooking, let it rest for 10 minutes without lifting the lid. This step lets the rice finish cooking and become tender. To get the perfect coconut mixture, mix 1 cup of coconut milk with 1 cup of sugar. Add 1 teaspoon of vanilla extract and 1 tablespoon of rice vinegar. Finally, add 1 tablespoon of gelatin powder. Whisk until everything blends well. Make sure the gelatin dissolves fully. This mixture should feel smooth and pourable. It will coat the rice nicely and add flavor. When layering in a Bundt pan, start by greasing it. Use non-stick spray or coconut oil. Press one-third of the rice mixture into the bottom. This forms a solid base. Next, add a layer of diced mango. Then, spread another third of the rice on top. Press down firmly to pack it. Follow with diced kiwi and finish with the last of the rice. This order helps to keep the layers even. Make sure to cover all fruit well. After layering, chill the cake in the fridge for at least 4 hours. Letting it set overnight works best. Pro Tips Rinse the Rice: Always rinse sushi rice under cold water until the water runs clear to remove excess starch for a non-gummy texture. Chill Time Matters: For the best texture and flavor, allow the Bundt cake to chill overnight. This helps the gelatin set perfectly. Layering Fruits: Press down firmly while layering the rice and fruits to ensure the cake holds its shape when inverted. Garnish Creatively: Enhance the visual appeal by using a mix of shredded coconut, toasted sesame seeds, and edible flowers on top. {{image_2}} You can change the fruits in the sushi Bundt cake. Try using berries like blueberries or raspberries. These fruits add a burst of flavor. You can also swap mango, kiwi, or strawberries for peaches or pineapples. Each fruit brings a new taste. Mix and match to find your favorite combo. The key is to choose ripe fruits for the best flavor. Want a vegan sushi Bundt cake? Simply replace the gelatin with agar-agar. This plant-based thickener works well. Use a dairy-free milk, like almond or oat milk, instead of coconut milk. For a gluten-free cake, ensure your rice vinegar is gluten-free as well. These changes keep the cake tasty while meeting dietary needs. Garnishing your sushi Bundt cake can make it pop! Sprinkle toasted sesame seeds on top for a nice crunch. Add bright edible flowers for a beautiful look. You can also drizzle a little coconut sauce over each slice. This adds flavor and makes each piece special. Get creative and have fun with the presentation! To keep your sushi Bundt cake fresh, store it in the fridge. Wrap it tightly with plastic wrap. This helps keep moisture in and prevents drying out. You can also use an airtight container. If you do this, the cake stays fresh for up to three days. Always slice the cake before serving to make it easier to store. If you want to save some cake for later, freezing works well. First, slice the cake into pieces. Then wrap each piece in plastic wrap. After that, put them into a freezer-safe bag or container. You can freeze the cake for up to a month. When you are ready to eat it, take it out and let it thaw in the fridge overnight. The sushi Bundt cake stays good in the fridge for about three days. If frozen, it stays fresh for one month. You don’t need to reheat the cake; it tastes best chilled. If you want it warmer, let it sit at room temperature for about 15 minutes before serving. This brings out the flavors nicely. No, you should not use regular rice. Sushi rice has a specific sticky texture. This helps the cake hold its shape and layers well. Regular rice will not give you the same results. It may break apart and not set properly. The cake needs at least 4 hours to chill and set. For the best flavor and texture, let it chill overnight. This time allows all the flavors to meld together and makes slicing easier. Yes, you can make it in advance. The Sushi Bundt Cake stays fresh for about three days in the fridge. Just cover it well to keep it moist. Making it ahead of time saves you stress on the day of your event. You can serve this cake with a side of coconut sauce. A scoop of vanilla ice cream pairs well too. Fresh fruit or whipped cream are great options. These add flavor and make your dessert even more enjoyable! Sushi Bundt Cake offers a fun twist on traditional desserts. We covered key ingredients, step-by-step instructions, and practical tips. You learned about variations and how to store leftovers properly. Remember, this cake is versatile and easy to adapt. With creativity, you can impress friends and family. Enjoy your baking adventure and share your unique creations! This cake will surely be a hit at any gathering.

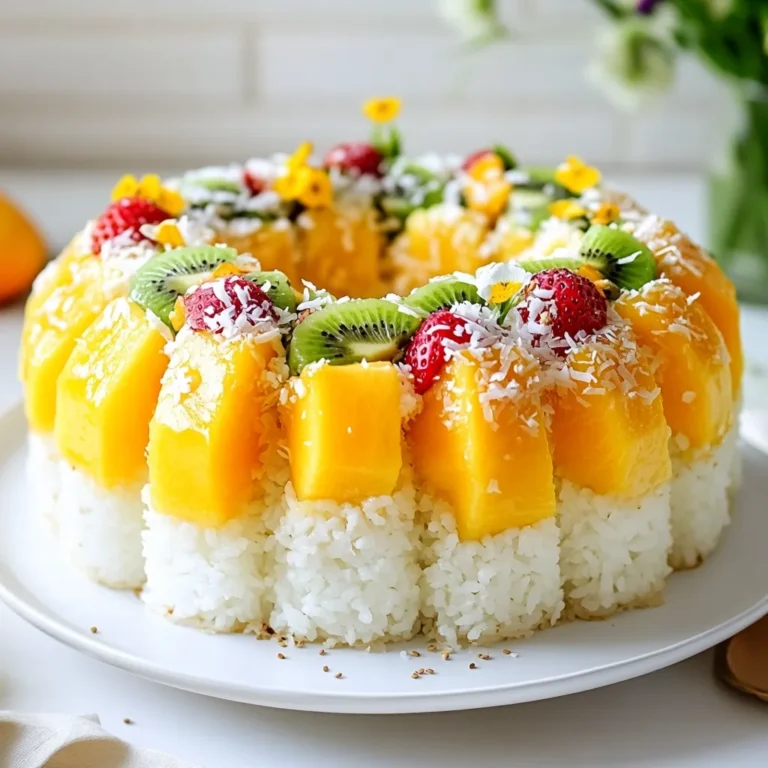
Sushi Bundt Cake Delightful and Unique Dessert Recipe

- 1 cup rolled oats - 1/2 cup almond butter - 1/4 cup honey or maple syrup - 1 cup white chocolate chips - 1/2 cup dried cranberries, chopped - 1/4 teaspoon salt - Optional: 1/4 cup shredded coconut - Almond butter alternatives: If you can't find almond butter, try peanut butter or sunflower seed butter. Both work well and add their own unique flavors. - Sweetener options: You can swap honey for agave syrup or use stevia for a lower-calorie option. Just keep in mind that sweeteners can change the final taste. - Using different mix-ins: Feel free to get creative! You can add nuts, seeds, or even dried fruits like apricots or raisins. These will change the texture and taste, making your cookies unique. Start by mixing the almond butter, honey, vanilla, and salt. Stir these in a medium bowl until smooth. Next, add the rolled oats, cranberries, white chocolate chips, and shredded coconut if you want. Gently fold these together until everything is well mixed. Now, scoop the mixture into small balls. Aim for about one inch in size. Place these balls onto a baking sheet lined with parchment paper. If you want, flatten each ball a bit to make them look more like cookies. Put the baking sheet in the fridge. Let the cookies chill for at least thirty minutes. This helps them set up nicely. After chilling, enjoy your tasty treats! If you have leftovers, store them in an airtight container in the fridge. To get the best texture, mix your almond butter and sweetener well. This blend should be smooth with no lumps. When adding oats and other ingredients, fold them gently. This keeps the mix fluffy and light. If you stir too hard, the cookies can become dense. Always check that every piece is coated. This gives you a great taste in each bite. When serving, arrange the cookies on a nice plate. You can sprinkle extra cranberries on top to add color. A drizzle of melted white chocolate can make them look fancy. This small touch makes a big difference for guests. Keep the display simple yet elegant. One big mistake is overmixing your dough. If you mix too much, the cookies can taste tough. On the flip side, under-mixing can leave dry spots. Both will affect the texture. Chilling is key, too. If you don’t chill long enough, the cookies won’t hold their shape. Make sure they sit in the fridge for at least 30 minutes. This step is crucial for a great outcome. {{image_2}} You can easily change up the flavor of these cookies. Adding nuts or seeds gives a nice crunch. Try using chopped almonds or sunflower seeds. They add a boost of protein and healthy fats. You can also swap out the white chocolate chips. Dark or milk chocolate chips work well too. Each type adds its own unique taste. Want a vegan-friendly option? Just use maple syrup instead of honey. You can also find vegan white chocolate chips. For a gluten-free option, make sure to use certified gluten-free oats. This way, everyone can enjoy the cookies without worry. Make these cookies festive for holidays! Add some cinnamon or nutmeg for a warm spice. You can also mix in seasonal fruits like dried apples or pumpkin. This adds a fun twist to the classic recipe. These small changes can make your cookies special for any occasion. To keep your cookies fresh, store them in an airtight container. This helps keep them soft and tasty. You can place them in the fridge for up to a week. Just make sure they are not exposed to air. You can freeze these no-bake cookies for later. To freeze, place them in a single layer on a baking sheet. Once they are firm, put them in a freezer-safe bag. Remove as much air as possible. They will stay good for up to three months. To thaw, just take them out and let them sit at room temperature for about 15 minutes. You can also warm them slightly in the microwave. These cookies are best enjoyed fresh. They stay good for about a week in the fridge. Look for signs of spoilage like a change in smell or texture. If they smell off or feel sticky, it's best to toss them. You can bake these cookies, but it changes their texture. Baking gives a chewy and crisp cookie, unlike the soft no-bake version. If you want to bake them, preheat your oven to 350°F (175°C). Shape the mixture into balls and place them on a baking sheet. Bake for about 10-12 minutes. Watch them closely to avoid burning. You may need to adjust the honey or maple syrup amount, as baked cookies can become too sweet. These cookies need about 30 minutes to set in the fridge. This chilling time helps them firm up. For best results, I recommend leaving them for an hour. If you want them extra firm, let them chill overnight. Yes, you can make these cookies without coconut. Just leave it out, and the cookies will still taste great. You can also add other ingredients like nuts or seeds. This keeps the texture nice and chewy. Feel free to get creative with your mix-ins! These no-bake cookies are simple and fun to make. You can use easy ingredients or change them to fit your taste. Follow the steps closely to get a perfect texture. Remember to chill them well for the best results. Also, consider adding nuts or fruits for extra flavor. Store them right to keep them fresh longer. With these tips, you can make the best cookies for any occasion. Enjoy your delicious treats!

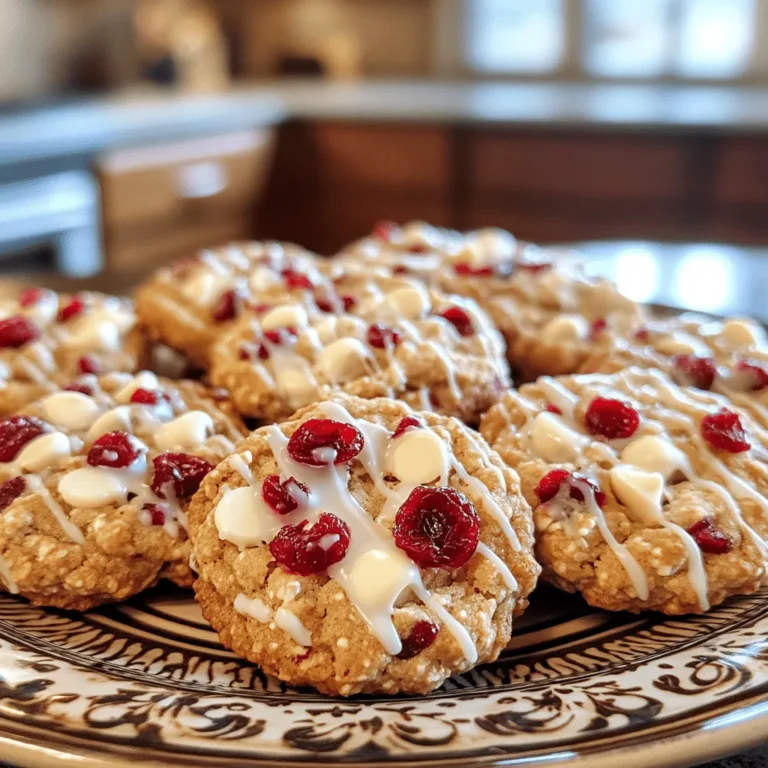
No-Bake White Chocolate Cranberry Cookies Delight

To make these tasty lemon poppy seed muffins, you will need: - 1 ½ cups all-purpose flour - ½ cup granulated sugar - 2 teaspoons poppy seeds - 1 tablespoon baking powder - ½ teaspoon baking soda - ¼ teaspoon salt - 1 large egg - ¾ cup buttermilk (or use milk + 1 tablespoon lemon juice) - ⅓ cup vegetable oil - Zest of 1 lemon - 2 tablespoons fresh lemon juice - Powdered sugar for dusting (optional) If you lack some ingredients, here are good swaps: - Buttermilk: Use regular milk mixed with 1 tablespoon of lemon juice. - Vegetable oil: You can use melted coconut oil or melted butter. - Granulated sugar: Brown sugar adds a slight caramel flavor. - All-purpose flour: Use a gluten-free blend if needed. Fresh ingredients make a big difference. They enhance flavor and texture. Use fresh lemons for zest and juice. Old ingredients can lead to stale muffins. Fresh buttermilk yields better moisture. Always check dates on your baking powder and baking soda. Freshness ensures your muffins rise well and taste great. Start by preheating your oven to 375°F (190°C). This ensures a nice rise on your muffins. Next, prepare your muffin tin. You can use paper liners or lightly grease each cup with cooking spray. This step helps the muffins release easily after baking. In a large bowl, combine the dry ingredients. Add 1 ½ cups of all-purpose flour, ½ cup of granulated sugar, 2 teaspoons of poppy seeds, 1 tablespoon of baking powder, ½ teaspoon of baking soda, and ¼ teaspoon of salt. Whisk these together until they are well mixed. In another bowl, crack 1 large egg and whisk it. Then, pour in ¾ cup of buttermilk, ⅓ cup of vegetable oil, and the zest and juice from 1 lemon. Mix until it looks smooth. Then, carefully pour the wet mixture into the dry ingredients. Gently fold them together until just combined. It’s okay if the batter is a bit lumpy; this keeps the muffins fluffy. Now, it’s time to bake! Use a spoon to divide the batter into each muffin cup. Fill each about two-thirds full. This allows space for rising. Place the muffin tin in your preheated oven. Bake for 15 to 18 minutes. Check for doneness by inserting a toothpick into the center of a muffin. If it comes out clean, they are ready. Once baked, remove the muffins from the oven. Let them cool in the pan for about 5 minutes. After that, transfer them to a wire rack to cool completely. If you like a sweet touch, dust the tops with powdered sugar before serving. Enjoy your fresh and fluffy lemon poppy seed muffins! To get that light and fluffy muffin, mix your batter gently. Overmixing makes muffins dense. When you combine the wet and dry ingredients, stop as soon as you see no dry flour. A few lumps are okay. This keeps air in the batter, helping it rise. One big mistake is not preheating the oven. If the oven is not hot, your muffins won’t rise well. Another mistake is filling the muffin cups too full. Fill them only two-thirds full, so they have space to grow. Lastly, always check doneness with a toothpick. If it comes out clean, your muffins are ready. To make your lemon poppy seed muffins even better, think about adding extras. Blueberries or blackberries pair well with lemon. You can also use nuts like almonds for a crunchy bite. A sprinkle of powdered sugar on top adds a sweet finish. Just remember, keep your add-ons balanced so the lemon shines through. {{image_2}} You can make these muffins gluten-free. Start by swapping the all-purpose flour with a gluten-free blend. Use a mix that works for baking. Almond flour or coconut flour can also work, but they change the texture. Adjust the liquid slightly if needed. This helps keep the muffins light and fluffy. Follow the same steps in the recipe. Bake as usual, and enjoy your gluten-free treat! To make vegan lemon poppy seed muffins, switch the egg with a flax egg. Mix 1 tablespoon of ground flaxseed with 2.5 tablespoons of water. Let it sit until it thickens. Also, replace buttermilk with a plant-based milk mixed with lemon juice. Almond milk or soy milk are great choices. Use vegetable oil as before. Follow the recipe steps to bake your vegan muffins. You can easily add more flavors to your muffins. Blueberries or blackberries add a nice burst of juice. Fold in about 1 cup of fresh or frozen berries into the batter. They bring sweetness and color. If you prefer a nutty taste, add sliced almonds. About ½ cup of almonds works well. Just mix them in with the dry ingredients. These simple additions make your muffins even better! To keep your lemon poppy seed muffins fresh, store them in an airtight container. This helps to trap moisture and prevent them from drying out. Place a piece of parchment paper between the muffins. This keeps them from sticking together. You can store them at room temperature for up to three days. If you want them to last longer, consider refrigerating them. Freezing muffins is simple and smart. Let the muffins cool completely before freezing. Wrap each muffin in plastic wrap or foil. Then, place them in a freezer-safe bag or container. Label the bag with the date, so you know how long they’ve been frozen. You can freeze them for up to three months. When you want to enjoy one, take it out and let it thaw at room temperature. Lemon poppy seed muffins have a good shelf life. At room temperature, they can stay fresh for about three days. In the fridge, they can last up to a week. To reheat, simply place a muffin in the microwave for about 15 to 20 seconds. You can also warm them in an oven at 350°F (175°C) for about five minutes. This helps to bring back their fluffy texture. Enjoy your muffins fresh and warm! Yes, you can use regular milk. To mimic buttermilk, add one tablespoon of lemon juice to the milk. Let it sit for five minutes. This makes the milk slightly sour, which helps the muffins rise and adds flavor. To boost the lemon flavor, add more lemon zest. You can also increase the lemon juice to three tablespoons. This extra zest and juice will make your muffins bright and tangy. If you don’t have poppy seeds, try chia seeds or sunflower seeds. Both add texture and a slight crunch. You can also skip the seeds entirely for a simple lemon muffin. This article explored how to make delicious lemon poppy seed muffins. We covered ingredients, step-by-step instructions, and handy tips. I shared ways to achieve that perfect muffin texture and listed fun variations. Always use fresh ingredients for the best taste. Store muffins properly to keep them fresh. Baking can be fun and rewarding. With these tips, you can create great muffins every time. Enjoy baking!

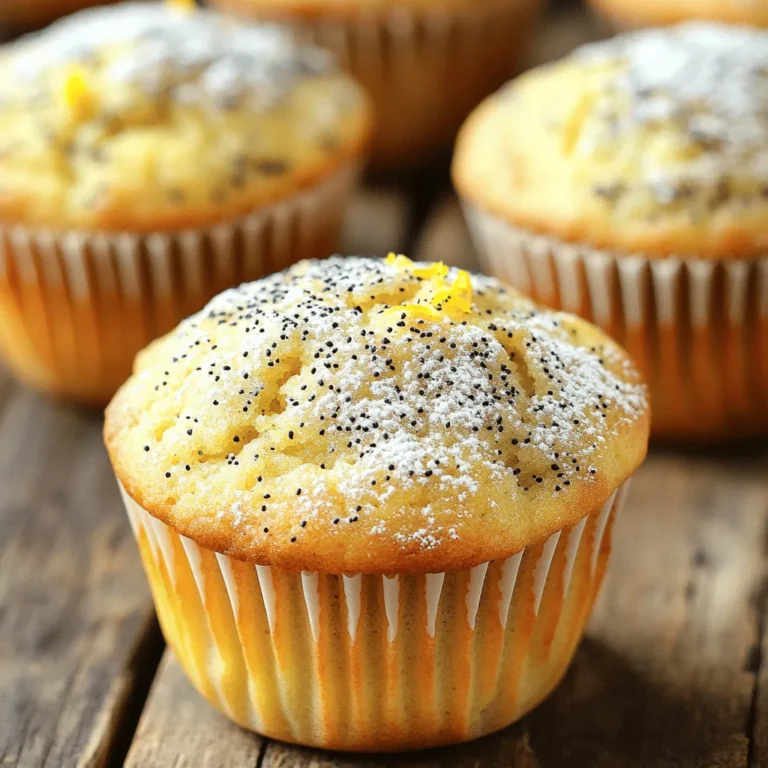
Lemon Poppy Seed Muffins Fresh and Fluffy Recipe

- 1 pound lean ground beef - 1 cup green or brown lentils, rinsed - 1 large onion, diced - 2 cloves garlic, minced - 1 bell pepper (red or green), diced The main ingredients give the chili its heartiness. Lean ground beef adds rich flavor and protein. Lentils bring a good texture and extra nutrients. Fresh vegetables like onion, garlic, and bell pepper add flavor and color. Together, they create a balanced, satisfying dish. - 2 tablespoons chili powder - 1 teaspoon cumin - 1 teaspoon smoked paprika - ½ teaspoon cayenne pepper (adjust for spiciness) - 1 teaspoon salt (to taste) - ½ teaspoon black pepper (to taste) Spices make the chili stand out. Chili powder gives heat and depth. Cumin adds a warm, earthy flavor. Smoked paprika adds a nice smokiness. You can adjust the cayenne for your spice level. Salt and black pepper enhance all the flavors. - 1 can (14 oz) crushed tomatoes - 4 cups vegetable or beef broth Liquids are key for the chili's richness. Crushed tomatoes add a sweet, tangy base. Broth adds depth and moisture. Together, they help the lentils and vegetables cook well and absorb all those lovely flavors. 1. Start with a skillet over medium heat. 2. Add one tablespoon of olive oil to the pan. 3. Place one pound of lean ground beef in the skillet. 4. Use a spoon to break up the beef as it cooks. 5. Cook until the beef is browned, about 5 to 7 minutes. 6. Drain any excess fat from the skillet. 7. Transfer the browned beef into the slow cooker. 1. In the slow cooker, add one diced large onion. 2. Next, add two cloves of minced garlic. 3. Toss in one diced bell pepper, either red or green. 4. Pour in one cup of rinsed green or brown lentils. 5. Add one can of crushed tomatoes, about 14 ounces. 6. Include one can of kidney beans, drained and rinsed. 7. Sprinkle in two tablespoons of chili powder. 8. Add one teaspoon each of cumin and smoked paprika. 9. For a kick, stir in half a teaspoon of cayenne pepper. 10. Season with one teaspoon of salt and half a teaspoon of black pepper. 11. Pour in four cups of vegetable or beef broth. 12. Stir everything together until well mixed. 1. Cover the slow cooker lid securely. 2. Set the slow cooker to low heat for 6 to 8 hours. 3. Alternatively, you can set it to high heat for 4 to 5 hours. 4. Check the chili when finished; it should be thick and hearty. 5. Adjust the seasoning if needed before serving. - Adjusting spice levels: If you like heat, add more cayenne pepper. Taste as you go. For milder chili, cut back on the cayenne. You can also use a pinch of sugar to balance the heat. - Using fresh herbs as garnishes: Fresh cilantro adds a burst of flavor. Sprinkle some on top before serving. You can also try chopped green onions or parsley for a fresh touch. - Checking for doneness: Lentils should be tender but not mushy. Check them after the cooking time. If they need more time, let them cook longer. - Adjusting liquid consistency if needed: If your chili is too thick, stir in more broth. For a thicker chili, let it cook uncovered for a bit. - Bowls presentation ideas: Serve the chili in deep bowls. Top with a scoop of sour cream and a sprinkle of cilantro. Add a lime wedge on the side for a zesty kick. - Optional toppings and accompaniments: Try tortilla chips for crunch. Shredded cheese or avocado also work well. You can even serve it with cornbread for a complete meal. {{image_2}} You can swap beef for turkey or chicken. Both options work well and add lighter flavors. Ground turkey provides a leaner choice with similar taste. Chicken adds a nice twist, making the chili feel fresh. For a vegetarian version, use plant-based protein. Options like lentils or soy crumbles give great texture. They soak up flavors, making every bite delicious. Adding different beans or vegetables can boost your chili. Try black beans or pinto beans for variety. You can also toss in corn for sweetness. Fresh peppers can add heat. Use jalapeños for a spicy kick or bell peppers for mild flavor. Both choices enhance the dish and make it more colorful. You can create Southwest-style variations by adding spices like oregano or coriander. These spices bring warmth and depth to your chili. For a sweet twist, include corn or sweet potatoes. They balance the heat and give a unique taste. You can mix and match these ideas to suit your cravings. Enjoy experimenting with flavors! To store leftovers, first let the chili cool. Use airtight containers to keep them fresh. Place the chili in the fridge. It will stay good for about 3 to 4 days. Label your containers with the date. This helps you keep track of freshness. You can freeze chili for longer storage. Pour cooled chili into freezer-safe bags or containers. Leave some space for expansion. Seal tightly and label them. You can freeze it for up to 3 months. When you're ready to eat, take it out and thaw it in the fridge overnight. For reheating, you have two main options: microwave or stovetop. In the microwave, place the chili in a bowl. Heat in short bursts, stirring often. This keeps the texture nice. On the stovetop, warm it over medium heat. Stir until heated through. Either method works well! Slow Cooker Beef & Lentil Chili can last for about 3 to 5 days in the fridge. To keep it safe, store it in an airtight container. Always check for any off smells or changes in color before eating. If you see anything suspicious, it's best to throw it away. When stored properly, this chili maintains its flavor and texture, making it a great option for meal prep. Yes, you can make this chili in advance. It's a fantastic meal for meal prep. Prepare it a day or two ahead and let the flavors blend. After cooking, cool it completely before storing it in the fridge. To reheat, warm it on the stove or in the microwave. If it thickens too much, you can add a splash of broth or water to loosen it up. You can serve this chili with many tasty sides. Here are a few ideas: - Cornbread: Its sweetness complements the chili's spice. - Rice: White or brown rice makes a filling base. - Tortilla chips: Crunchy chips add texture and fun. - Fresh salad: A light salad balances the meal. - Sour cream: A dollop on top cools the heat. Each of these options enhances the overall meal experience and brings different flavors to your table. Using lean ground beef and lentils, you can create a tasty chili. Start with fresh veggies and spices for more flavor. Follow the steps to brown your beef and combine all ingredients in a slow cooker. Add tips and variations for personalizing your dish. Remember to store leftovers properly and enjoy them later. With these details, you can make a meal that satisfies and warms everyone. Cooking should be fun and rewarding, so get started on your chili today!

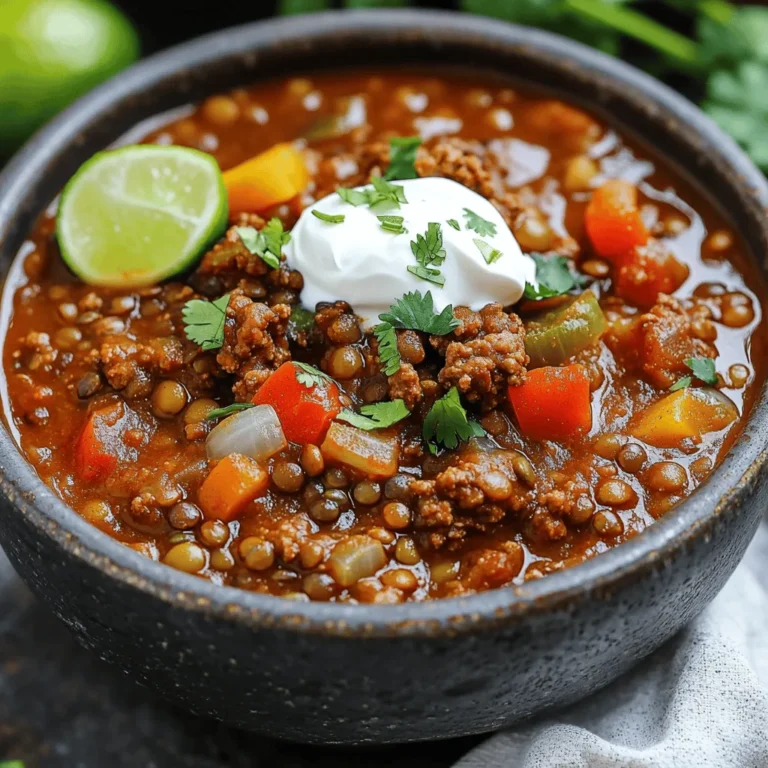
Slow Cooker Beef & Lentil Chili Hearty Comfort Dish

- 4 boneless, skinless chicken thighs - 1 cup pineapple chunks (fresh or canned) - 1 red bell pepper, sliced - 1 green bell pepper, sliced - 1 small red onion, sliced These main ingredients give the dish its great taste. The chicken thighs stay juicy, while pineapple provides a sweet touch. Bell peppers add crunch and color, making the dish bright and fun. - 3 tablespoons soy sauce (low sodium) - 2 tablespoons honey - 1 tablespoon rice vinegar - 2 cloves garlic, minced - 1 teaspoon grated fresh ginger - 1 tablespoon sesame oil The marinade brings all the flavors together. Soy sauce adds saltiness, and honey brings sweetness. Rice vinegar adds a slight tang. Garlic and ginger boost the taste with their strong flavors. Sesame oil adds a nutty richness that makes everything shine. - 1 tablespoon cornstarch (optional, for thickening sauce) - 2 green onions, chopped (for garnish) - Sesame seeds (for garnish) Cornstarch helps thicken the sauce for a nice glaze. Green onions and sesame seeds add brightness and crunch when sprinkled on top. These toppings make the dish look extra special and inviting. 1. Preheat your oven to 400°F (200°C). This ensures even cooking. 2. Line a large sheet pan with parchment paper. It helps with easy cleanup. 3. In a large mixing bowl, whisk together the marinade ingredients. Combine soy sauce, honey, rice vinegar, minced garlic, and grated ginger. 4. Add sesame oil for a rich flavor. If you like a thicker sauce, mix in cornstarch. 1. Coat the chicken thighs with the marinade. Make sure they are well covered. 2. Season with a pinch of salt and pepper. This boosts the taste. 3. Marinate the chicken for at least 15 minutes. You can leave it for up to 30 minutes if you want more flavor. 1. Arrange the marinated chicken in the center of the sheet pan. 2. Surround it with pineapple chunks, red and green bell peppers, and sliced red onion. 3. Pour any leftover marinade over the chicken and veggies. 4. Roast in the oven for 25 to 30 minutes. Check that the chicken reaches 165°F (74°C). The veggies should be tender. 5. For a crispy finish, broil for the last 2-3 minutes. Watch closely to prevent burning. 6. When done, let it rest for a few minutes. Garnish with chopped green onions and sesame seeds before serving. For tasty chicken, marinate for at least 15 minutes. If you have time, go for 30 minutes. This lets the flavors soak in well. Fresh pineapple gives a bright taste. Canned pineapple works too but may be sweeter. Choose what you like best. To check if the chicken is done, use a meat thermometer. It should read 165°F (74°C). This keeps your chicken safe to eat. For a nice caramelized finish, switch to broil for the last 2-3 minutes. Watch closely to avoid burning. Use parchment paper on your sheet pan. This makes cleanup quick and easy. After cooking, just toss it away. For leftovers, store in an airtight container. They last up to three days in the fridge. This keeps your food fresh and safe. {{image_2}} You can swap chicken thighs for chicken breasts. Chicken breasts cook faster, so check them early. If you want something plant-based, try tofu. Just press it to remove excess water. Shrimp is also a great option. It cooks quickly and adds a nice flavor. Feel free to mix in other veggies. Broccoli, snap peas, and carrots work well. Use seasonal veggies to keep it fresh. In summer, try zucchini or asparagus. In fall, consider butternut squash or Brussels sprouts. This adds variety and nutrition. You can change the marinade to fit your taste. Add chili paste for heat or more honey for sweetness. Try orange juice for a citrus twist. For garnishes, use cilantro or chopped peanuts for a crunch. These small changes can create a whole new dish. You can store your sheet-pan teriyaki chicken and pineapple in the fridge for up to four days. To keep it fresh, place the leftovers in an airtight container. Make sure to seal it tightly to prevent moisture loss or any unwanted odors. If you have extra sauce, store it separately to keep everything nice and juicy. If you want to save some for later, freezing works great. Portion the chicken and veggies into freezer-safe bags or containers. Remove as much air as possible to avoid freezer burn. Label the bags with the date, and they can last up to three months. When you’re ready to eat, thaw them in the fridge overnight. Reheat in the oven at 350°F (175°C) for about 20 minutes or until hot. You can also microwave it for a quick meal, but the oven gives better texture. Leftovers are a chance to get creative. You can chop the chicken and veggies and toss them into fried rice or a stir-fry. Adding them to a salad with some greens makes a fresh lunch. You can even use the teriyaki chicken as a filling for tacos. Just warm it up, add some toppings, and enjoy a new dish! Use a meat thermometer to check the chicken's temperature. It should reach 165°F (74°C). This means it is safe to eat. Look for clear juices running from the chicken. The meat should no longer be pink inside. These cues help you avoid undercooked chicken. Yes, meal prepping this dish is easy. First, marinate the chicken and store it in the fridge. You can do this a day ahead. For effective meal prep, pack the chicken and veggies in separate containers. Use airtight containers to keep them fresh. Glass containers work well for storage. Try serving this dish with steamed rice or quinoa. Both will soak up the tasty sauce. You can also add a simple salad for crunch. Consider roasted veggies for extra flavor. The sweet pineapple pairs well with fresh greens. You learned how to make a tasty Sheet-Pan Teriyaki Chicken with Pineapple. By using simple ingredients and easy steps, you can create a flavorful meal loved by all. Remember, marinating the chicken boosts flavor. Don't forget about storage tips to keep leftovers fresh for future meals. This dish is flexible—swap proteins or veggies as you like. Enjoy your cooking and make it your own. Your kitchen adventures with this recipe are just beginning!

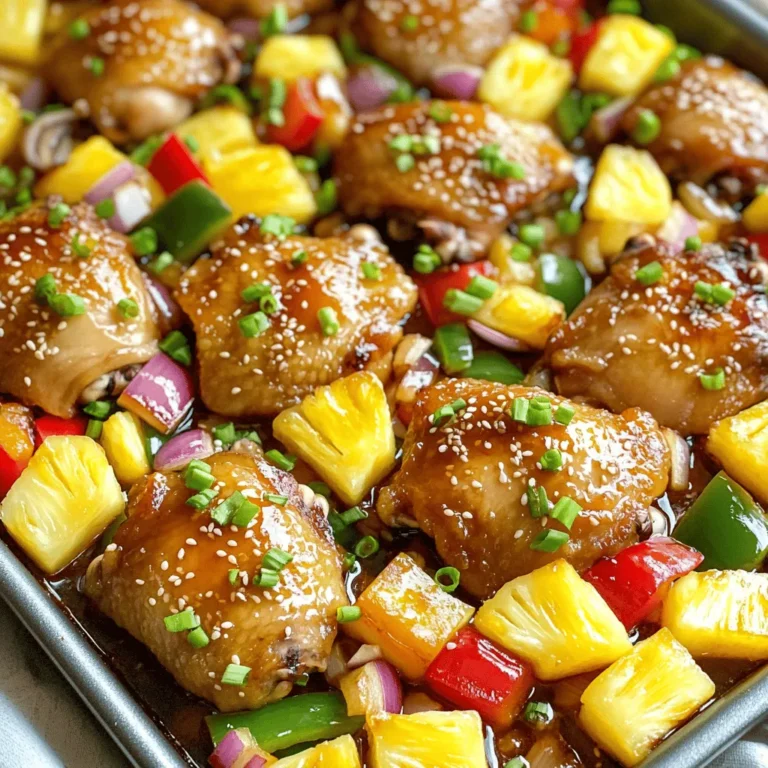
Sheet-Pan Teriyaki Chicken & Pineapple Delight

- 6 large egg whites - 1/2 cup bell peppers (mixed colors), diced - 1/2 cup spinach, chopped - 1/4 cup onion, finely chopped - 1/4 cup cherry tomatoes, halved - 1/4 cup low-fat cottage cheese - 1 tablespoon olive oil - Salt and pepper to taste - Fresh herbs (like chives or parsley) for garnish Egg whites are low in calories and high in protein. They help build muscle and keep you full. Bell peppers add color and are high in vitamins A and C. They boost your immune system. Spinach is rich in iron and helps keep your blood healthy. Onions add flavor and contain antioxidants. Cherry tomatoes are juicy and packed with lycopene, which is good for your heart. Low-fat cottage cheese brings creaminess and adds more protein. Olive oil is a healthy fat that supports brain health. Fresh herbs not only add taste but also provide vitamins. You can replace egg whites with whole eggs for a richer flavor. For a dairy-free option, use silken tofu instead of cottage cheese. If you don’t have bell peppers, zucchini or mushrooms work well. Kale can substitute spinach if you want a different green. Use any type of oil you prefer, like avocado oil, in place of olive oil. Fresh herbs can be swapped with dried herbs if needed. To whisk egg whites, start with a clean bowl. Make sure there is no yolk in the whites. It can stop them from getting fluffy. Use a whisk or an electric mixer. Begin whisking slowly, then speed up. Whisk until the egg whites look frothy. This should take about 2 to 3 minutes. You want soft peaks, not stiff ones. Soft peaks will hold their shape but still look smooth. This means your egg whites are ready for cooking. First, heat the olive oil in a non-stick skillet on medium heat. Add the onion and bell peppers. Cook them for about 2 to 3 minutes. You want them soft but not mushy. Then, add the chopped spinach and cherry tomatoes. Stir well and cook for 2 more minutes. The spinach should wilt down, and the tomatoes should soften. This timing helps each vegetable keep its flavor and texture. Once your veggies are ready, pour the whisked egg whites into the skillet. Let them cook without stirring for about 2 minutes. You will see them start to set on the edges. After that, gently stir the eggs with a spatula. This helps the uncooked egg whites reach the hot edges. Keep stirring until all the egg whites are cooked. If you want creaminess, fold in the cottage cheese at the end. Finally, take your skillet off the heat, and serve hot. Add fresh herbs on top for a tasty finish. To boost flavor, use fresh herbs. Chives and parsley add a nice touch. You can also add a dash of hot sauce for heat. Mix in spices like paprika or garlic powder for an extra kick. A sprinkle of cheese can also add rich flavor. You can use low-fat cheese or a dairy-free option. When cooking egg whites, use a non-stick skillet. This helps prevent sticking. Heat the pan on medium heat for even cooking. Whisk the eggs until they are frothy and light. This helps them cook evenly. Cook them slowly for the best texture. Stir gently to keep a fluffy texture. Serve your scramble with whole-grain toast for fiber. You can add a side of fruit for vitamins. Avocado slices make a great topping and add healthy fats. Pair it with a small salad for more greens. Enjoy your meal with a glass of water or herbal tea for hydration. {{image_2}} You can boost the protein in your egg white veggie scramble in many ways. Try adding cooked chicken breast or turkey for a hearty meal. Canned beans, like black beans or chickpeas, also work well. They add a nice texture and flavor. You could even toss in some Greek yogurt. It adds creaminess and extra protein, too. For a vegetarian option, just stick with the egg whites and cottage cheese. If you want to make it vegan, swap the egg whites for silken tofu. Tofu scrambles wonderfully and soaks up flavors. You can also use nutritional yeast. It brings a cheesy taste without dairy. Using seasonal veggies makes your scramble fresh and exciting. In spring, add asparagus and peas for a bright touch. Summer offers zucchini and fresh corn, which are sweet and juicy. Fall is the time for mushrooms and kale, adding depth to your dish. Winter brings hearty options like sweet potatoes and root veggies. Mix and match to keep your scramble fun! To keep your leftover scramble fresh, place it in an airtight container. Store it in the fridge for up to three days. Make sure it cools to room temperature before sealing. This helps maintain taste and texture. When you are ready to eat, reheat your scramble gently. Use a microwave-safe dish and cover it with a lid. Heat for 30 seconds at a time, stirring in between. This method keeps your scramble moist and tasty. You can also reheat it in a non-stick skillet over low heat. Stir frequently until warm. Meal prepping with egg white scramble is easy and fun. You can make a large batch at once. Divide it into meal prep containers for quick breakfasts. Pair it with whole-grain toast or a side of fruit for a balanced meal. You can also add cooked quinoa or brown rice for extra fiber. Enjoy your protein-packed meals throughout the week! Yes, you can use whole eggs. Whole eggs add more flavor and richness. They also provide a good amount of healthy fats. If you want more protein, stick with egg whites. They have less fat and fewer calories too. Egg whites are a great source of protein. They contain about 3.6 grams of protein per egg white. This helps build muscle and aids in recovery. Egg whites are low in calories, with just 17 calories each. They have no fat and no cholesterol. This makes them heart-healthy. They also provide essential vitamins and minerals, like riboflavin and selenium. This dish is naturally gluten-free. All the ingredients, like egg whites and veggies, do not contain gluten. Make sure to check the labels on cottage cheese. Some brands might add additives that contain gluten. Using fresh ingredients helps keep your meal safe for a gluten-free diet. Enjoy your tasty, gluten-free veggie scramble! In this post, we explored how to make a high-protein egg white veggie scramble. We broke down key ingredients and their benefits. I shared tips to whisk egg whites and cook your veggies right. You also learned fun variations and smart storage ideas. Using these steps, you can cook a tasty, healthy meal. Try adding your favorite flavors and ingredients. With practice, your skills will improve, and each dish will be better. Enjoy your cooking journey!

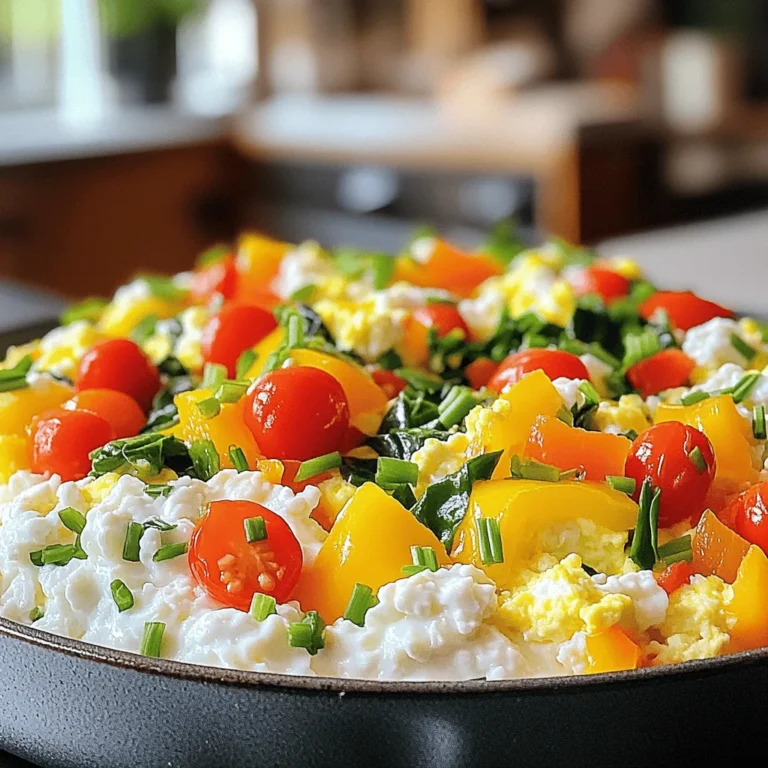
High-Protein Egg White Veggie Scramble Delightful Meal

- 1 cup unsalted butter, melted - 2 cups granulated sugar - 4 large eggs - 1 teaspoon vanilla extract - 1 cup all-purpose flour - 1 cup unsweetened cocoa powder - 1 teaspoon baking powder - 1/2 teaspoon salt - 1 cup pumpkin puree - 1 teaspoon pumpkin spice - 8 oz cream cheese, softened - 1/2 cup powdered sugar The magic of Pumpkin Cream Cheese Swirl Brownies starts with these simple ingredients. You need unsalted butter for a rich base. Melt it down to mix well with sugar. The sweetness comes from granulated sugar, which you add next. Eggs help bind everything together, giving the brownies a nice rise. Don’t forget the vanilla extract! It adds a lovely warmth to your brownies. You’ll need all-purpose flour and unsweetened cocoa powder for that classic brownie texture. Baking powder helps the brownies rise, while a pinch of salt balances the sweetness. For the pumpkin swirl, you’ll need pumpkin puree and pumpkin spice. These give your brownies that fall flavor we all love. Cream cheese adds a creamy richness. Finally, powdered sugar sweetens the cream cheese swirl just right. Gather these ingredients, and you’re ready to create a delightful treat that combines rich chocolate with warm pumpkin flavor. First, preheat your oven to 350°F (175°C). This step is key for even baking. While the oven heats, grease a 9x13 inch baking pan to prevent sticking. In a large bowl, whisk together 1 cup of melted butter and 2 cups of granulated sugar. Mix until smooth. Next, add 4 large eggs one at a time, mixing well after each. Finally, stir in 1 teaspoon of vanilla extract for a nice flavor boost. In a separate bowl, sift together 1 cup of all-purpose flour, 1 cup of unsweetened cocoa powder, 1 teaspoon of baking powder, and 1/2 teaspoon of salt. This helps ensure your brownies will be light and fluffy. Gradually add this dry mixture to your wet ingredients, stirring gently until just combined. Now, in another bowl, mix 1 cup of pumpkin puree, 1 teaspoon of pumpkin spice, and 8 oz of softened cream cheese. Blend until smooth. Then, add 1/2 cup of powdered sugar and mix until fully combined. This creates a rich, flavorful swirl. Pour half of the brownie batter into the prepared pan. Spread it evenly to cover the bottom. Next, spoon dollops of the pumpkin cream cheese mixture on top. Then, add the remaining brownie batter over that. Use a knife or skewer to create a swirling pattern, merging the pumpkin mixture with the brownie batter. Place your pan in the preheated oven. Bake for about 30 to 35 minutes. Check for doneness by inserting a toothpick into the center. It should come out with a few moist crumbs, not a wet batter. Once baked, remove the pan from the oven. Let it cool in the pan on a wire rack. Once cool, cut into squares. Serve these delightful brownies on a rustic wooden platter. A dusting of powdered sugar and a sprig of mint add a nice touch. To make perfect brownies, pay attention to the details. Here are my top tips: - Use room temperature ingredients: This helps the batter mix well. - Do not overmix: Mix until just combined for a fudgy texture. - Check your oven: Use an oven thermometer to ensure accuracy. - Cool before cutting: This helps the brownies set and makes cutting easier. Swirling gives your brownies a beautiful look and great taste. Here’s how to do it right: - Dollop the pumpkin mixture: Place spoonfuls of the pumpkin mix on the brownie batter. - Use a knife or skewer: Gently swirl the pumpkin into the batter without overdoing it. - Create a marble effect: Aim for a nice blend, but leave some areas distinct. You might want to tweak the sweetness or flavor. Here are some ideas: - Taste the batter: Adjust sugar levels before baking if it seems too sweet. - Add spices: Sprinkle in more pumpkin spice for a stronger flavor. - Use dark cocoa powder: This adds depth and richness to the brownies. {{image_2}} You can add nuts or chocolate chips to the brownies. Walnuts or pecans work well. They add crunch and flavor. Just fold in one cup of chopped nuts or chocolate chips into the brownie batter. This makes the treat even richer. You can mix and match your favorites. The extra texture enhances every bite. Making gluten-free brownies is simple. Replace all-purpose flour with a gluten-free blend. Look for one that includes xanthan gum. This helps with texture. You can also use almond flour or coconut flour. Just remember to adjust the amount. This way, you still enjoy the rich chocolate flavor without gluten. You can play with flavors in these brownies. Try adding a splash of almond extract for a nutty twist. You could also mix in some orange zest for a fresh taste. If you like it spicy, add more pumpkin spice or some cinnamon. Each change creates a new fun dessert to enjoy! To keep your pumpkin cream cheese swirl brownies fresh, store them in an airtight container. Use parchment paper to separate layers if you stack them. This keeps them from sticking together. You can leave them at room temperature for up to three days. For longer storage, refrigerate them. They can last up to a week in the fridge. Freezing these brownies is a great way to enjoy them later. First, let the brownies cool completely. Then, cut them into squares. Wrap each square in plastic wrap. Place the wrapped brownies in a freezer-safe bag or container. You can freeze them for up to three months. When you want to eat them, just take out what you need. To reheat brownies, preheat your oven to 350°F (175°C). Place the brownies on a baking sheet. Cover them with foil to keep them moist. Heat for about 10-15 minutes. You can also microwave a single square for about 15-20 seconds. Just be careful not to overheat, or they may become dry. Enjoy your warm, delicious brownies! Yes, you can use canned pumpkin. It saves time and is easy to find. Just make sure it is pure pumpkin puree, not pumpkin pie filling. This will keep the taste right and avoid extra sugar and spices. To check if the brownies are done, insert a toothpick in the center. If it comes out with a few moist crumbs, the brownies are ready. They should not be wet or gooey. Remember, they will continue to cook a bit as they cool. Yes, you can make some swaps. You can use applesauce instead of butter for lower fat. You can also use whole wheat flour instead of all-purpose flour. For sugar, try using a natural sweetener like honey or maple syrup. Just know that these changes might change the taste and texture a bit. These brownies are great on their own. But, you can make them even better! Serve with a scoop of vanilla ice cream or whipped cream. A drizzle of caramel sauce adds a nice touch too. You can also pair them with a hot cup of coffee or spiced tea for a cozy treat. In this blog post, you learned how to make delicious pumpkin cream cheese swirl brownies. We covered key ingredients and step-by-step instructions. Plus, I shared tips for perfecting your brownies and exciting variations to try. Storing and reheating your treats was also discussed. Now you can impress friends and family with these tasty treats. Enjoy experimenting with flavors and enjoy every bite!

Pumpkin Cream Cheese Swirl Brownies Irresistible Delight

For Air Fryer Garlic Butter Steak Bites, you will need the following: - 1 lb sirloin steak, cut into bite-sized cubes - 4 tablespoons unsalted butter, divided - 4 cloves garlic, minced - 1 teaspoon smoked paprika - 1 teaspoon garlic powder - Salt and pepper, to taste - Fresh parsley, chopped (for garnish) - Lemon wedges (for serving) Each ingredient plays a key role in making this dish tasty. The sirloin steak gives a rich flavor and a good texture. Unsalted butter adds a creamy touch, while garlic brings a bold taste. The smoked paprika adds a hint of warmth, and garlic powder boosts the garlic flavor. Salt and pepper enhance all the flavors, making them pop. Fresh parsley adds a nice color and freshness. Lastly, lemon wedges give a bright zing when served. Be sure to use fresh ingredients for the best taste. Quality steak makes a big difference. The butter should be soft but not melted when you mix it with the steak. This recipe is simple but packed with flavor, making it a must-try. Start by preheating your air fryer to 400°F (200°C). This takes about 5 minutes. Preheating helps the steak bites cook evenly. In a mixing bowl, add the cubed sirloin steak. Pour in 2 tablespoons of melted butter. Add 4 cloves of minced garlic, 1 teaspoon of smoked paprika, and 1 teaspoon of garlic powder. Season with salt and pepper. Toss everything well until each cube is coated with the mixture. This marinade adds great flavor to the steak. Now, place the steak bites in the air fryer basket. Make sure they sit in a single layer. Avoid overcrowding, as this can lead to uneven cooking. You may need to cook in batches. Air fry for 8-10 minutes, shaking the basket halfway through to ensure even browning. If you like your steak medium-rare, aim for around 8 minutes. While the steak cooks, melt the remaining 2 tablespoons of butter in a small saucepan over low heat. You can add a pinch of salt and more minced garlic if you want a stronger garlic flavor. Once the steak bites are done, drizzle the garlic butter over them. Toss gently to coat all the steak bites. Transfer the steak bites to a serving platter. Sprinkle chopped parsley on top for a fresh touch. Serve with lemon wedges on the side. The lemon adds a nice zing that complements the rich flavors of the steak. Enjoy your meal! For steak bites, I prefer sirloin steak. It is tender, juicy, and full of flavor. Look for meat that is bright red with some marbling. This marbling helps keep the steak moist during cooking. You can also use ribeye for more fat and flavor. To get the best cook, check the time carefully. For medium-rare, aim for 8 minutes in the air fryer. If you like it more done, add a minute or two. Use a meat thermometer if you have one. Medium-rare should be about 130°F (54°C). Don’t overcrowd the air fryer. If you pack in too many steak bites, they won’t cook evenly. Cook in small batches to ensure they brown well and stay juicy. This way, each bite will have that great garlic butter flavor. Want to elevate your steak bites? Try adding a splash of Worcestershire sauce to the marinade. It adds a nice depth of flavor. You can also sprinkle in some red pepper flakes for a spicy kick. Fresh herbs like thyme or rosemary work well too. {{image_2}} For a kick, add some heat to your steak bites. Use crushed red pepper flakes in the marinade. Start with half a teaspoon and adjust to your taste. You can also swap regular garlic for spicy garlic. This adds a nice zing to each bite. Herbs can elevate your steak game. Mix in fresh herbs like rosemary or thyme with your spices. You can chop a tablespoon of fresh herbs and toss them in. The aroma and flavor will be amazing. You can even use dried herbs if fresh ones are not available. Just use a smaller amount. Get creative with different seasonings. Try using Italian seasoning for a twist. You can also use a taco seasoning for a fun flavor change. Just sprinkle it on your steak before cooking. Each blend gives a unique taste to the steak bites. Don’t be afraid to experiment with your favorite spices! Store leftover steak bites in an airtight container. Let them cool down first. Place them in the fridge. They will stay fresh for up to three days. To reheat, use the air fryer or a skillet. Heat the air fryer to 350°F. Cook for about 5 minutes. If using a skillet, warm it over medium heat. Add a little butter to keep them moist. You can freeze steak bites for later. Place cooled bites in a freezer bag. Squeeze out any air and seal it tightly. They can last for up to three months. To eat, thaw in the fridge overnight and reheat as needed. The best way to season your steak bites is with simple spices. I use salt, pepper, smoked paprika, and garlic powder. These flavors mix well with the steak. You can also add fresh herbs like parsley for extra taste. Just remember, always taste as you go! Air fryer steak bites can last about 3 to 4 days in the fridge. Make sure to keep them in an airtight container. This helps keep them fresh. If you want to enjoy them later, you can reheat them in the air fryer or on the stovetop. Yes, you can use different cuts of meat. Cuts like ribeye or tenderloin work great too. Just remember, cooking times may vary with different cuts. Always check for doneness to make sure they are cooked to your liking. To ensure your steak bites are tender, start with good quality meat. Cut against the grain for the best bite. Marinating the steak for a bit can also help. Lastly, avoid overcooking them; use a meat thermometer for accuracy. Yes, you can make this recipe without an air fryer. Simply use a skillet over medium-high heat. Cook the steak bites for about 5-7 minutes, turning them often. It’s a quick method and still gives you tasty results! We covered the key ingredients and step-by-step guide for making flavorful air fryer steak bites. Remember, the right cut and seasonings make all the difference. Keep these tips in mind for the best results and feel free to experiment with variations. Store leftovers properly to enjoy later. With this easy recipe, you can impress anyone at your next meal. Enjoy your cooking and the great taste of your steak bites!

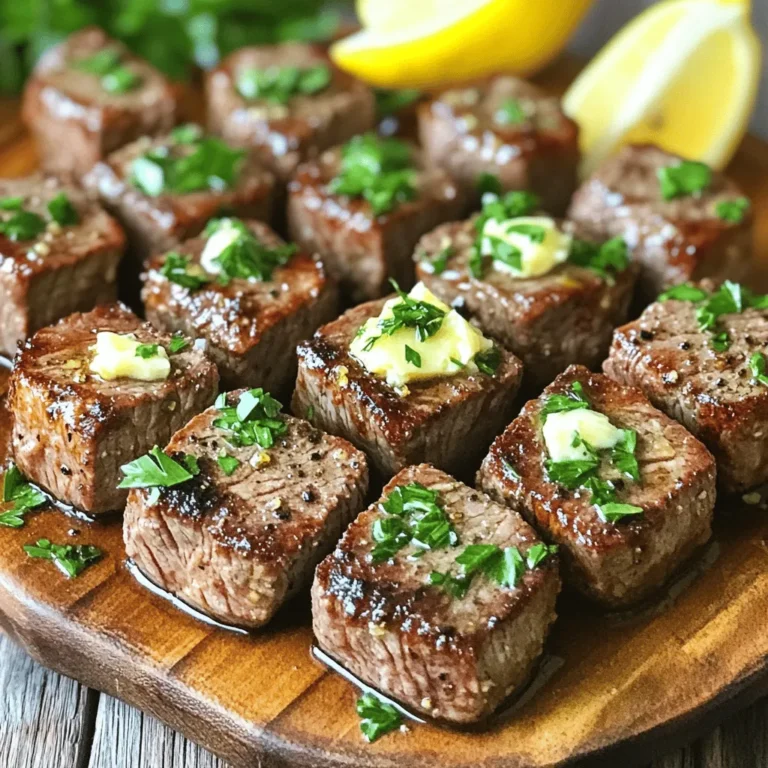
Air Fryer Garlic Butter Steak Bites Easy and Tasty Recipe

PREV 1 … 29 30 31 … 56 NEXT
go kitchen now

explore

DessertsDinnerAppetizersDrinks

Our Policies

  • Cookie Policy
  • Copyright Policy
  • Disclaimer
  • GDPR Policy
  • Terms Of Use
Back to Top
  • About
  • Contact Us
  • Privacy Policy
© 2025 go kitchen now