FREE DINNER EBOOK! Get your copy!
  • Cookie Policy
  • GDPR Policy
  • Disclaimer
  • Terms Of Use
  • Visit my other site: Fun Cookie Recipes
go kitchen now
  • Home
  • Dinner
  • Desserts
  • Drinks
  • Appetizers
  • Contact
  • About
  • Privacy Policy
  • Home
  • Dinner
  • Desserts
  • Drinks
  • Appetizers
  • Contact
  • About
  • Privacy Policy
  • Cookie Policy
  • GDPR Policy
  • Disclaimer
  • Terms Of Use
Visit my other site: Fun Cookie Recipes

HOME / CATEGORIES /

Latest

To make these tasty bites, you need a few basic ingredients: - 1 can of refrigerated cinnamon rolls (8 rolls) - 3 large eggs - 1/2 cup milk - 1 teaspoon vanilla extract - 1 teaspoon ground cinnamon - 1/4 teaspoon nutmeg - 1 tablespoon sugar - 2 tablespoons butter (for frying) - Maple syrup (for serving) - Powdered sugar (for dusting) These ingredients come together to create a warm, gooey treat that everyone will love. You can add your own twist to these cinnamon roll bites. Consider these options: - Chopped nuts for crunch - Fresh fruit, like berries or bananas - A sprinkle of chocolate chips for sweetness - Cream cheese icing drizzled on top Mixing in these extras makes the dish more fun and personal. If you need to swap out some ingredients, here are a few ideas: - Instead of milk, you can use almond milk or oat milk. - If you do not have eggs, you can use 1/4 cup of applesauce. - For a dairy-free option, use vegan butter instead of regular butter. These substitutes keep your dish just as tasty while fitting your needs. 1. Start by preheating your skillet or griddle over medium heat. 2. Open the can of cinnamon rolls and separate them. Cut each roll into quarters and set them aside. 3. In a mixing bowl, whisk together the eggs, milk, vanilla extract, ground cinnamon, nutmeg, and sugar until well mixed. 4. Dip each quarter of cinnamon roll in the egg mix, making sure they are fully coated. Let any extra drip off. 5. Melt the butter in your preheated skillet. Once it bubbles, place the cinnamon roll bites in the skillet in one layer. You may need to cook in batches. 6. Cook each side for about 2-3 minutes until golden brown and slightly crispy. 7. Take the cooked bites from the skillet and keep them warm while you finish the rest. 8. Once all the bites are cooked, serve them warm. Drizzle with maple syrup and dust with powdered sugar for extra sweetness. Enjoy this delightful treat with family or friends! To make the best Cinnamon Roll French Toast Bites, start with fresh rolls. Use a can of refrigerated cinnamon rolls for ease. Cut them into quarters for bite-sized pieces. Make sure you whisk the egg mixture well. This helps each piece soak up flavor. Don’t rush the frying process. Cook them until they are golden and crispy. Turn them gently to avoid breaking. Add a pinch of salt to the egg mixture. This brings out the sweetness and spice. Try using flavored milk, like almond or oat, for a twist. You can also mix in a little orange zest for a fresh taste. A touch of vanilla bean paste instead of extract can elevate the flavor. For a spicy kick, add a bit more nutmeg or even a dash of cayenne. Serve these bites warm for the best experience. Drizzle with maple syrup right before serving. A light dusting of powdered sugar adds a nice touch. You can pair them with fresh fruit like strawberries or bananas. For a fun twist, serve with whipped cream. Make a dipping station with syrup and fruit for guests to enjoy. {{image_2}} You can mix flavors for fun twists! Try adding chocolate chips to the cinnamon rolls. You can also use flavored syrups, like caramel or hazelnut. Another idea is to sprinkle in some nuts, like pecans or walnuts, for crunch. You might like to use pumpkin spice instead of cinnamon in the egg mix, too. Each change makes a new taste that everyone will enjoy. Want to make these bites gluten-free? Use gluten-free cinnamon rolls. They taste just as good! For a dairy-free option, swap regular milk for almond or oat milk. You can use plant-based butter for frying. This way, everyone can enjoy the treat, no matter their dietary needs. Serve these bites in fun ways! You can stack them high on a plate. Drizzle different syrups on top for a tasty look. Add fresh fruit like strawberries or bananas for color. For a fun touch, use toothpicks to make them easy to grab. This makes them great for brunch or parties. To store leftover Cinnamon Roll French Toast Bites, let them cool first. Then, place them in an airtight container. This keeps them fresh and tasty for up to three days. Make sure to layer them with parchment paper to avoid sticking. When you want to enjoy your leftovers, reheat them in a skillet. Heat the skillet over medium heat and add a little butter. Place the bites on the skillet and cook for about 2-3 minutes on each side. This method gives them a nice crispy texture again. You can freeze these bites for later. Place cooled bites in a freezer-safe bag or container. They stay good for about one month. To thaw, just move them to the fridge overnight. Then, reheat as mentioned above. Enjoy your sweet treat anytime! Yes, you can use homemade cinnamon rolls. Just make sure they are similar in size. Homemade rolls will add a fresh touch. They might also change the cooking time. Keep an eye on them as they cook. You can prep the bites earlier in the day. Cut the cinnamon rolls and mix the egg mixture. Store both separately in the fridge. When you are ready, dip and cook them. This saves time for busy mornings or brunches. These bites go well with maple syrup. You can also add fresh berries or whipped cream. For a twist, try serving with flavored yogurt. A sprinkle of nuts can add some crunch too. Look for a golden brown color on both sides. The bites should feel firm but soft inside. You can also use a toothpick to check. If it comes out clean, they are ready to serve. Cinnamon Roll French Toast Bites combine warm cinnamon flavor with soft bread. We discussed key ingredients and how to customize them to your taste. The step-by-step instructions ensure a smooth cooking process. I shared tips for perfect bites and fun variations to suit your needs. Storage info even helps keep leftovers fresh. In summary, these bites are easy, tasty, and are sure to impress. Enjoy experimenting with different flavors and enjoy every bite!

Cinnamon Roll French Toast Bites Delightful Treat

To make crispy hashbrown sausage bites, you need the following ingredients: - 2 large russet potatoes, peeled and grated - 1 cup cooked breakfast sausage, crumbled - 1/2 cup cheddar cheese, shredded - 1/4 cup green onions, finely chopped - 1 large egg - 3 tablespoons all-purpose flour - 1 teaspoon garlic powder - 1/2 teaspoon paprika - Salt and pepper to taste - Oil for frying If you want to change things up, you can try these substitutions: - Use sweet potatoes instead of russet potatoes for a sweeter flavor. - Swap out breakfast sausage for turkey or chicken sausage for a leaner option. - Instead of cheddar cheese, use mozzarella or pepper jack for different tastes. - Green onions can be replaced with chives or shallots for a milder flavor. To make these bites, gather these tools: - A large mixing bowl for combining ingredients. - A small bowl for whisking the egg mixture. - A skillet for frying the bites. - A grater for the potatoes. - A spatula for flipping the bites. - Paper towels for draining excess oil. With these ingredients and tools, you will be ready to make delicious crispy hashbrown sausage bites! First, peel and grate the russet potatoes. Grating them makes them crispy. Soak the grated potatoes in cold water for 10 minutes. This step removes excess starch. Drain the potatoes well after soaking. Use a clean kitchen towel to pat them dry. This helps them crisp up when cooking. In a large bowl, combine the grated potatoes with the crumbled sausage. Next, add the shredded cheddar cheese and chopped green onions. In a separate small bowl, whisk the egg, flour, garlic powder, paprika, salt, and pepper. Pour this mixture over the potato mixture. Stir well until everything is evenly coated. You want to ensure every bite is tasty. Heat oil in a large skillet over medium heat. You need enough oil to cover the bottom. Take small portions of the mixture, about 2 tablespoons each. Flatten these slightly to form patties. Carefully place them in the hot oil. Be sure not to overcrowd the pan. Fry the patties for about 3-4 minutes on each side. Look for a golden brown and crispy texture. Adjust the heat as needed to prevent burning. Once done, transfer the bites to a paper towel-lined plate. This will drain excess oil. Serve them warm with your favorite dipping sauce or enjoy them plain. To get that perfect crisp, start by soaking your grated potatoes. Soak them in cold water for 10 minutes. This step removes excess starch. After soaking, drain and dry the potatoes well. Use a clean towel to pat them dry. The less moisture, the better they fry! When frying, use enough oil to cover the bottom of the skillet. This helps them cook evenly and get crispy. These crispy hashbrown sausage bites shine on their own. However, a good dip can make them even better! Try serving them with ketchup, ranch, or spicy mustard. You can also make a simple dip with sour cream and chives. Pair these bites with a fresh salad or fruit for a complete meal. They work great as party snacks or appetizers too! Avoid overcrowding the pan when cooking. If you add too many bites, they won’t crisp up. Cook in batches if needed. Another mistake is not drying the potatoes well. Wet potatoes lead to soggy bites. Lastly, don’t skip the seasoning. Salt and pepper are essential for flavor. {{image_2}} If you want a meatless option, swap the sausage for a veggie mix. You can use cooked mushrooms or diced bell peppers. Both add great flavor. You can also use black beans for protein. This keeps the bites hearty and satisfying without meat. Cheese can really change the taste of these bites. Instead of cheddar, try mozzarella for a gooey melt. You can also use pepper jack for a spicy kick. Feta cheese gives a nice tangy flavor, too. Experiment with what you like best! You can add local flavors to these bites. For a Southwest twist, add corn and jalapeños. For a Mediterranean flair, toss in some olives and oregano. You can even try a barbecue version with BBQ sauce and smoked sausage. The options are endless! To keep your crispy hashbrown sausage bites fresh, let them cool completely. Place them in an airtight container. You can store them in the fridge for up to three days. Make sure they are not stacked too high. This prevents them from getting soggy. To reheat, use an oven or an air fryer. Preheat the oven to 350°F. Place the bites on a baking sheet and warm them for about 10 minutes. This helps them regain their crispness. If using an air fryer, cook at 350°F for about 5 minutes. Avoid using the microwave, as it makes them soft. You can freeze these bites for later. After cooling, lay them flat on a baking sheet and freeze until solid. Then, transfer them to a freezer bag. They can last up to three months in the freezer. When ready to eat, cook from frozen in the oven or air fryer. This makes for a quick and tasty snack! The best potatoes for hashbrowns are russet potatoes. Their high starch content helps make the hashbrowns crispy. You want to peel and grate them before soaking. Soaking removes excess starch and makes them crispier. Yes, you can bake these hashbrown sausage bites. To do this, preheat your oven to 400°F (200°C). Place the patties on a baking sheet lined with parchment paper. Brush them lightly with oil. Bake for about 25-30 minutes. Turn them halfway through for even crispiness. To prevent the bites from falling apart, make sure to squeeze out excess water from the grated potatoes. Use a clean kitchen towel for this. Adding an egg and some flour helps bind the mixture. Don't overcrowd the pan while frying. Cook in batches for best results. You learned about the key ingredients and tools for making hashbrown sausage bites. We explored step-by-step instructions to prepare, mix, and cook these delicious snacks. I shared tips for the best texture and tasty serving ideas. You also discovered fun variations and how to store leftovers. In conclusion, making hashbrown sausage bites is easy and fun. With these tips, you can impress friends and family every time. Enjoy the cooking process!

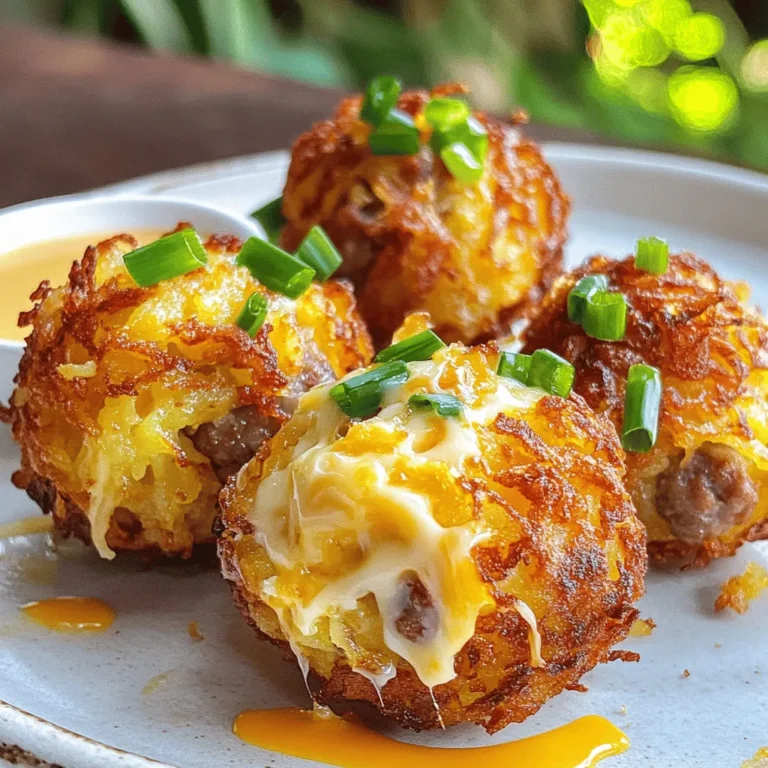
Crispy Hashbrown Sausage Bites Easy and Flavorful Treat

- 1 pound breakfast sausage - 4 cups frozen hashbrowns - 6 large eggs - 2 cups shredded cheddar cheese To create a hearty and flavorful base for your casserole, start with these main ingredients. The breakfast sausage adds richness, while the hashbrowns provide a satisfying texture. Eggs bind everything together, and cheddar cheese gives it a deliciously cheesy finish. - Diced bell peppers - Diced onion - Garlic powder and onion powder - Salt and pepper Next, we add vegetables and seasonings. Diced bell peppers and onions bring color and flavor. The garlic and onion powders enhance the taste without adding extra prep time. Salt and pepper balance the flavors, making every bite enjoyable. - Fresh chives, chopped For a fresh touch, consider adding chopped chives. They not only look pretty but also add a mild onion flavor. This simple garnish makes a big difference in presentation and taste. 1. Preheat your oven. Set it to 350°F (175°C). This step is key for even cooking. 2. Prepare your baking dish. Grease a 9x13 inch dish with cooking spray. This helps the casserole come out easily. 3. Cook the breakfast sausage. In a large skillet, cook 1 pound of sausage over medium heat. Break it apart with a spatula. Cook until it's browned. If there is extra fat, remove it. 4. Sauté the vegetables. Add 1 small diced onion and 1 cup of diced bell peppers to the skillet. Cook for about 5 minutes. Stir until they soften. 1. Layer the ingredients. In the greased baking dish, spread half of the 4 cups of thawed hashbrowns on the bottom. 2. Add the sausage and veggies. Top the hashbrowns with the cooked sausage and vegetable mix. 3. Pour the egg mixture. In a bowl, beat 6 large eggs with 1 cup of milk. Add 1 teaspoon each of garlic powder and onion powder, and season with salt and pepper. Pour half of this mixture over the sausage and veggies. 4. Add cheese. Sprinkle half of the 2 cups of shredded cheddar cheese on top. Then, layer the rest of the hashbrowns on top. 5. Finish the layers. Pour the remaining egg mixture over the hashbrowns. Add the rest of the cheddar cheese on top. 1. Cover and bake. Cover the dish with aluminum foil and bake for 30 minutes. This keeps the moisture in. 2. Uncover and finish baking. After 30 minutes, take off the foil. Bake for another 15-20 minutes. The cheese should be bubbly, and the center should be set. 3. Cool and serve. Let it cool for a few minutes before slicing. Garnish with chopped fresh chives if you like. Choosing the right sausage type matters for flavor. You can pick mild or spicy sausage based on your taste. If you want more heat, go for spicy. For a milder dish, use mild sausage. To ensure even cooking, break the sausage apart while it cooks. Stir it often to avoid clumps. This method helps the sausage cook through evenly. Also, remember to sauté your vegetables until soft. This step adds great flavor and helps with cooking later. You can add spices or herbs to enhance your casserole. Try mixing in some paprika or Italian seasoning for extra depth. Fresh herbs like thyme or parsley can bring a bright taste. If you want to add more veggies, diced tomatoes or spinach work well. You can also mix in different meats like bacon or ham. Just remember to adjust cooking times if you add raw meat. This casserole pairs well with fresh fruit or a green salad. A light side balances the richness of the dish. You can also serve it with toast or muffins for a full breakfast spread. It works great for brunch or family gatherings. Just slice it up and let everyone serve themselves. This dish is perfect for sharing and makes mornings special. {{image_2}} You can switch up the cheese for fun. Try pepper jack for a kick. Or use mozzarella for a milder taste. You can even mix cheeses for unique flavors. If you need it gluten-free, look for gluten-free hashbrowns. Most brands offer this option, so check the labels. For a vegetarian twist, skip the sausage. Use mushrooms or extra veggies instead. Spinach, zucchini, or diced tomatoes can work well. If you're watching carbs, use cauliflower rice instead of hashbrowns. It gives a similar texture without the carbs. Want to use a slow cooker? Just brown the sausage first. Then layer the ingredients in the slow cooker. Cook on low for about 6 hours or high for 3 hours. If you prefer the Instant Pot, brown the sausage using the sauté function. Then add the rest and cook on high pressure for 10 minutes. Quick and easy! To store leftovers, let the casserole cool first. Cover it tightly with plastic wrap or aluminum foil. You can also place it in an airtight container. This will keep it fresh for up to four days. When reheating, preheat your oven to 350°F (175°C). Place the casserole in the oven for about 15 to 20 minutes. You can also reheat individual portions in the microwave for 2 to 3 minutes. You can freeze this dish for longer storage. Consider freezing individual portions for easy meals later. To do this, cut the casserole into squares and wrap each piece tightly. If you prefer, freeze the whole casserole in a freezer-safe dish. Make sure it is well covered. For thawing, move it to the fridge overnight. To reheat, bake in the oven at 350°F (175°C) for about 30 to 40 minutes, or until heated through. In the fridge, this casserole lasts about four days. If you freeze it, it can stay good for up to three months. Always check for any signs of spoilage before eating. If it smells off or looks strange, it is best to throw it away. How do I know when the casserole is done? You can tell the casserole is done when the cheese bubbles and the center is firm. The edges should be slightly golden. A toothpick inserted in the middle should come out clean. Can I prepare this dish in advance? Yes, you can prepare it a day ahead. Assemble the casserole, cover it, and place it in the fridge overnight. Bake it the next morning, adding a few extra minutes to the cooking time. What are the nutritional benefits of the ingredients? This casserole packs protein from the eggs and sausage. The hashbrowns offer carbs for energy. Bell peppers and onions add fiber and vitamins. Cheese gives calcium, while chives add flavor and nutrients. How can I make it healthier? You can use turkey or chicken sausage for less fat. Swap regular cheese for low-fat cheese. Add more veggies like spinach or mushrooms for extra nutrients. You can also use whole grain hashbrowns. What drinks pair well with sausage hashbrown casserole? Coffee is a classic choice for breakfast. Fresh orange juice adds a bright flavor. You can also enjoy a light tea or even a mimosa for a special touch. Can I serve it with sides like fruit or salad? Absolutely! Fresh fruit like berries or sliced apples adds a sweet touch. A light salad can balance the rich flavors. Try a simple green salad with a lemon vinaigrette for a refreshing side. This blog shared a simple, tasty sausage hashbrown casserole recipe. We covered key ingredients, prep steps, and baking tips. Customization options let you make it your own. Plus, we looked at storage methods and answered common questions. In conclusion, this casserole is perfect for breakfast gatherings. Its easy steps and options let anyone enjoy cooking. Try out this recipe and impress your friends and family with a delicious meal.

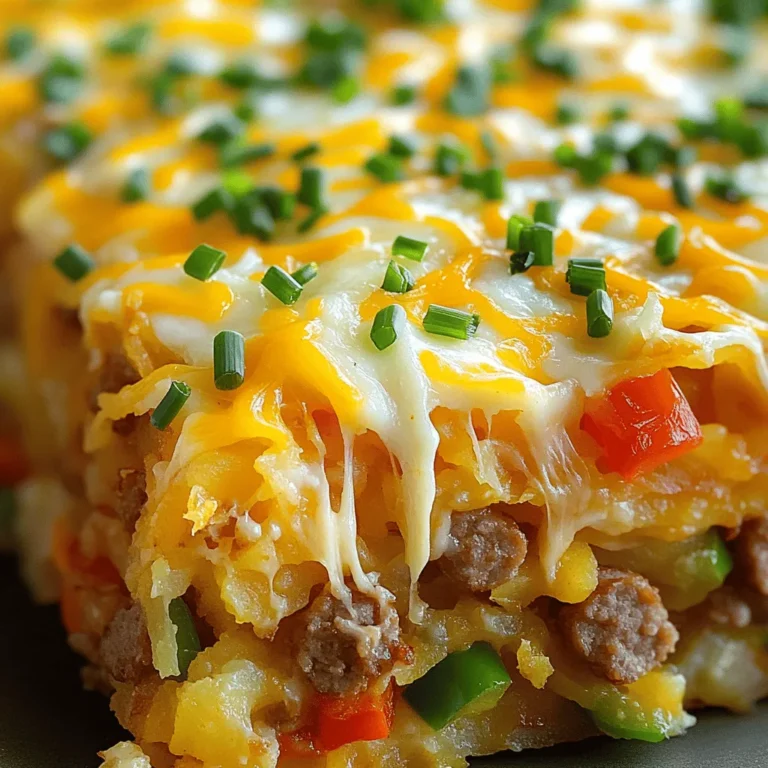
Sausage Hashbrown Breakfast Casserole Delightful Dish

- 2 cups cooked jasmine rice (preferably day-old) - 1 cup chicken breast, diced into small cubes - 4 cloves garlic, minced - 2 eggs, lightly beaten - 1 cup peas and carrots mix - 3 tablespoons soy sauce - 1 tablespoon oyster sauce (optional) - 1 teaspoon sesame oil - 1 teaspoon ground black pepper - Salt to taste - 2 tablespoons vegetable oil for frying - 3 green onions, chopped (whites and greens separated) You need these simple ingredients for a tasty dish. Day-old jasmine rice works best. It keeps the rice from getting mushy. Diced chicken adds protein and flavor. Garlic brings a strong taste. Eggs give the dish richness. Peas and carrots add color and nutrients. For flavor, soy sauce is a must. It adds depth and seasoning. Oyster sauce is optional but gives a nice sweetness. Sesame oil adds a nutty aroma. Ground black pepper and salt round out the taste. You’ll want vegetable oil for frying. It helps achieve that crispy texture. Green onions make a great garnish for a fresh touch. Keep these ingredients ready, and you’ll create a delicious meal! First, heat 1 tablespoon of vegetable oil in a large skillet over medium-high heat. Add the diced chicken breast. Season it well with salt and ground black pepper. Cook the chicken for about 5-7 minutes. Look for a golden brown color and make sure it’s cooked through. Once done, remove the chicken from the skillet and set it aside. This step adds great flavor to your fried rice. Next, add another tablespoon of vegetable oil into the same skillet. Toss in the minced garlic and sauté for about 30 seconds. Garlic is key; it brings a rich flavor to the dish. After that, pour in the lightly beaten eggs. Scramble them until they are fully cooked. Mix the eggs with the garlic. This step makes the fried rice creamy and delicious. Now, add the peas and carrots mix to the skillet. Stir-fry for 2-3 minutes until the veggies are tender. They should be bright and colorful. Next, add the cooked jasmine rice. Break up any clumps as you stir-fry it with the vegetable mix for about 3-4 minutes. This ensures the rice heats through and absorbs those tasty flavors. Return the cooked chicken back to the skillet. Pour in the soy sauce and oyster sauce if you are using it. Drizzle with sesame oil for a nutty flavor. Stir everything together well. Ensure the rice is evenly coated with the sauces. Finally, add the chopped green onion whites. Mix it all together. Taste your fried rice and adjust the seasoning if needed. Add more salt or soy sauce if you like. Serve hot and garnish with the green onion greens. Enjoy your crispy garlic chicken fried rice! Using day-old rice is key. Fresh rice holds too much moisture. This makes your fried rice mushy. Day-old rice is drier and creates the perfect base. For a crispy texture, use a hot skillet. Heat your oil before adding any ingredients. Stir-fry the rice in small batches. This helps it fry evenly. Make sure to break up clumps while cooking. You can add more flavor with simple spices. Try adding ginger for a warm kick. A dash of chili flakes gives it a nice heat. Garnishes can elevate your dish. Fresh herbs like cilantro or basil add brightness. Slices of lime or lemon can add a zesty finish. A sprinkle of sesame seeds adds crunch. Crispy garlic chicken fried rice pairs well with many dishes. Serve it alongside a light salad for balance. Grilled vegetables or spring rolls also make great sides. For presentation, use a large plate. Pile the rice high in the center. Garnish with green onion greens on top. This makes your meal look vibrant and inviting. {{image_2}} You can change the protein in this dish. Try using tofu for a vegan option. Shrimp also works great and adds a nice flavor. For veggies, swap peas and carrots with bell peppers or broccoli. Zucchini or snap peas can add a fresh twist, too. Mix and match to fit your taste! Want a gluten-free meal? Just use tamari instead of soy sauce. This keeps the same rich taste without gluten. For low-carb options, replace rice with cauliflower rice. It gives a similar texture without the carbs. You can still enjoy all the flavors. If you want a restaurant-style dish, add a splash of rice wine vinegar. This gives a nice tangy flavor. Consider adding some spices from other cuisines. A bit of curry powder can add warmth. Or try a dash of chili oil for heat. These small changes can make your dish stand out! To keep leftover crispy garlic chicken fried rice fresh, store it in the fridge. Use airtight containers to prevent moisture loss. Make sure to cool the rice to room temperature before sealing it. This helps reduce bacteria growth. Leftover fried rice stays good for up to three days when stored properly. When you're ready to enjoy your fried rice again, use the stove or microwave. For the stove, heat a pan over medium heat and add a splash of water. This steam helps keep the rice from drying out. Stir frequently until heated through. To avoid soggy rice, don’t add too much water. If using a microwave, place the rice in a microwave-safe dish. Cover it with a damp paper towel to add moisture. Heat for one to two minutes, stirring halfway. Freezing fried rice is easy. First, cool it completely before packing it. Use freezer-safe containers or bags, removing as much air as possible. Label the bags with the date. Fried rice can last for up to three months in the freezer. When you're ready to eat it, transfer the frozen rice to the fridge overnight to thaw. For reheating, use the stovetop method for the best texture. Just remember to add a little water to keep it moist. You can store leftover fried rice for about 3-4 days. Make sure to keep it in an airtight container. This helps keep it fresh and safe to eat. When storing, let it cool before sealing. Always check for any off smells or textures before enjoying leftovers. Yes, you can use white rice. However, jasmine rice adds a nice aroma and flavor. It also has a slightly sticky texture. This helps the rice clump together, making it easier to stir-fry. If you use white rice, aim for short-grain rice for better results. To spice up your fried rice, consider adding chopped fresh chili peppers. You can also use chili flakes or hot sauce. For a different kick, try sriracha or a dash of cayenne pepper. Adjust the amount based on your heat preference. To make this dish vegetarian, swap the chicken with tofu or tempeh. Use firm tofu for the best texture. You can also add more vegetables like bell peppers and broccoli. Replace the oyster sauce with mushroom sauce for a similar umami taste. This post covered how to make crispy garlic chicken fried rice. You learned about key ingredients, step-by-step cooking tips, and variations to try. I shared ways to enhance flavor and ideal storage methods. Experiment with different proteins and veggies to make this dish your own. Enjoy this great meal with friends and family, and don't forget the garnish. Making fried rice can be fun and rewarding! Happy cooking!

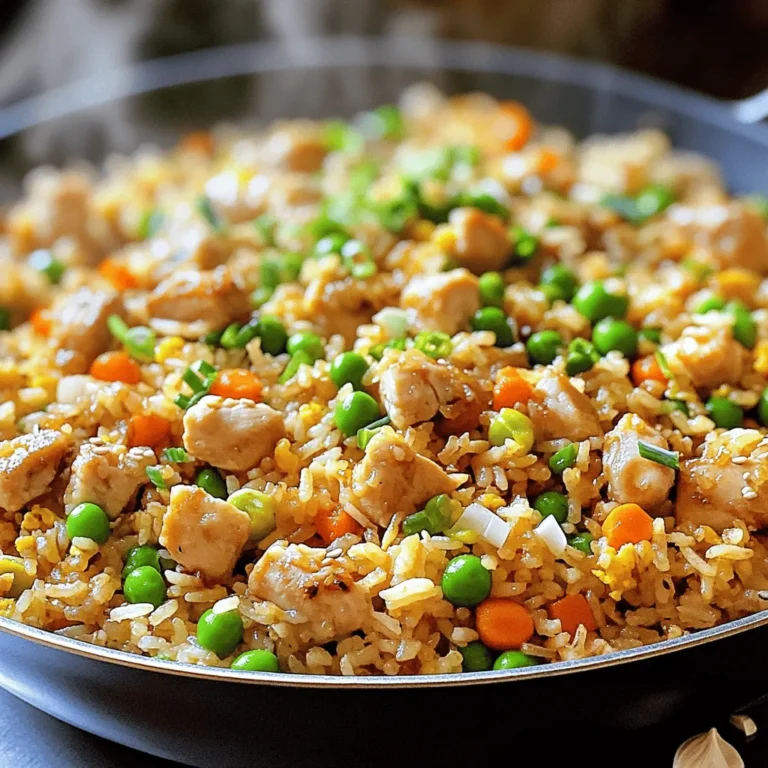
Crispy Garlic Chicken Fried Rice Quick and Flavorful Meal

To make Quick Chicken Ramen Stir-Fry, you need these ingredients: - 200g ramen noodles - 300g boneless chicken breast, thinly sliced - 1 tablespoon sesame oil - 2 cups mixed vegetables (bell peppers, carrots, and snap peas) - 3 cloves garlic, minced - 2 tablespoons soy sauce - 1 tablespoon teriyaki sauce - 1 teaspoon ginger, grated - 2 green onions, chopped - Sesame seeds, for garnish - Salt and pepper to taste Each ingredient adds a unique flavor and texture to the dish. The ramen noodles provide a hearty base, while the chicken adds protein. The mixed vegetables brighten the meal with color and crunch. For the best results, I suggest these brands: - Ramen noodles: Look for Nissin or Maruchan, as they offer great flavor. - Sesame oil: Kadoya is a top choice for its rich taste. - Soy sauce: Use Kikkoman for a balanced, savory flavor. - Teriyaki sauce: Try Soy Vay for a sweet and tangy kick. These brands ensure high quality and flavor, making your stir-fry even better. If you need to swap ingredients, here are some options: - Ramen noodles: You can use udon or rice noodles if you prefer. - Chicken breast: Thinly sliced turkey or tofu work well too. - Mixed vegetables: Feel free to use broccoli, zucchini, or frozen stir-fry mixes. - Soy sauce: A low-sodium version is great for a lighter option. - Teriyaki sauce: You can make your own by mixing soy sauce with honey and sesame oil. These substitutions keep the dish tasty while fitting your needs. First, boil water in a pot. Once it boils, add 200g of ramen noodles. Cook them according to the package instructions, which is usually just a few minutes. Stir them gently to keep them from sticking. When done, drain the noodles and set them aside. This step is key. You want them firm, not mushy. Next, grab a large skillet or wok. Heat 1 tablespoon of sesame oil over medium-high heat. Once hot, add 300g of thinly sliced chicken breast. Season the chicken with salt and pepper. Cook for about 5-7 minutes. Make sure the chicken is fully cooked and no longer pink. This step ensures your chicken is juicy and tender. Now, add 3 cloves of minced garlic and 1 teaspoon of grated ginger. Cook these for 1-2 minutes until fragrant. The smell will be amazing! After the garlic and ginger, toss in 2 cups of mixed vegetables. I like bell peppers, carrots, and snap peas for color and crunch. Stir-fry these for another 3-4 minutes. You want them tender but still crisp. This adds great texture. Now, pour in 2 tablespoons of soy sauce and 1 tablespoon of teriyaki sauce. Stir everything together so the chicken and veggies soak up the flavors. Finally, fold in the cooked ramen noodles. Mix gently until everything is heated through. Remove from heat. For a lovely finish, garnish with chopped green onions and sesame seeds. Serve in deep bowls for a pretty look! To cook chicken just right, slice the meat thinly. This helps it cook fast and evenly. Heat sesame oil in your skillet until it shimmers. Add the chicken and season with salt and pepper. Stir-fry it for 5-7 minutes. Look for a golden color and make sure no pink remains. This method keeps the chicken juicy and tender. Seasonings can elevate your dish. Use garlic and ginger for a fragrant kick. These add depth and warmth. Soy sauce and teriyaki sauce bring umami and sweetness. Mix them well to coat the chicken and veggies. A sprinkle of sesame seeds at the end adds a nice crunch. Green onions offer freshness and color. Meal prep can make your week easier. Chop veggies and slice chicken ahead of time. Store them in the fridge for quick access. Cook a big batch of ramen noodles and keep them in the fridge too. When you're ready to eat, just stir-fry everything together. This saves time and gives you a warm meal in minutes. {{image_2}} To make this dish vegetarian, swap the chicken for tofu or tempeh. Both options soak up flavors well and add protein. Use firm tofu for a nice texture. Cut it into cubes and pan-fry until golden. You can also add extra vegetables like mushrooms or zucchini for more flavor. If you want to change the protein, use shrimp, beef, or pork. Shrimp cooks fast and adds a nice taste. Slice beef or pork thinly for quick cooking. Each protein gives a different spin on the dish. Just remember to adjust cooking times to ensure everything is cooked through. You can play with flavors by using different sauces. Try hoisin sauce for a sweet twist. Add chili paste for heat if you like spice. A dash of lime juice can brighten the dish. Experiment with herbs like cilantro or basil for freshness. Mixing sauces can lead to new and exciting flavors. Store your leftover Quick Chicken Ramen Stir-Fry in an airtight container. Let the dish cool before sealing it. This helps keep your meal fresh and tasty. Keep it in the fridge for up to three days. If you want to save it longer, consider freezing. To reheat, use a microwave or stovetop. If using a microwave, warm it on medium heat for two to three minutes. Stir halfway through for even heating. On the stovetop, add a splash of water and heat over low for about five minutes. This keeps the noodles from drying out. If you freeze the stir-fry, use a freezer-safe container. It can last for up to three months in the freezer. To thaw, place it in the fridge overnight or use the microwave’s defrost setting. After thawing, reheat using the stovetop or microwave as mentioned. Enjoy your meal again! To make this dish gluten-free, swap regular ramen noodles for gluten-free noodles. You can find options made from rice or buckwheat. For the sauces, use gluten-free soy sauce or tamari. These changes keep the dish tasty while meeting gluten-free needs. Absolutely! You can use any vegetables you like. Try broccoli, zucchini, or mushrooms. Just remember to cut them into small pieces for even cooking. The key is to keep the stir-fry colorful and full of nutrients. This stir-fry is great on its own, but you can add sides. Consider serving it with a light salad or some steamed dumplings. A small bowl of miso soup pairs well too. These options add variety and round out your meal. This blog post covered key steps to make Chicken Ramen Stir-Fry. We explored the ingredients, cooking methods, and tips to boost flavor. I shared variations for different diets and how to store leftovers safely. Experiment with your meals and find what tastes best for you. Enjoy this dish, and don’t hesitate to try new flavors. The kitchen is a place for fun and creativity!

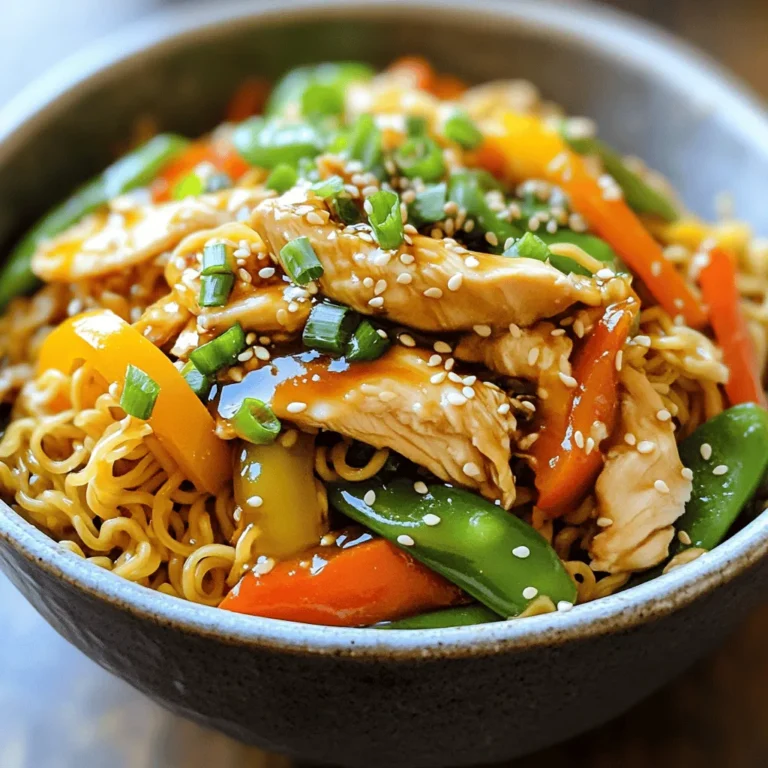
Quick Chicken Ramen Stir-Fry Flavorful and Easy Meal

For these wraps, you need: - 2 boneless, skinless chicken breasts - 1 cup bell peppers (mixed colors), sliced - 1 cup romaine lettuce, shredded - 1/2 cup cherry tomatoes, halved - 1/2 cup cooked corn (canned or frozen) The chicken adds protein and flavor. The bell peppers bring color and crunch. Romaine lettuce gives a fresh taste. Cherry tomatoes add a sweet touch, and corn provides a nice texture. You will also need: - 4 large whole wheat tortillas - 1/2 cup ranch dressing - 1 tablespoon olive oil - Salt and pepper to taste Whole wheat tortillas are healthy and filling. Ranch dressing makes everything creamy and tasty. Olive oil helps cook the chicken and peppers perfectly. For extra flavor, consider: - 1/4 cup shredded cheddar cheese, for garnish Cheddar cheese is not a must, but it adds a rich taste. You can skip it or use other cheeses if you prefer. These ingredients make Chicken Bell Pepper Ranch Wraps a fun and easy meal. You can mix and match to suit your taste. Enjoy! {{ingredient_image_1}} To start, take the chicken breasts and season them. Use salt and pepper for flavor. Heat a skillet on medium. Add a tablespoon of olive oil. Cook the chicken for about 6-7 minutes on each side. You want it cooked through and golden brown. Once done, take it off the heat. Let it rest for a few minutes. Then, slice it into thin strips. This makes it easy to add to your wrap. Next, use the same skillet. Add the sliced bell peppers. They should be mixed colors for a pretty look. Sauté them for about 3-4 minutes. You want them to be slightly soft but still crunchy. Add a pinch of salt and pepper to season. This little step brings out their sweet flavor. Now, lay out your tortillas on a clean surface. Spread about 2 tablespoons of ranch dressing on each tortilla. This gives a creamy taste. Next, add a handful of shredded romaine lettuce on top. Follow with the sliced chicken and sautéed bell peppers. Then, toss in the halved cherry tomatoes and corn. If you like cheese, sprinkle some shredded cheddar on top. Finally, fold the sides of the tortilla in. Roll it tightly from the bottom to the top. Make sure all the fillings stay inside. Cut each wrap in half diagonally. Serve them right away with extra ranch dressing for dipping. Enjoy your tasty meal! To cook chicken well, heat your skillet on medium. Add olive oil to prevent sticking. Season your chicken breasts with salt and pepper. Cook each breast for 6-7 minutes on one side. Flip and cook the other side until no pink shows. Let the chicken rest for a few minutes before slicing. This keeps it juicy. Whole wheat tortillas work great for these wraps. They add fiber and flavor. You can also use flour tortillas if you prefer a softer wrap. For a gluten-free option, look for corn tortillas. Choose large ones to hold all your fillings securely. Add more zest to your wraps by mixing spices into the ranch dressing. A pinch of garlic powder or paprika adds depth. Fresh herbs like cilantro or parsley can brighten the dish. For a kick, add jalapeños or hot sauce. You can also try adding some avocado for creaminess. Pro Tips Cook Chicken Evenly: To ensure the chicken cooks evenly, let it rest at room temperature for about 15 minutes before cooking. This helps it cook through without drying out. Fresh Veggies: Use fresh bell peppers and other vegetables for the best flavor and texture. They should be crisp and vibrant to enhance the wrap's overall appeal. Ranch Dressing Alternatives: Experiment with different dressings like honey mustard or Greek yogurt dressing for a unique flavor twist in your wraps. Wrap Storage Tips: If preparing in advance, wrap each tortilla in plastic wrap to keep them fresh until serving. This prevents them from getting soggy. {{image_2}} You can switch the chicken for other proteins. Try using turkey, shrimp, or tofu. Each option brings a new taste. Turkey gives a leaner bite, while shrimp adds a savory twist. Tofu is great for a plant-based meal. Just prepare it like the chicken, and you'll have a tasty wrap. Feel free to mix up the veggies in your wrap. You can use spinach, cucumbers, or carrots. Spinach adds a nice crunch. Cucumbers give a fresh flavor, and carrots add sweetness. Don't be afraid to experiment with what you like. The more colors you use, the more fun your wraps will look! While ranch is a classic choice, other dressings work too. Try using Caesar, blue cheese, or a zesty vinaigrette. Each dressing changes the flavor completely. Blue cheese offers a bold taste, while vinaigrette keeps it light and tangy. Choose what sounds best to you or what you have on hand! You can store leftover Chicken Bell Pepper Ranch Wraps in the fridge. Wrap each one tightly in plastic wrap or foil. Place them in an airtight container. This keeps them fresh and tasty. They should stay good for about 3 days. When you're ready to eat, just remove the wrap. If you want to save the wraps for later, freezing is a great option. Wrap each one in plastic wrap first. Then, place them in a freezer-safe bag or container. Make sure to remove as much air as possible. These wraps can last up to 2 months in the freezer. When you want one, let it thaw in the fridge overnight. To reheat your wraps, you have a few options. The microwave is the quickest way. Place the wrap on a plate and cover it with a damp paper towel. Heat it for about 30 seconds, then check it. If it's not warm enough, heat for an extra 15 seconds until hot. You can also use an oven for a crispier wrap. Preheat your oven to 350°F (175°C). Wrap it in foil and heat for about 10-15 minutes. This keeps the wrap nice and crunchy. Enjoy your meal! Yes, you can make these wraps ahead of time. Prepare the chicken and veggies, then store them separately. Wraps stay fresh in the fridge for up to 24 hours. When ready to eat, simply assemble the wraps. This saves time and makes meal prep easy. You can use several options for ranch dressing. Greek yogurt offers a creamy base with fewer calories. You might also try hummus for a different flavor. If you prefer a zesty kick, use salsa or guacamole. These options keep your wraps tasty and exciting. To make this recipe healthier, consider these tips: - Use low-fat ranch dressing or Greek yogurt. - Replace the tortillas with lettuce wraps. - Add more veggies like spinach or cucumbers. - Use grilled chicken instead of fried for less fat. These small changes can boost the nutrition while keeping the flavor. This blog post covered making delicious wraps using chicken and veggies. We explored cooking tips, ingredient options, and variations for fun twists. Remember, you can customize with different toppings and dressings. Use the best tortillas and enhance flavors for a great meal. Store extras properly to enjoy later. Overall, this recipe is easy and fun. Now you can create wraps that fit your tastes and needs. Enjoy making them your own!

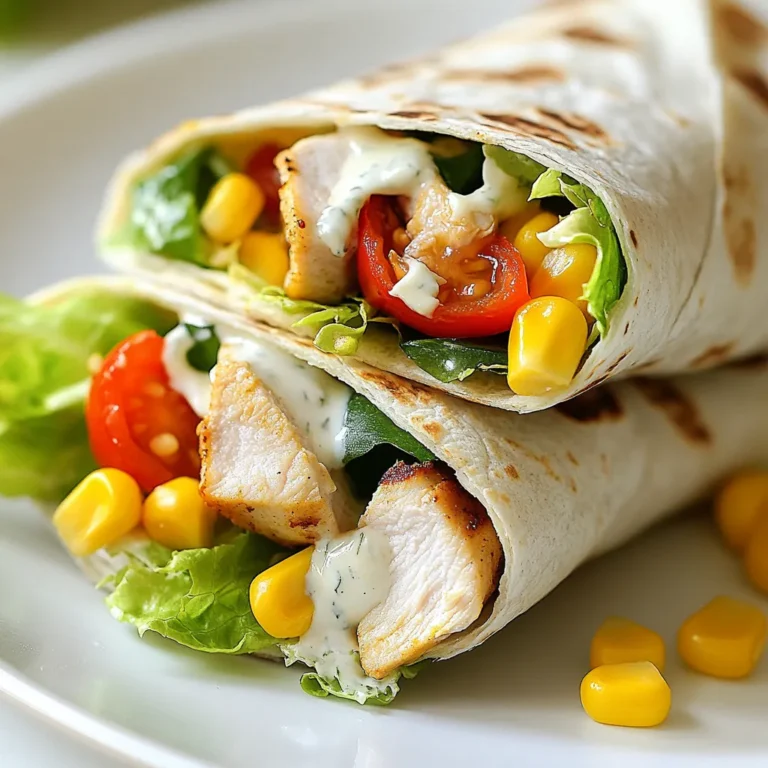
Chicken Bell Pepper Ranch Wraps Tasty and Easy Meal

- 2 cups cooked chicken, shredded - 1 cup cream cheese, softened - 1 cup shredded Monterey Jack cheese - 1 cup cauliflower rice (fresh or frozen) - 1/2 cup sour cream - 1/2 cup chicken broth - 1 teaspoon garlic powder - 1 teaspoon onion powder - 1 teaspoon cumin - 1/2 teaspoon salt - 1/2 teaspoon black pepper - 8 large lettuce leaves (for wrapping) - 1/4 cup chopped fresh cilantro (optional, for garnish) To make low carb white chicken enchiladas, gather these simple ingredients. You need cooked chicken, which adds protein. Cream cheese gives a rich, creamy texture. Monterey Jack cheese brings flavor and melts well. Cauliflower rice acts as a great low-carb substitute for traditional tortillas. Sour cream adds a nice tang, while chicken broth keeps it moist. Spices like garlic powder, onion powder, and cumin enhance the flavor. Salt and black pepper are must-haves for seasoning. Finally, large lettuce leaves wrap everything up perfectly. If you want, add fresh cilantro on top for a bright finish. With these ingredients, you’re ready to create a delicious meal that’s easy and fun to make. {{ingredient_image_1}} - Preheat the oven to 350°F (175°C). - In a large mixing bowl, combine: - 2 cups cooked chicken, shredded - 1 cup cream cheese, softened - 1 cup shredded Monterey Jack cheese - 1 cup cauliflower rice (fresh or frozen) - 1/2 cup sour cream - 1/2 cup chicken broth - 1 teaspoon garlic powder - 1 teaspoon onion powder - 1 teaspoon cumin - 1/2 teaspoon salt - 1/2 teaspoon black pepper - Mix all the ingredients until well combined. - Lay out the large lettuce leaves on a flat surface. - Spoon about 1/4 cup of the chicken mixture onto each leaf. - Roll tightly, folding in the sides to secure the filling. - Place the rolled enchiladas seam-side down in a greased 9x13 inch baking dish. - In a small bowl, mix the remaining 1/2 cup of chicken broth and 1/4 cup of Monterey Jack cheese. - Pour this mixture evenly over the rolled enchiladas. - Cover the dish with aluminum foil and bake in the oven for 20 minutes. - After 20 minutes, remove the foil and bake for an additional 10 minutes. - The cheese should be bubbly and slightly golden when done. - Let cool for a few minutes before serving. You can garnish with chopped fresh cilantro if you like. Using cooked chicken is key for this dish. You can use rotisserie chicken for ease. Shred it finely for even mixing. This saves time and adds great flavor. To soften cream cheese, take it out of the fridge early. Let it sit for about 30 minutes. You can also microwave it in short bursts. Just 10 seconds at a time works well. Stir after each round until soft. Spices can make a big difference. Adding chili powder gives a nice kick. Cumin adds warmth, while garlic powder enhances the flavor. Feel free to adjust spices to your taste. For garnishes, fresh cilantro brightens the dish. A squeeze of lime juice adds freshness. You can also serve it with avocado slices or diced tomatoes. Rolling enchiladas evenly is important. If they are not tight, they may fall apart. Start from one end and roll firmly, tucking in the sides. Soggy lettuce leaves can ruin the dish. Make sure to dry them well. If using fresh leaves, choose larger ones to hold the filling better. Pro Tips Use Rotisserie Chicken: For an even quicker prep time, consider using store-bought rotisserie chicken. It adds great flavor and saves you from cooking the chicken yourself. Experiment with Cheese: Feel free to mix up the cheeses! Adding pepper jack or cheddar can give your enchiladas a unique twist. Make Ahead: You can prepare the enchiladas a day in advance. Just cover them tightly and refrigerate. When ready to bake, add a few extra minutes to the cooking time. Fresh Herbs for Garnish: Don’t skip the cilantro! It adds a fresh burst of flavor that complements the richness of the dish beautifully. {{image_2}} You can swap the chicken for turkey or tofu. Turkey has a similar taste and texture. It also adds a nice twist to the dish. Tofu is great for a plant-based option. Just make sure to use firm tofu for the best results. Changing the cheese can also change the flavor. Try using pepper jack for a spicy kick. You could also use cheddar for a sharper taste. Mixing different cheeses keeps things exciting. Adding more low-carb veggies boosts nutrition and flavor. Spinach or zucchini can work well. Just chop them finely and mix them in. You can also use mushrooms, which add a nice earthy flavor. For tortillas, consider using low-carb options like almond flour wraps. They have fewer carbs than regular tortillas. You can also use cabbage leaves for a fresh, crunchy wrap. Pair your enchiladas with low-carb side dishes. A simple salad with avocado and lime juice fits perfectly. You can also serve roasted vegetables for a hearty option. For sauces or dips, consider a creamy avocado dip. It adds richness and flavor. A homemade salsa can brighten up the dish too. Just mix diced tomatoes, onions, and cilantro for a fresh taste. To keep your Low Carb White Chicken Enchiladas fresh, store leftovers right away. Place them in an airtight container. This helps keep moisture in and prevents drying out. Glass or BPA-free plastic containers work great. Make sure the lid seals well, which keeps the flavors locked in. You can freeze enchiladas either before or after baking. If you freeze before baking, wrap each one tightly in plastic wrap. Then, place them in a freezer-safe bag. To freeze after baking, let them cool first. Then, cover them with foil and put them in a freezer-safe dish. To reheat frozen enchiladas, take them out and let them thaw overnight in the fridge. Once thawed, bake at 350°F (175°C) for about 20 minutes or until heated through. In the fridge, your enchiladas will last about 3 to 4 days. Be sure to check for signs of spoilage. If you see mold or an off smell, it’s best to throw them away. Keep an eye on your food to enjoy the best flavors! The best way to shred chicken is with two forks. Hold one fork steady and use the other to pull apart the meat. This method works well for warm or cold chicken. You can also use your hands if the chicken is cool. For a quicker option, a stand mixer can shred cooked chicken in seconds. Just place the chicken in the bowl and mix on low speed until shredded. Yes, you can use many types of cheese. Cheddar cheese adds a nice sharp flavor. Pepper Jack gives a spicy kick. You might also try cream cheese for a richer taste. If you want something lighter, mozzarella works well too. Just keep in mind that cheese changes the texture and flavor of your dish. To make this recipe dairy-free, use dairy-free cream cheese and sour cream. Many brands offer great substitutes that taste similar. You can also try cashew cream, made by blending soaked cashews with a bit of water. This will give you a creamy texture without dairy. Just be sure to adjust the amounts based on your taste. Yes, you can prepare these enchiladas in advance. Assemble them and store them in the fridge for up to a day. Just cover the dish tightly with foil or plastic wrap. If you want to freeze them, do that before baking. Wrap them well and store them for up to three months. When ready, thaw in the fridge overnight and bake as directed. In this blog post, we explored an easy and delicious enchilada recipe using simple ingredients. You learned about preparation steps, cooking tips, and ways to avoid common mistakes. We discussed variations, like swapping proteins or making the dish low-carb. You also found storage tips to keep leftovers fresh. Try these enchiladas for a tasty meal that fits your needs. Enjoy the cooking and eating experience!

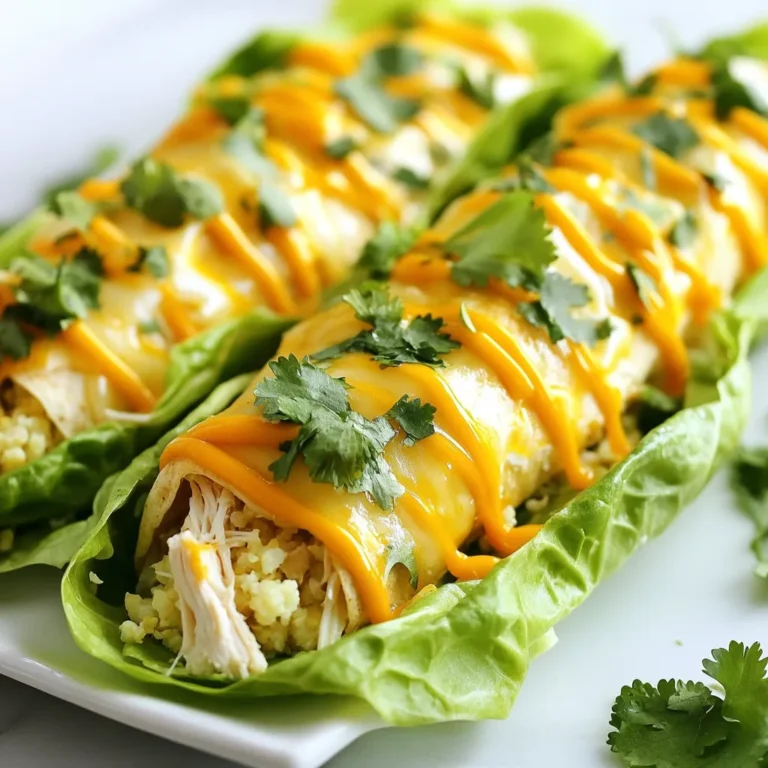
Low Carb White Chicken Enchiladas Simple and Tasty

To make Orange Ginger Honey Cakes, gather these ingredients: - 1 cup all-purpose flour - 1/2 teaspoon baking powder - 1/4 teaspoon baking soda - 1/2 teaspoon ground ginger - 1/4 teaspoon cinnamon - 1/4 teaspoon salt - 1/2 cup unsalted butter, softened - 1/3 cup honey - 1/4 cup brown sugar - 2 large eggs - Zest of 1 orange - 1/4 cup fresh orange juice - 1 tablespoon grated fresh ginger - 1/2 teaspoon vanilla extract These ingredients blend to create a warm and cozy flavor. The mix of spices adds a nice kick. You can swap some ingredients to suit your taste. For example: - Use whole wheat flour for a heartier texture. - Maple syrup can replace honey if you prefer. - Coconut oil works well instead of butter for a dairy-free option. Adding nuts like walnuts or almonds can add crunch. You can also use dried fruit for extra sweetness. Each ingredient adds not just flavor but also health perks: - Honey: It offers antioxidants and can soothe sore throats. - Ginger: This spice can aid digestion and reduce nausea. - Orange zest: It’s rich in vitamin C, boosting your immune system. These cakes are not only tasty but also provide nourishment. Enjoying them can be a delightful way to treat yourself while getting some health benefits. First, preheat your oven to 350°F (175°C). This step is key for even baking. Next, line a muffin tin with paper liners. This helps with easy removal. It also gives your cakes a nice look. Now, let’s mix our dry ingredients. In a medium bowl, whisk together: - 1 cup all-purpose flour - 1/2 teaspoon baking powder - 1/4 teaspoon baking soda - 1/2 teaspoon ground ginger - 1/4 teaspoon cinnamon - 1/4 teaspoon salt Set this bowl aside. In a large bowl, cream together: - 1/2 cup unsalted butter, softened - 1/3 cup honey - 1/4 cup brown sugar Mix these until they’re light and fluffy. Add in the eggs, one at a time. Make sure to mix well after each egg. Next, stir in the zest of one orange and 1 tablespoon of grated fresh ginger. Now, combine your dry mixture with the wet mixture. Alternate with: - 1/4 cup fresh orange juice Start and end with the dry mix. Mix until just combined. Don’t overmix, or your cakes can get tough. Scoop the batter into the prepared muffin tin. Fill each cup about 3/4 full. This gives them room to rise. Bake these in your preheated oven for 18-20 minutes. To check if they’re done, insert a toothpick into the center. If it comes out clean, they are ready. Let the cakes cool in the tin for 5 minutes. After that, transfer them to a wire rack to cool completely. Enjoy the lovely smell while they cool! To keep your orange ginger honey cakes moist, use fresh ingredients. Fresh eggs and butter bring more moisture. Use honey, as it adds sweetness and keeps cakes soft. Mix the batter gently to avoid overworking the flour. Overmixing can lead to dry cakes. Also, don't skip the orange juice; it adds both flavor and moisture. Lastly, let the cakes cool in the pan for a few minutes. This helps them stay tender. To save time, gather all your ingredients first. This makes the process smoother. You can also prepare the dry mix ahead. Store it in an airtight container until you’re ready to bake. When measuring ingredients, use the spoon-and-level method for flour. This helps you avoid packing it down. While the cakes bake, clean up the kitchen. This way, you enjoy your cakes without a mess. For a lovely presentation, dust your cakes with powdered sugar. Place them on a rustic wooden platter for a warm touch. Garnish with thin orange slices and mint leaves. This adds color and freshness. Serve the cakes warm or at room temperature. They pair well with tea or coffee. If you want extra flair, drizzle a bit of honey on top before serving. It looks great and adds sweetness. {{image_2}} You can easily change the texture and taste of your Orange Ginger Honey Cakes by adding nuts or dried fruit. Chopped walnuts or pecans add a nice crunch. You can also toss in dried cranberries or apricots for extra sweetness. Just mix in about 1/2 cup of your choice before baking. This makes each bite even more exciting. If you want to make these cakes gluten-free, swap the all-purpose flour for a gluten-free blend. Many brands offer mixes that work well. You may also try almond flour or coconut flour, but adjust the liquid. Gluten-free flours can absorb more moisture. Start with the original recipe and make small changes as needed. To give your cakes a richer flavor, consider adding more spices or extracts. A teaspoon of vanilla extract can deepen the taste. If you love spice, try a pinch of nutmeg or cardamom. You can even add a bit of citrus zest like lemon or lime for a bright twist. These small changes can turn your cakes into a unique treat. To keep your Orange Ginger Honey Cakes fresh, store them in an airtight container. Place a piece of parchment paper between layers if stacking. This helps prevent sticking. Store them at room temperature for up to three days. If you want them to last longer, refrigeration is a good choice. Just be aware this might change their texture a bit. If you want to save some cakes for later, freezing works well. First, let the cakes cool completely. Then, wrap each cake tightly in plastic wrap. After that, place them in a freezer-safe bag. Be sure to label the bag with the date. Cakes can stay fresh in the freezer for up to three months. When you're ready to enjoy, simply take them out and thaw at room temperature. To enjoy your cakes warm, reheating is easy. Preheat your oven to 300°F (150°C). Place the cakes on a baking sheet and cover them with foil. Heat for about 10 minutes. This keeps them moist and brings out all the flavors. You can also microwave a cake for about 15-20 seconds. Just be careful not to overheat, or the cake may dry out. Enjoy your warm, delightful treat! Yes, you can use other sweeteners. Maple syrup works well. Agave nectar is another option. You can also use granulated sugar, but adjust the liquid in the recipe. Remember, honey adds moisture, so consider that when you swap it out. You can prepare the batter a day before. Store it in the fridge overnight. When ready, bake them fresh in the morning. Alternatively, bake the cakes and let them cool. Store them in an airtight container for up to three days. This keeps them soft and tasty. These cakes pair well with many toppings. A dollop of whipped cream adds a nice touch. You can also serve them with a side of yogurt. Fresh fruit like berries or slices of orange brightens the plate. For a fun twist, drizzle some chocolate sauce on top. In this blog post, we explored key ingredients for tasty cakes and their health benefits. I shared step-by-step instructions and helpful tips to ensure your cake is moist and delightful. We also discussed variations like gluten-free options and flavor infusions. As you bake, remember that experimentation is key. Adjusting recipes will make fun and unique treats. Embrace creativity in the kitchen, and enjoy every bite you make!

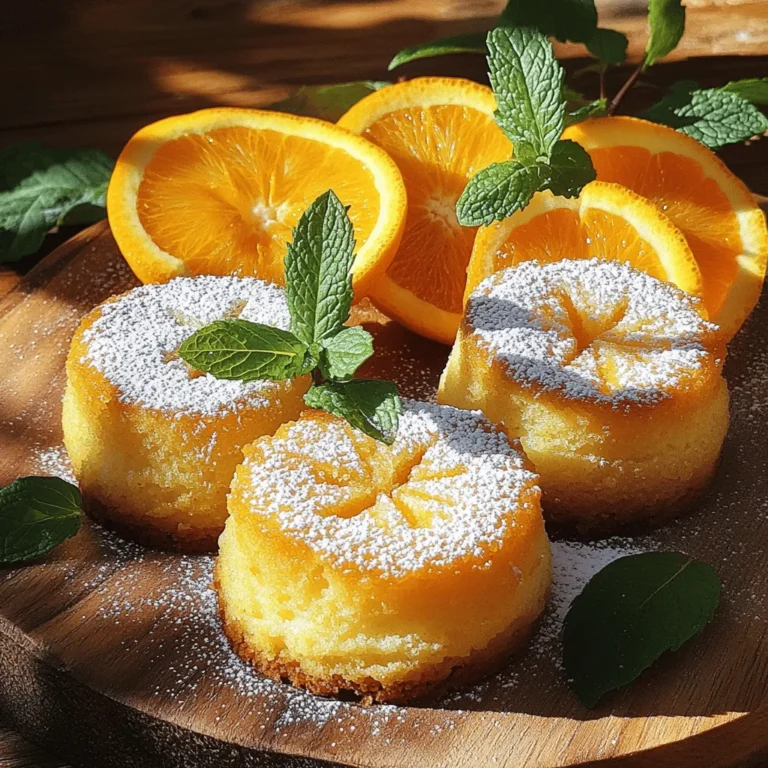
Orange Ginger Honey Cakes Delightful and Simple Treat

- Chicken thighs (1.5 lbs, boneless and skinless) - Basmati rice (2 cups, rinsed) - Onion and garlic (1 large onion, 4 cloves garlic) - Ground cumin (1 tablespoon) - Paprika (1 tablespoon) - Ground turmeric (1 teaspoon) - Ground cinnamon (1 teaspoon) - Cayenne pepper (½ teaspoon) - Chicken broth (3 cups) - Olive oil (2 tablespoons) - Garnishes (fresh parsley and lemon wedges) To make my savory One-Pot Shawarma Chicken and Rice, I start with the main ingredients. First, I choose 1.5 pounds of chicken thighs. I prefer them boneless and skinless for easy cooking. Next, I take 2 cups of basmati rice. Rinsing the rice helps remove excess starch and keeps it fluffy. I also add one large onion and four cloves of garlic. Chopping these finely brings out their flavors. Next come the spices and seasonings. I measure one tablespoon of ground cumin and one tablespoon of paprika. These spices give the dish its warm, rich taste. I also add one teaspoon of ground turmeric for color and health benefits. Then, I sprinkle in one teaspoon of ground cinnamon. This spice adds a sweet note. For some heat, I add half a teaspoon of cayenne pepper. You can adjust this spice to your liking. For the additional ingredients, I use three cups of chicken broth. This broth adds depth and moisture to the dish. I also need two tablespoons of olive oil for cooking. Finally, I prepare garnishes. Fresh parsley adds a nice touch, while lemon wedges give a zesty finish. 1. Start by heating two tablespoons of olive oil in a large pot over medium heat. 2. Next, add one large onion, finely chopped, and four minced garlic cloves. Sauté them for about 3-4 minutes. You want them soft and fragrant. 3. Now, stir in 1.5 pounds of boneless, skinless chicken thighs cut into bite-sized pieces. Add one tablespoon of ground cumin, one tablespoon of paprika, one teaspoon of ground turmeric, one teaspoon of ground cinnamon, and ½ teaspoon of cayenne pepper. 4. Season with salt and pepper. Cook for 5-7 minutes until the chicken is browned on all sides. 1. Once the chicken is brown, stir in 2 cups of rinsed basmati rice until well combined. 2. Carefully pour in 3 cups of chicken broth. Bring it to a boil. 1. After it boils, reduce the heat to low. Cover the pot and let it simmer for 20-25 minutes. The rice should absorb all the liquid and become tender. 2. After cooking, remove the pot from heat. Let it sit, covered, for 5 minutes before serving. Fluff the rice with a fork, adjust seasoning if needed, and serve your delicious Shawarma Chicken and Rice! To get the best flavor from your One-Pot Shawarma Chicken and Rice, adjust the spiciness with cayenne pepper. If you like it hotter, add more. If you prefer milder, use less. You can also change the salt and pepper to fit your taste. Experiment with cumin, paprika, and turmeric until it feels just right for you. I recommend using a Dutch oven for cooking. It helps the heat spread evenly, giving you a perfect meal. After cooking, fluff the rice with a fork for the best texture. This step makes the rice light and separates the grains, so it doesn't clump together. For a rustic look, serve the dish directly from the pot. It looks inviting and keeps the food warm. If you prefer, plate it individually. Add lemon wedges on the side for a pop of color and a burst of fresh flavor. Squeezing lemon juice over the dish enhances the taste and makes it look appealing. {{image_2}} You can change the protein in this dish. Try using chicken breast instead of thighs. Chicken breast is leaner and cooks faster. It will still taste great with the spices. For a vegetarian option, use chickpeas. Chickpeas add protein and fiber. They soak up the shawarma flavors well. If you want to switch the rice, consider quinoa or jasmine rice. Quinoa is a healthy choice, full of protein. Jasmine rice has a lovely aroma and texture. For a low-carb option, use cauliflower rice. It cooks quickly and absorbs flavors nicely. This swap keeps the dish light and fresh. To make the dish even better, add some veggies. Bell peppers or peas work well. They add color and nutrition. You can also top your dish with yogurt or tahini. Both options add creaminess and a tangy taste. These little changes can make a big difference in flavor. You can store leftover Shawarma Chicken and Rice in the fridge for up to three days. To keep it fresh, place it in an airtight container. This helps lock in flavors and moisture. Make sure to let it cool down before sealing to prevent condensation. For longer storage, you can freeze this dish for up to three months. Let it cool completely before transferring it to a freezer-safe container. Be sure to label it with the date. When you are ready to eat, thaw it overnight in the fridge. For the best texture, reheat it on the stove with a splash of chicken broth. This keeps the rice from drying out. Batch cooking is a great way to save time. You can double the recipe and store extra portions for later. Use meal prep containers for easy storage and portion control. This way, you can grab a meal and heat it quickly during your busy week. Yes, you can use other rice types. Jasmine rice works well. You can also use brown rice for a healthier option. If you choose brown rice, you will need more broth and a longer cooking time. Adjust the liquid to 3.5 cups and cook for about 30-35 minutes. Yes, you can make this dish gluten-free. Use gluten-free chicken broth. Most spices are gluten-free, but check labels just in case. Avoid any pre-made spice mixes that may contain gluten. To add heat, try using more cayenne pepper. Start with one teaspoon and adjust to taste. You can also add chopped jalapeños or red pepper flakes. For a different flavor, consider using harissa paste in the cooking process. This blog post highlighted a flavorful chicken and rice dish. We discussed key ingredients like chicken thighs, basmati rice, and essential spices. You learned step-by-step cooking instructions to ensure great results. I offered tips for enhancing flavor, various ingredient swaps, and storage advice. Incorporating these elements will help you create a delicious meal tailored to your taste. Enjoy experimenting with flavors and don’t hesitate to make it your own!

Savory One-Pot Shawarma Chicken and Rice Recipe

Cooking Spinach Mushroom One-Pot Pasta is simple and quick. You need just a few main ingredients to make a flavorful dish. - Pasta type: Use 8 ounces of spaghetti or any pasta you like. - Fresh vegetables: You will need 4 cups of fresh spinach, 8 ounces of sliced mushrooms, 1 medium onion, and 4 cloves of minced garlic. - Seasonings and broth: Gather 3 cups of vegetable broth, 1 teaspoon of dried oregano, and 1 teaspoon of dried thyme. Add salt and pepper to taste. - Cheese and garnish options: If you want, include 1/2 cup of grated Parmesan cheese. Fresh basil leaves make a great garnish too. These ingredients come together in one pot to create a meal that is hearty and satisfying. The fresh spinach and mushrooms add texture and flavor, while the cheese brings it all together. You can customize this dish based on what you have at home or what you prefer. Enjoy the process of cooking, and feel free to get creative! 1. Start by heating 2 tablespoons of olive oil in a large pot over medium heat. 2. When the oil is hot, add 1 medium onion, finely chopped. Sauté the onion for 3 to 4 minutes, until it turns translucent. 3. Next, stir in 4 cloves of minced garlic and 8 ounces of sliced mushrooms. Cook for another 5 to 7 minutes. The mushrooms should be tender and release their moisture. 4. Now, add 1 teaspoon of dried oregano, 1 teaspoon of dried thyme, salt, and pepper. Toss everything well to mix the spices into the veggies. 5. Pour in 3 cups of vegetable broth and bring the mixture to a gentle boil. 1. Add 8 ounces of your choice of pasta to the pot. Make sure the pasta is submerged in the broth. 2. Reduce the heat to a low simmer and cover the pot. Let it cook for 10 to 12 minutes. Stir occasionally to prevent sticking. 3. When the pasta is nearly al dente, fold in 4 cups of fresh spinach. Cook for another 2 to 3 minutes until the spinach wilts. 4. If you like, stir in ½ cup of grated Parmesan cheese for a creamy touch. Adjust the seasoning if needed. 5. Remove the pot from heat and let it sit for a minute before serving. This one-pot pasta is simple, quick, and full of flavor! To keep your pasta from sticking, stir it often. When you add the pasta to the pot, mix it well. This helps it stay separate. You can also use a bit more broth if needed. Adjusting the seasoning is key for your taste. Start with the salt and pepper, then taste. You can always add more later. If you like more heat, add red pepper flakes. If you want it richer, mix in more cheese. For a great presentation, serve the pasta in deep bowls. Top it with fresh basil leaves. A sprinkle of extra Parmesan cheese adds flavor and looks nice. Drizzle a bit of olive oil on top for shine. Complementary side dishes can enhance the meal. A simple salad with lemon dressing pairs well. Garlic bread is also a great choice. You can even serve it with a light soup for a full dinner. {{image_2}} You can switch out some ingredients for fun twists. Try using kale or zucchini instead of spinach. These veggies add new flavors and textures. If you need gluten-free options, use gluten-free pasta. It cooks well and tastes great too. To boost flavor, think about adding protein. Chicken, shrimp, or even beans work well. They make the dish heartier and more filling. You can also experiment with different cheeses. Try mozzarella, feta, or goat cheese for a new taste. Each cheese gives the dish a unique flavor that makes it special. To store your one-pot pasta, let it cool first. Place it in an airtight container. This keeps the pasta fresh and ready for later. You can keep it in the fridge for up to three days. When you reheat it, add a splash of vegetable broth. This helps keep the pasta moist. Heat it on the stove over low heat. Stir it often to avoid burning. You can also use a microwave. Heat it in short bursts, stirring in between. If you want to freeze the dish, let it cool completely first. Use a freezer-safe container for best results. It can stay in the freezer for up to three months. When you are ready to enjoy it again, thaw it in the fridge overnight. You can also thaw it in the microwave on low power. Reheat it on the stove with added broth for moisture. This helps restore its fresh taste. Yes, you can make this dish vegan. Simply skip the Parmesan cheese or use a vegan cheese. Use vegetable broth and ensure any pasta you choose is egg-free. Fresh spinach and mushrooms add great flavor and nutrition. This dish pairs well with a side salad. A simple green salad with olive oil dressing complements the pasta nicely. You might also enjoy garlic bread or a light soup. These sides enhance your meal without taking away from the pasta. Cooking pasta in a one-pot recipe takes about 10-12 minutes. This is after bringing your broth to a gentle boil. Stir the pasta often to keep it from sticking. Make sure to check for doneness and adjust cooking time as needed. This blog post covers the key ingredients for a tasty one-pot pasta dish, along with clear steps for cooking. I shared tips to enhance your meal and ways to store leftovers. The recipe offers flexibility too, letting you swap ingredients for your taste. You can create a simple yet delicious meal with ease. I hope you feel inspired to try it today! Enjoy your cooking and make it your own!

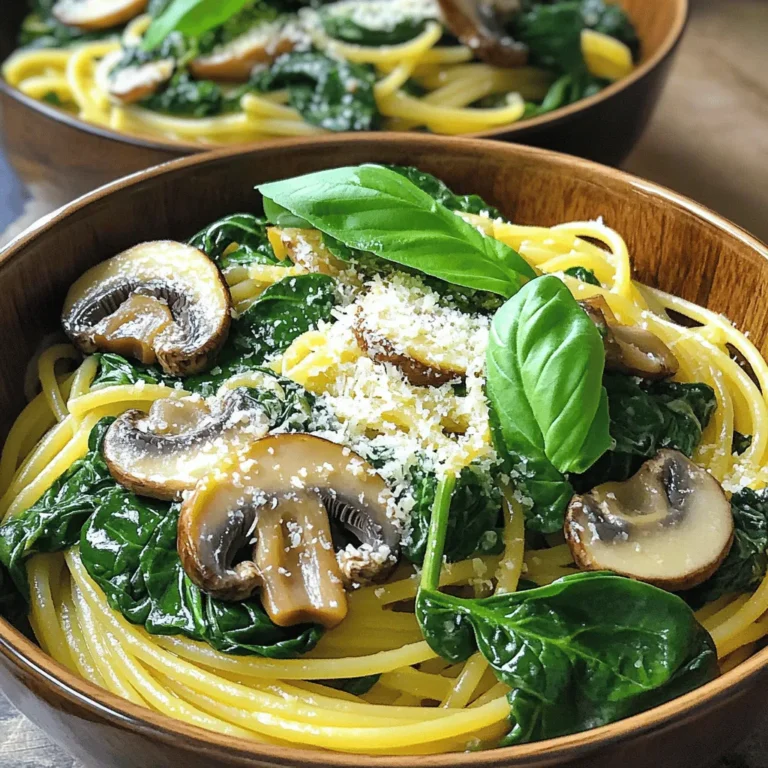
Spinach Mushroom One-Pot Pasta Simple and Quick Meal

PREV 1 … 31 32 33 … 57 NEXT
go kitchen now

explore

DessertsDinnerAppetizersDrinks

Our Policies

  • Cookie Policy
  • Copyright Policy
  • Disclaimer
  • GDPR Policy
  • Terms Of Use
Back to Top
  • About
  • Contact Us
  • Privacy Policy
© 2025 go kitchen now