FREE DINNER EBOOK! Get your copy!
  • Cookie Policy
  • GDPR Policy
  • Disclaimer
  • Terms Of Use
  • Visit my other site: Fun Cookie Recipes
go kitchen now
  • Home
  • Dinner
  • Desserts
  • Drinks
  • Appetizers
  • Contact
  • About
  • Privacy Policy
  • Home
  • Dinner
  • Desserts
  • Drinks
  • Appetizers
  • Contact
  • About
  • Privacy Policy
  • Cookie Policy
  • GDPR Policy
  • Disclaimer
  • Terms Of Use
Visit my other site: Fun Cookie Recipes

HOME / CATEGORIES /

Latest

To make fudgy brownies, you need the following ingredients: - 1 cup (230g) unsalted butter - 2 cups (400g) granulated sugar - 4 large eggs - 1 teaspoon vanilla extract - 1 cup (125g) all-purpose flour - 1 cup (90g) unsweetened cocoa powder - 1/2 teaspoon salt - 1/2 teaspoon baking powder - 1 cup (150g) chocolate chips (semi-sweet or dark) - 1/2 cup (75g) chopped walnuts or pecans (optional) The butter is key for rich flavor and soft texture. It helps the brownies stay moist. Granulated sugar adds sweetness and helps create that shiny top. Eggs give structure and keep the brownies fudgy. Vanilla extract adds depth to the flavor. Cocoa powder is a must for chocolate richness. The flour adds structure, but we use less of it for a fudgier result. Salt balances the sweetness and boosts flavor. Baking powder lifts the brownies slightly. Chocolate chips are great for added melty bites. You can add walnuts or pecans for crunch and flavor. These ingredients come together to create a perfect fudgy brownie. You can swap butter with coconut oil for a dairy-free option. Brown sugar can replace granulated sugar for more moisture. If you need an egg-free version, use unsweetened applesauce or flaxseed meal mixed with water. For gluten-free brownies, use a gluten-free all-purpose flour mix. You can use cacao powder instead of cocoa powder if you want a lighter chocolate flavor. These substitutions will change the texture and taste, but your brownies will still be delicious. 1. First, preheat your oven to 350°F (175°C). This step ensures even baking. 2. Grease a 9x13 inch (23x33 cm) baking pan. Line it with parchment paper. Leave some paper hanging over the sides. This helps you lift the brownies out later. 3. Next, melt 1 cup (230g) of unsalted butter in a medium saucepan over low heat. 4. Once melted, take it off the heat. Stir in 2 cups (400g) of granulated sugar until it mixes well. 5. Let the mixture cool a bit. Then, add 4 large eggs one at a time. Whisk them in well. 6. Add 1 teaspoon of vanilla extract for flavor. Mix until smooth. 7. In another bowl, whisk together 1 cup (125g) of all-purpose flour, 1 cup (90g) of unsweetened cocoa powder, 1/2 teaspoon of salt, and 1/2 teaspoon of baking powder. 8. Slowly add the dry mix to the wet mix. Stir gently to combine. Avoid overmixing to keep the brownies fudgy. 9. Fold in 1 cup (150g) of chocolate chips. If you like nuts, add 1/2 cup (75g) of chopped walnuts or pecans here. 10. Pour the brownie batter into the pan. Spread it out evenly. 11. Bake for 25-30 minutes. Check with a toothpick. It should come out with a few moist crumbs but not wet batter. Overbaking can make them dry. 12. After baking, let brownies cool in the pan for about 15 minutes. 13. Lift them out using the parchment paper. Transfer to a wire rack to cool completely. 14. Once cooled, cut them into squares. Serve them plain or with a dusting of powdered sugar. Add a scoop of vanilla ice cream for a treat. By following these steps closely, you will create fudgy brownies that are rich and decadent. Enjoy the process and the delicious results! To get fudgy brownies, focus on the right balance of ingredients. Use more butter and sugar than flour. This tip keeps your brownies moist and rich. Avoid overmixing the batter; mix just until combined. This keeps the texture soft. Bake at 350°F (175°C) for 25 to 30 minutes. A toothpick should come out with a few moist crumbs. This shows your brownies are perfectly fudgy. Many people overbake their brownies. This makes them dry instead of fudgy. Always check with a toothpick a few minutes before the time is up. Another mistake is using cold eggs. Cold eggs can affect how well they mix. Let them sit at room temperature for a bit. Lastly, don’t skip the cooling step. Letting them cool helps set the texture before cutting. Using high-quality ingredients makes a big difference. Choose real unsalted butter for a rich taste. Use pure vanilla extract, not imitation, for better flavor. For cocoa powder, select a good brand for depth in taste. Semi-sweet or dark chocolate chips add a lovely richness. If you like nuts, choose fresh walnuts or pecans. This adds a crunchy texture that pairs well with the fudginess. {{image_2}} You can add a crunchy twist to your fudgy brownies. Nuts like walnuts or pecans work great. They add texture and flavor. Just chop them into small pieces. Fold in about half a cup into the batter. You can also try chocolate chunks or even dried fruit for a unique taste. While fudgy brownies are rich on their own, frosting can take them to the next level. A simple chocolate ganache is a popular choice. Just heat heavy cream and pour it over chocolate chips. Stir until smooth, then spread it on top of the cooled brownies. Cream cheese frosting also adds a nice tang. You can even sprinkle some sea salt on top for a sweet and salty mix. Adding flavors can make your brownies special. For mint, add a teaspoon of mint extract to the batter. This gives a fresh twist. If you love coffee, use espresso powder. Just one teaspoon can deepen the chocolate flavor. You can also try orange zest for a citrus kick. Experiment with these flavors to find your favorite combo! To keep your fudgy brownies tasty, store them in an airtight container. This helps keep them moist and fresh. You can line the container with parchment paper to avoid sticking. Always let the brownies cool completely before sealing. If you live in a warm place, keep them in the fridge. This stops them from melting or getting too soft. Freezing brownies is easy and a great way to save them. First, let the brownies cool down fully. Then, cut them into squares. Wrap each square tightly in plastic wrap. Place them in a freezer bag or container. Label with the date. To reheat, take out a square and let it sit at room temperature for about 30 minutes. Then, warm it in the microwave for 10-15 seconds or until soft. When stored properly, fudgy brownies last about 3 days at room temperature. If you keep them in the fridge, they can last up to a week. In the freezer, they stay good for about 3 months. Just remember, the fresher they are, the better they taste! A fudgy brownie has a dense and moist texture. This comes from using more fat and less flour. In our recipe, the butter and eggs create this rich feel. The chocolate chips add extra gooeyness. Mixing gently also helps keep that fudgy texture. Yes, you can make fudgy brownies without eggs. You can use applesauce or mashed bananas as substitutes. Use 1/4 cup of either for each egg you replace. This keeps the brownies moist and adds natural sweetness. You can also use flaxseed meal mixed with water for a similar effect. To check if your brownies are done, use a toothpick. Insert it into the center of the brownies. If it comes out with a few moist crumbs, they are ready. If it comes out clean, they may be overbaked. Remember, they will continue to cook while cooling. Fudgy brownies are simple to make and delicious. We covered key ingredients, steps, and tips for baking. You learned how to avoid mistakes and enhance flavors. Using good ingredients is vital for the best taste. Remember, experimenting with mix-ins, frostings, and flavors can make your brownies special. Store them right to keep them fresh. Keep practicing to master fudginess, and soon you’ll impress everyone with your brownies. Enjoy baking, and share your tasty results!

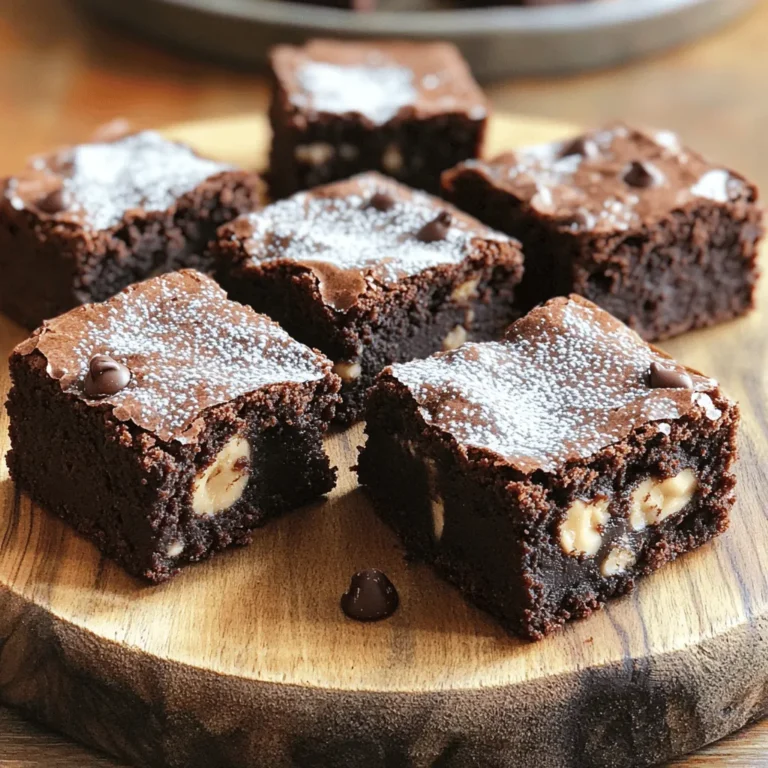
Fudgy Brownies Rich and Decadent Chocolate Treat

- 1 lb ground beef - 1 medium onion, chopped - 2 cloves garlic, minced - 1 can (15 oz) diced tomatoes with green chilies - 1 cup uncooked elbow macaroni - 2 cups beef broth - 1 teaspoon Italian seasoning - 1 cup shredded cheddar cheese - 1 cup shredded mozzarella cheese - Salt and pepper to taste - Fresh parsley, chopped (for garnish) When you cook, it helps to know the right amounts. Here’s a quick guide: - 1 lb ground beef is about 16 ounces. - 1 medium onion is roughly 1 cup when chopped. - 2 cloves garlic should be minced fine. - 1 can of diced tomatoes holds 15 ounces, perfect for flavor. - 1 cup elbow macaroni is dry and will cook up nicely. - 2 cups beef broth keeps everything moist and tasty. - 1 teaspoon Italian seasoning adds a nice touch. - 1 cup of each cheese gives that cheesy goodness. Using fresh ingredients can enhance the taste. Fresh onions and garlic pack more flavor than dried or powdered forms. I love using fresh parsley for garnish. It adds a pop of color and taste. Canned tomatoes save time and still taste great. The green chilies add a nice kick without being too spicy. For the macaroni, I always choose uncooked. It cooks perfectly in the casserole and absorbs flavors well. {{ingredient_image_1}} First, you need to preheat your oven to 375°F (190°C). This makes sure your casserole bakes evenly. Grab a large skillet and a 9x13 inch baking dish. Grease the baking dish with a little oil. This helps the casserole come out easily. Next, place the skillet on medium heat. Add 1 pound of ground beef to the skillet. Use a wooden spoon to break it apart. Cook until it’s brown. This should take about 5-7 minutes. Drain any extra fat, then add 1 chopped onion and 2 minced garlic cloves. Stir and cook until the onion turns soft. This takes about 3-4 minutes. Now, it’s time to mix in the main ingredients. Add 1 can of diced tomatoes with green chilies, 1 cup of uncooked elbow macaroni, and 2 cups of beef broth. Don’t forget the Italian seasoning, salt, and pepper for flavor. Stir everything well and bring it to a gentle boil. Lower the heat and cover the skillet. Let it simmer for 10-12 minutes until the macaroni is tender. After simmering, take the skillet off the heat. Stir in half of the cheddar cheese and half of the mozzarella cheese. Mix until it’s well combined. Now, carefully pour this mixture into the greased baking dish. Make sure it’s spread out evenly. Finally, sprinkle the remaining cheddar and mozzarella cheese on top. Place the dish in the preheated oven. Bake for 20-25 minutes. Keep an eye on it until the cheese is bubbly and golden. Once done, take it out and let it cool for 5 minutes before serving. You can garnish with fresh chopped parsley for a nice touch. Enjoy your cheesy hamburger casserole bake! To boost flavor, use Italian seasoning. It adds herbs like oregano and basil. You can also add a dash of paprika for warmth. If you like spice, try some cayenne pepper. These spices blend well with the beef and tomatoes. To cook evenly, make sure to break apart the ground beef. Brown it well before adding other ingredients. Stir the mixture often while it simmers. This helps the macaroni cook evenly. If you notice any clumps, break them up gently. For the best cheese melt, use a mix of cheddar and mozzarella. Shred the cheese yourself for better melting. Pre-shredded cheese has additives that can affect melting. Spread cheese evenly across the top before baking. This ensures a nice, golden layer. Pro Tips Brown the Beef Properly: Make sure to brown the ground beef well for enhanced flavor. This caramelization adds depth to your casserole. Use Quality Cheese: Opt for a high-quality sharp cheddar and fresh mozzarella for a richer taste and better melting texture. Add Veggies: Consider adding extra vegetables like bell peppers or zucchini for added nutrition and flavor. Let it Rest: Allow the casserole to cool for a few minutes before serving. This helps the layers set and makes for easier serving. {{image_2}} You can change the meat in this dish. Try ground turkey or chicken instead of beef. You might also use cooked sausage for a spicy kick. If you want a different pasta, use penne or rotini. They work well in casseroles too. Just remember, the cooking time might change a bit. To make a vegetarian version, skip the meat. Use a mix of beans for protein, like black beans or kidney beans. You can add more veggies too, like bell peppers or zucchini. Use vegetable broth instead of beef broth. This keeps the flavor rich. Serve this casserole with a fresh green salad. A light vinaigrette complements the cheesy dish. You can also add garlic bread on the side. It will soak up any extra sauce. For a fun twist, top with sliced jalapeños for heat. Enjoy your meal with a cold drink, like iced tea or lemonade. To keep your Cheesy Hamburger Casserole Bake fresh, let it cool first. Use an airtight container for storage. This helps prevent moisture loss and keeps flavors intact. Store it in the fridge for up to three days. If you want to save it longer, freezing is a great option. To freeze the casserole, let it cool completely. Then, cut it into portions for easy serving. Wrap each piece tightly in plastic wrap. Place the wrapped portions in a freezer-safe bag. This keeps the casserole fresh for up to three months. Label the bag with the date to track freshness. When you're ready to enjoy the leftovers, take a portion from the fridge or freezer. If frozen, let it thaw overnight in the fridge. To reheat, place it in an oven-safe dish. Cover it with foil to keep it moist. Heat at 350°F (175°C) for about 20-25 minutes. For a bubbly finish, uncover for the last 5 minutes. Enjoy your cheesy delight! Yes, you can make this dish ahead of time. Prepare the casserole up to the baking step. Cover it and store it in the fridge. When ready to serve, just bake it. This makes it a great choice for busy days. If you want to switch things up, use other pasta types. You can try rotini, penne, or even shells. Each pasta shape brings a different texture. Just adjust the cooking time as needed. The casserole can last for about three to four days in the fridge. Make sure to cover it well to keep it fresh. If you want to enjoy it later, consider freezing it instead. Absolutely! Adding vegetables boosts the nutrition and flavor. You can include bell peppers, spinach, or peas. Just chop them small and add them when cooking the beef. This makes your dish even more colorful and tasty. In this post, we explored the tasty Cheesy Hamburger Casserole Bake. You learned about the key ingredients and their measurements. We covered step-by-step instructions, useful tips, and flavor variations. Don't forget how to properly store and reheat leftovers for the best taste. This dish is easy to make and offers room for creativity. Whether you cook for family or friends, everyone will love it. Enjoy your cooking journey and make this comforting meal your own!

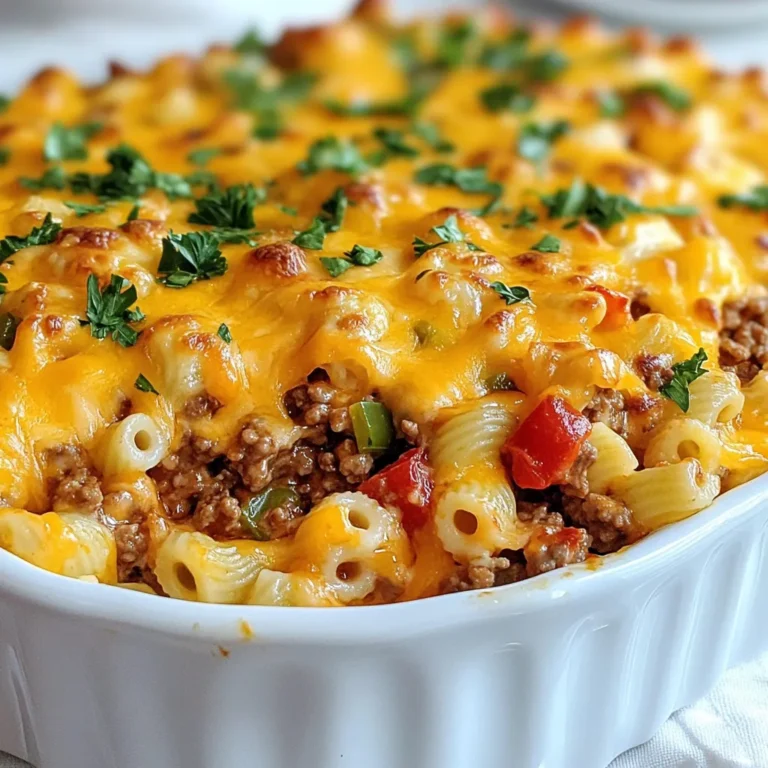
Cheesy Hamburger Casserole Bake Easy and Comforting Dish

- 1 cup all-purpose flour - 1/3 cup water (plus extra if needed) - ½ teaspoon salt - 1 cup finely chopped cabbage - ½ cup shredded carrots - ½ cup minced mushrooms - 2 green onions, finely chopped - 1 teaspoon grated ginger - 1 tablespoon soy sauce - 1 teaspoon sesame oil - 2 tablespoons vegetable oil (for frying) - Dipping sauces: soy sauce and chili oil To make crispy pan-fried dumplings, you need fresh ingredients. The dough starts with all-purpose flour, water, and salt. This simple mix forms a soft and pliable dough. The filling is where the magic happens! Use chopped cabbage, shredded carrots, and minced mushrooms for flavor and crunch. Green onions and ginger add a fresh kick. Soy sauce and sesame oil bring everything together. These ingredients make each bite burst with taste. For cooking, you need vegetable oil to fry the dumplings. Serve with soy sauce and chili oil for dipping. This balance of flavors is sure to impress! To start, combine 1 cup of all-purpose flour and ½ teaspoon of salt in a bowl. Slowly add 1/3 cup of water while mixing. Keep stirring until you have a shaggy dough. Next, knead the dough on a floured surface for about 5 minutes. You want it to feel smooth. Once ready, cover it with a damp cloth and let it rest for 30 minutes. This resting time helps the dough become more elastic. For the filling, take a separate bowl. Mix together 1 cup of finely chopped cabbage, ½ cup of shredded carrots, ½ cup of minced mushrooms, and 2 finely chopped green onions. Add 1 teaspoon of grated ginger, 1 tablespoon of soy sauce, and 1 teaspoon of sesame oil. Stir until all the ingredients blend well. This mix will give a tasty punch to your dumplings. After the dough rests, divide it into small pieces. Each piece should be about the size of a golf ball. Roll each piece into a thin circle, around 3 inches wide. Keep the rolled wrappers covered with a damp cloth. This prevents them from drying out. Place 1 teaspoon of filling in the center of each wrapper. Fold the dough over to form a half-moon shape. Pinch the edges tightly to seal them. You can make pleats for a nice touch if you like. To cook, heat 2 tablespoons of vegetable oil in a large non-stick skillet over medium heat. Add the dumplings in a single layer, leaving space between them. Cook for about 2-3 minutes until the bottoms turn golden brown. Next, carefully add ¼ cup of water to the skillet. Cover the skillet right away and let it steam for about 5-7 minutes. This step helps cook the dumplings through. Once the water evaporates, remove the lid. Let them cook for an extra minute to crisp up the bottoms. Now, your crispy pan-fried dumplings are ready to serve! To make dumplings crispy, start with the right frying temperature. Heat your oil until it's hot but not smoking. A medium heat works best. You want the bottoms to brown without burning. Next, steam your dumplings for doneness. After frying, add water to the pan. Cover it quickly to trap steam inside. This helps cook the filling while keeping the skin crispy. Steam for about 5-7 minutes, then uncover and fry for one more minute. You can mix up your filling for fun. Try using different vegetables like spinach, bell peppers, or zucchini. Each adds a unique taste and texture. For added protein, consider minced chicken, pork, or tofu. These options can make your dumplings more filling and satisfying. Don’t be afraid to experiment! When serving, arrange the crispy dumplings on a large platter. This makes a great display. Small bowls of soy sauce and chili oil are perfect for dipping. Garnish with chopped green onions for a pop of color. You can even add sesame seeds for extra flair. A beautiful presentation makes your dish stand out! {{image_2}} You can make your dumplings healthier by choosing whole wheat flour. Whole wheat flour adds fiber and nutrients. It also gives a nutty flavor that pairs well with the filling. Another way to lighten up your dish is by reducing the oil for frying. Instead of using two tablespoons, start with one tablespoon. You can also use a non-stick pan. This will help keep the dumplings crispy without using too much oil. To boost flavor, try adding spices or herbs. A pinch of garlic powder or some fresh cilantro can make a big difference. You can also add a dash of chili flakes for some heat. These tweaks can make your dumplings even more exciting. Creative dipping sauce ideas can elevate your meal. Instead of just soy sauce, mix soy sauce with a splash of rice vinegar. You can also blend soy sauce with sesame oil and a hint of honey for a sweet touch. Experimenting with different sauces can lead you to your new favorite dumpling dip. You can make different types of dumplings to suit your taste. Vegetarian dumplings are a great option. Fill them with a mix of vegetables like bell peppers, spinach, or even tofu for protein. If you prefer meat, meat-filled dumplings are delicious too. You can use ground pork, chicken, or beef for the filling. Just make sure to season the meat well with ginger, garlic, and soy sauce for extra flavor. This way, you can enjoy the best of both worlds while savoring your crispy pan-fried dumplings. To store leftover dumplings, place them in an airtight container. This keeps them fresh. You can also line the container with parchment paper to avoid sticking. The recommended shelf life in the fridge is about 3 days. After that, they may lose their crispy texture. You can freeze dumplings before or after cooking. To freeze raw dumplings, spread them on a tray. Make sure they don’t touch. Once frozen, transfer them to a zip-top bag. For cooked dumplings, let them cool first. Then, place them in a container or bag. To thaw, leave them in the fridge overnight. For quick thawing, use the microwave on low. To reheat, pan-fry them straight from frozen for about 5-7 minutes. Add a splash of water and cover to steam. This keeps them crispy and warm inside. To keep dumpling wrappers fresh, cover them with a damp cloth. This will help maintain moisture. You can also place them in a sealed container. Avoid leaving them exposed to air. If you need to stack them, add parchment paper between the layers. This prevents sticking and keeps them soft. Yes, you can make dumplings ahead of time! You can store them in the fridge for up to two days. Keep them in an airtight container to avoid drying out. If you want to freeze them, place them in a single layer on a baking sheet first. Once frozen, transfer them to a freezer bag. They can last for about three months in the freezer. Reheat them by steaming or pan-frying straight from frozen. Crispy pan-fried dumplings pair well with many side dishes. Here are some tasty options: - Steamed vegetables like broccoli or bok choy - A simple salad with a light vinaigrette - Rice or noodles for a filling meal - Soy sauce or chili oil for dipping - Green tea or a light beer for beverages These sides will enhance your dumpling experience and balance flavors on your plate. Dumplings are fun to make and eat. We covered simple ingredients for dough, filling, and cooking. You learned how to prepare and assemble dumplings with easy steps. Tips on achieving crispiness and variations give you room to be creative. You can also store dumplings well, keeping leftovers fresh. Try new flavors and fillings to make them your own. Enjoy this cooking journey, and share your dumpling creations with friends!

Crispy Pan-Fried Dumplings Flavorful and Simple Treat

- 1 cup unsalted butter - 2 cups granulated sugar - 4 large eggs - 1 teaspoon vanilla extract - 1 cup all-purpose flour - 1/2 cup unsweetened cocoa powder - 1/2 teaspoon salt - 1 cup semi-sweet chocolate chips - 16 oz cream cheese - 1 cup granulated sugar - 3 large eggs - 1 teaspoon vanilla extract - 1/4 cup sour cream - 1/2 cup chocolate ganache - Chocolate shavings or berries for garnish To start, we need to gather all our ingredients. This makes cooking smooth and fun. For the brownie layer, use good quality unsalted butter. It adds a rich flavor. You will also need granulated sugar, eggs, and vanilla extract for sweetness and moisture. Next, we add flour, cocoa powder, and salt. This gives the brownie a deep chocolate taste. Don't forget the semi-sweet chocolate chips! They melt and add gooey goodness. For the cheesecake layer, grab 16 ounces of cream cheese. It must be soft for easy mixing. Sugar, eggs, vanilla, and sour cream will make it creamy and rich. Finally, for the topping, you can use ready-made chocolate ganache or make your own. Use chocolate shavings or fresh berries to make the cake look pretty. Gathering all these ingredients makes the baking process easier. Enjoy the mix of flavors and textures in this decadent brownie cheesecake layer cake! - Preheat oven to 350°F (175°C). - Grease and line two 9-inch round cake pans with parchment paper. - Melt 1 cup of unsalted butter in a saucepan. - Mix melted butter with 2 cups of granulated sugar. - Add 4 large eggs, one at a time, mixing well after each. - Stir in 1 teaspoon of vanilla extract. - In a separate bowl, combine 1 cup of all-purpose flour, 1/2 cup of unsweetened cocoa powder, and 1/2 teaspoon of salt. - Gradually add the dry mix to the wet mixture until just combined. - Fold in 1 cup of semi-sweet chocolate chips. - Divide the brownie batter between the two prepared pans. - Bake brownies for 20-25 minutes. - Check with a toothpick; it should come out with a few moist crumbs. - Allow brownies to cool in the pans. - In a large bowl, beat 16 oz of softened cream cheese and 1 cup of granulated sugar until smooth. - Add 3 large eggs, one at a time, mixing well after each. - Stir in 1 teaspoon of vanilla extract and 1/4 cup of sour cream until fully combined. - Pour cheesecake batter over the cooled brownie layers. - Bake cheesecake layer at 325°F (160°C) for 30-35 minutes. - The edges should be set, but the center can still jiggle. - Let both layers cool completely. - Stack the brownie-cheesecake layers with a layer of ganache between them. - Chill the cake in the refrigerator for at least 2 hours before serving. - Use quality chocolate. Good chocolate gives your brownies a rich taste. - Avoid overbaking for fudginess. Bake just until a toothpick shows some moist crumbs. This keeps them soft and gooey. - Ensure cream cheese is at room temperature. Soft cream cheese blends well and creates a smooth batter. - Do not overmix to prevent cracking. Mix just until combined. Overmixing adds air, which can cause cracks. - Use ganache elegantly. Pour it over the top for a smooth, shiny finish. - Add garnishes for visual appeal. Use chocolate shavings or fresh berries for color and texture. These little details make a big difference in presentation. {{image_2}} You can change the flavor of this cake easily. Adding different extracts makes a big difference. For example, try using almond extract instead of vanilla. This will give your cake a nutty twist. You could also swap chocolate ganache for a fruit topping. Fresh berries or a berry sauce can add a bright flavor. This makes the cake more refreshing and fun to eat. If you are gluten-free, you can still enjoy this cake. Use almond flour instead of all-purpose flour for the brownie base. This change keeps the brownies rich and fudgy. For those who follow a vegan diet, both layers can be made vegan. Use plant-based cream cheese and a flax egg instead of regular eggs. This way, everyone can enjoy a slice of this delicious cake. How you present this cake can change the whole experience. You could layer the brownies and cheesecake in different colors or flavors. This makes each slice a surprise! Another fun idea is to serve individual cheesecakes in jars. This makes for a cute and easy dessert for parties. Plus, it’s a great way to let everyone enjoy their own serving. You can refrigerate leftovers for up to 4 days. Store the cake in airtight containers. This keeps it fresh and tasty. Make sure to cover it well to avoid drying out. To freeze individual slices, wrap them tightly in plastic wrap. Place them in a freezer-safe bag or container. This helps prevent freezer burn. When you want to enjoy a slice, thaw it in the fridge overnight. For quicker thawing, leave it at room temperature for about 30 minutes. To serve after storage, warm the cake slightly in the microwave. Heat it for about 10-15 seconds. This brings back its gooey texture. Pair your slice with a glass of milk or a scoop of vanilla ice cream. The creaminess complements the rich flavors well. Enjoying your cake this way makes it even better! To check if the cheesecake layer is done, look for a few signs. The edges should be set, while the center remains slightly jiggly. This means it will firm up as it cools. A toothpick inserted in the center should come out clean or with a few moist crumbs. Avoid overbaking, as this can lead to cracks. Yes, you can make this cake ahead of time. After baking, let it cool completely. Wrap the cake well in plastic wrap. Store it in the fridge for up to three days. You can also freeze it for up to a month. Just remember to thaw it in the fridge overnight before serving. If you need a substitute for cream cheese, try using Greek yogurt or silken tofu. Both options provide a creamy texture. You can also use dairy-free cream cheese for a vegan choice. Just ensure all ingredients blend well for the right consistency. To avoid cracks in your cheesecake, follow these tips. Use room temperature cream cheese to mix smoothly. Do not overmix the batter, as excess air can cause cracking. Bake the cheesecake in a water bath to keep it moist. Finally, let the cheesecake cool slowly in the oven with the door ajar. Yes, you can make a nut-free version of this recipe. Use semi-sweet chocolate chips that are labeled nut-free. Check for any potential cross-contamination. For the brownie layer, substitute any nut flour with all-purpose flour. This keeps the texture and taste just right. This blog detailed how to create a delicious brownie cheesecake layer cake. You learned about the key ingredients, step-by-step instructions, and essential tips for perfect baking. Remember, quality matters for both the brownies and cheesecake. Explore variations and presentation styles to make it your own. Lastly, follow the storage tips to keep your cake fresh and tasty. Enjoy the sweet rewards of your baking effort!

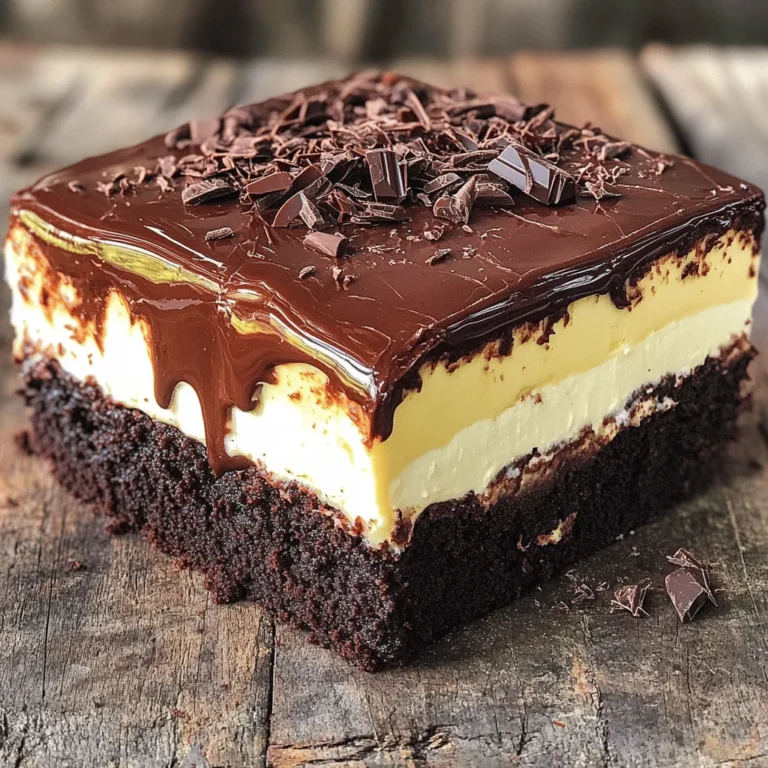
Decadent Brownie Cheesecake Layer Cake Recipe

To make Mini Tiramisu Cups, you need a few key items: - 1 cup strong brewed coffee, cooled - 1 tablespoon cocoa powder (for dusting) - 1 cup heavy whipping cream - 1/2 cup mascarpone cheese - 1/4 cup powdered sugar - 1 teaspoon vanilla extract - 12 ladyfinger cookies (savoiardi) - Chocolate shavings (for garnish) These ingredients work together to create a rich and creamy dessert. The coffee adds a nice flavor, while the mascarpone cheese gives it a smooth texture. You can swap some ingredients if needed. If you don’t have mascarpone cheese, cream cheese works well. Just soften it before using. For a lighter option, use Greek yogurt instead of heavy cream. If you prefer decaf, use decaffeinated coffee. You can also try almond milk for a dairy-free version. Add fun toppings to make your Mini Tiramisu Cups shine! Some ideas include: - Fresh berries for a fruity touch - Whipped cream for extra fluffiness - Crushed nuts for a crunchy bite - More cocoa powder for a richer flavor - Mint leaves for a fresh look These garnishes can elevate your dessert and make it more appealing. Feel free to mix and match! To start, gather your ingredients. You need heavy cream, mascarpone cheese, powdered sugar, and vanilla extract. In a mixing bowl, whip the heavy cream until soft peaks form. This step is crucial for a light texture. Next, gently fold in the mascarpone cheese, powdered sugar, and vanilla extract. Be careful not to deflate the whipped cream, or your mixture will be too heavy. You want it airy and fluffy. Now it's time to build your cups! Take each ladyfinger cookie and dip it quickly into the cooled coffee for 1-2 seconds. You want them to soak in some coffee, but don’t let them get soggy. Place a layer of these coffee-soaked cookies at the bottom of your small cups or glasses. After that, add a layer of your creamy mascarpone mixture on top. Repeat this process, layering ladyfingers and cream until the cups are full, aiming for 2-3 layers. For a beautiful finish, sift cocoa powder over the top layer of each cup. This adds a nice touch and a rich flavor. Chill your cups in the refrigerator for at least 2 hours. This wait allows the flavors to meld, creating a delightful dessert. Just before serving, sprinkle some chocolate shavings on top for an extra bit of luxury. Enjoy your charming mini tiramisu cups! To keep your ladyfingers crisp, dip them quickly in coffee. Just 1-2 seconds is enough. You want them to soak up some coffee but stay firm. If you dip too long, they will become mushy. Also, make sure the coffee is cooled. Hot coffee can make the ladyfingers too soft. Whip the heavy cream until you see soft peaks. This means the cream should hold its shape but still be smooth. When mixing in the mascarpone, do it gently. Use a spatula to fold the ingredients together. This helps keep the air in the whipped cream. If you mix too hard, it will lose its lightness. For a lovely look, use clear cups or glasses. Layer the ladyfingers and cream mixture neatly. Finish with a dusting of cocoa powder for an elegant touch. Don’t forget the chocolate shavings on top! They add flavor and make the dessert look fancy. Chill the cups before serving to make them extra refreshing. {{image_2}} I love chocolate, so I made a chocolate version of mini tiramisu cups. To start, mix in some melted dark chocolate into the mascarpone mixture. Use about 1/4 cup of melted chocolate. This change adds a rich taste. You can also replace the cocoa powder with chocolate powder for dusting. These chocolate cups look beautiful and taste amazing! For a fruity twist, try adding fruit puree to the mascarpone mixture. You can use berries, mango, or passion fruit. Start with 1/4 cup of puree. Blend it well with the mascarpone and powdered sugar. This makes the dessert fresh and light. You can also layer sliced fruit between the ladyfingers. It adds color and flavor. If you need a gluten-free option, use gluten-free cookies instead of ladyfingers. You can find gluten-free savoiardi or sponge cake in stores. Make sure they are not too soft. Another option is to make your own gluten-free ladyfingers at home. Use almond flour or coconut flour. This way, everyone can enjoy the mini tiramisu cups! To keep your mini tiramisu cups fresh, cover them tightly. Use plastic wrap or a lid. Store them in the fridge. They stay good for up to three days. This dessert tastes best when chilled. You can freeze mini tiramisu cups for longer storage. First, wrap each cup in plastic wrap. Then, place them in a freezer-safe container. They can last for up to a month. To enjoy, move them to the fridge overnight. This helps them thaw slowly and keeps them tasty. Always chill your mini tiramisu cups in the back of the fridge. The back is colder than the front. Keep them away from strong-smelling foods. This prevents them from absorbing unwanted odors. Enjoy the rich flavors of your tiramisu without any off-tastes. Yes, you can make Mini Tiramisu Cups ahead of time. The flavors get better when they sit. You can prepare them a day before your event. Just keep them covered in the fridge. This helps them stay fresh and tasty. If you can't find mascarpone cheese, you have options. Cream cheese works well as a substitute. You can blend it with a bit of heavy cream for a creamier texture. Ricotta cheese is another choice, but it has a grainier feel. Your Mini Tiramisu Cups are ready after chilling for at least 2 hours. This time allows the layers to set well. They should feel firm but still soft. The top should have a nice dusting of cocoa powder. When you see that, they are ready to enjoy! You learned how to make delicious Mini Tiramisu Cups with key ingredients and steps. I covered substitutions, tips for perfect texture, and creative variations. Always remember to layer carefully and store properly for the best flavor. These cups are fun, easy, and a treat for any occasion. Now, get your ingredients ready and start making these bites of joy! Enjoy your sweet creation!

Mini Tiramisu Cups Delightful and Easy Dessert Treat

- 1 cup cottage cheese - 1/2 cup almond butter - 1/4 cup honey or maple syrup - 1/2 cup cocoa powder - 1/2 cup rolled oats - 1/4 cup chocolate protein powder - 1/4 cup dark chocolate chips - 1 teaspoon vanilla extract - A pinch of salt These ingredients make up the base for my Cottage Cheese Brownie Protein Bites. Each item plays a key role. Cottage cheese serves as a protein-packed foundation. It gives a creamy texture that balances the dense cocoa flavor. Almond butter adds healthy fats and a nutty taste. Honey or maple syrup sweetens the mix while keeping it natural. Cocoa powder is the star, giving that rich chocolatey flavor we all love. Rolled oats add fiber and a bit of chewiness, making each bite satisfying. Chocolate protein powder boosts the protein content even more, making this a great snack for active folks. Dark chocolate chips add little bursts of sweetness and richness, making each bite a treat. The vanilla extract rounds out the flavors, and a pinch of salt enhances everything. With this simple list, you’re ready to create a tasty, healthy snack. First, grab a large mixing bowl. In it, combine 1 cup of cottage cheese, 1/2 cup of almond butter, and 1/4 cup of honey or maple syrup. Mix these ingredients well until the mixture is smooth. Next, add the dry ingredients. This includes 1/2 cup of cocoa powder and 1/2 cup of rolled oats. Stir these in until you see no dry bits left. Then, fold in 1/4 cup of chocolate protein powder and 1/4 cup of dark chocolate chips. Make sure everything blends nicely into a thick batter. Now, cover the bowl with plastic wrap. Place it in the fridge for about 30 minutes. This step makes the mixture firmer, which helps when you shape the bites. Once chilled, use a tablespoon to scoop the mixture. Roll it into small balls, about 1 inch in size, using your hands. After shaping all the bites, place them on a baking sheet lined with parchment paper. You can put them back in the fridge for another 15-20 minutes. This extra chill time helps them firm up even more before you enjoy or store them. Cottage cheese is a great source of protein. It helps build muscle and keeps you full. One cup has about 28 grams of protein. This makes it perfect for snacks or meals. Almond butter is rich in healthy fats. It provides energy and helps your heart. Just half a cup has about 25 grams of fat, mostly unsaturated. This is good for your body. Dark chocolate and cocoa are not just tasty; they have health perks too. They contain antioxidants that fight free radicals. This helps with heart health and mood. Plus, a bit of dark chocolate can satisfy your sweet tooth without too much sugar. Each bite is about one inch wide. You can expect around 80 calories per bite. If you make 12 to 15 bites, that totals about 960 to 1,200 calories for the whole batch. Here's a quick look at the approximate nutritional values per bite: - Calories: 80 - Protein: 4 grams - Fat: 5 grams - Carbohydrates: 7 grams - Fiber: 2 grams These bites are a great way to enjoy a tasty snack while also packing in some nutrition! {{image_2}} To get the best texture, start with smooth cottage cheese. If it's too chunky, blend it slightly. This will help make the bites creamy. Use a thick almond butter for a richer taste. When mixing, add the dry ingredients slowly. This helps them blend without clumping. Stir well but do not over-mix. This keeps the bites light and fluffy. Serve your protein bites on a pretty plate. A tiered stand looks great for parties. You can drizzle melted dark chocolate over the bites for a fun touch. This adds a nice shine and extra flavor. If you want a pop of color, add fresh berries or mint leaves. These not only look good but also taste great. You might not have almond butter. No worries! You can use peanut butter or sunflower seed butter instead. Both options work well and add a unique taste. For sweeteners, you can choose between honey and maple syrup. Honey gives a rich flavor, while maple syrup adds a mild sweetness. Try both and see which one you like best! Want to spice things up? Add a pinch of cinnamon or nutmeg to the mix. These spices boost flavor and add warmth to each bite. You can also mix in some nuts or dried fruit. Chopped walnuts or almonds add crunch, while raisins or dried cranberries bring sweetness. Get creative with your choices! Can I use non-dairy alternatives for cottage cheese? Yes, you can use non-dairy alternatives like tofu or almond-based ricotta. These options work well and keep the bites creamy. Just ensure the texture is similar to cottage cheese. How long do these protein bites last? These protein bites can last about a week in the fridge. Keep them in an airtight container to maintain freshness. You might notice the taste gets better over time. Can I freeze Cottage Cheese Brownie Protein Bites? Absolutely! You can freeze them for up to three months. Make sure to store them in a freezer-safe bag or container. Thaw them in the fridge before enjoying. Are these suitable for meal prep or on-the-go snacks? Yes, these bites are perfect for meal prep. They are easy to grab and pack for snacks. They also make a great post-workout treat, giving you energy and protein on the go. This blog explored how to make tasty Cottage Cheese Brownie Protein Bites. We covered the needed ingredients, step-by-step instructions, and their health benefits. You learned tips for perfecting your recipe and ideas for fun variations. These bites are not only easy to make but also healthy. Experiment with flavors and enjoy them as snacks or meal prep. Try these bites for a yummy treat that fuels your body!

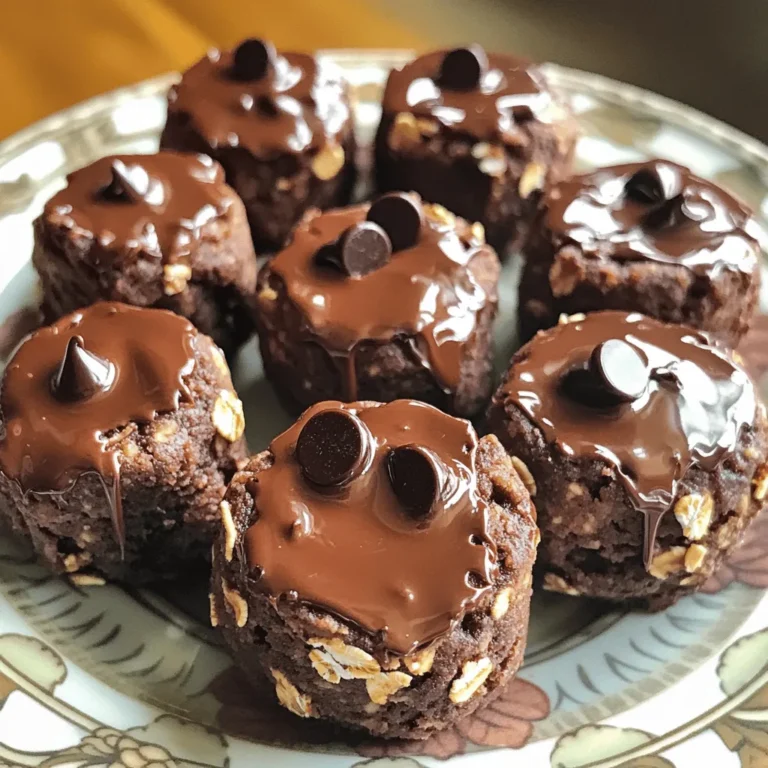
Cottage Cheese Brownie Protein Bites Easy Snack Recipe

Here are the simple ingredients you need for Crockpot Chicken Fried Rice: - 2 cups cooked rice (preferably day-old for better texture) - 2 medium chicken breasts, diced - 1 cup frozen mixed vegetables (carrots, peas, and corn) - 1 small onion, diced - 3 cloves garlic, minced - 1/4 cup soy sauce (low-sodium, if preferred) - 2 tablespoons sesame oil - 1 tablespoon oyster sauce (optional) - 2 green onions, sliced (for garnish) - 2 eggs, lightly beaten - Salt and pepper to taste Using day-old rice improves the texture. Fresh rice can become mushy in the crockpot. Day-old rice has dried out a bit, making it perfect for fried rice. For this recipe, I use diced chicken breasts. They cook evenly and stay tender. You can also use thighs if you prefer. Frozen mixed vegetables save time and add color. They include carrots, peas, and corn, but feel free to add your favorites! Soy sauce and sesame oil are key for flavor. Low-sodium soy sauce helps control salt. Oyster sauce adds depth but is optional. Adding lightly beaten eggs near the end makes the dish creamy. It also brings extra protein and flavor. Slicing green onions for garnish adds a fresh crunch. They brighten the dish and enhance the look. With these ingredients, you're ready to make a delicious family meal that everyone will love! 1. Layering rice in the crockpot Start by placing 2 cups of cooked rice at the bottom of the crockpot. Day-old rice works best here. It gives a nice texture and prevents mushiness. 2. Adding chicken and vegetables Next, add 2 diced chicken breasts on top of the rice. Spread them out evenly. Now, sprinkle 1 cup of frozen mixed vegetables over the chicken. This adds color and flavor. Add 1 small diced onion and 3 minced garlic cloves next. 3. Mixing sauces and seasoning In a separate bowl, mix together 1/4 cup of low-sodium soy sauce, 2 tablespoons of sesame oil, and 1 tablespoon of oyster sauce if you like. Add salt and pepper to taste. Pour this sauce mix over the chicken and veggies. Gently stir to combine all the ingredients. 1. Setting the crockpot temperature and time Cover the crockpot and set it to low heat. Cook for about 4 hours. This time allows the chicken to cook through and the flavors to blend well. 2. Incorporating eggs towards the end About 20 minutes before serving, push the rice mixture to one side of the crockpot. Pour 2 lightly beaten eggs into the empty side. Scramble the eggs gently until they are just set. Then, mix them into the rice. This adds richness and protein. 1. How to serve garnished with green onions When ready to serve, taste the fried rice and adjust the seasoning if needed. Serve hot, garnished with 2 sliced green onions. This adds a fresh crunch. 2. Ideal pairing options This dish pairs well with simple sides like steamed vegetables or a light salad. Enjoy your meal! - Use day-old rice for better texture: Day-old rice has dried out a bit. It helps the rice stay firm when cooked. Fresh rice can turn mushy. Using leftover rice also saves time. - Importance of low-sodium soy sauce: Low-sodium soy sauce keeps the dish flavorful without being too salty. It allows you to control the salt level better. You can always add more salt later if needed. - Tips for cooking time adjustments: If you use frozen chicken, add an extra 30 minutes. The cooking time may also vary by your crockpot model. Check the chicken after 3.5 hours to avoid overcooking. - Ensuring chicken is fully cooked: Make sure the chicken reaches an internal temperature of 165°F. Use a meat thermometer to check. This ensures the chicken is safe to eat. - Recommendations for additional spices: Try adding ginger for warmth or red pepper flakes for heat. A little garlic powder can boost the flavor too. - Ideas for adding extra vegetables or proteins: You can add bell peppers or broccoli for color and nutrition. For extra protein, consider shrimp or tofu. This keeps the dish exciting and tasty. {{image_2}} You can make this dish vegetarian by using tofu or tempeh instead of chicken. Tofu works well since it absorbs flavors nicely. Cut firm tofu into small cubes. You can also use tempeh, which has a nuttier taste. Just slice it thinly. Both options add protein and pair well with rice and veggies. Want to change up the taste? You can use different sauces. For a sweet touch, try teriyaki sauce. If you like spice, sriracha adds heat. You can also mix sauces for a unique flavor. Don’t forget about veggies! Bell peppers and broccoli add crunch and color. These changes keep the meal fresh and fun. You don’t have to stick to the crockpot. An Instant Pot works great too. Just follow the same steps but reduce the cooking time. For a quicker option, make it on the stove. In a large pan, sauté the chicken and veggies first. Then add rice and sauces. Cooking it this way cuts the time down a lot. To keep your Crockpot Chicken Fried Rice fresh, follow these steps: - Let the dish cool down to room temperature. - Transfer it to an airtight container. - Store it in the fridge. This dish lasts about 3 to 4 days in the fridge. If you want to enjoy it later, consider freezing it. Freezing is a great option for long-term storage. Here’s how to do it: - Place cooled leftovers in a freezer-safe container. - Seal tightly to prevent freezer burn. - Label the container with the date. To reheat, let it thaw overnight in the fridge. Heat it in the microwave or stovetop until hot. For best texture, add a splash of water while reheating. This keeps the rice moist and fluffy. Enjoy your meal even after a few weeks! Can I use uncooked rice in the crockpot? No, uncooked rice does not cook well in a crockpot. Always use cooked rice. Day-old rice is best. It has the right texture and keeps from getting mushy. How can I make this recipe gluten-free? To make this dish gluten-free, swap soy sauce for tamari. Tamari is a great gluten-free option. Ensure all other ingredients are also gluten-free. What are the signs that the chicken is cooked properly? Check the chicken's internal temperature. It should be 165°F (75°C) at the thickest part. The color should be white, not pink. Can I double this recipe in a standard crockpot? Yes, you can double the recipe. Make sure your crockpot can hold the extra food. Adjust the cooking time if needed, but check the chicken for doneness. What’s the best way to reheat leftovers? Reheat leftovers in the microwave or on the stovetop. Add a splash of water or broth to keep it moist. Heat until warm throughout. What can I substitute for soy sauce? You can use coconut aminos as a soy sauce substitute. It gives a similar flavor without the soy. Can I skip the oyster sauce? Yes, you can skip the oyster sauce. The dish will still taste great without it. You can add more soy sauce or a little sugar for sweetness. You’ve learned how to make a delicious crockpot chicken fried rice. We covered ingredients, preparation steps, cooking tips, and even variations. I shared ways to enhance flavor and storage tips for your leftovers. Experiment with different sauces and proteins to fit your taste. This dish is easy to prepare, satisfying, and perfect for meals throughout the week. Enjoy your cooking, and don’t be afraid to make it your own!

Crockpot Chicken Fried Rice Easy Family Meal Recipe

- 2 cups rolled oats - 1/2 cup almond butter (or peanut butter) - 1/3 cup honey or maple syrup These main ingredients form the heart of your no-bake oatmeal bars. Rolled oats provide a chewy texture and a good dose of fiber. Almond butter or peanut butter adds protein and a rich flavor. Honey or maple syrup sweetens the bars naturally. You can mix and match these to find your favorite taste. - 1/2 cup chopped nuts (e.g., almonds, walnuts) - 1/4 cup mini chocolate chips (or dried fruits) - 1/2 teaspoon cinnamon (optional) Adding optional ingredients can make your bars even better. Chopped nuts give a nice crunch and extra nutrients. Mini chocolate chips offer a sweet bite, while dried fruits add a chewy texture. A pinch of cinnamon enhances the flavor, giving the bars a warm, cozy taste. You can customize these bars to fit your own likes. First, grab a medium bowl. In it, combine these ingredients: - 2 cups rolled oats - 1/2 cup chopped nuts - 1/4 cup mini chocolate chips - 1/2 teaspoon cinnamon (if you like) Mix them well. This gives the bars a nice crunch and sweet bites. Next, take a small saucepan. On low heat, melt: - 1/2 cup almond butter (or peanut butter) - 1/3 cup honey Stir often. You want it smooth, not boiling. Once melted, take it off the heat. Stir in: - 1 teaspoon vanilla extract - 1/4 teaspoon salt This mix adds sweetness and depth to your bars. Now, pour the wet mixture over the dry mix. Stir until every bit of oat is coated. Line a 9x9 inch baking dish with parchment paper. Leave some paper hanging over the sides. This helps with easy removal. Pour the combined mix into the dish. Press it down firmly to make an even layer. You can use another piece of parchment paper to help with this. Put the dish in the fridge. Let it chill for at least 2 hours. This helps the bars set. Once firm, lift the bars out using the parchment. Cut them into squares or rectangles. Store the bars in an airtight container in the fridge. They stay fresh for up to a week. Enjoy your tasty no-bake oatmeal bars! To get the right texture for your no-bake oatmeal bars, press the mixture firmly. This step helps the bars hold together. If you don’t press hard enough, they may crumble. Use a flat object to push down the mixture evenly. This ensures a solid base for each bar. Also, line your baking dish with parchment paper. It makes it easy to lift the bars out when they are set. The overhang on the sides helps a lot. You can make these bars your own by adding flavors. Consider mixing in dried fruits like raisins or cranberries. Seeds like pumpkin or sunflower can also add a nice crunch. If you want a warm taste, sprinkle in some spices, like nutmeg or ginger. Adjust the sweetness too. If you like it sweeter, add a bit more honey or maple syrup. For less sweetness, cut back on these ingredients. When ready to serve, arrange the bars on a pretty platter. This makes them look nice for guests. Drizzle some extra honey on top just before serving. This adds a touch of sweetness and shine. You can also garnish with chopped nuts for added flavor and crunch. These simple touches will impress anyone who tries them. {{image_2}} You can make these bars vegan by swapping honey for maple syrup. Maple syrup gives a sweet touch without using animal products. For the nut butter, try using almond or cashew butter. These options are plant-based and add great flavor and protein. This way, everyone can enjoy a tasty treat! To keep these bars gluten-free, use certified gluten-free oats. This ensures no gluten sneaks in. For extra crunch, mix in your favorite nuts and seeds. Sunflower seeds and pumpkin seeds are great choices. They add texture and nutrients, making your bars even better. Mixing flavors can make your bars unique. For a chocolatey twist, blend almond butter with dark chocolate. This classic pairing is a crowd-pleaser. You can also try adding fruits like dried cranberries or banana chips. These options will add natural sweetness and keep things fresh. Feel free to get creative with your flavor choices! To keep your no-bake oatmeal bars fresh, store them in an airtight container. This keeps moisture out and helps maintain their yummy taste. I recommend placing the container in the fridge. This way, the bars stay firm and ready to eat. These bars can last for up to a week in the fridge. After that, they may lose their flavor and texture. Signs that the bars have gone bad include a strange smell or a change in color. If you notice these signs, it's best to toss them out. For longer storage, you can freeze the bars. Wrap each bar in plastic wrap and place them in a freezer bag. This method helps keep them fresh for up to three months. When you want to enjoy them, simply take out a bar and let it thaw in the fridge overnight. This helps keep their texture nice and smooth. Quick oats cook faster than rolled oats. They have a finer texture. If you use quick oats, the bars may be softer. Rolled oats give a chewier, heartier bite. For best results, stick with rolled oats in this recipe. Almond butter offers a light, nutty flavor. It’s smooth and creamy. Peanut butter is rich and classic, giving a familiar taste. Both are good for nutrition. Almond butter has more vitamins, while peanut butter has more protein. Choose based on your flavor preference or dietary needs. Yes, you can adjust the sweetness. Use less honey or maple syrup for less sweet bars. You can also add dried fruits for natural sweetness. Taste the mixture before pressing it into the pan to find your perfect level of sweetness. To avoid crumbly bars, press the mixture firmly into the dish. Use parchment paper to help. Make sure the nut butter and sweetener bind well with the oats. If they seem dry, add a bit more nut butter or sweetener. Chilling them properly helps them set too. You learned how to make delicious and healthy oat bars. We covered key ingredients, like rolled oats and nut butters. The steps were easy: mix, combine, press, and set. You can vary textures and flavors to suit your taste. Remember, storing them right keeps them fresh longer. I hope you feel excited to try making these bars at home. You can customize them to fit your needs and cravings. Enjoy your creations and share them with others!

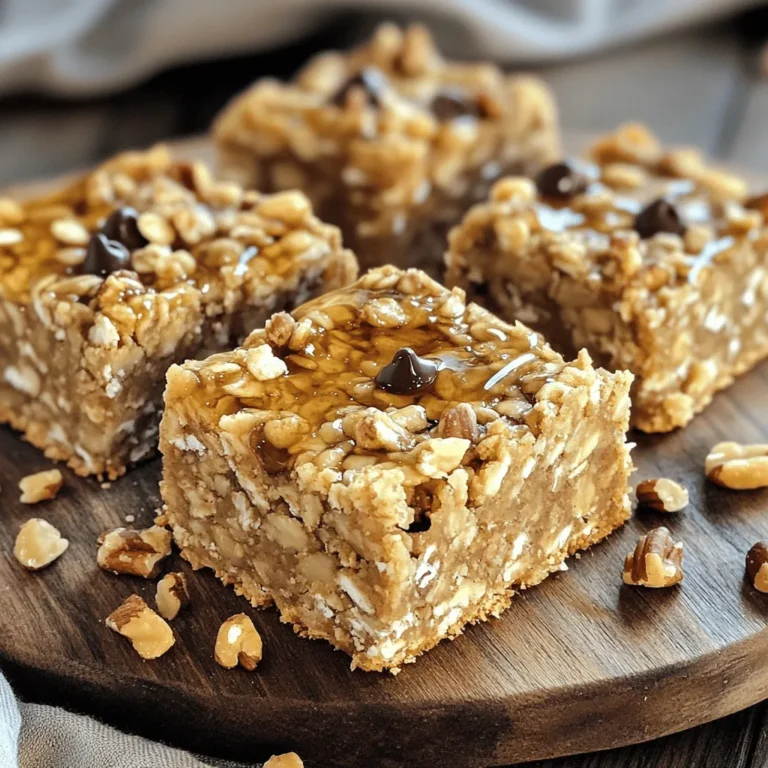
No-Bake Oatmeal Bars Simple and Tasty Treat

- 1 lb boneless, skinless chicken thighs, cut into bite-sized pieces - 1 cup orzo pasta - 1 medium onion, finely chopped - 2 cloves garlic, minced - 1 cup mushrooms, sliced - 1 cup spinach, chopped The chicken is the star of the dish. I prefer using boneless, skinless thighs for their juicy texture. You can easily cut them into bite-sized pieces. The orzo pasta gives a nice bite and absorbs flavors well. I always use fresh vegetables. The onion adds sweetness, while garlic gives a robust flavor. Mushrooms add earthiness, and spinach brings a bright touch. - 2 cups chicken broth - 2 tablespoons olive oil - 1 tablespoon balsamic vinegar - 1 teaspoon dried thyme - 1 teaspoon dried oregano - Salt and pepper to taste Chicken broth enhances the dish's depth. I recommend low-sodium broth for better control of saltiness. Olive oil is perfect for sautéing and gives a rich flavor. Balsamic vinegar adds a sweet tang that balances the savory notes. Thyme and oregano bring warmth and earthiness, making every bite delicious. - Grated Parmesan cheese - Extra herbs I love adding grated Parmesan for a salty finish. It melts over the warm dish and adds creaminess. Fresh herbs can brighten the flavor. Parsley or basil works well if you have them on hand. These toppings make the dish even more special. - Heat Olive Oil: Start by heating 2 tablespoons of olive oil in a large skillet over medium heat. This oil adds flavor and helps cook the ingredients evenly. - Sauté Onion and Garlic: Add 1 medium finely chopped onion to the skillet. Cook it for about 3-4 minutes until it turns translucent. Then, add 2 cloves of minced garlic and 1 cup of sliced mushrooms. Sauté for another 4-5 minutes. The mushrooms should become soft and release their juices. - Seasoning Tips: While the vegetables cook, season 1 pound of boneless, skinless chicken thighs cut into bite-sized pieces. Use salt, pepper, 1 teaspoon of dried thyme, and 1 teaspoon of dried oregano. This blend gives the chicken a tasty kick. - Browning the Chicken: Once the veggies are ready, push them to the side of the skillet. Add the seasoned chicken and cook for about 5-6 minutes. You want the chicken to get a nice brown color. This step adds depth to the overall flavor. - Adding Orzo and Broth: Stir in 1 cup of orzo pasta. Then, pour in 2 cups of chicken broth and 1 tablespoon of balsamic vinegar. This mix brings rich flavors and a great texture to the dish. - Simmering Tips: Bring the mixture to a boil. Then, reduce the heat to low, cover, and let it simmer for 10-12 minutes. Keep an eye on it until the orzo is cooked and absorbs most of the liquid. This step makes the orzo soft and creamy. After the orzo is tender, stir in 1 cup of chopped spinach. Cook it for an additional 2-3 minutes until it wilts. This adds a pop of color and nutrients to your meal. Cooking Times: Cook the chicken until it is golden brown, about 5-6 minutes. For orzo, it simmers for 10-12 minutes. Keep an eye on it to avoid mushy pasta. Ingredient Substitutions: You can swap chicken thighs for chicken breasts if you prefer. Use any small pasta if you don’t have orzo. Spinach can be replaced with kale or Swiss chard. Pre-cooking Options: You can chop veggies and chicken a day before. Store them in the fridge for easy prep. You can also cook the orzo ahead and mix it in later. Reheating Instructions: To reheat, warm it on the stove with a splash of broth. This keeps the orzo from drying out. You can also use the microwave, but check every minute to avoid overcooking. Serving Suggestions: Serve it hot in large bowls. This makes it feel cozy and inviting. Pair it with a simple green salad for a fresh touch. Garnish Tips: Sprinkle grated Parmesan on top for a rich flavor. Fresh herbs like parsley or basil add a nice color and taste. A drizzle of balsamic vinegar elevates the dish too. {{image_2}} Different Proteins You can swap the chicken for other proteins. Try shrimp or turkey for a new taste. For a vegetarian option, use tofu or chickpeas. These swaps keep the dish flavorful and fun. Alternative Vegetables Feel free to change the vegetables. Zucchini or bell peppers work well. You can also add carrots or peas for color and nutrition. Mixing in your favorite veggies makes the meal more exciting. Spice Variations Want to change the flavor? Add spices like paprika or cayenne for heat. You can also try fresh herbs like basil or parsley for a fresh taste. Experimenting with spices adds a personal touch to your dish. Using Different Broths If you want a twist, use vegetable or beef broth instead of chicken. This simple change can add depth to the flavor. Each broth brings its own unique taste to the dish. Gluten-free Options To make this dish gluten-free, swap orzo for gluten-free pasta. You can also use quinoa or rice. These options keep the dish satisfying and safe for those with gluten issues. Vegetarian Versions For a vegetarian Marsala Chicken Orzo Skillet, leave out the chicken. Add more mushrooms or hearty vegetables. This version still offers rich flavors and a filling meal. - After making Marsala Chicken Orzo Skillet, let it cool. - Store leftovers in an airtight container. - It stays fresh for up to three days in the fridge. - Check for any off smells or changes in color before eating. - You can freeze this dish, too! - Use a freezer-safe container or bag. - It lasts up to three months in the freezer. - For best taste, freeze it without cheese. - To serve, thaw overnight in the fridge. - You can reheat it in the microwave. - Use a microwave-safe dish and cover it. - Stir halfway to heat it evenly. - For stovetop, warm it in a skillet over low heat. - Add a splash of broth to keep it moist. Yes, you can use other pasta types. Some good choices are: - Penne - Fusilli - Farfalle When swapping pasta, adjust cooking time. Most shapes cook faster or slower than orzo. Check the package for time and taste for doneness. To make Marsala Chicken Orzo Skillet without wine, try these options: - Use extra chicken broth. - Add a splash of apple cider vinegar for tang. - Use grape juice for sweetness. These substitutes will keep the dish tasty and flavorful. Pair this dish with sides that enhance its flavors. Here are some great options: - Steamed broccoli for crunch. - A fresh garden salad for a light touch. - Garlic bread for extra comfort. These sides complement the dish and add more nutrients. Enjoy the blend of textures and tastes! This blog post shows how to make a tasty Marsala Chicken Orzo Skillet. We discussed key ingredients like chicken, orzo, and veggies, and shared steps for cooking. You learned tips for adjusting the recipe and making it ahead of time. There are many ways to vary flavors and ingredients to fit your needs. Finally, we covered storage and reheating best practices. Remember, this dish is both easy and delicious. Try it tonight and enjoy a comforting meal!

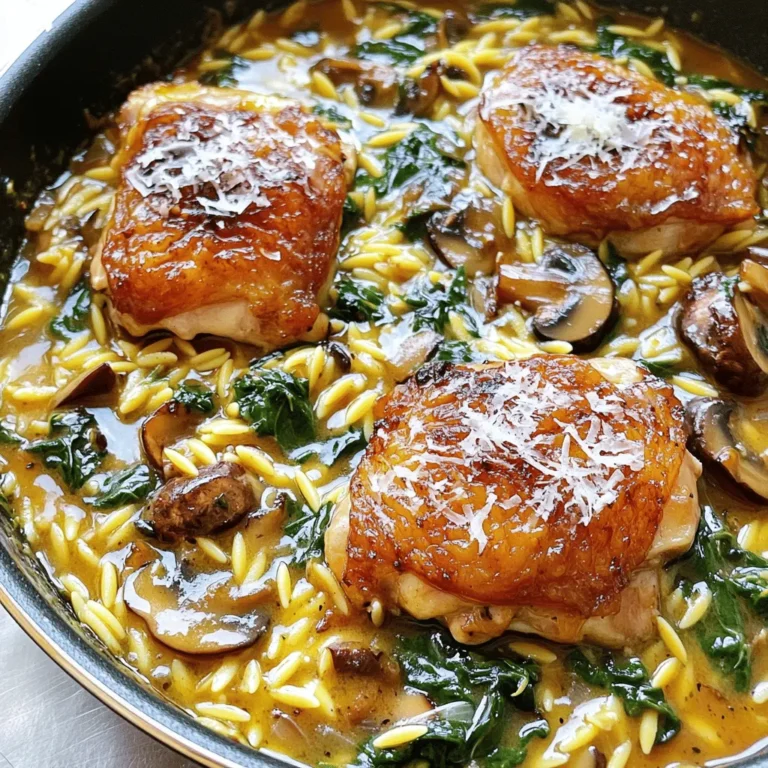
Marsala Chicken Orzo Skillet Flavorful One-Pan Dish

To make baked feta eggs, you need simple, fresh ingredients. Here’s what you will need: - Feta cheese - Large eggs - Cherry tomatoes - Olive oil - Dried oregano - Salt and pepper - Fresh basil - Optional ingredients: avocado, crusty bread Feta cheese gives a creamy texture. Use about 200g, crumbled. Large eggs are key for this dish. You’ll need four eggs for a perfect balance. Cherry tomatoes add sweetness and color. Aim for one cup, halved, to spread joy in every bite. Olive oil is essential for flavor. Use two tablespoons to drizzle over the tomatoes. Dried oregano brings warmth and earthiness. A teaspoon is just right. Don’t forget salt and pepper to taste. Fresh basil adds a lovely finish. You can slice an avocado for extra creaminess if you like. Crusty bread is a great side for dipping. These ingredients come together to create a tasty breakfast that feels special. Enjoy the process of gathering and preparing them! 1. Preheating the oven: Start by preheating your oven to 200°C (400°F). This step is key for even cooking. 2. Arranging cherry tomatoes: Take your baking dish and spread 1 cup of halved cherry tomatoes evenly in it. Make sure they cover the bottom well for great flavor. 3. Drizzling olive oil and seasoning: Next, drizzle 2 tablespoons of olive oil over the tomatoes. Sprinkle with 1 teaspoon of dried oregano, and add salt and pepper to taste. This adds depth to your dish. 4. Crumbling feta cheese: Now, crumble 200g of feta cheese over the tomatoes. Ensure it’s spread out evenly for a rich taste in every bite. 5. Adding eggs to the mixture: Create small wells in the feta and tomato mix. Crack 4 large eggs into each well. Season the eggs lightly with salt and pepper. This is where the magic happens! - Baking time and temperature: Place the dish in your preheated oven. Bake for about 15-20 minutes. You want the egg whites to set but keep the yolks runny. - Monitoring egg consistency: Keep an eye on the eggs while they bake. You want a slight jiggle in the yolks for the perfect texture. - Cool down instructions: Once baked, remove the dish from the oven. Let it cool for a few minutes. This allows the flavors to settle. - Garnishing with basil: Top the dish with fresh basil for a pop of color and flavor. It really brightens up the meal. Serve hot, and enjoy! To get the most from your baked feta eggs, start with oven calibration. Always check your oven's temperature with an oven thermometer. This step ensures even cooking. If your oven runs hot or cold, adjust your time accordingly. Next, focus on the egg consistency. I recommend baking until the whites are set but the yolks are still runny. This creates a delightful mix of textures. Keep an eye on them as they bake. Every oven is different, so watch for the perfect moment. For a tasty meal, pair your baked feta eggs with crusty bread. The bread soaks up the rich flavors. Use it to scoop up the eggs and tomatoes. This adds a fun and satisfying crunch. If you want extra creaminess, add sliced avocado on the side. The smooth texture complements the dish well. Plus, it adds healthy fats and nutrients. Enjoy your meal with a fresh salad or some herbs for a bright finish. {{image_2}} You can swap feta cheese for other cheeses. Goat cheese brings a tangy flavor. Cream cheese gives a richer taste. Mozzarella adds a soft, mild touch. Use what you like best. Adding veggies boosts nutrition and flavor. Spinach adds a nice green touch. Bell peppers bring sweetness and crunch. Mushrooms add earthiness. Feel free to mix and match. Spices and herbs can change the dish’s flavor profile. Try adding paprika for smoky warmth. A pinch of red pepper flakes adds heat. Fresh herbs like parsley or thyme brighten the taste. You can also explore different cooking methods. Instead of baking, you can scramble the eggs with feta. Try making a frittata for a thicker dish. Each method gives a unique twist to the meal. To keep your baked feta eggs fresh, store them in the fridge. Place any leftovers in an airtight container. Make sure they cool down before sealing. This way, they stay tasty for up to three days. If you want to keep them longer, you can freeze them, but remember that eggs can change texture. To freeze, separate the eggs from the tomatoes and feta. Store each in a freezer-safe bag. They can last for one month in the freezer. When you are ready to enjoy your leftovers, reheating is key. The best method is using an oven. Preheat it to 180°C (350°F). Place the dish in the oven for about 10-15 minutes. This warms the eggs nicely without making them rubbery. If you’re in a hurry, you can use a microwave. Heat it for 1-2 minutes, checking every 30 seconds. This keeps your baked feta eggs warm and yummy. Can I make this dish in advance? Yes, you can prepare some parts ahead of time. You can chop the tomatoes and crumble the feta the day before. Store them in the fridge. However, I recommend baking the eggs fresh for the best taste and texture. What can I substitute for feta? If you need a different cheese, try goat cheese or ricotta. Both give a nice flavor. You can also use a softer cheese, like cream cheese, for a different twist. Just keep in mind that it may change the taste. Is this dish vegetarian-friendly? Yes, Baked Feta Eggs is vegetarian-friendly. It contains no meat. It features eggs and cheese, making it a great choice for vegetarian diets. How long does it last in the fridge? This dish stays good for about 2-3 days in the fridge. Make sure to store it in an airtight container. When ready to enjoy, reheat in the oven for the best results. This dish uses simple ingredients like feta, eggs, and cherry tomatoes to create a delicious meal. You learned how to prepare, bake, and serve baked feta eggs with helpful tips. Remember to try variations and substitutions to make it your own. Store leftovers properly to enjoy them later. I hope you feel inspired to make this tasty dish soon!

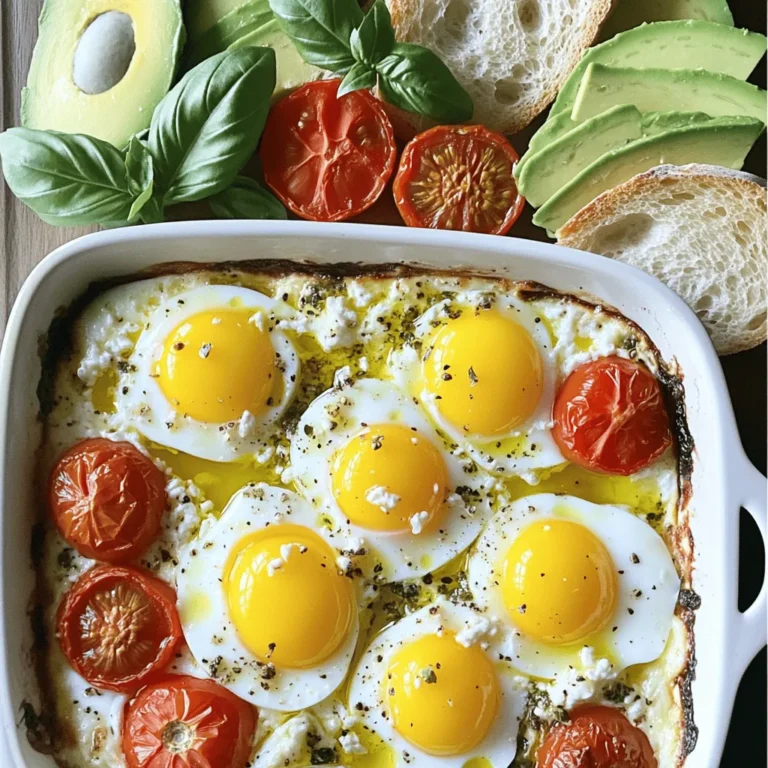
Baked Feta Eggs Flavorful and Easy Breakfast Recipe

PREV 1 … 33 34 35 … 57 NEXT
go kitchen now

explore

DessertsDinnerAppetizersDrinks

Our Policies

  • Cookie Policy
  • Copyright Policy
  • Disclaimer
  • GDPR Policy
  • Terms Of Use
Back to Top
  • About
  • Contact Us
  • Privacy Policy
© 2025 go kitchen now