FREE DINNER EBOOK! Get your copy!
  • Cookie Policy
  • GDPR Policy
  • Disclaimer
  • Terms Of Use
  • Visit my other site: Fun Cookie Recipes
go kitchen now
  • Home
  • Dinner
  • Desserts
  • Drinks
  • Appetizers
  • Contact
  • About
  • Privacy Policy
  • Home
  • Dinner
  • Desserts
  • Drinks
  • Appetizers
  • Contact
  • About
  • Privacy Policy
  • Cookie Policy
  • GDPR Policy
  • Disclaimer
  • Terms Of Use
Visit my other site: Fun Cookie Recipes

HOME / CATEGORIES /

Latest

- 2 cups all-purpose flour - 1 tablespoon baking powder - 1 teaspoon salt - ½ teaspoon baking soda - ½ cup unsalted butter, cold and cubed - ¾ cup buttermilk - 1 lb boneless, skinless chicken thighs - 1 teaspoon garlic powder - 1 teaspoon paprika - 1 teaspoon black pepper - ½ cup hot honey (store-bought or homemade) - Fresh parsley, chopped for garnish To create the best hot honey chicken biscuits, we start with a solid base. The flour, baking powder, and baking soda are key for fluffy biscuits. The cold butter adds flakiness, while buttermilk gives a rich flavor. Chicken thighs, seasoned with garlic powder, paprika, and black pepper, provide depth. Hot honey is the star, bringing sweet heat, and fresh parsley adds a bright finish. - Mixing bowls - Baking sheets - Skillets - Cutting tools You’ll need a few kitchen tools for this dish. Mixing bowls help combine dry and wet ingredients. Baking sheets ensure even cooking of the biscuits. A skillet is perfect for frying chicken, while cutting tools help shape biscuits. Having these tools ready makes cooking smooth and fun. - Homemade hot honey: mix honey with chili flakes or cayenne - Additional herbs: try thyme or chives for garnishing Feel free to customize your hot honey chicken biscuits. Making your hot honey adds a personal touch. Adding herbs like thyme or chives can enhance the flavor. Mix and match to find what you love! How to mix the dry ingredients Start by taking a large mixing bowl. Add 2 cups of all-purpose flour, 1 tablespoon of baking powder, 1 teaspoon of salt, and ½ teaspoon of baking soda. Whisk these ingredients together until they blend well. Incorporating butter and buttermilk Next, take ½ cup of cold, cubed unsalted butter. Add it to the flour mix. Use your fingers or a pastry cutter to mix until the mixture looks like coarse crumbs. Now, make a well in the center of the mixture. Pour in ¾ cup of buttermilk. Gently mix until just combined. Avoid overmixing, as this can make the biscuits tough. Techniques for kneading and cutting the dough Turn the dough out onto a lightly floured surface. Gently knead it a few times, just enough to bring it together. Pat the dough into a rectangle that is about 1 inch thick. Use a round cutter to cut out your biscuits. Place them on a baking sheet lined with parchment paper. Baking temperature and timing for perfect biscuits Preheat your oven to 450°F (230°C). Bake the biscuits for 12 to 15 minutes. They should turn golden brown. Once done, remove them from the oven and set them aside. Tips for seasoning and cooking chicken thighs effectively Take 1 pound of boneless, skinless chicken thighs. Season them with 1 teaspoon each of garlic powder, paprika, and black pepper. This adds great flavor. Ensuring the chicken is juicy and golden In a skillet over medium heat, add a drizzle of oil. Cook the chicken thighs for about 6 to 7 minutes on each side. You want them to be cooked through and golden brown. This method keeps the chicken juicy. Now you have perfectly cooked chicken and warm biscuits, ready to be paired together with hot honey! To get the best biscuit texture, start with cold butter. Cut it into small cubes. Use your fingers to mix it into the flour. You want it to look like coarse crumbs. This keeps the biscuits flaky and light. Avoid overmixing the dough. When you add buttermilk, stir gently. Mix just until combined. If you mix too much, your biscuits will be tough. Remember, less is more for fluffier biscuits! When cooking chicken, use boneless, skinless thighs. They stay juicy and cook evenly. Start by seasoning with garlic powder, paprika, and black pepper. This adds great flavor. Heat oil in a skillet over medium heat. Cook the chicken for about 6-7 minutes on each side. Look for a golden brown color. This shows it's cooked through and full of flavor. Hot honey makes this dish special. You can adjust sweetness by adding more or less honey. If you like heat, mix in a pinch of cayenne pepper. This extra kick will make your taste buds dance! Don't just use hot honey for these biscuits. Try drizzling it on pizza, fried chicken, or even cheese boards. It adds a sweet and spicy twist to many dishes. {{image_2}} You can spice up your hot honey chicken biscuits easily. To add heat, use cayenne pepper or hot sauce. Start with a pinch of cayenne in the hot honey. Taste it and add more if you want. If you're a fan of heat, try adding hot sauce directly to the chicken. This gives each bite a kick that balances the sweetness of the honey. To create sweet versions of this dish, you can swap out the hot honey. Try maple syrup or agave nectar for a different flavor. Infuse the honey with flavors like ginger or cinnamon for extra depth. These options add a unique twist while keeping the dish fun and tasty. If you need gluten-free biscuits, use almond flour or coconut flour. These options work well and keep the biscuits light. For a healthier choice, add oats or whole wheat flour. These alternatives give you a nutritious boost while keeping the taste you love. You can also try vegan butter to make the biscuits dairy-free. Each option allows you to enjoy hot honey chicken biscuits while fitting your dietary needs. To keep your hot honey chicken biscuits fresh, store them in an airtight container. Place the biscuits and chicken in separate layers. This helps avoid sogginess. Make sure they cool to room temperature first. Store them in the fridge for up to three days. If you want to keep them longer, freezing is a great option. To warm up your leftovers, use an oven for the best results. Preheat it to 350°F (175°C). Place the biscuits and chicken on a baking sheet. Heat them for about 10 minutes. This will help them regain their crispness. For a quicker option, you can use the microwave. Just cover them with a damp paper towel. Heat for about 30 seconds, checking to avoid overheating. To freeze biscuits and chicken, make sure they are cool. Wrap the biscuits in plastic wrap. Place them in a freezer-safe bag. For the chicken, wrap it in foil or put it in a container. They can stay in the freezer for up to three months. When ready to use, thaw them in the fridge overnight before reheating. This keeps them tasting fresh and delicious. Hot honey is a sweet and spicy blend of honey and chili peppers. It adds a kick to dishes. For hot honey chicken biscuits, it provides a great contrast to the savory chicken. You can use store-bought hot honey or make it at home by warming honey with chili flakes. This mix enhances flavors and makes every bite exciting. Yes, you can make the biscuits ahead of time. Prepare the biscuit dough and cut out the shapes. Place them on a baking sheet and freeze them. Once frozen, transfer them to a bag. You can bake them fresh later. Just add a few extra minutes to the baking time. This method keeps your biscuits soft and fluffy. You can serve hot honey chicken biscuits with various sides. Some great options include: - Crispy coleslaw - Roasted vegetables - Sweet potato fries Pairing with a beverage is also fun. Consider sweet tea or a light beer. These choices balance the flavors of the dish. Enjoying these sides makes your meal even better. Hot honey chicken biscuits combine flavor, texture, and fun. This recipe features fluffy biscuits and juicy chicken. You learned essential ingredients, techniques, and storage tips. You can customize with extra herbs or extra heat. Remember to use the right equipment and avoid overmixing for the best results. These biscuits are perfect for any meal or a fun snack. With hot honey, you can take this dish to new heights. Enjoy making it your own and share it with friends or family!

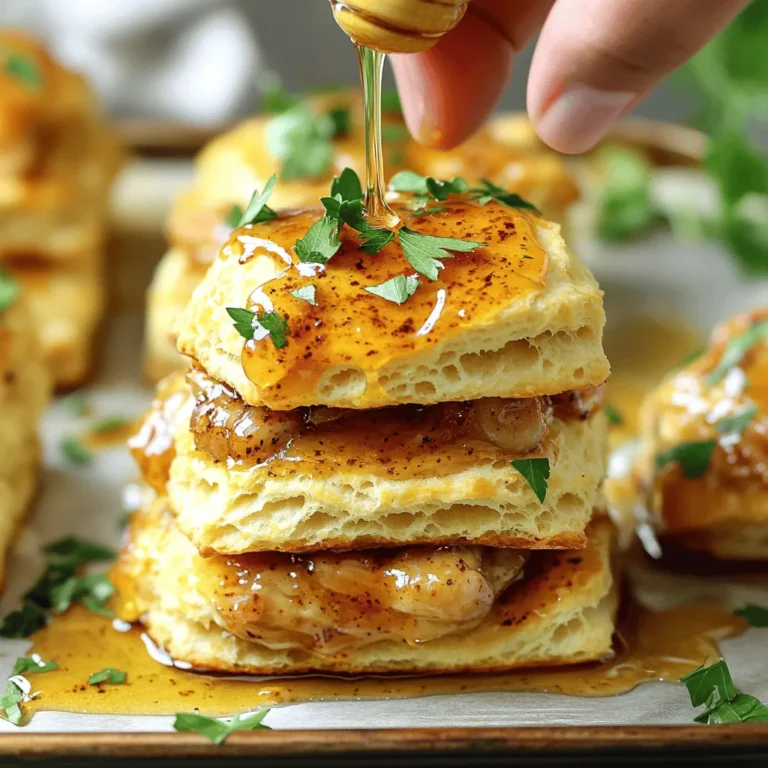
Hot Honey Chicken Biscuits Tasty Comfort Food Recipe

The main ingredients for a perfect Minute Beef Veggie Stir Fry include: - 1 pound beef sirloin, thinly sliced against the grain - 2 cups broccoli florets - 1 red bell pepper, sliced - 1 carrot, julienned - 1 cup snap peas, trimmed These ingredients come together to create a tasty and colorful dish. The beef provides protein, while the veggies add crunch and color. To add flavor, you will need these seasonings and sauces: - 3 tablespoons soy sauce - 2 tablespoons sesame oil - 1 tablespoon hoisin sauce - 4 cloves garlic, minced - 1 tablespoon fresh ginger, grated - 1 teaspoon red pepper flakes (adjust to taste) - Salt and pepper to taste These seasonings elevate the dish. The soy sauce and hoisin sauce give it a sweet and savory taste. For a final touch, consider these optional garnishes: - 3 green onions, chopped - Sesame seeds (optional, for garnish) These garnishes add a pop of color and extra flavor. Green onions bring freshness, while sesame seeds add a nice crunch. Start by preparing the beef. Take 1 pound of thinly sliced beef sirloin. Put it in a bowl. Add 1 tablespoon of soy sauce and a pinch of black pepper. Mix well. Let the beef marinate while you prepare the veggies. This helps the beef soak up the flavors. Next, heat a large wok or non-stick skillet. Use medium-high heat for this. Add 1 tablespoon of sesame oil to the pan. Wait until the oil is hot. Now, add the marinated beef in a single layer. Sear the beef for about 2 to 3 minutes. You want it to turn brown. Once it’s done, remove the beef and set it aside. In the same pan, add the remaining 1 tablespoon of sesame oil. Now, toss in 4 cloves of minced garlic and 1 tablespoon of grated ginger. Sauté these for about 30 seconds. You want them to smell nice. Then, add 2 cups of broccoli florets, 1 sliced red bell pepper, 1 julienned carrot, and 1 cup of snap peas. Stir fry these for about 3 to 4 minutes. The veggies should be tender-crisp. Now, it’s time to bring it all together. Return the cooked beef to the pan. Add the remaining soy sauce, 1 tablespoon of hoisin sauce, and a teaspoon of red pepper flakes. Mix everything well. Cook for another 2 minutes. This lets the sauce coat the beef and veggies. Remove the pan from heat. For the final touch, garnish your stir fry with 3 chopped green onions. If you like, you can sprinkle some sesame seeds on top too. This adds a nice crunch and looks great! When picking beef for stir fry, sirloin is a top choice. It has a nice balance of flavor and tenderness. It also cooks quickly, making it perfect for this dish. Other cuts, like flank steak, can work too, but they may need more time to cook. Look for beef with a bright red color and some marbling. This marbling gives flavor and keeps the meat juicy. Avoid cuts that look gray or have too much fat. To get those crisp veggies, timing is key. Start by heating your pan until it’s really hot. This helps the veggies cook fast without getting soggy. Add garlic and ginger first for flavor, then toss in your broccoli, bell pepper, carrot, and snap peas. Stir fry them for about three to four minutes. You want them tender but still bright and crisp. Keep stirring to cook them evenly. If they look dull or limp, you’ve cooked them too long! Making this stir fry your own is easy. Soy sauce gives a salty base, but you can change it up. Add more hoisin sauce for sweetness or red pepper flakes for heat. If you like it spicy, try adding a dash of sriracha. You can also use different sauces like teriyaki or sweet chili. Just taste as you go. This lets you find the flavor that you love. Don't be afraid to experiment! {{image_2}} You can switch the beef for other proteins. Chicken is a great choice. It cooks fast and stays juicy. Tofu works well for a plant-based meal. Press it to remove water for better texture. Shrimp is another fun option. Just cook until they turn pink. Each option brings a unique taste to the dish. Feel free to change up the veggies. Bell peppers add sweetness and color. Zucchini brings a nice crunch and moisture. Bok choy is a flavorful green that cooks quickly. You can also add mushrooms for an earthy taste. Each vegetable swap changes the stir fry's flavor and texture. Try different sauces to mix things up. Teriyaki sauce adds a sweet and savory touch. Sweet chili sauce gives a spicy kick. You can also use oyster sauce for a rich flavor. Experimenting with sauces can make each meal unique. Just remember to balance flavors for the best taste. After you make the Minute Beef Veggie Stir Fry, let it cool first. Store it in an airtight container. This keeps the dish fresh and tasty. You can keep it in the fridge for up to three days. Make sure you label the container with the date. This way, you won't forget how long it has been. To reheat, use a pan on medium heat. Add a splash of water or broth to keep it moist. Stir it often to heat evenly. This helps keep the beef juicy and the veggies crisp. Avoid using the microwave if you want to keep the texture nice. If you use the microwave, do it on low power and stir halfway through. You can freeze the stir fry if you want to save some for later. Place it in a freezer-safe bag or container. Squeeze out as much air as you can. This prevents freezer burn. When you’re ready to eat, thaw it overnight in the fridge. Reheat it in a pan as mentioned above for the best results. Minute Beef Veggie Stir Fry can last for about three to four days in the fridge. To store it, place the stir fry in an airtight container. This keeps it fresh and tasty. If you want to enjoy it later, be sure to cool it down first. This helps preserve its flavor and texture. When you’re ready to eat, just reheat it on the stove or in the microwave. Yes, you can make this recipe ahead of time. Prep the beef and veggies and store them separately in the fridge. This will save time for busy nights. You can marinate the beef a few hours before cooking. Just keep it in the fridge until you are ready to stir fry. This helps the flavors to soak in. When you’re ready to cook, follow the steps as usual for a quick meal. You can make this stir fry gluten-free easily. Use gluten-free soy sauce instead of regular soy sauce. Many brands offer this option. Also, check the hoisin sauce label to make sure it is gluten-free. With these swaps, you can enjoy a tasty stir fry that fits your diet. Always read labels to ensure the ingredients meet your needs. This blog post covered making a tasty Minute Beef Veggie Stir Fry. I shared the key ingredients, like beef sirloin and fresh vegetables, along with seasonings that bring flavor. I provided step-by-step cooking tips and clever ways to store leftovers. As you try this stir fry, remember you can customize it to your taste. Enjoy experimenting with different proteins or sauces! With practice, you’ll master this dish and delight your family. Happy cooking!

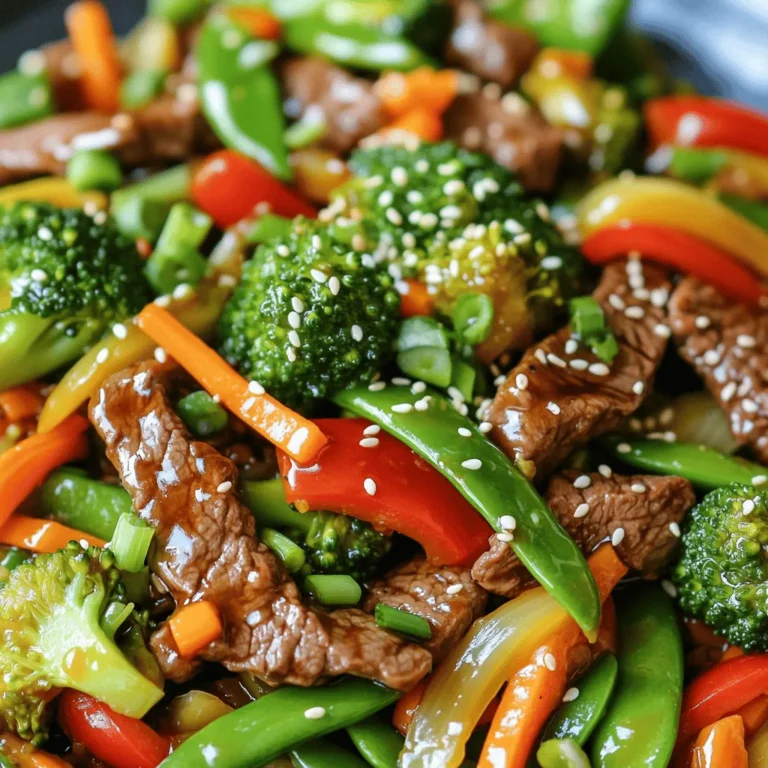
Minute Beef Veggie Stir Fry Quick and Tasty Meal

To make these tasty spaghetti garlic bread bowls, gather these key items: - 8 ounces spaghetti - 4 cloves garlic, minced - 1/4 cup unsalted butter, melted - 1 teaspoon dried Italian herbs (oregano, basil) - 1/2 teaspoon red pepper flakes (optional) - 1/2 cup grated Parmesan cheese - 1 cup marinara sauce - 1/4 cup fresh parsley, chopped - 4 large sourdough rolls - Salt and pepper, to taste These ingredients give the dish its rich, savory flavor. The sourdough rolls act as the perfect edible bowls, holding in all the goodness. To elevate your dish, consider adding: - Extra garlic for a stronger taste - Fresh basil leaves for a bright touch - Cooked protein, like chicken or meatballs, for a heartier meal - Olives or sun-dried tomatoes for extra zest These options can give your bowls a twist and cater to your taste buds. If you have dietary needs, here are some alternatives: - Use gluten-free pasta and rolls for a gluten-free option. - Substitute vegan butter and cheese for a dairy-free dish. - Replace spaghetti with zucchini noodles for a low-carb choice. These swaps keep the spirit of the dish while making it suitable for more diets. {{ingredient_image_1}} Start by gathering all your ingredients. You need 8 ounces of spaghetti, 4 cloves of garlic, and 1/4 cup of unsalted butter. Also, have your Italian herbs, red pepper flakes, and salt ready. Get 1/2 cup of grated Parmesan cheese and 1 cup of marinara sauce, plus fresh parsley for garnish. Lastly, grab 4 large sourdough rolls. Preheat your oven to 375°F (190°C). This helps the bread bowls bake perfectly. Next, cook the spaghetti. Follow the package instructions until it's al dente. Drain the spaghetti and set it aside. In a small bowl, mix the melted butter with minced garlic, Italian herbs, and red pepper flakes. Add a pinch of salt to enhance the flavor. This garlic butter mix will make your bread bowls extra tasty. Now, take your sourdough rolls. Cut the tops off and hollow them out. Leave a thin layer of bread on the sides and bottom. This will hold your spaghetti. Brush the garlic butter mixture on the insides of the sourdough bowls and their tops. Make sure to coat them well. Place the bowls on a baking sheet. Bake for about 10-12 minutes until they turn golden brown. While the bread is baking, combine the drained spaghetti with marinara sauce, grated Parmesan, and chopped parsley in a large bowl. Toss everything until the spaghetti is coated well. Season with salt and pepper to your taste. Once the bread bowls are ready, fill each bowl with the spaghetti mixture. Top them with extra Parmesan cheese. Bake them again for 5 minutes. This warms the spaghetti and melts the cheese slightly. When done, take them out of the oven. Let them cool for a minute before serving. Enjoy your hearty and tasty spaghetti garlic bread bowls! To make the best garlic bread bowl, start with fresh sourdough rolls. The crust should be firm to hold the filling. Hollow them out gently, leaving a thin layer. This helps keep the spaghetti from spilling. Brush the insides with the garlic butter mixture. Use a generous amount for great flavor. Bake until golden brown to achieve that perfect crunch. If you have leftovers, store the spaghetti and bread separately. Place the spaghetti in an airtight container. Keep the bread bowls in a paper bag to avoid sogginess. This keeps them fresh and tasty. When you want to eat, reheat the spaghetti gently. You can warm the bread bowls in the oven for that crispy texture again. When serving, place your garlic bread bowls on a wooden platter. It adds a nice rustic touch. Garnish with extra parsley and Parmesan cheese. This makes the dish look even more inviting. You can also serve with a side of marinara sauce for dipping. This adds a fun twist and extra flavor! Pro Tips Choose the Right Bread: Sourdough rolls provide a sturdy and flavorful base for your spaghetti bowls, but any crusty bread will work well. Just ensure it can hold the filling without getting soggy. Customize Your Filling: Feel free to add vegetables or proteins like cooked chicken or sausage to the spaghetti mixture for added flavor and nutrition. Extra Crispiness: For an even crispier bread bowl, toast the insides of the rolls briefly before filling them with the spaghetti mixture. Serving Suggestions: Pair your spaghetti garlic bread bowls with a fresh salad or garlic knots for a complete Italian feast! {{image_2}} You can make spaghetti garlic bread bowls vegetarian by swapping the marinara sauce. Try using a rich tomato basil sauce. You can also add veggies like bell peppers, mushrooms, or spinach. These add color and nutrients. Another option is to mix in some cooked lentils for extra protein. This makes the dish both hearty and healthy. For a gluten-free version, look for gluten-free spaghetti. There are many brands available that taste great. For the bread, you can use gluten-free rolls. Just make sure they are sturdy enough to hold the filling. Hollow them out as you would with regular sourdough. This way, you can enjoy the same great flavors while keeping it gluten-free. You can easily customize your garlic bread bowls. Add cooked sausage or meatballs for a meaty twist. If you like spice, try adding more red pepper flakes or diced jalapeños. Fresh herbs like basil or thyme can brighten the dish. For a cheesy kick, mix in more cheese before baking. You can even top the bowls with a drizzle of balsamic glaze for added flavor. The options are endless! To store leftover garlic bread bowls, let them cool down first. Place each bowl in an airtight container. Keep them in the fridge for up to three days. Make sure to cover the filling to keep it fresh. If you have extra marinara sauce, store it separately. Reheat your garlic bread bowls in the oven for best results. Preheat your oven to 350°F (175°C). Place the bowls on a baking sheet and cover them with foil. Heat for about 10-15 minutes. This keeps the bread crispy and warms the filling. You can also use a microwave, but the bread may get soft. You can freeze these bowls if you want to save them for later. Wrap each filled bowl tightly in plastic wrap. Then, place them in a freezer-safe bag. They can last up to three months in the freezer. To thaw, move them to the fridge overnight. Reheat as mentioned above before serving. Yes, you can use different types of bread. Try ciabatta, baguette, or even whole wheat rolls. Just ensure they are sturdy enough to hold the filling. This keeps the sauce from soaking through. Each type of bread adds a unique flavor and texture. You can store them in the fridge for up to three days. Make sure to wrap them tightly. This keeps them fresh and prevents them from drying out. Reheat them in the oven for the best taste. Avoid the microwave, as it can make the bread chewy. Marinara sauce works great, but you can also try Alfredo or pesto. Each sauce adds its own flavor. You can mix sauces too! For a spicy kick, add a bit of arrabbiata sauce. This makes the dish more exciting and keeps it fresh. Yes, you can prepare the garlic bread bowls and filling in advance. Just store the bowls and filling separately in the fridge. When ready to serve, fill the bowls and bake them. This saves time and allows you to enjoy the dish with less stress. In this post, we explored how to make delicious spaghetti garlic bread bowls. You learned about the key ingredients, preparation steps, and tips to enhance your dish. We also covered variations for different diets and storage methods for leftovers. Remember, the key to a great meal is using fresh ingredients and adding your personal touch. Enjoy making these bowls and delighting your friends and family! Your kitchen adventures start now.

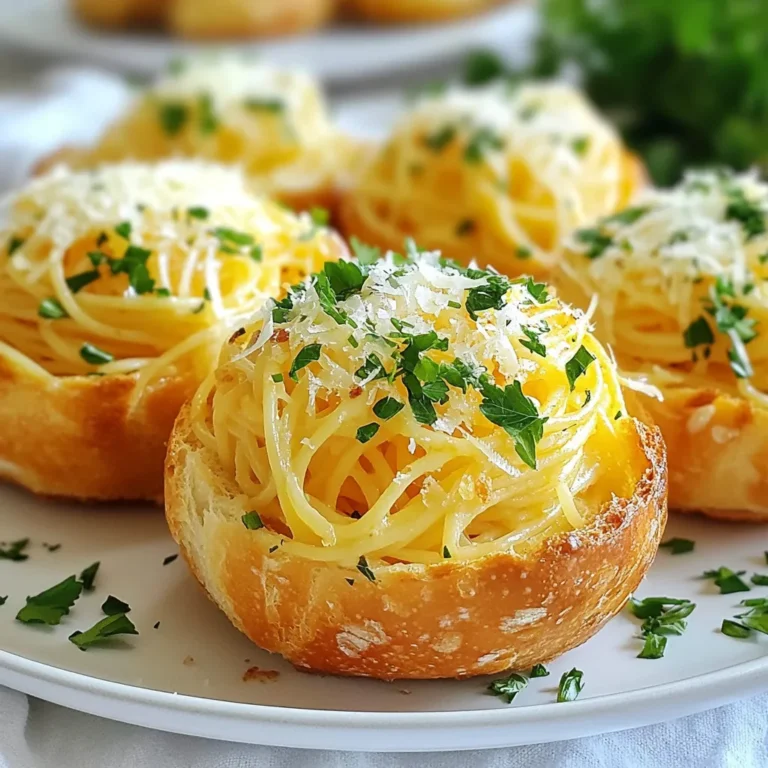
Spaghetti Garlic Bread Bowls Hearty and Tasty Dish

- 2 cups rolled oats - 2 apples, peeled and diced - 1 cup almond milk (or any milk of your choice) - 1/2 cup maple syrup - 1/4 cup unsweetened applesauce - 2 teaspoons cinnamon - 1 teaspoon vanilla extract - 1/4 teaspoon nutmeg - 1/2 cup chopped nuts (walnuts or pecans) - 1/4 cup raisins or dried cranberries - Pinch of salt For the Oatmeal Apple Breakfast Bake, I always start with these basic ingredients. The rolled oats give it a hearty texture. The apples add a sweet and tart flavor that brightens each bite. Almond milk makes it creamy, but feel free to swap it for any milk you like. You can mix in a variety of other ingredients for extra flavor or texture. Consider adding: - Chia seeds for added fiber - Flaxseed meal for healthy fats - Coconut flakes for a tropical twist - Chocolate chips for a sweet touch - Fresh berries for a burst of freshness These optional ingredients let you make the dish your own. You can adjust the flavors to fit your taste or dietary needs. This breakfast bake packs a nutritious punch. Here’s a quick overview: - Calories per serving: ~250 - Protein: 5g - Carbohydrates: 45g - Fiber: 6g - Sugars: 10g - Fats: 8g With wholesome oats, fruit, and nuts, this dish offers a filling meal. It fuels your morning with energy, making it a great choice for breakfast. First, set your oven to 375°F (190°C). This step warms the oven while you prep. Next, grease a 9x9 inch baking dish with a bit of oil or butter. This helps the bake come out easily later. In a large bowl, combine 2 cups of rolled oats, 2 diced apples, 1/2 cup of chopped nuts, and 1/4 cup of raisins. Add 2 teaspoons of cinnamon, 1/4 teaspoon of nutmeg, and a pinch of salt. Mix well to make sure everything blends. This mix gives your bake that yummy flavor! In another bowl, whisk together 1 cup of almond milk, 1/2 cup of maple syrup, 1/4 cup of applesauce, and 1 teaspoon of vanilla extract. You want this mixture to be smooth. This adds moisture and sweetness to the bake. Now, pour the wet mixture over the dry ingredients. Stir until everything is well combined. Transfer the mix into your greased baking dish and spread it evenly. Bake in the oven for about 30-35 minutes. You want the top to look golden brown and the oats to be set. Let it cool for 10 minutes before cutting it into squares. This helps it hold its shape. Enjoy your warm and tasty Oatmeal Apple Breakfast Bake! To get the best bake, follow these steps closely. First, preheat the oven to 375°F (190°C). This ensures that the bake cooks evenly. Grease your 9x9 inch baking dish well. It helps the bake come out easily. Mix the dry ingredients well. Ensure the oats and fruits blend nicely. When you combine the wet ingredients, whisk until smooth. This helps all flavors mix. Pour the wet mix over the dry mix and stir gently. Spread it evenly in the baking dish. Bake for 30 to 35 minutes. Look for a golden top and firm oats. Cool for about 10 minutes before slicing. This keeps it from falling apart. Serving this bake warm makes it extra tasty. Drizzle some maple syrup on top for sweetness. A sprinkle of cinnamon adds flavor. For a creamy touch, add some yogurt. Fresh apple slices give a nice crunch. You can serve it with coffee or tea. This dish pairs well with many drinks. Enjoy it with family or friends for a cozy meal. You can easily adapt this bake for different diets. For a dairy-free option, use almond milk or another plant-based milk. Want to cut sugar? Use less maple syrup or try a sugar substitute. If you want more fiber, add more fruits like bananas or berries. For nut allergies, leave out the nuts and add seeds instead. You can also use gluten-free oats. This makes it safe for those with gluten issues. Each change keeps the dish tasty and enjoyable for everyone. {{image_2}} You can easily make this dish dairy-free. Instead of regular milk, use almond milk or oat milk. Both options work well and keep the bake creamy. If you want a nut-free choice, try coconut milk. It adds a nice flavor and keeps it moist. Want to boost flavor? Add more fruits or spices! Diced pears or berries mix great with apples. You can also add banana for extra sweetness. For spices, try ginger or cardamom. They add warmth and depth. Just remember to adjust the sweetener if you add more fruit. If you need a gluten-free version, use certified gluten-free oats. They taste just like regular oats and work perfectly. Another choice is quinoa flakes. They add a different texture and flavor. Both options let you enjoy this bake without gluten. Enjoy the variety! To store your Oatmeal Apple Breakfast Bake, let it cool first. Once cool, cut it into squares. Place the squares in an airtight container. This keeps them fresh for up to five days in the fridge. If you want to keep it longer, freezing is a great option. When you are ready to enjoy your leftovers, remove the desired portion from the fridge. You can heat it in the microwave for about 30 seconds to one minute. If you prefer the oven, preheat it to 350°F (175°C). Bake for about 10 minutes until warmed through. Add a splash of almond milk before reheating for extra moisture. To freeze your Oatmeal Apple Breakfast Bake, wrap each square in plastic wrap. Place the wrapped pieces in a freezer-safe bag. You can freeze them for up to three months. When you want to eat one, simply thaw it in the fridge overnight. Then, reheat it as mentioned above. This way, you have a quick and tasty breakfast ready to go! Yes, you can prepare this bake in advance. Make it a day ahead and store it in the fridge. Just cover it tightly with plastic wrap or foil. When you’re ready to eat, bake it again for 10 to 15 minutes at 350°F (175°C) until it warms through. This way, you save time on busy mornings. If you don’t have maple syrup, honey is a great option. You can also use agave nectar or brown sugar. Just keep in mind that each sweetener has a unique flavor, so it will change the taste slightly. Adjust the amount to your liking, as some sweeteners may be sweeter than others. Yes, you can easily boost the protein. Try adding Greek yogurt on top when serving. You can also mix in protein powder into the wet mixture. For a nutty flavor and extra protein, add seeds like chia or flaxseeds into the mix. This makes your breakfast more filling and nutritious. This Oatmeal Apple Breakfast Bake lasts about 4 to 5 days in the fridge. Just store it in an airtight container. If you notice any moisture or changes in texture, it’s best to toss it. Always check for signs of spoilage before eating leftovers. You explored the key ingredients and simple steps to create a tasty Oatmeal Apple Breakfast Bake. You learned how to customize it for different diets and got storage tips for leftovers. Remember, cooking can be fun and easy. Try new flavors and make it your own. Enjoy this delicious breakfast again and again!

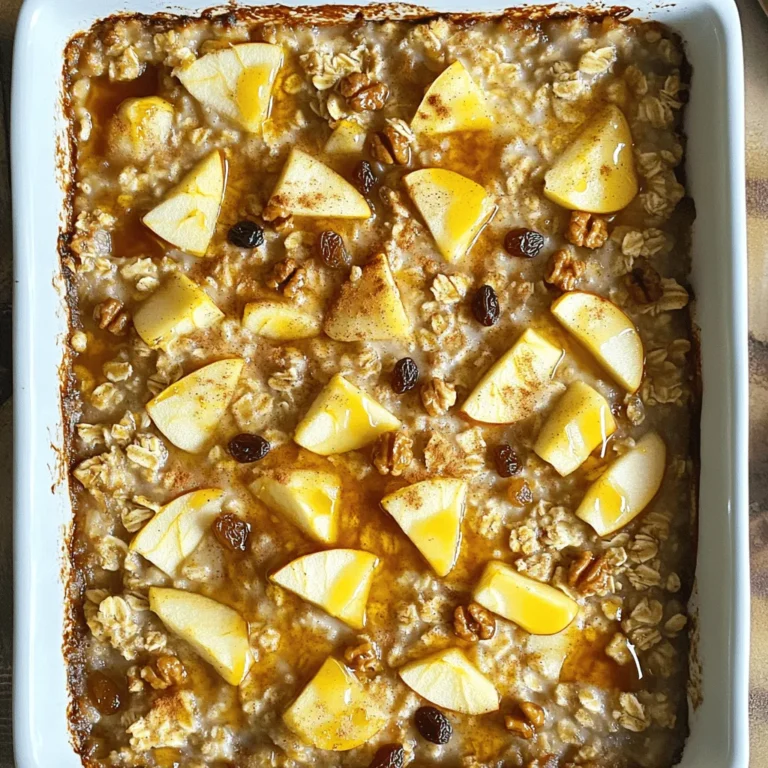
Oatmeal Apple Breakfast Bake Easy and Nutritious Dish

- 1 cup old-fashioned rolled oats - 1/2 cup natural peanut butter - 1/3 cup honey or maple syrup - 1/2 cup ground flaxseed - 1/4 cup mini dark chocolate chips - 1/4 cup shredded coconut (unsweetened) - 1 teaspoon vanilla extract - A pinch of salt Old-fashioned rolled oats provide fiber and energy. They help you feel full. Natural peanut butter adds protein and healthy fats. It fuels your body. Honey or maple syrup gives natural sweetness and quick energy. Ground flaxseed is rich in omega-3 fatty acids. It supports heart health. Mini dark chocolate chips add a touch of joy and antioxidants. Shredded coconut offers fiber and healthy fats too. Vanilla extract enhances flavor and lifts your mood. A pinch of salt balances sweetness and boosts taste. You can swap old-fashioned oats for quick oats. The bites will still hold shape. If you need a nut-free option, use sunflower seed butter instead of peanut butter. Maple syrup works well if you prefer a vegan option. You can skip flaxseed if you do not have it. Just add more oats or nut butter. For chocolate lovers, you can use chocolate chunks instead of chips. If you dislike coconut, simply leave it out or replace it with chopped nuts. Start by gathering your ingredients. You need rolled oats, peanut butter, honey, flaxseed, chocolate chips, coconut, vanilla, and salt. In a large bowl, mix the rolled oats, peanut butter, honey, flaxseed, and vanilla. Use a spatula or your hands to combine them well. If the mix is dry, add a bit more peanut butter or honey. You want a sticky dough. Once your dough is ready, fold in the mini chocolate chips and shredded coconut. Make sure they spread evenly in the mix. To form the bites, scoop about one tablespoon of dough. Roll it into a ball using your hands. Keep going until you use all the mixture. You should end up with about 20 bites. Now, place the energy bites on a baking sheet lined with parchment paper. This keeps them from sticking. Next, put them in the fridge for at least 30 minutes. Chilling helps them firm up and hold their shape. After that, you can store them in an airtight container in the fridge for up to one week. Enjoy your tasty energy bites! To keep your energy bites fresh, store them in an airtight container. This helps avoid moisture and keeps them tasty. You can keep them in the fridge for up to one week. If you want them to last longer, freeze them. They freeze well for about three months. Just make sure to place parchment paper between layers to avoid sticking. You can add a twist to your bites by mixing in extras. Try using different nut butters for a unique taste. Almond butter or cashew butter can work great. You can also add dried fruits like cranberries or raisins for a sweet boost. For a crunch, think about adding nuts or seeds. A sprinkle of cinnamon can also uplift the flavor beautifully. One common mistake is not measuring ingredients properly. This can change the texture of your bites. Too much peanut butter can make them too sticky, while too little can make them dry. Also, be careful not to skip the chilling step. Chilling helps the bites firm up, so they don't fall apart. Lastly, don’t rush when mixing. Make sure all ingredients blend well for the best flavor. {{image_2}} You can make these bites even yummier by adding chocolate or fruit. Mini dark chocolate chips give a sweet touch. If you want fruit, try dried cranberries or raisins. Both add flavor and chewiness. You can mix in about 1/4 cup of your choice. This change keeps the bites fun and tasty. Peanut butter is great, but other nut butters work too. Almond butter or cashew butter can change the taste. Each nut butter has its own flavor and texture. You can swap the peanut butter for any nut butter in equal amounts. This keeps the bites creamy and delicious. To make these bites vegan, use maple syrup instead of honey. This simple swap keeps the sweetness while being plant-based. For gluten-free bites, ensure your oats are certified gluten-free. These changes make the bites perfect for a wider range of diets. Enjoy the bites with no worries! To keep your oatmeal peanut butter energy bites fresh, store them in an airtight container. Place the container in the refrigerator. This will keep them good for up to one week. Make sure the bites are not exposed to air. This prevents them from drying out. If you want to save some energy bites for later, freezing is a great option. First, place the energy bites in a single layer on a baking sheet. Put this sheet in the freezer for about an hour. Once they are firm, transfer the bites to a freezer-safe bag or container. You can freeze them for up to three months. Just remember to label the container with the date. Check your energy bites before eating. If they smell strange or have a dry texture, it’s best to throw them away. Any signs of mold mean they are spoiled. Always trust your senses. If something seems off, don’t eat it. Yes, you can use quick oats. They will make the bites softer. Rolled oats give more texture. I like the chewiness of rolled oats, but quick oats work too. These energy bites last up to one week in the fridge. Store them in an airtight container. If you want them to last longer, you can freeze them. They stay good for up to three months in the freezer. Serve these bites as a snack or a quick breakfast. They are great for on-the-go. You can also pack them in lunch boxes. Kids love them, and they are easy to grab. Yes, agave syrup is a good substitute for honey. It adds sweetness without changing the flavor much. Just use the same amount as you would honey. You now have all the details to make tasty oatmeal peanut butter energy bites. We discussed ingredients, their benefits, and how to choose substitutes. I provided step-by-step instructions for easy preparation and storage tips to keep them fresh. You can also create fun variations by adding chocolate or fruit. Be sure to avoid common mistakes for the best results. Enjoy your bites as a quick snack or a healthy treat. Get creative and make these energy bites your own!

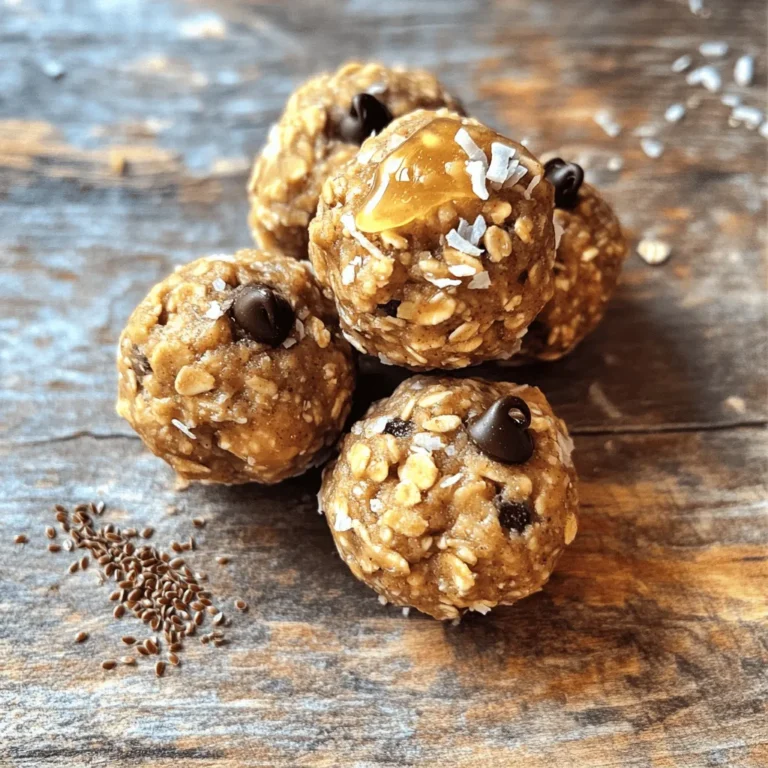
Oatmeal Peanut Butter Energy Bites Simple and Tasty

To make a tasty cucumber pasta salad, gather these main ingredients: - 8 oz. whole wheat pasta (like fusilli or penne) - 2 medium cucumbers, diced - 1 cup cherry tomatoes, halved - 1/2 red onion, thinly sliced - 1/4 cup black olives, sliced - 1/2 cup feta cheese, crumbled These ingredients blend well to create a fresh taste. You can add more flavor with these optional ingredients: - Fresh parsley for garnish - 3 tablespoons olive oil - 2 tablespoons fresh lemon juice - 1 teaspoon dried oregano - Salt and pepper to taste These extra items enhance the salad’s taste and aroma. Each serving of cucumber pasta salad has about: - Calories: 300 - Protein: 10g - Carbohydrates: 35g - Fiber: 5g - Fat: 12g This salad is a healthy choice, full of nutrients and flavor. First, take 8 oz. of whole wheat pasta. You can use fusilli or penne. Bring a pot of water to a boil. Add a pinch of salt for flavor. Cook the pasta according to the package instructions until it's al dente. This usually takes about 8-10 minutes. Drain the pasta in a colander. Rinse it under cold water to cool it down and stop the cooking. This step is key to keeping the pasta firm. Now, let’s chop some veggies! Take 2 medium cucumbers and dice them into small pieces. Next, grab 1 cup of cherry tomatoes and cut them in half. Then, slice 1/2 of a red onion thinly. Don’t forget about 1/4 cup of black olives; slice them too. Combine all these fresh ingredients in a large mixing bowl. Their colors will make the salad pop! In a small bowl, you will make the dressing. Start with 3 tablespoons of olive oil. Add 2 tablespoons of fresh lemon juice for a zesty kick. Then, sprinkle in 1 teaspoon of dried oregano. Season with salt and pepper to taste. Whisk these together until everything is mixed well. A good dressing ties the salad together! Now it's time to combine everything! Pour the dressing over the bowl of pasta and veggies. Toss gently to coat all the ingredients with the dressing. Be careful not to mash the pasta. Next, fold in 1/2 cup of crumbled feta cheese. It adds a creamy texture and salty flavor. Taste the salad and adjust the seasoning if needed. Let it sit for 10-15 minutes so the flavors mix well. Serve the salad chilled or at room temperature. This dish is great for picnics or barbecues. Garnish with fresh parsley for a pop of color. You can also add more feta on top if you like. Enjoy this fresh and flavorful delight! When selecting cucumbers, look for firm, smooth skin. You want cucumbers that feel heavy for their size. Avoid cucumbers with soft spots or wrinkles. Fresh cucumbers have a bright green color. If they are yellow, they may be overripe. You can also check for a sweet smell, which indicates freshness. To cook pasta perfectly, use plenty of water and salt. Bring the water to a rolling boil before adding the pasta. Stir the pasta right after you add it to prevent sticking. Follow the package instructions for cooking time. Test the pasta a minute before the end. It should be al dente, meaning it has a slight bite. To boost flavor, consider adding fresh herbs like basil or dill. You can also include a splash of balsamic vinegar for depth. For a spicy kick, try adding red pepper flakes. If you like nuts, toasted pine nuts add a nice crunch. Finally, for a creamy texture, swap feta for avocado or add Greek yogurt. {{image_2}} You can easily make this salad vegetarian or vegan. To do this, simply leave out the feta cheese. You can replace it with avocado for a creamy texture. If you want some extra protein, add chickpeas or black beans. They will give you a satisfying bite while keeping it plant-based. If you need a gluten-free version, swap whole wheat pasta for gluten-free pasta. Many stores sell options made from rice or corn. These pastas cook well and taste great in this salad. Just watch the cooking time, as it may differ from regular pasta. Feel free to add more ingredients to boost flavor and texture. Some great choices are: - Bell peppers for crunch and color. - Spinach or arugula for extra greens. - Artichoke hearts for a tangy twist. - Fresh herbs like basil or dill for freshness. Mix and match these ideas to make your perfect cucumber pasta salad! To keep your cucumber pasta salad fresh, store it in the fridge. Use an airtight container. This helps keep moisture in and air out. The salad can stay fresh for about three days. If you have leftovers, let the salad cool first. Then, transfer it to a container. Make sure to seal it tightly. You can also separate the dressing if you want. This keeps the pasta from getting soggy. Don’t leave the salad out at room temperature for too long. Bacteria can grow quickly. Also, avoid adding salt to the salad before storing. Salt can draw out moisture and make your salad mushy. Yes, you can make Cucumber Pasta Salad ahead of time. It tastes great when chilled. I often prepare it a few hours or even a day before serving. Just keep it in the fridge. This gives the flavors time to blend nicely. You can use many dressings for Cucumber Pasta Salad. A balsamic vinaigrette adds a nice twist. Italian dressing can also work well. You might try a yogurt-based dressing for creaminess. Experiment and find what you like best! Cucumber Pasta Salad lasts about 3 to 5 days in the fridge. Keep it in an airtight container. If you notice the cucumbers getting soggy, it’s time to toss it. Freshness is key for the best taste. Absolutely! You can use any pasta shape you enjoy. Fusilli and penne work great, but rotini or farfalle can be fun too. Just make sure to cook it until al dente for the best texture. Cucumber Pasta Salad makes a great side dish. Serve it with grilled chicken or fish. It’s also perfect at picnics or barbecues. You can even top it with extra feta or herbs for a fresh touch. Cucumber pasta salad combines fresh ingredients, simple steps, and healthy choices. You learned to cook pasta, prep veggies, and whip up a tasty dressing. Remember to pick the best cucumbers and avoid common storage mistakes. With variations for different diets, this dish fits many needs. Enjoy making this salad ahead or trying new ingredients. Get creative with flavors! This salad is not just a meal; it’s a chance to explore and enjoy. Happy cooking!

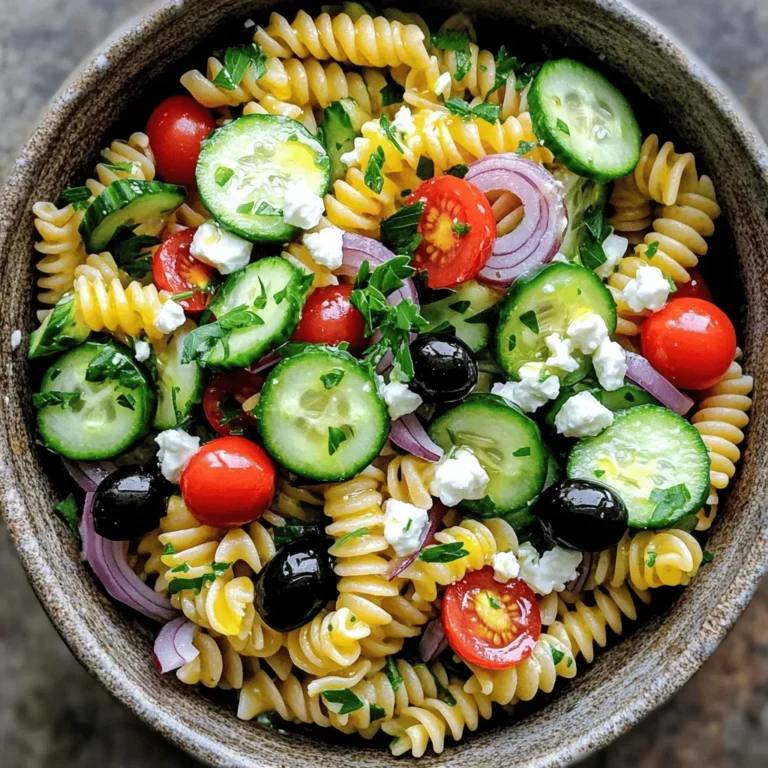
Cucumber Pasta Salad Fresh and Flavorful Delight

- 16 oz cream cheese, softened - 1 cup graham cracker crumbs - 1/4 cup fresh lemon juice These three main ingredients create the base of our mini lemon cheesecakes. Cream cheese gives them their rich and creamy texture. Graham cracker crumbs form a delicious crust, while fresh lemon juice adds a bright, zesty flavor. - Fresh berries - Mint leaves These optional ingredients are fun to add. Fresh berries, like strawberries or blueberries, provide color and sweetness. Mint leaves add a lovely touch and fresh taste. You can use them to top your cheesecakes for an extra pop. - Muffin tin - Mixing bowls - Electric mixer You'll need a muffin tin to shape the mini cheesecakes. Mixing bowls help you combine the ingredients easily. An electric mixer makes it simple to beat the cream cheese until smooth. Make sure you have all these tools ready before you start! First, preheat your oven to 325°F (160°C). Line a muffin tin with paper liners. In a small bowl, mix together: - 1 cup graham cracker crumbs - 1/4 cup unsalted butter, melted - 2 tablespoons sugar Stir until the mixture looks like wet sand. Next, take about 1 tablespoon of this mix. Spoon it into each muffin liner. Press down firmly to form a nice crust. In a large bowl, beat 16 oz of softened cream cheese with 1/2 cup sugar. Mix until it’s smooth and creamy. Now, add in 2 large eggs, one at a time. Make sure to mix well after each egg. Then, stir in: - 1/4 cup fresh lemon juice - Zest of 1 lemon - 1 teaspoon vanilla extract Mix everything until it is fully combined. Pour the cheesecake batter into the crusts. Fill each liner about 3/4 full. Bake for 18 to 20 minutes. Check if the edges are set. The centers should jiggle a bit but not be wet. After baking, let the cheesecakes cool for about 30 minutes at room temperature. Then, chill them in the fridge for at least 2 hours. This helps them firm up. Once chilled, carefully remove the cheesecakes from the muffin tin. Enjoy your mini lemon cheesecakes! To get the best texture, use room temperature ingredients. This helps the cream cheese mix well. Cold cream cheese can make the batter lumpy. Let your eggs sit out for a bit, too. They blend in better when warm. For cooling, let the cheesecakes sit at room temperature first. After 30 minutes, move them to the fridge. Chilling them for at least two hours makes them firm and easier to remove from the liners. Garnishing your mini cheesecakes can make them look fancy. Use fresh berries like raspberries or blueberries on top. Add a sprig of mint for color and freshness. You can also drizzle some honey or a lemon glaze over them for extra flair. Serve the cheesecakes on a nice platter. This makes them more appealing. If you want, pair them with a scoop of vanilla ice cream for a special treat. One big mistake is overmixing the batter. Mix just until smooth to prevent cracks. Overmixing adds too much air, which can cause them to puff up and crack while baking. Another common error is not chilling long enough. If you skip the chill time, they won’t set properly. Make sure to let them cool completely before serving for the best results. {{image_2}} You can mix things up by adding different fruit juices. Imagine the bright taste of lime or the sweetness of strawberry. Each flavor adds a new twist to your mini lemon cheesecakes. You can also try incorporating chocolate. Add melted chocolate to the batter for a rich, creamy treat. Just remember that chocolate pairs well with a hint of lemon! If you need gluten-free options, use gluten-free graham crackers. They work just as well and taste great! For sugar-free adaptations, swap regular sugar for a sugar substitute. This way, you can enjoy a delicious cheesecake without the guilt. Always check the labels to ensure they fit your diet. For holiday-themed versions, think about adding spices like cinnamon or nutmeg. These spices can give your mini cheesecakes a warm, festive flavor. In summer, use fresh fruits like peaches or berries for a fruity twist. Top your cheesecakes with seasonal fruits for a bright, colorful look. These changes make each batch special and fun! To keep your mini lemon cheesecakes fresh, store them in an airtight container. Use a container that fits the cheesecakes snugly to prevent them from moving around. If you want to keep them cool, place the container in the fridge. This helps maintain their creamy texture and zesty flavor. You can freeze mini cheesecakes for later enjoyment. First, let them cool completely after baking. Then, wrap each cheesecake in plastic wrap. Place the wrapped cheesecakes in a freezer bag or airtight container. To thaw, leave them in the fridge overnight. This keeps them from getting soggy. In the fridge, mini lemon cheesecakes last for about 5 days. You may notice they start to lose their texture after a few days. Check for any signs of spoilage. If they smell off or have visible mold, it's best to toss them. Always prioritize freshness for the best taste! Yes, you can make mini cheesecakes a day or two ahead. Just store them in the fridge. It's a great way to save time. Look for the edges to be set. The centers should jiggle slightly but not be wet. This means they are ready to cool. Absolutely! You can use Oreo cookies or almond flour for a crust. Adjust your butter amount based on your choice for the best results. You can use Greek yogurt or silken tofu for a lighter option. They will change the taste slightly but will still be creamy. Yes, they freeze well. Place them in an airtight container. They can last for up to two months in the freezer. You learned how to make mini lemon cheesecakes, from choosing ingredients to storing them. Remember to use the right tools and techniques for great results. Customizing flavors or dietary options is easy, so have fun! Follow those tips for the perfect texture and presentation. Enjoy sharing these treats with friends and family. Now it's time to get baking!

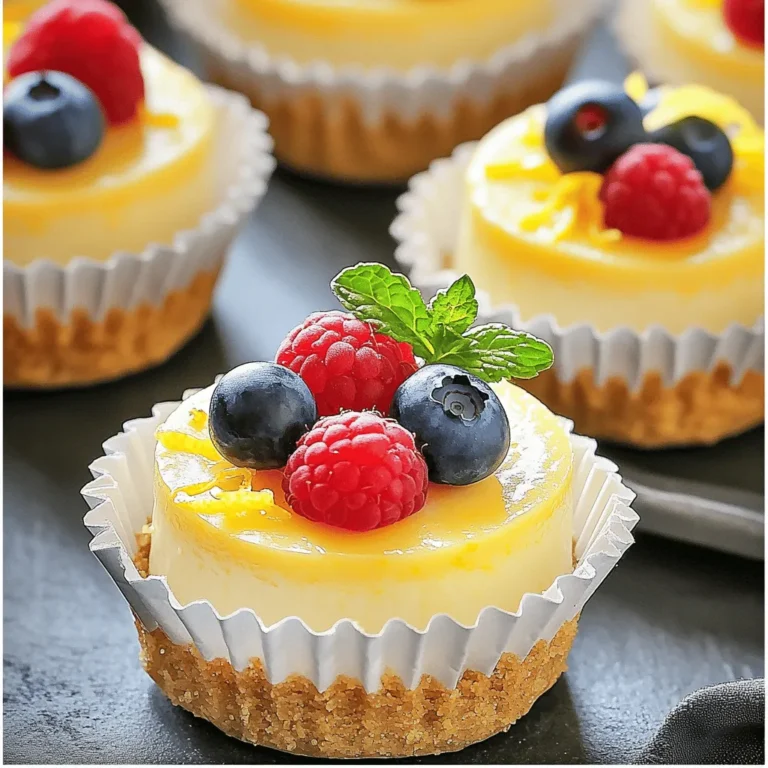
Mini Lemon Cheesecakes Delightful and Simple Treat

- 12 oz cheese tortellini - 1 lb shrimp, peeled and deveined - 2 cups fresh spinach - 1 cup heavy cream - 1 cup chicken broth - 2 cloves garlic, minced - 1 cup cherry tomatoes, halved - 1 teaspoon Italian seasoning - 1 tablespoon olive oil - Salt and pepper, to taste - Grated Parmesan cheese, for garnish These ingredients come together to create a delightful dish. The cheese tortellini gives a nice bite. Shrimp adds a lovely flavor, while spinach brings freshness. Heavy cream makes the sauce rich and smooth. The garlic and Italian seasoning enhance all the flavors. Cherry tomatoes add a bit of sweetness and color. Feel free to make this dish your own. Here are some ideas: - Add red pepper flakes for heat. - Use sun-dried tomatoes for a tangy twist. - Swap out spinach for kale for a different texture. - Try adding mushrooms for an earthy flavor. - Use different cheeses, like feta or goat cheese, for a new taste. These options let you tailor the dish to your liking. Each serving provides: - Calories: 525 - Protein: 28g - Carbohydrates: 45g - Fat: 25g - Fiber: 3g This meal is filling and nutritious. It balances protein and carbs, perfect for a hearty dinner. Enjoy the flavors while knowing you’re eating well. Start by boiling a large pot of salted water. This helps flavor the tortellini. Once the water boils, add 12 oz of cheese tortellini. Cook it as the package says, usually about 3 to 5 minutes. Stir gently to prevent sticking. When they float to the top, they are done. Drain the tortellini in a colander and set it aside. Next, heat 1 tablespoon of olive oil in a large skillet over medium heat. Add 2 cloves of minced garlic and sauté for 1 minute. This brings out a great flavor. Now, toss in 1 lb of peeled and deveined shrimp. Season with salt, pepper, and 1 teaspoon of Italian seasoning. Cook for about 2-3 minutes. Once the shrimp turns pink, they are ready. Stir in 1 cup of halved cherry tomatoes and cook for another 2 minutes. They should soften a bit. Pour in 1 cup of chicken broth and let it simmer gently. After that, add 1 cup of heavy cream and mix well. Allow the sauce to simmer for about 5 minutes. Stir occasionally to keep it smooth. Now, add 2 cups of fresh spinach and stir until it wilts. This adds color and nutrients. Finally, gently fold in the cooked tortellini. Mix until every piece is coated in the creamy sauce. Taste it and adjust the seasoning with more salt and pepper if needed. Serve hot, and finish with some grated Parmesan cheese on top. Enjoy your creamy shrimp spinach tortellini! To get that creamy texture, use heavy cream. It gives richness. If you want it lighter, mix in some chicken broth. Always simmer the sauce gently. This helps it thicken nicely. Stir frequently to avoid sticking. If the sauce feels too thick, add more broth. If it’s too thin, let it simmer longer. You can swap cheese tortellini for other pasta types. Try fettuccine or penne for a twist. For a lighter meal, replace shrimp with chicken or tofu. Spinach works well, but you can use kale too. Cherry tomatoes can be replaced with sun-dried tomatoes for a deeper flavor. This dish shines with a fresh side salad. A simple mix of greens, tomatoes, and a light vinaigrette is great. Crusty bread pairs well, too. It’s perfect for dipping into the creamy sauce. For drinks, a crisp white wine or sparkling water balances the meal. Enjoy your dinner with your loved ones! {{image_2}} To make a vegetarian version of creamy shrimp spinach tortellini, swap the shrimp for mushrooms. Use about 1 pound of sliced mushrooms. Sauté them in olive oil until golden. You can also add more vegetables like zucchini or bell peppers for extra flavor. Keep the rest of the recipe the same for a rich and creamy dish. If you want a low-carb version, use cauliflower gnocchi instead of tortellini. Cook the gnocchi according to the package. This change cuts down on carbs while still keeping the meal tasty. You can skip the heavy cream and use unsweetened almond milk for a lighter sauce. You can boost this dish with extra proteins or veggies. Consider adding cooked chicken or scallops for different tastes. For veggies, try asparagus or peas. Just add them when you mix in the spinach. This will give your meal a hearty feel and keep it colorful. To keep your creamy shrimp spinach tortellini fresh, first let it cool. Then, place it in an airtight container. You can store it in the fridge for up to 3 days. Make sure to label the container with the date. This helps you remember when you made it. When you're ready to enjoy your leftovers, use gentle heat. The microwave works well but can cause uneven heating. Use a microwave-safe dish and cover it with a lid or a damp paper towel. Heat in 30-second bursts, stirring in between. You can also reheat in a skillet over low heat. Add a splash of broth or cream to keep it creamy. To freeze the tortellini, follow these steps. First, let the dish cool completely. Then, transfer it to a freezer-safe container. You can also use freezer bags for easy storage. Squeeze out as much air as possible to prevent freezer burn. It will stay fresh for up to 3 months. To reheat, thaw overnight in the fridge and follow the reheating tips mentioned above. Enjoy the same great taste later! Yes, you can use frozen shrimp. Just thaw them before cooking. To thaw, place them in cold water for about 15-20 minutes. Make sure to dry them well before adding to the pan. This helps them cook evenly and stay tender. You can use half-and-half or whole milk as a substitute. If you want a lighter option, try Greek yogurt. Just mix it with a bit of milk for a creamier texture. Coconut milk also works well for a dairy-free choice. Cook the tortellini and shrimp as normal, but skip adding the spinach and cream. Store the shrimp and tortellini in the fridge. When ready to serve, heat them up, add the cream and spinach, and cook until warm. This keeps the dish fresh and tasty. Yes, this recipe is great for meal prep. Store it in airtight containers in the fridge for up to four days. Just reheat it on the stove or in the microwave. If you freeze it, the texture might change, but it will still taste good after reheating. You now have a clear path to make a delicious tortellini dish. We covered the key ingredients, cooking steps, and helpful tips. Remember, you can customize the recipe or try different variations. Store leftovers properly for later enjoyment. In my experience, this recipe fits into any meal plan. Whether you need a hearty dinner or a light lunch, it serves you well. Enjoy every bite, make it your own, and impress your friends and family with your cooking skills.

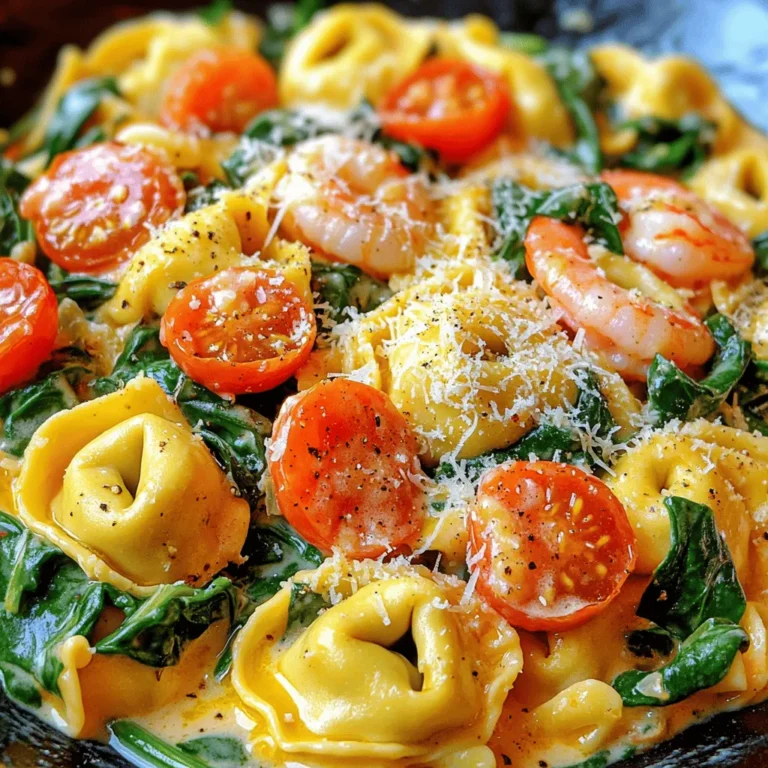
Creamy Shrimp Spinach Tortellini Delightful Dinner

- 12 oz penne pasta - 1 lb smoked sausage, sliced - 1 medium onion, diced - 2 cloves garlic, minced - 1 bell pepper, diced - 1 can diced tomatoes (14 oz) - 2 cups chicken broth - 1 cup heavy cream - 2 tablespoons Cajun seasoning - 1 teaspoon paprika - Salt and pepper - 2 tablespoons olive oil - 1 cup grated Parmesan cheese - Fresh parsley for garnish Gather these ingredients before you start. Each one adds a layer of flavor. The penne pasta gives a nice bite. Smoked sausage brings a deep, rich taste. Onions and garlic add sweetness and warmth. The bell pepper adds color and crunch. Diced tomatoes bring a juicy tang. Chicken broth makes the dish savory. Heavy cream creates that creamy texture we love. Cajun seasoning is a must for that kick. Paprika adds depth. Don’t forget salt and pepper to enhance each flavor. You’ll need olive oil for cooking. Parmesan cheese adds a salty finish. Fresh parsley gives a vibrant touch when you serve it. Having everything ready will make your cooking smooth and fun. 1. Sautéing the sausage Heat 2 tablespoons of olive oil in a large pot over medium heat. Add 1 pound of sliced smoked sausage to the pot. Cook for about 5-7 minutes until the sausage turns brown. Remove the sausage from the pot and set it aside. 2. Cooking the vegetables In the same pot, add 1 diced medium onion and 1 diced bell pepper. Add 2 minced garlic cloves to the pot as well. Cook these vegetables for about 3-4 minutes until they soften. 3. Adding seasonings and liquids Stir in 2 tablespoons of Cajun seasoning and 1 teaspoon of paprika. Cook for another minute to let the flavors bloom. Now, add 1 can of diced tomatoes and 2 cups of chicken broth. Toss in 12 ounces of penne pasta and stir to combine. Bring the mixture to a boil. 1. Incorporating the pasta Once boiling, reduce the heat to a simmer. Cover the pot and let it cook for about 10-12 minutes. Stir occasionally until the pasta is al dente. 2. Mixing in cream and cheese After the pasta is cooked, stir in 1 cup of heavy cream. Add the cooked sausage back into the pot. Let it simmer for 3-4 minutes until everything is heated through. Fold in 1 cup of grated Parmesan cheese next. Adjust the flavor with salt and pepper to taste. 3. Garnishing before serving Before serving, sprinkle 1/4 cup of chopped fresh parsley on top. This adds a nice touch and fresh flavor. Enjoy your creamy, spicy, and delicious dish! Choosing the right pasta I love using penne pasta for this dish. Its shape holds the sauce well. You can also try rotini or fusilli. They both work nicely with creamy sauces. How to avoid mushy pasta To keep pasta from getting mushy, watch the cooking time. Cook it until it's al dente, which means it has a slight bite. Stir often while it simmers. This helps it cook evenly. Additional spices and herbs For extra flavor, add a pinch of cayenne pepper. It gives a nice kick! Fresh thyme or basil also adds depth. Try adding these herbs when you mix in the cream. Best toppings for serving I recommend topping your pasta with grated Parmesan cheese. It melts nicely and adds a rich flavor. Fresh parsley is great for color and taste. You can also add crushed red pepper flakes for more heat. {{image_2}} You can switch up the sausage to match your taste. Try turkey sausage for a lighter option. Chicken sausage also works well. For a spicy kick, go for a hot sausage. If you want a meat-free dish, you can use plant-based sausage. It adds great flavor and keeps it creamy. Another option is to add beans for protein. Black beans or chickpeas work nicely. You can make this dish in an Instant Pot for a quick meal. Set it to high pressure for about 5 minutes. Use the sauté function to cook the sausage and veggies first. Then, add the rest of the ingredients. Follow with a quick release. If you prefer oven-baked pasta, you can try that too. Mix all the ingredients in a baking dish. Cover with foil and bake at 350°F for about 30 minutes. Remove the foil and add cheese for the last 10 minutes. This gives a nice crispy top. To store leftovers, first let the pasta cool down. Transfer it to an airtight container. Place the container in the fridge. It can last for about 3 to 4 days. When ready to eat, reheat it in a pot over low heat. You can add a splash of chicken broth or cream to revive its creamy texture. Freezing pasta dishes can be simple. Allow the pasta to cool completely before freezing. Portion it into freezer-safe containers. Leave some space at the top for expansion. It is best to eat frozen pasta within 2 to 3 months for the best taste. To reheat, thaw overnight in the fridge. Heat gently on the stove, adding a bit of extra cream or broth to keep it creamy. How do you make One Pot Creamy Cajun Sausage Pasta healthier? You can make this dish healthier by using whole grain pasta. Swap heavy cream for light cream or milk. Use turkey sausage instead of smoked sausage for less fat. You can add more vegetables, like spinach or zucchini, for extra nutrients. These changes keep the flavor while boosting health benefits. Can I use other types of pasta? Yes, you can use various pasta shapes! Short pasta like rotini or farfalle works well. You can also try whole wheat or gluten-free pasta if needed. Cooking times may vary slightly, so check the package for guidance. Remember, the key is to cook the pasta until it is just right. What side dishes pair well with this meal? This creamy pasta goes great with a fresh salad. A Caesar or mixed greens salad adds crunch. Garlic bread is another tasty side that complements the meal. You can also serve it with roasted vegetables for a healthy touch. These sides balance the richness of the pasta nicely. This blog post covered all you need for a tasty Cajun sausage pasta. I shared the key ingredients and gave you a clear step-by-step method for cooking. Cooking tips and variations help you adjust the recipe to fit your taste. Storing leftovers and answers to common questions make this meal easy to enjoy anytime. Now, you can create a delicious dish that feels special, yet simple. Enjoy experimenting and sharing this yummy recipe with others!

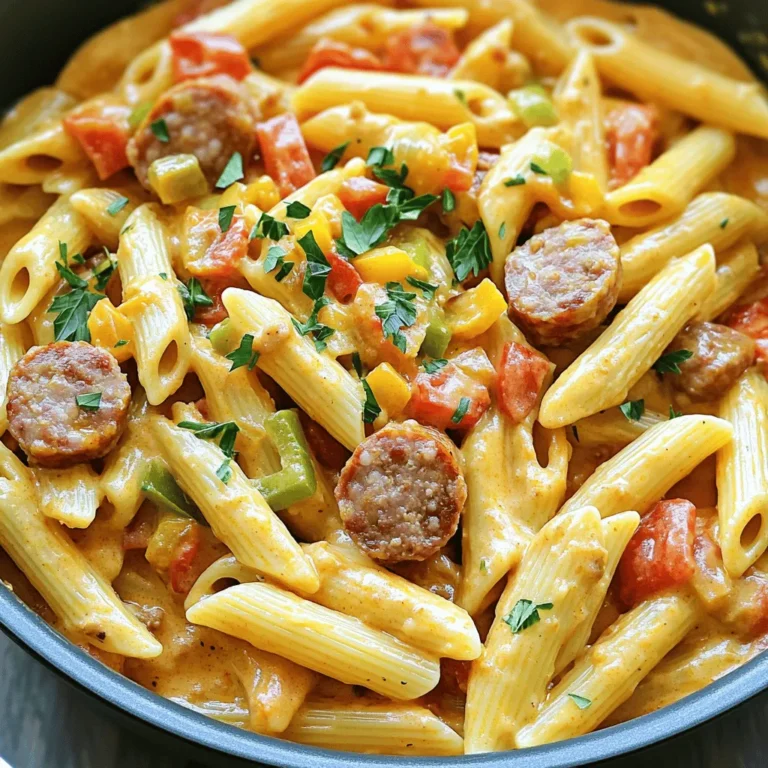
One Pot Creamy Cajun Sausage Pasta Simple Delight

- 4 large Granny Smith apples, peeled, cored, and sliced - 1/2 cup brown sugar - 1/4 cup unsalted butter - 1 teaspoon ground cinnamon - 1/2 teaspoon nutmeg - 1/4 teaspoon salt - 1 teaspoon vanilla extract - 2 tablespoons lemon juice - Optional: chopped pecans or walnuts for crunch Southern Fried Apples are a simple yet delightful dish. You need a few key ingredients to make them shine. First, choose Granny Smith apples. They provide the perfect tartness. Brown sugar is essential for sweetness and rich flavor. Unsalted butter adds a creamy base, while ground cinnamon and nutmeg bring warmth and spice. A small amount of salt enhances all the flavors. Vanilla extract gives the dish depth, and lemon juice brightens the apples. For extra crunch, consider adding chopped pecans or walnuts on top. These ingredients blend together to create a warm, sweet treat you can enjoy any time. To start, I grab four large Granny Smith apples. First, I peel, core, and slice them. Then, I place the slices in a mixing bowl. I add two tablespoons of lemon juice to the bowl. This step is key! The lemon juice keeps the apples from turning brown. No one wants brown apples in this dish. Next, I heat a large skillet over medium heat. I add a quarter cup of unsalted butter to the skillet. Once the butter melts, I mix in half a cup of brown sugar. I also add one teaspoon of ground cinnamon, half a teaspoon of nutmeg, and a quarter teaspoon of salt. I stir this mixture until it bubbles. The smell is amazing! Now, I add the lemon juice-coated apple slices to the skillet. I stir them well, coating the apples in that sweet, buttery mixture. I let them cook for about eight to ten minutes. I stir occasionally, ensuring they turn tender and caramelized. After cooking, I stir in one teaspoon of vanilla extract. This adds a lovely depth of flavor. I let everything meld for another minute. If you want a crunchy bite, now is the time to add chopped pecans or walnuts. I gently fold them into the apple mixture. Once done, I remove the skillet from the heat and let the apples cool slightly before serving. For Southern Fried Apples, I recommend using Granny Smith apples. Their tartness balances well with the sweet brown sugar. Other good choices include Honeycrisp and Fuji apples. These apples stay firm when cooked, giving you a nice bite. When choosing your apples, look for ones that are fresh and firm. Avoid apples with bruises or soft spots. The flavor is important, so go for apples that smell sweet and crisp. An ideal skillet for this dish is a cast-iron skillet. It heats evenly and gives a nice caramelization. If you don’t have one, any heavy skillet will work. When cooking, keep the heat at medium. This helps the apples cook through without burning. Cook them for about 8-10 minutes until they are tender and caramelized. Stir them occasionally to coat them well in the buttery mixture. Serve your Southern Fried Apples warm. They pair perfectly with a scoop of vanilla ice cream. The cold ice cream melts into the warm apples, creating a delightful treat. Another great option is to serve them with warm biscuits. The flaky texture complements the sweet apples nicely. For presentation, use a clear bowl to show off the vibrant colors. You can also sprinkle some chopped pecans or walnuts on top for a nice crunch. {{image_2}} You can make Southern fried apples healthier. Try using honey or maple syrup instead of brown sugar. These options add sweetness without the refined sugar. You can also swap butter for coconut oil. Coconut oil adds a rich flavor and is a great alternative. Boost the flavor of your fried apples. You might drizzle caramel or melted chocolate on top. This makes a sweet treat even sweeter. You can also add seasonal spices like ginger or allspice. These spices can give your dish a cozy feel. Southern fried apples shine as a topping. Serve them on pancakes or waffles for a special breakfast. You can also mix them with oats or yogurt. This makes a delicious and filling breakfast option. Enjoy your fried apples in many fun ways! To keep your Southern Fried Apples fresh, store them in an airtight container. Place them in the fridge right after they cool. They will stay good for about three days. If you want to enjoy them later, make sure to use them within this timeframe. The flavors will still be nice, but they taste best when fresh. When it's time to eat leftovers, reheat them gently. You can use a skillet on low heat to warm them up. This method helps keep their texture nice. You can also use the microwave, but do so in short bursts. Heat them for about 30 seconds at a time to avoid mushiness. I recommend serving them warm, but some like them cold too. It all depends on your taste! If you want to save Southern Fried Apples for later, freezing is a great option. First, let them cool completely. Then, transfer them to a freezer bag or container. Make sure to remove as much air as possible. They will stay good in the freezer for about three months. After thawing, you can reheat them in a skillet for the best flavor. They make a great topping for pancakes or even yogurt! For Southern Fried Apples, I recommend using Granny Smith apples. They are tart and firm. Their crispness holds up well during cooking. You can also try Honeycrisp or Fuji apples. Honeycrisp adds sweetness, while Fuji brings a juicy bite. Each type brings its own flavor and texture to the dish. Yes, you can prepare Southern Fried Apples in advance. You can slice the apples and toss them with lemon juice. This keeps them fresh and prevents browning. Cook them just before serving for the best taste and texture. If you have leftovers, store them in the fridge for up to three days. To make Southern Fried Apples vegan, swap out the butter for coconut oil or vegan butter. You can also use maple syrup instead of brown sugar for sweetness. This keeps the dish delicious and plant-based. Be sure to check that your vanilla extract is also vegan. Southern Fried Apples are a treat packed with sweet, spicy goodness. We covered essential ingredients and the step-by-step method to get it just right. From choosing the best apples to perfect cooking techniques, every detail matters for the best flavor. Don't forget to try out variations like healthier options and delicious toppings. These apples not only serve as a dessert but also as tasty additions to breakfast. Store leftovers properly, so nothing goes to waste. Enjoy crafting this dish and let its flavors warm your meals every time.

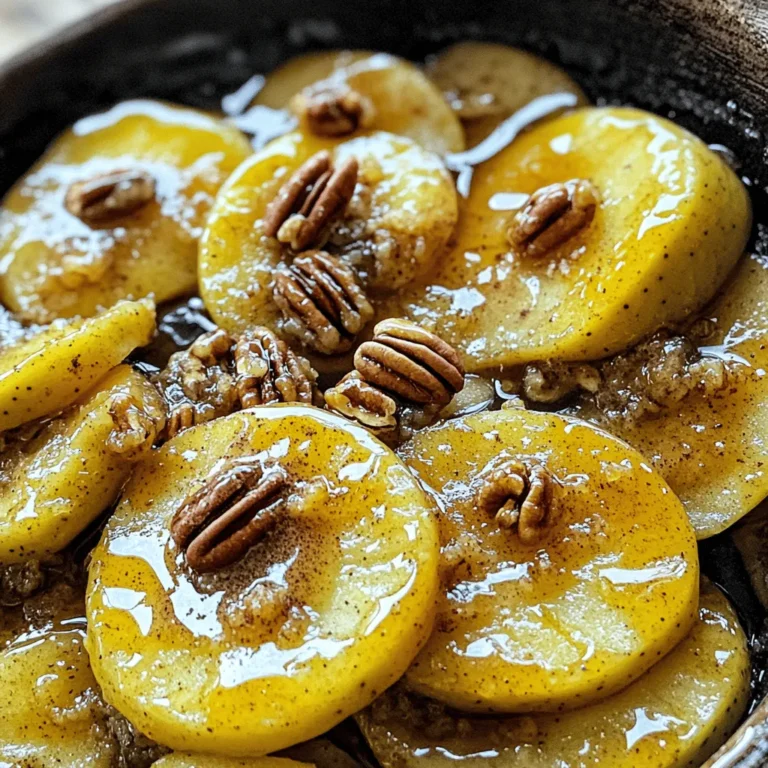
Southern Fried Apples Irresistible Sweet Treat

PREV 1 … 34 35 36 … 57 NEXT
go kitchen now

explore

DessertsDinnerAppetizersDrinks

Our Policies

  • Cookie Policy
  • Copyright Policy
  • Disclaimer
  • GDPR Policy
  • Terms Of Use
Back to Top
  • About
  • Contact Us
  • Privacy Policy
© 2025 go kitchen now