FREE DINNER EBOOK! Get your copy!
  • Cookie Policy
  • GDPR Policy
  • Disclaimer
  • Terms Of Use
  • Visit my other site: Fun Cookie Recipes
go kitchen now
  • Home
  • Dinner
  • Desserts
  • Drinks
  • Appetizers
  • Contact
  • About
  • Privacy Policy
  • Home
  • Dinner
  • Desserts
  • Drinks
  • Appetizers
  • Contact
  • About
  • Privacy Policy
  • Cookie Policy
  • GDPR Policy
  • Disclaimer
  • Terms Of Use
Visit my other site: Fun Cookie Recipes

HOME / CATEGORIES /

Latest

To make perfect chocolate chip cookies, gather these simple ingredients: - 2 1/4 cups all-purpose flour - 1 teaspoon baking soda - 1 teaspoon salt - 1 cup unsalted butter, softened (2 sticks) - 3/4 cup granulated sugar - 3/4 cup brown sugar, packed - 1 teaspoon vanilla extract - 2 large eggs - 2 cups chocolate chips (semi-sweet or dark) - 1/2 cup chopped walnuts or pecans (optional) Each ingredient plays a key role in creating the best cookie. Flour gives structure, while butter adds richness. The sugars help the cookies spread and caramelize. Eggs bind everything together, and vanilla adds a warm flavor. Chocolate chips are, of course, the star of the show. You can choose semi-sweet or dark, based on your taste. If you love nuts, add walnuts or pecans for extra crunch. Make sure you use fresh ingredients for the best results. This will give your cookies a great taste and texture. First, set the oven to 350°F (175°C). This step gets your oven ready. Line two baking sheets with parchment paper. This helps cookies bake evenly. In a medium bowl, whisk together the flour, baking soda, and salt. Set this mix aside for later. This blend gives cookies structure and helps them rise. In a large bowl, add the softened butter, granulated sugar, and brown sugar. Mix these well until they are light and fluffy. This should take about 2-3 minutes. A stand mixer or hand mixer works best here. Next, add the eggs and vanilla extract to the butter mix. Mix in one egg at a time. Make sure each egg is fully blended before adding the next. This keeps the batter smooth and creamy. Now, gradually add the dry ingredients to the wet mix. Stir gently until just combined. Be careful not to overmix! This keeps the cookies soft and chewy. Using a tablespoon or cookie scoop, drop rounded balls of dough onto the prepared baking sheets. Place them about 2 inches apart. Bake in the oven for 9-11 minutes. Look for edges that are browned and centers that are set but still soft. Let them cool for 5 minutes before moving to wire racks. To get the best texture in your cookies, start with room-temperature butter. This makes it easy to cream with sugars. Softened butter helps trap air, giving your cookies lift. Aim for a dough temperature between 65°F and 70°F. This ensures a great mix of softness and chewiness. One mistake is overmixing the dough. This can make cookies tough. Mix just until the dry ingredients blend in. Another mistake is underbaking. Check your cookies at the 9-minute mark. The edges should be golden, and the centers should look soft but set. Remove them from the oven promptly. Cool your cookies on the baking sheet for about 5 minutes. This helps them firm up while staying soft inside. Then, transfer them to a wire rack. This allows air to circulate, keeping them from getting soggy. Enjoy your cookies warm or at room temperature! {{image_2}} You can change up your cookies with different types of chocolate chips. Try dark, milk, or even white chocolate. Each type brings its own unique taste. Dark chocolate adds richness, while milk chocolate offers sweetness. White chocolate gives a creamy flavor that blends well with the dough. Mixing different types can create a fun flavor experience. Want to make your cookies more exciting? Consider adding nuts or dried fruits. Chopped walnuts or pecans add crunch and depth. You can also use dried cranberries or cherries for a fruity twist. If you prefer a nut-free version, feel free to skip the nuts. You can even try adding oats for texture or a bit of coconut for tropical flair. If you need gluten-free cookies, swap the all-purpose flour for a gluten-free blend. Be sure to check that your chocolate chips are also gluten-free. For a vegan option, use plant-based butter and replace the eggs with flax eggs. Mix one tablespoon of ground flaxseed with three tablespoons of water, then let it sit for a few minutes until it thickens. This keeps your cookies tasty while meeting dietary needs. To keep your cookies fresh, store them in an airtight container. This helps keep them chewy. Place a slice of bread inside the container to add moisture. The bread absorbs air, keeping your cookies soft. If you prefer crispy cookies, skip the bread. Stack cookies with parchment paper between layers to avoid sticking. You can freeze your unbaked cookie dough for later. Start by scooping the dough onto a baking sheet. Space the dough balls about two inches apart. Freeze the sheet for about one hour. Once frozen, transfer the dough balls to a freezer bag. Seal it tightly and label it with the date. The dough can stay fresh for three months. At room temperature, baked cookies last about one week. Make sure they are in a sealed container. If you store them in the fridge, they can last up to two weeks. However, the fridge can make them dry. For the best taste, eat them fresh! The perfect chocolate chip cookie strikes a balance. It should be soft in the middle and crisp on the edges. Use a mix of granulated and brown sugar for the right sweetness. Brown sugar adds moisture; it gives your cookie chewiness. Another key is the chocolate chips. Use semi-sweet or dark for rich flavor. Also, don’t skip the salt. It enhances the sweetness and overall taste. Chilling the dough for at least 30 minutes helps too. It firms up the dough, leading to a thicker cookie. I recommend using softened butter, not cold butter. Softened butter mixes easily with sugars. It creates air pockets that help your cookie rise. Cold butter does not blend well. You might end up with flat cookies. If you forget to take out the butter, no worries! You can cut it into small cubes. Let it sit at room temperature for about 15 minutes. This helps it soften faster. If your cookie dough is too dry, you can fix it easily. Add a tablespoon of milk or water. Mix it in slowly until the dough is moist enough. You can also add a bit more melted butter. Be careful not to overdo it. You want a soft dough that holds together but is not sticky. If you add too much liquid, your cookies can spread too much when baking. Cookies can spread too much for a few reasons. One common reason is warm dough. If your dough is too warm before baking, it spreads out. Always chill the dough if possible. Another reason is too little flour. Make sure you measure flour correctly. Use the spoon and level method. Finally, check your oven temperature. An oven that is too hot can cause cookies to spread too much. Baking chocolate chip cookies requires the right ingredients and techniques. We covered the essential steps, tips, and even variations to make your cookies unique. Remember to avoid common mistakes, like overmixing, to achieve the perfect texture. Storing cookies properly keeps them fresh longer. Whether you prefer classic flavors or want to try something new, there’s a cookie for everyone. Enjoy the joy of baking and sharing these treats!

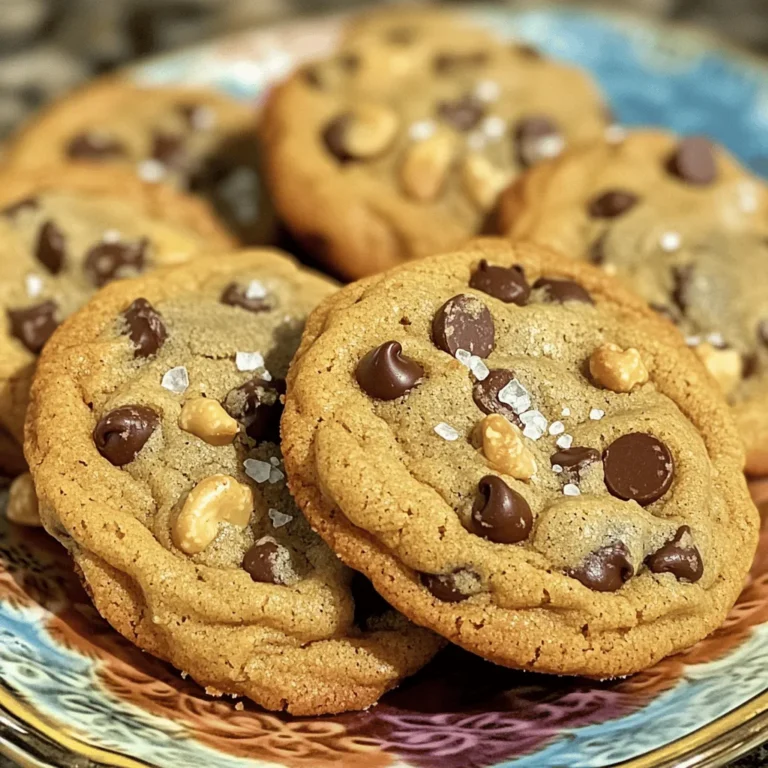
Perfect Chocolate Chip Cookies Simple and Delicious Recipe

To make Slow Cooker Street Corn Chicken, you need the following: - 2 lbs boneless, skinless chicken thighs - 1 cup frozen corn kernels - 1 cup cream cheese - 1 cup shredded cheddar cheese - 1/2 cup sour cream - 1/4 cup mayonnaise - 2 tablespoons lime juice - 1 tablespoon chili powder - 1 teaspoon garlic powder - 1 teaspoon onion powder - 1/2 teaspoon smoked paprika - Salt and pepper, to taste Each ingredient plays a key role in crafting that creamy, tangy flavor you’ll love. The chicken thighs provide a tender base, while the corn adds sweetness. The cream cheese and sour cream create a rich sauce that wraps around every bite. To take your dish to the next level, consider these optional ingredients: - Fresh cilantro, chopped (for garnish) - Jalapeños, diced (for heat) - Lime zest (for extra zing) Adding fresh cilantro gives a fresh taste and bright color. If you like heat, jalapeños can spice things up. Lime zest enhances the citrus flavor and adds depth. Choosing the best ingredients makes a big difference: - Chicken: Look for thighs that are pink and moist. Avoid any that look dull or have dark spots. - Corn: Frozen corn should be bright yellow and not clumped together. This ensures freshness. - Dairy: Choose cream cheese and sour cream with a good expiration date. This guarantees creaminess in your dish. Always check the labels for quality. Fresh ingredients lead to a tastier meal, and they help you feel good about what you eat. To start, grab your slow cooker. Place the boneless, skinless chicken thighs at the bottom. This will be the base of our dish. Season the chicken with salt, pepper, chili powder, garlic powder, onion powder, and smoked paprika. This mix adds great flavor. Make sure you cover the chicken well with the spices. Next, add the frozen corn kernels right on top of the chicken. The corn adds sweetness and texture. Now, let’s make the creamy mixture. In a bowl, mix the cream cheese, sour cream, mayonnaise, and lime juice. Stir it well until everything blends smoothly. Pour this creamy mix over the corn and chicken. Spread it evenly with a spatula for better cooking. Cover the slow cooker with its lid. Cook on low for 6-8 hours or high for 3-4 hours. The chicken should be fully cooked and tender when done. After cooking, use two forks to shred the chicken right in the pot. Stir it into the creamy corn mix. This makes the dish rich and flavorful. Finally, add shredded cheddar cheese. Let it melt in for a delicious finish. Taste the dish and adjust the seasoning as needed. Garnish with fresh cilantro before serving. For the best flavor, use fresh spices. Fresh chili powder adds a kick. Mix it well with garlic and onion powder for depth. The smoked paprika gives a warm, rich taste. Don’t skip the lime juice; it brightens the dish and balances the creaminess. I love adding a sprinkle of fresh cilantro at the end. It lifts the flavors and adds a fresh twist. You can control the heat in this dish. If you like it mild, use less chili powder. For more heat, add jalapeños or extra chili powder. You can also serve hot sauce on the side for those who want more spice. Always taste as you go. Adjust the heat to fit your family's needs. Shredding the chicken is easy if you follow a few steps. After cooking, let the chicken rest for a few minutes. Use two forks to pull apart the chicken right in the slow cooker. This keeps all the flavors together. Make sure to mix it well with the creamy corn sauce. This creates a delicious blend of textures and flavors. {{image_2}} To kick up the heat, you can add jalapeños. Dice up a few fresh jalapeños and toss them in before cooking. This adds a nice, spicy kick to the dish. If you like it hotter, add more jalapeños. For less heat, remove the seeds before adding. If you want a meatless version, swap chicken for hearty veggies. You can use mushrooms or cauliflower as great substitutes. These ingredients soak up the flavors well. Add extra corn or black beans for protein. You can also use a plant-based cream cheese and sour cream. Need to make swaps? No problem! You can use Greek yogurt instead of sour cream. This keeps the creaminess while adding protein. If you have dairy issues, use almond or coconut cream. For a low-carb option, skip the corn and use zucchini. Just adjust the cooking time for different ingredients. After enjoying your Slow Cooker Street Corn Chicken, store leftovers in an airtight container. This keeps the taste fresh. Let the dish cool down before sealing it up. It can last in the fridge for up to four days. Make sure to label the container with the date, so you know when it’s best to eat. When it’s time to enjoy your leftovers, reheat them gently. You can use the microwave or a stovetop. If using a microwave, place it in a safe dish and cover it with a paper towel. Heat in short bursts, stirring in between. This helps keep the creamy texture. If using a stovetop, warm it on low heat. Stir often to avoid sticking and ensure even warming. To freeze your Slow Cooker Street Corn Chicken, let it cool completely first. Transfer it to a freezer-safe container. Seal it tightly to prevent freezer burn. It can last for up to three months in the freezer. When you’re ready to eat it, thaw it in the fridge overnight. Then, reheat it using the methods above for the best flavor. Yes, you can use chicken breasts. They will cook well in this dish. Chicken breasts may be a bit drier than thighs. To keep them juicy, watch the cooking time closely. You want them tender and moist. This dish stays good for about three to four days in the fridge. Store it in an airtight container to keep it fresh. Before eating, check for any off smells or changes in color. Yes, you can prep this dish a day ahead. Simply layer the ingredients in your slow cooker. Cover and store in the fridge. When you’re ready, just cook it as directed. This saves time on busy days. There are many tasty sides to serve with this dish. Try these options: - Rice or quinoa for extra carbs - Tortillas for a fun wrap - A fresh salad for crunch - Grilled veggies for a healthy touch In this post, we explored a simple recipe for Slow Cooker Street Corn Chicken. We covered required and optional ingredients, plus tips for selecting fresh items. You learned about cooking steps for great texture and ways to adjust flavors to your taste. Remember, you can make this dish spicy or adapt it for a vegetarian option. Storing leftovers properly ensures nothing goes to waste. With these tips, you're ready to impress with your cooking. Enjoy every bite!

Slow Cooker Street Corn Chicken Flavorful Comfort Dish

To make baked cabbage steaks, you need: - 1 large head of green cabbage - 3 tablespoons olive oil - 1 teaspoon garlic powder - 1 teaspoon smoked paprika - 1/2 teaspoon ground cumin - 1/2 teaspoon black pepper - 1 teaspoon sea salt - 1 tablespoon balsamic vinegar These main ingredients create a robust flavor that makes cabbage steaks shine. The olive oil helps the spices stick and adds richness. Cabbage is the star here, and its natural sweetness shines when baked. You can add fun toppings to your cabbage steaks for more flavor: - Crumbled feta cheese - Chopped fresh parsley - Red pepper flakes These toppings add texture and taste. Feta brings creaminess, parsley adds freshness, and red pepper flakes give a spicy kick. Feel free to mix and match! The seasonings truly elevate the dish. Here are my favorites: - Garlic powder - Smoked paprika - Ground cumin - Black pepper - Sea salt These seasonings combine to create a warm, smoky flavor. They complement the natural taste of cabbage perfectly. Adjust the spices to suit your taste; it’s all about what you enjoy! Start by preheating your oven to 400°F (200°C). Next, grab a large head of green cabbage. Remove the outer leaves, as they can be tough. Slice the cabbage into 1-inch thick steaks. You should get around 4-6 good-sized steaks. Place these steaks on a baking sheet lined with parchment paper. This helps with cleanup later. In a small bowl, combine your olive oil, garlic powder, smoked paprika, ground cumin, black pepper, and sea salt. This mix will give your cabbage a great flavor. Stir it well until everything blends together. The oil helps the spices stick to the cabbage while baking. Now, it’s time to bake! Brush the olive oil mixture generously over both sides of each cabbage steak. This ensures every bite is tasty. Next, drizzle balsamic vinegar over the steaks. This adds a nice touch of sweetness. Place the baking sheet in your preheated oven and bake for 25-30 minutes. Remember to flip the steaks halfway through. You want them tender and slightly caramelized. If you like, sprinkle on toppings like feta cheese or fresh parsley right before serving. Enjoy your delicious baked cabbage steaks! To get your cabbage steaks nice and tender, slice them about 1 inch thick. Thinner slices may burn, while thicker ones take longer to cook. Bake them at 400°F (200°C) for 25-30 minutes. Flip them halfway through to help them cook evenly. You want a nice caramelized look, which adds flavor and texture. To really boost the flavor, use a marinade. Mix olive oil, garlic powder, smoked paprika, ground cumin, black pepper, and sea salt in a bowl. Brush this mix on both sides of your cabbage steaks. Let them sit for a few minutes so the flavors soak in. You can also add balsamic vinegar for a tangy kick. Use a parchment-lined baking sheet to prevent sticking. It also makes cleanup easier. Spread the cabbage steaks out in a single layer. Avoid crowding them, as this can lead to steaming instead of roasting. Keep an eye on the steaks near the end. You want them tender and slightly browned, not burnt. {{image_2}} Baked cabbage steaks are great for everyone. They are already vegan. You can enjoy them with just the basic recipe. For more flavor, try adding nutritional yeast. It gives a cheesy taste without dairy. You can also drizzle tahini on top. It adds creaminess and a nutty taste. Want to spice things up? You can add cayenne pepper or chili powder for heat. If you prefer herbs, try thyme or rosemary. These herbs bring freshness to the dish. You can also mix in curry powder for an exotic twist. Just adjust the seasonings to your taste. Baking cabbage steaks is great, but you can grill them too. Grilling gives them a smoky flavor. Simply follow the same steps, but place the steaks on a hot grill. Cook for about 5-7 minutes on each side. You can also pan-sear them. Heat a skillet with olive oil, then cook the steaks for 4-5 minutes on each side. This method adds a nice crispiness. After enjoying your baked cabbage steaks, let them cool. Place any leftovers in an airtight container. Store them in the fridge for up to 3 days. This keeps the flavor fresh and tasty. To reheat, use your oven for the best results. Preheat it to 350°F (175°C). Place the cabbage steaks on a baking sheet. Heat for about 10-15 minutes until warm. You can also use a microwave. Just cover the steaks with a damp paper towel. Heat for 1-2 minutes. You can freeze cabbage steaks if you want to save some for later. First, cool them completely. Wrap each steak in plastic wrap. Then, place them in a freezer bag. They will keep well for up to 2 months. When ready to eat, thaw in the fridge overnight and reheat as mentioned. Yes, you can prepare baked cabbage steaks ahead of time. After slicing the cabbage, store the steaks in the fridge. Keep them in an airtight container. You can season them up to a day in advance. Just brush the oil and spices on. When ready, bake them as directed. This saves time during busy days. Baked cabbage steaks are great as a side dish. You can pair them with grilled meats like chicken or fish. They also match well with roasted veggies. If you want a vegetarian meal, serve them with quinoa or rice. Adding a fresh salad on the side adds a nice crunch. Toppings like feta or parsley enhance the flavors. Yes, baked cabbage steaks are very healthy. Cabbage is low in calories and high in fiber. It also has many vitamins, like C and K. The olive oil adds healthy fats, while spices boost taste without extra calories. If you use less salt or skip cheese toppings, they stay light and nutritious. Enjoy them guilt-free! Baked cabbage steaks are easy and fun to make. We explored the main ingredients, optional toppings, and seasonings. I provided step-by-step instructions to prepare, mix, and bake them. Helpful tips showed you how to make them tender and tasty. We also discussed vegan options, flavor infusions, and cooking methods. Remember to store leftovers properly to keep them fresh. You can enjoy these steaks any day. I hope you feel inspired to try this delicious dish in your kitchen. Happy cooking!

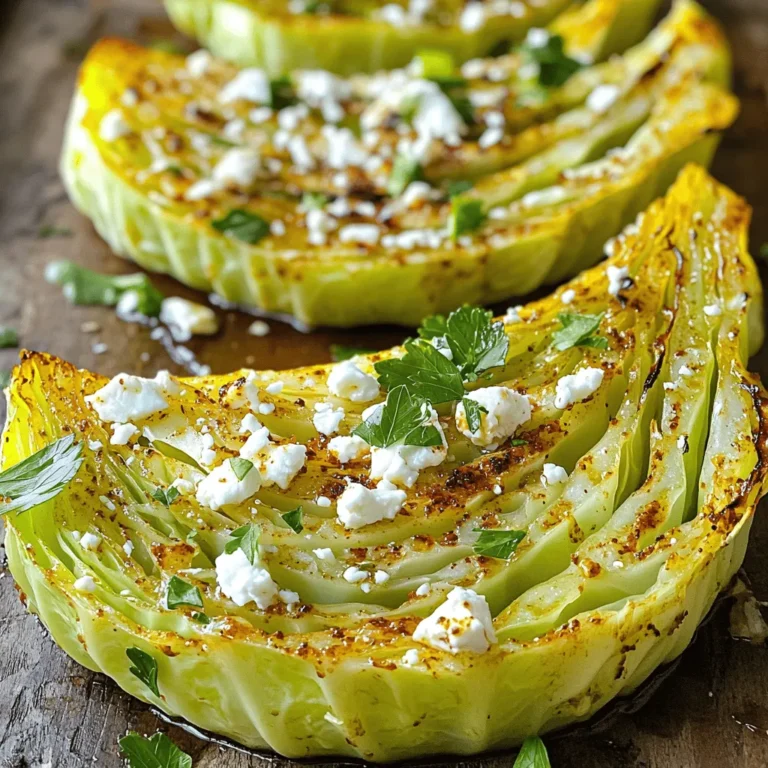
Baked Cabbage Steaks Tasty and Simple Recipe Guide

- 300g spaghetti - 2 boneless chicken breasts, sliced - 1 cup heavy cream - 1 cup cooked spinach (fresh or frozen) - 1 cup cherry tomatoes, halved - 2 cloves garlic, minced - 1 teaspoon Italian seasoning - 2 tablespoons olive oil - Salt and pepper to taste - Fresh basil leaves for garnish - Grated Parmesan cheese for serving When I make creamy spaghetti chicken, I focus on fresh, simple ingredients. The spaghetti is the base, giving you that comforting feel. The chicken adds protein and makes the dish hearty. Heavy cream creates a rich sauce that ties everything together. Spinach and cherry tomatoes bring color and nutrition to the mix. Garlic adds a lovely aroma and extra flavor. Italian seasoning gives the dish a warm, herby note. A touch of salt and pepper enhances all these flavors. To finish, I sprinkle fresh basil on top. It adds a burst of freshness. Grated Parmesan cheese gives a salty kick that I can’t resist. These ingredients come together to create a meal that is not only tasty but also satisfying. - Bring a large pot of salted water to a boil. - Cook the spaghetti according to the package instructions until al dente. - Drain the spaghetti and reserve a little pasta water for later. - Heat olive oil in a large skillet over medium heat. - Season the sliced chicken with salt, pepper, and Italian seasoning. - Cook the chicken for about 6-8 minutes until golden brown. - Remove the chicken from the skillet and set it aside. - In the same skillet, add minced garlic and sauté until fragrant. - Pour in the heavy cream and stir, bringing it to a gentle simmer. - Add the cooked spinach and halved cherry tomatoes, thickening the sauce. - Toss the cooked spaghetti and chicken in the creamy sauce. - If the sauce seems too thick, add a splash of the reserved pasta water. - Serve the dish warm, garnished with fresh basil and grated Parmesan cheese. - Use full-fat heavy cream for richness. - Don't rush the simmering process. The cream makes the sauce rich and smooth. Full-fat heavy cream brings a great flavor. It makes the dish feel special. Simmer the sauce slowly. This allows all flavors to blend well. If you rush, the sauce may not thicken right. Take your time, and you will taste the difference. - Avoid overcrowding the pan for even cooking. - Use a meat thermometer for perfect doneness. When cooking chicken, give each piece space. This helps them cook evenly. If you crowd the pan, some pieces will steam instead of sear. A meat thermometer is a great tool. Aim for 165°F to ensure your chicken is safe and moist. This takes the guesswork out of cooking. - Experiment with fresh herbs like thyme or parsley. - Add a pinch of red pepper flakes for heat. Fresh herbs can lift the dish's flavor. Thyme or parsley adds a nice touch. You can also spice things up with red pepper flakes. Just a pinch can add some warmth without overwhelming the dish. Don't be afraid to try new flavors! {{image_2}} You can make a tasty vegetarian version of creamy spaghetti chicken. Just substitute the chicken with grilled vegetables. Think bell peppers, zucchini, and mushrooms. This swap keeps the dish colorful and full of flavor. For the sauce, use plant-based cream instead of heavy cream. This gives you a rich texture without dairy. You still enjoy a creamy dish, perfect for any meal. If you want to change things up, try different proteins. Shrimp or salmon bring a new flavor profile. Both seafood options cook quickly and pair well with the creamy sauce. For a unique twist, add bacon. The crispy bacon gives a nice crunch and adds depth to the dish. Each protein choice allows you to explore new tastes. Switching up the pasta can also enhance your meal. Instead of spaghetti, you can use penne or fusilli. These shapes hold the sauce well, making each bite flavorful. If you prefer gluten-free options, there are many brands available. Whole wheat pasta is another great choice. It adds extra nutrition and a nutty flavor. Experimenting with pasta types keeps the dish fresh and fun. Store leftover creamy spaghetti chicken in an airtight container. This keeps it fresh and tasty. It is best consumed within 3-4 days for optimal freshness. The flavors will still shine, making for a great lunch or quick dinner. If you want to save some for later, freeze portions in freezer-safe containers. This way, you can enjoy it another day. To reheat, thaw overnight in the refrigerator. This helps keep the sauce creamy. When it's time to eat again, reheat on the stovetop over low heat. This method warms it gently. If the sauce thickens, add a splash of cream or pasta water. This keeps your creamy spaghetti chicken just as delicious as before. Follow the step-by-step instructions provided in the recipe. Start by cooking the spaghetti in salted water until it is al dente. Sauté sliced chicken in olive oil until golden and cooked through. Then, add garlic, heavy cream, spinach, and tomatoes to the skillet. Mix in the cooked chicken and spaghetti, tossing everything together. Yes, whole wheat spaghetti makes a healthier alternative. It adds fiber and a nutty flavor. You can use it in the same way as regular spaghetti. Just remember to adjust the cooking time as needed. Pair it with a side salad or garlic bread for a complete meal. A fresh green salad adds crunch and balance. Garlic bread complements the creamy flavors well. You can also add steamed veggies for extra nutrition. Add a bit of cream or reserved pasta water while reheating. This helps to keep the sauce creamy and smooth. Heat it gently on the stovetop, stirring often to avoid sticking. This recipe for creamy spaghetti chicken is simple and delicious. You learned how to cook the pasta and sauté the chicken. We covered the steps to make the creamy sauce with garlic, spinach, and tomatoes. I shared tips for perfecting texture and flavor. You even saw fun variations like using shrimp or a vegetarian option. Now, enjoy making this dish for family or friends. It's sure to impress!

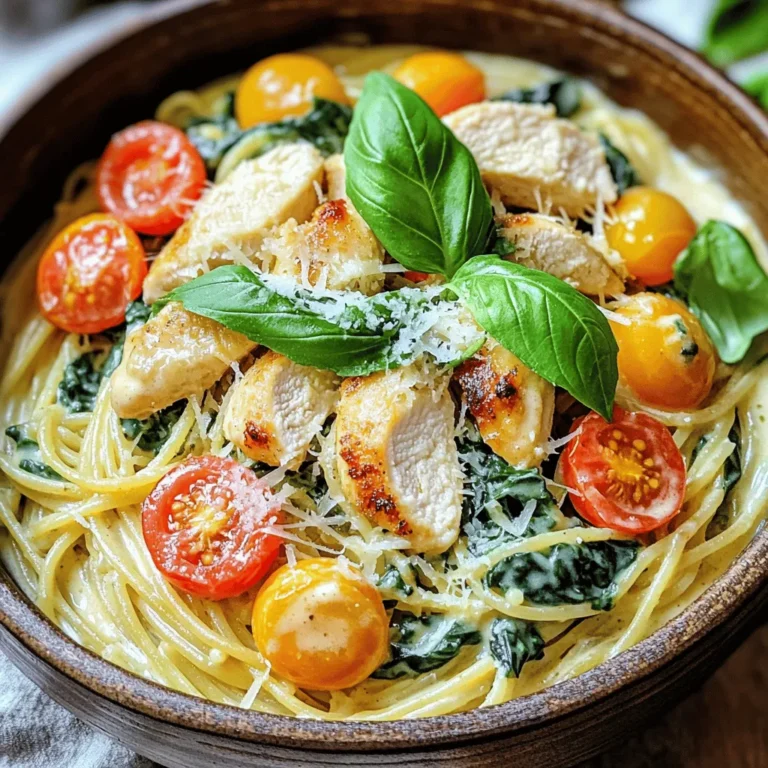
Creamy Spaghetti Chicken Enriching Comfort Meal

To make this tasty coleslaw, you need simple yet fresh ingredients. Here’s what you’ll need: - 4 cups green cabbage, shredded - 2 cups cooked corn kernels (fresh or canned) - 1 cup red bell pepper, diced - 1/2 cup red onion, finely chopped - 1/2 cup cotija cheese, crumbled (or feta as a substitute) - 1/4 cup fresh cilantro, chopped - 1/2 cup mayonnaise - 2 tablespoons lime juice - 1 teaspoon chili powder - 1 teaspoon garlic powder - Salt and pepper to taste These ingredients give the coleslaw its crunchy texture and bright flavor. The cabbage and corn shine together, while the peppers add color and sweetness. The cotija cheese adds a creamy touch. You can take this coleslaw to the next level by adding a few optional ingredients. Here are some ideas: - Jalapeños for heat - Avocado for creaminess - Black beans for protein - Corn chips for crunch - Extra lime juice for zest Feel free to get creative! These add-ins can enhance flavors and textures. This coleslaw is not only delicious but also offers nutrition. Here’s a quick overview: - Calories: About 200 per serving - Protein: 5 grams - Fiber: 3 grams - Fat: 10 grams - Carbs: 25 grams The fresh veggies provide vitamins, and the cheese adds calcium. You can enjoy this dish as a side or a light meal. Start by shredding the green cabbage. You need about 4 cups. Use a sharp knife or a box grater for this task. Next, grab 2 cups of cooked corn kernels. You can use fresh corn or canned corn. Then, dice one cup of red bell pepper. This will add a nice crunch and color. Finally, finely chop half a cup of red onion. This will give your coleslaw a great flavor. In a separate bowl, combine half a cup of mayonnaise and 2 tablespoons of lime juice. Whisk them together until smooth. Next, add 1 teaspoon of chili powder and 1 teaspoon of garlic powder. Don’t forget to add salt and pepper to taste. Mix it all well until the dressing is creamy and flavorful. Now, combine the vegetable mixture with the dressing. Pour the dressing over the cabbage, corn, bell pepper, and onion. Toss everything gently. You want each piece to be coated well. After that, add half a cup of crumbled cotija cheese and a quarter cup of chopped cilantro. Mix gently again to incorporate these last ingredients. Let the coleslaw chill in the fridge for 15 to 20 minutes. This lets all the flavors blend together. Serve it cold for a tasty side dish! You can easily make this coleslaw your own. Try adding diced jalapeños for heat. Grated carrots add color and sweetness. You can swap the cotija cheese for feta or even goat cheese. If you like crunch, toss in some chopped nuts. Each tweak brings a new taste! Start by washing all your veggies. This step is key for freshness. Shred the cabbage thinly for the best texture. Dice the red bell pepper small for even bites. If using fresh corn, grill it first for a smoky flavor. Prepping ahead makes assembly quick and easy. Serve the coleslaw cold for the best taste. It pairs well with grilled meats like chicken or steak. Use it as a topping for tacos or burritos. For a fiesta feel, add lime wedges on the side. This coleslaw brings color and joy to any meal! {{image_2}} To add some heat to your coleslaw, try the spicy version. You can use more chili powder or add diced jalapeños. This gives a nice kick. It works well with the creamy dressing. You can also mix in some hot sauce if you like. Adjust the spice to fit your taste. This variation is great for those who enjoy bold flavors. For a vegan twist, swap out the mayonnaise for a plant-based option. You can use vegan mayo or a blend of cashews and lemon juice. It keeps the creamy texture while being dairy-free. For cheese, try using nutritional yeast. This adds a cheesy flavor without using dairy. You can also pack in more veggies, like shredded carrots or radishes. If you want more protein, add grilled chicken. Cook the chicken and slice it thinly. Toss it in with the coleslaw before serving. This makes it a complete meal. The chicken pairs well with the flavors of the coleslaw. It also adds a nice texture. You can use any protein you like, such as shrimp or tofu, too. To keep your Mexican street corn coleslaw fresh, place it in an airtight container. Make sure the lid seals tightly. This helps prevent air from getting in and keeps the flavors strong. Store it in the fridge for up to three days. For best taste, eat it within this time. If you know you won't finish it, consider other options. You can freeze coleslaw, but with some notes. The texture may change after thawing. To freeze, place coleslaw in a freezer-safe bag or container. Remove as much air as possible. Label the bag with the date. It can last for about two months in the freezer. When ready to eat, thaw in the fridge overnight. Once thawed, mix it well before serving. Coleslaw tastes best when fresh. In the fridge, it stays good for about three days. After this, the cabbage may become soggy, and flavors fade. Always check for any off smells or changes in color. If you see these signs, it’s best to discard it. For frozen coleslaw, use it within two months for optimal flavor. Yes, you can use frozen corn. It is convenient and saves time. Just thaw it first. Drain any extra water before mixing it with the other ingredients. Frozen corn gives a nice sweet taste, just like fresh corn. Cotija cheese is a crumbly, salty cheese from Mexico. It adds a great flavor to the coleslaw. If you can't find cotija, you can use feta cheese as a substitute. Feta will give a similar salty taste but has a creamier texture. The coleslaw lasts about 3 to 5 days in the fridge. Store it in an airtight container to keep it fresh. The flavors will blend and get even better over time. Just give it a good stir before serving again. This blog post covered how to make Mexican street corn coleslaw, including ingredients, tips, and storage methods. We explored the main ingredients and optional add-ins for more flavor. I shared step-by-step instructions for easy prep and assembly. With variations like spicy or vegan options, you can enjoy this dish your way. Remember to store leftovers properly for the best taste. Enjoy making and sharing this tasty coleslaw!

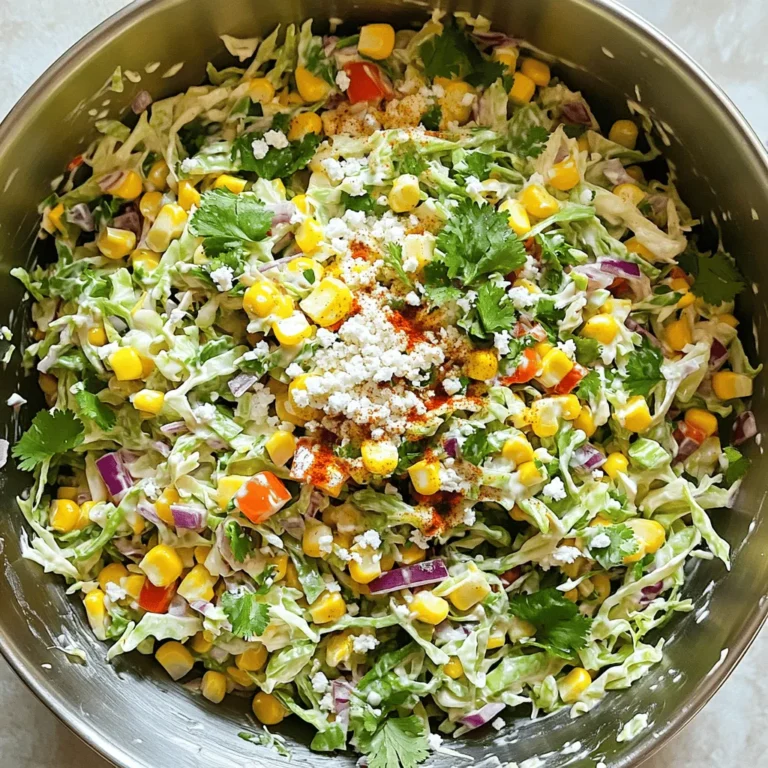
Mexican Street Corn Coleslaw Flavorful Side Dish

- 1 cup chopped pecans - 1 cup brown sugar - 1 cup granulated sugar - 1 cup all-purpose flour - 1 cup unsweetened vanilla almond milk (or regular milk) - ½ cup unsalted butter, melted - 1 teaspoon vanilla extract - 1 teaspoon baking powder - ½ teaspoon salt - 1 cup chocolate chips (optional) - Whipped cream or vanilla ice cream for serving The ingredients for Pecan Pie Dump Cake are simple and easy to find. You start with chopped pecans, which give the cake its nutty flavor and crunch. Brown sugar and granulated sugar add sweetness and a lovely texture. All-purpose flour binds everything together. Unsweetened vanilla almond milk adds a creamy touch, but you can use regular milk if you prefer. Melted unsalted butter adds richness and helps the cake come together. Vanilla extract boosts the flavor, while baking powder helps the cake rise. A bit of salt balances the sweetness. You can also add chocolate chips for a fun twist. For serving, I recommend whipped cream or vanilla ice cream. These toppings make the cake even more delightful. Enjoy the rich flavors of this easy dessert! 1. Preheat your oven to 350°F (175°C). Grease a 9x13 inch baking dish with cooking spray or butter. 2. In a large mixing bowl, combine ½ cup melted unsalted butter, 1 cup brown sugar, 1 cup granulated sugar, and 1 teaspoon vanilla extract. Whisk until you have a smooth mixture. 3. Stir in 1 cup all-purpose flour, 1 teaspoon baking powder, and ½ teaspoon salt. Mix until just combined. Be careful not to overmix. 4. Gently fold in 1 cup chopped pecans and 1 cup chocolate chips if you want that extra sweetness. 1. Pour the batter into the greased baking dish. Spread it out evenly to ensure even baking. 2. Bake in the oven for 25-30 minutes. You want the top to turn golden brown. 3. To check if it’s done, insert a toothpick into the center. It should come out mostly clean. If it pulls out wet batter, give it a few more minutes. To make your pecan pie dump cake perfect, avoid overmixing. Mix just until combined. Overmixing makes the cake dense and tough. To check if your cake is done, look for a golden-brown top. Insert a toothpick into the center. If it comes out mostly clean, it’s ready. Let it cool for about 10-15 minutes before serving. If you need a gluten-free option, use gluten-free flour. This swap works great and keeps the taste. For a dairy-free choice, use almond milk or coconut milk. Both add a nice flavor. You can also adjust sweetness. If you like less sugar, use half the brown and granulated sugars. This change keeps the cake tasty without being too sweet. {{image_2}} You can easily make your Pecan Pie Dump Cake even more exciting. Try adding spices like cinnamon or nutmeg. A dash of cinnamon brings warmth and a cozy vibe. Nutmeg adds a nice, fragrant touch. These spices blend well with the sweet pecans. You can also swap out pecans for different nuts. Walnuts are a great choice if you want a richer flavor. Almonds add a nice crunch and a slightly sweet taste. Experiment with various nuts to find your favorite mix. Topping your dump cake opens up a world of flavors. Drizzle caramel sauce over the warm cake for a rich, sweet touch. Chocolate syrup also works well, especially if you added chocolate chips. Whipped cream or a scoop of vanilla ice cream can elevate your dessert even more. You can serve this cake warm or chilled. Warm slices melt the ice cream and create a lovely mix. Chilled pieces offer a refreshing bite, perfect for hot days. Choose your serving style based on your mood or the season! To keep your pecan pie dump cake fresh, follow these steps: - Refrigeration: Let the cake cool completely. Cover it with plastic wrap or foil. Store it in the fridge. This keeps it fresh for up to five days. - Containers: Use an airtight container for best results. A glass or plastic dish with a lid works well. When it's time to enjoy leftovers, here's how to reheat: - Avoid drying out: Preheat your oven to 350°F (175°C). Place the cake in the oven for about 10-15 minutes. You can also microwave it for about 30 seconds. Add a little almond milk or water to keep it moist. - Serving after storage: Serve warm with whipped cream or vanilla ice cream. This restores its delicious flavor and texture. What can I substitute for almond milk? You can use regular milk instead of almond milk. Soy milk or oat milk also works well. Choose what you like best. Can I make this cake ahead of time? Yes, you can make it ahead. Bake the cake and let it cool. Store it in the fridge. What’s the best way to serve Pecan Pie Dump Cake? Serve it warm for the best taste. Top it with whipped cream or a scoop of ice cream. How long does it last in the fridge? The cake lasts about four days in the fridge. Store it in an airtight container for best results. This article walked you through making a delicious Pecan Pie Dump Cake. We covered the key ingredients, step-by-step instructions, helpful tips, and tasty variations. Remember to avoid overmixing for the best texture and feel free to swap in your favorites. This cake is a great treat for any occasion. Try different toppings or storage methods to make it your own. Enjoy your baking adventure and share this recipe with friends!

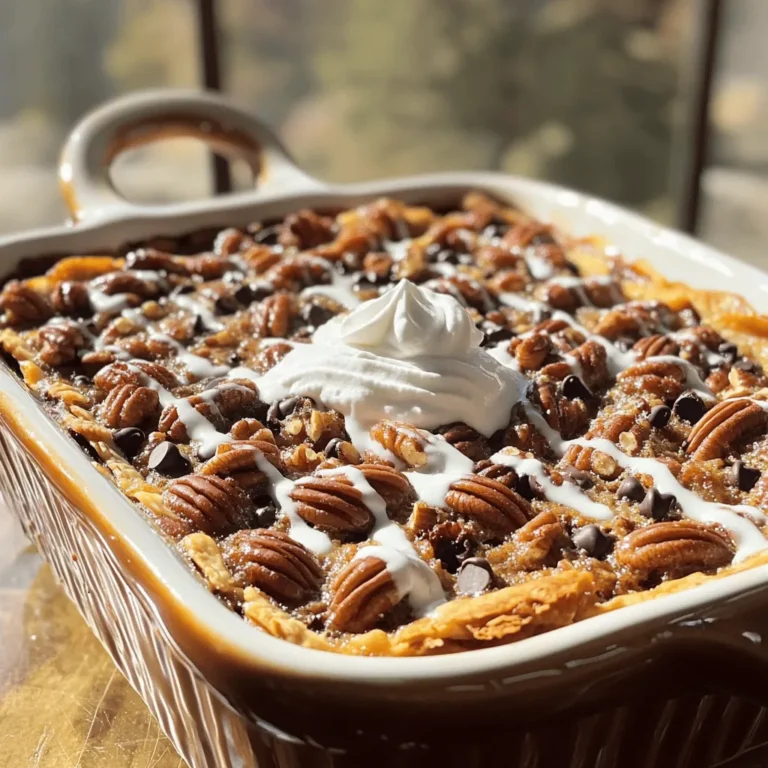
Pecan Pie Dump Cake Delightfully Easy Recipe

The ingredients for fudgy pumpkin brownies are simple and easy to find. Here’s what you need: - 1 cup pumpkin puree (canned or fresh) - 1/2 cup unsweetened cocoa powder - 1/2 cup all-purpose flour - 1 cup granulated sugar - 1/4 cup brown sugar, packed - 1/2 cup unsalted butter, melted - 2 large eggs - 1 teaspoon vanilla extract - 1/2 teaspoon baking powder - 1/2 teaspoon pumpkin pie spice (or a mix of cinnamon, nutmeg, and ginger) - 1/4 teaspoon salt - 1/2 cup chocolate chips (optional, for extra fudginess) Each ingredient plays a key role in creating rich and delicious brownies. Pumpkin puree adds moisture and a lovely flavor. It makes the brownies soft and fudgy. Cocoa powder gives the brownies a deep chocolate taste. It pairs well with pumpkin. All-purpose flour helps bind everything together. It gives structure to each brownie. Granulated sugar and brown sugar provide sweetness and enhance the chewy texture. Unsalted butter adds richness. It also helps the brownies bake evenly. Eggs help the batter rise. They create a nice, fluffy texture. Vanilla extract gives a warm flavor that complements the chocolate. Baking powder acts as a leavening agent. It makes the brownies light and airy. Pumpkin pie spice brings in warmth. It adds a hint of spice to the brownies. Salt balances the sweetness. It enhances all the flavors in the recipe. Chocolate chips are optional but highly recommended. They add extra fudginess and richness. Gather these items to make your fudgy pumpkin brownies. Enjoy the process of baking and the delightful aroma that fills your kitchen! 1. Preheat your oven and prepare the baking pan. Start by setting your oven to 350°F (175°C). This is the perfect temp for fudgy brownies. Next, get a 9x9-inch baking pan. Grease it lightly and line it with parchment paper. Let some paper hang over the sides. This makes it easy to lift out the brownies later. 2. Mixing wet ingredients together. In a large mixing bowl, combine the melted butter, granulated sugar, and brown sugar. Whisk them together until you see a smooth mixture. This step is key for a fudgy texture. 3. Combining dry ingredients. In another bowl, sift together the cocoa powder, flour, baking powder, pumpkin pie spice, and salt. The sifting helps the dry ingredients mix well and keeps the brownies light. 4. Folding dry into wet ingredients. Gradually fold the dry mix into the bowl with the wet ingredients. Mix until just combined. Be careful not to overmix, or your brownies may turn out cakey. If you love chocolate, gently fold in the chocolate chips at this stage. 5. Pouring batter into the baking pan. Pour the brownie batter into your prepared pan. Use a spatula to spread it evenly. This helps the brownies bake evenly. 6. Baking and checking for doneness. Place the pan in the preheated oven. Bake for 25 to 30 minutes. To check if they are done, insert a toothpick into the center. It should come out with a few moist crumbs. This means your fudgy brownies are ready! Follow these steps closely, and you’ll have delicious fudgy pumpkin brownies in no time! To keep your brownies fudgy, don’t overbake them. Bake until a toothpick shows a few moist crumbs. Use a 9x9-inch pan for even baking. A darker pan may cook faster than a lighter one. Avoid overmixing your batter. Mix just until the dry and wet ingredients blend. This keeps the brownies dense and fudgy. If you see streaks of flour, stop mixing. Always choose high-quality chocolate. A rich chocolate adds depth to your brownies. I recommend using semi-sweet or dark chocolate chips. Ensure your pumpkin puree is fresh. Canned puree works well, but homemade gives a brighter flavor. Look for pure pumpkin, not pumpkin pie filling. Use room temperature eggs for better mixing. Cold eggs can cause lumps in the batter. Take them out of the fridge about 30 minutes before mixing. {{image_2}} You can change the flavor of your fudgy pumpkin brownies easily. Here are some fun ideas: - Adding nuts or different types of chocolate chips: Nuts like walnuts or pecans add crunch. You can also try dark chocolate or white chocolate chips for a twist. - Incorporating spices like cinnamon or cloves: If you love spice, add more cinnamon or a pinch of cloves. This will boost the warm flavors. - Swapping for gluten-free flour options: Use gluten-free flour blends to make these brownies safe for gluten-free eaters. They will still taste great! How you serve your brownies can change the experience. Here are some tasty ideas: - Pairing with ice cream or whipped cream: A scoop of vanilla ice cream or a dollop of whipped cream on top makes it extra special. The cold cream contrasts with the warm brownie. - Adding a chocolate ganache drizzle: A simple chocolate ganache drizzle adds glam. Just melt chocolate with cream and pour it over the brownies. - Serving warm vs. cooled: Warm brownies are soft and gooey. If you wait for them to cool, they will be more set and easier to cut. Store your fudgy pumpkin brownies at room temperature. Place them in an airtight container. This keeps them fresh for up to three days. If you want them to last longer, keep them in a cool, dry place. Avoid exposing them to heat or sunlight. For long-term storage, you can freeze the brownies. Wrap each brownie in plastic wrap and then place them in a freezer bag. They stay good for up to three months. When you want to eat them, just remove them from the freezer. Let them thaw at room temperature for about an hour. You can also reheat them in the oven at 350°F for about 10 minutes. This makes them warm and gooey again, just like fresh out of the oven. How can I tell when my brownies are done? You can check if your brownies are done by inserting a toothpick into the center. If it comes out with a few moist crumbs, your brownies are ready. If it has wet batter, bake them a little longer. Can I use fresh pumpkin instead of canned? Yes, you can use fresh pumpkin. Just make sure to cook and puree it well. It should be smooth and not too watery. Canned pumpkin works well too, for a quick option. What can I substitute for eggs in this recipe? You can replace each egg with 1/4 cup unsweetened applesauce or 1/4 cup mashed banana. These options keep the brownies moist and add a bit of natural sweetness. Why are my brownies cakey instead of fudgy? Cakey brownies can happen if you overmix the batter or add too much flour. Be gentle when folding in the dry ingredients, and measure your flour carefully. What should I do if my brownies are too sweet? If your brownies are too sweet, try adding a pinch of salt or serving them with a side of unsweetened whipped cream. This can help balance the sweetness. Can I make these brownies dairy-free? Yes, you can make these brownies dairy-free. Use a dairy-free butter substitute or coconut oil instead of unsalted butter. For chocolate chips, choose dairy-free options. This blog covered all you need to bake the perfect pumpkin brownies. You learned about key ingredients like pumpkin puree and cocoa powder. I explained step-by-step how to prepare and bake your brownies. You also picked up tips for making them fudgy and flavorful. With different variations and serving ideas, you can make this treat your own. Store them properly for the best taste. Enjoy your baking adventure and savor each delicious bite!

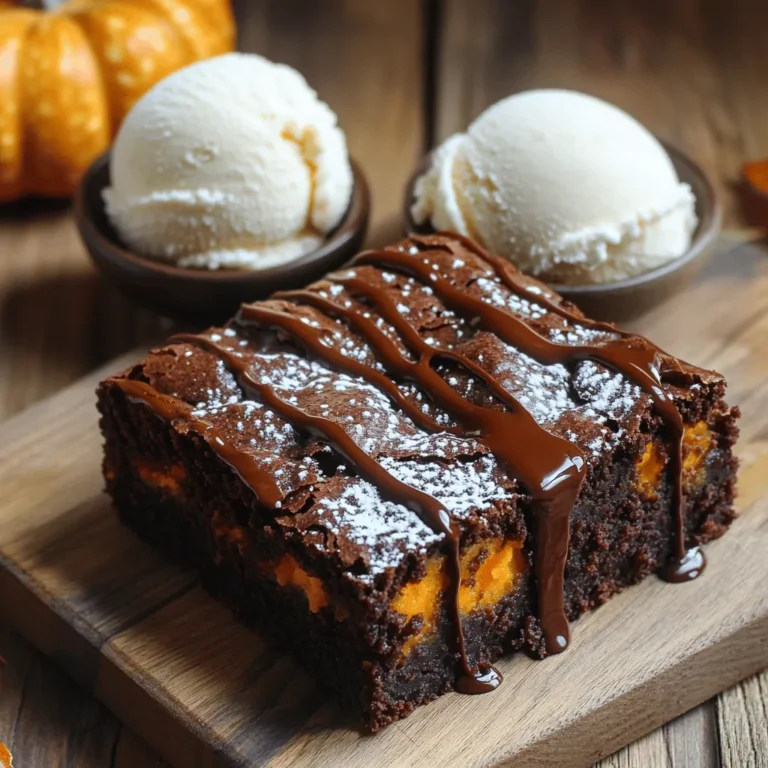
Fudgy Pumpkin Brownies Indulgent and Easy Recipe

- 2 cups all-purpose flour - 1 ½ cups granulated sugar - 1 tablespoon pumpkin pie spice - 1 teaspoon baking powder - 1 teaspoon baking soda - ½ teaspoon salt - 1 cup canned pumpkin puree - ½ cup vegetable oil - 4 large eggs - 1 teaspoon vanilla extract - 1 cup chopped pecans - 1 cup brown sugar - ½ cup cold butter, cut into small cubes - 1 teaspoon ground cinnamon Using fresh and quality ingredients is key. Here is why each ingredient matters: 1. All-purpose flour gives the cake its structure. It helps it rise and hold its shape. 2. Granulated sugar adds sweetness and helps the cake brown nicely. 3. Pumpkin pie spice brings that cozy fall flavor. It blends cinnamon, nutmeg, and ginger. 4. Baking powder and baking soda are both leavening agents. They help the cake rise and become fluffy. 5. Salt enhances all the other flavors. It balances the sweetness. 6. Canned pumpkin puree is rich and moist. It provides the pumpkin flavor and keeps the cake soft. 7. Vegetable oil adds moistness. It keeps the cake from being dry. 8. Eggs bind the ingredients together. They also help the cake rise. 9. Vanilla extract gives a warm, sweet note. It rounds out the flavor. 10. Chopped pecans add a nice crunch and nutty taste. 11. Brown sugar adds extra moisture and depth. It gives a slight caramel flavor. 12. Cold butter is key for the crunchy topping. It creates a nice texture when baked. 13. Ground cinnamon enhances the pumpkin spice flavor. It adds warmth and sweetness. Each ingredient plays an important role in making this cake delicious. Choose high-quality items for the best results. - Preheat your oven to 350°F (175°C). Grease and flour a 9x13 inch cake pan. - In a large bowl, whisk together 2 cups of all-purpose flour, 1 ½ cups of granulated sugar, 1 tablespoon of pumpkin pie spice, 1 teaspoon of baking powder, 1 teaspoon of baking soda, and ½ teaspoon of salt. Mix until it's all combined. - In another bowl, mix 1 cup of canned pumpkin puree, ½ cup of vegetable oil, 4 large eggs, and 1 teaspoon of vanilla extract. Stir until smooth. - Gradually add the wet mix to the dry mix. Stir gently just until combined. Don’t overmix! - Pour the batter into the prepared cake pan, spreading it evenly. - In a small bowl, mix 1 cup of chopped pecans, 1 cup of brown sugar, and 1 teaspoon of ground cinnamon. Sprinkle this mix over the cake batter. - Dot the top with ½ cup of cold butter, cut into small cubes. This helps create a crunchy topping as it bakes. - Bake in the preheated oven for 30-35 minutes. Check doneness by inserting a toothpick. It should come out clean. - Let the cake cool in the pan for 10 minutes. Then, transfer it to a wire rack to cool completely. Enjoy your delicious Pumpkin Spice Crunch Cake warm or at room temperature! Serve it with whipped cream and a sprinkle of cinnamon for a festive touch. - Ensuring the right texture: To get a soft and moist cake, mix the batter gently. Overmixing can make the cake tough. Stir until just combined. - Recommended mixing techniques: Always whisk the dry ingredients first. This helps mix the baking powder and spices evenly. Then, mix wet ingredients separately. This keeps everything smooth. - Importance of measuring ingredients correctly: Use measuring cups and spoons for accuracy. Too much flour can dry out the cake. Always level off your measuring cups for best results. - Whipped cream topping options: I love using sweetened whipped cream. You can also add a dash of cinnamon for a cozy flavor. For a twist, try maple-flavored whipped cream. - Best accompaniments for the cake: Serve the cake warm with a scoop of vanilla ice cream. A cup of hot cider pairs perfectly too. You can also enjoy it with a sprinkle of nuts on top for extra crunch. {{image_2}} You can easily adjust this pumpkin spice crunch cake to fit your needs. Here are some ideas: - Gluten-free substitutions: Use a gluten-free flour blend. This works well in place of all-purpose flour. Make sure it has a good binding agent, like xanthan gum. - Vegan modifications: Replace eggs with flaxseed meal or applesauce. Use a neutral oil, like coconut or canola oil, instead of vegetable oil. For the butter topping, choose a vegan butter substitute. You can make this cake even more fun with some seasonal twists: - Adding chocolate or cranberries: Fold in chocolate chips or dried cranberries into the batter for a sweet surprise. Both add flavor and a festive touch to your cake. - Transforming into cupcakes or muffins: You can bake this cake in cupcake liners for a fun treat. Just adjust the baking time to about 20-25 minutes. Keep an eye on them; they bake faster than a whole cake. To keep your Pumpkin Spice Crunch Cake fresh, use the right containers. I recommend an airtight container. This helps keep moisture in and air out. If you don’t have one, wrap the cake tightly in plastic wrap. Now, let’s talk about storage locations. You can store this cake at room temperature for up to two days. It’s best to place it in a cool, dry spot, away from sunlight. If you want to keep it longer, the fridge is a good choice. Just remember, the cold will change the texture slightly. So, how long does this cake last? If stored properly, Pumpkin Spice Crunch Cake can last about a week in the fridge. At room temperature, it stays tasty for about two days. Now, let’s discuss signs of spoilage. Look out for mold or an off smell. If the cake feels dry or hard, it’s time to toss it. Always trust your senses! Can I freeze this cake? Yes, you can freeze this cake. Wrap it well in plastic wrap. Then, put it in an airtight container. It will stay fresh for about three months. To eat, let it thaw in the fridge overnight. What can I substitute for pumpkin puree? If you can't find pumpkin puree, use applesauce or mashed bananas. These options will keep the cake moist. You can also use sweet potato puree for a different flavor. How to make this recipe nut-free? To make this cake nut-free, skip the pecans. You can replace them with sunflower seeds or pumpkin seeds. This adds crunch without nuts. Is it possible to make this cake ahead of time? Yes, you can make this cake a day in advance. Just store it covered at room temperature. This helps the flavors blend and makes it taste even better. - [Pumpkin Spice Latte Recipe](#) - [How to Make Whipped Cream](#) - [Video: Baking the Perfect Cake](#) - [User Reviews and Tips](#) We covered everything you need for the perfect Pumpkin Spice Crunch Cake. From the list of ingredients to step-by-step instructions, you can bake it with ease. Remember to follow the mixing tips for the best texture. Try serving it with whipped cream or explore variations like gluten-free options. Proper storage ensures your cake stays fresh longer. Enjoy baking and sharing this treat, and don't hesitate to experiment with flavors. Trust me, each slice brings joy to anyone who tries it!

Pumpkin Spice Crunch Cake Delicious Fall Dessert Treat

For these tasty mini glazed chicken meatloaves, you will need: - 1 pound ground chicken - 1/2 cup breadcrumbs - 1/4 cup grated Parmesan cheese - 1/4 cup finely chopped onion - 2 cloves garlic, minced - 1 large egg - 1 tablespoon Worcestershire sauce - 1 teaspoon dried Italian herbs - Salt and pepper to taste - 1/4 cup ketchup - 2 tablespoons brown sugar - 1 tablespoon apple cider vinegar These ingredients come together to create moist and flavorful meatloaves. Ground chicken is lean and takes on flavors well. The breadcrumbs help bind everything. Parmesan cheese adds a nice salty touch. Onion and garlic bring depth to the dish. The Worcestershire sauce adds a savory kick. You can make your mini meatloaves even more appealing with some garnishes. I suggest: - Fresh parsley, chopped This adds a vibrant green color and fresh flavor. You can sprinkle it on top right before serving. It makes the dish look beautiful and adds a pop of taste. Pair these mini meatloaves with great side dishes! I recommend: - Mashed potatoes - Steamed vegetables - A fresh garden salad Mashed potatoes bring comfort, while steamed vegetables add nutrition. A salad can provide crunch and freshness. These sides work well together and make the meal complete. Enjoy your cooking adventure! {{ingredient_image_1}} First, set your oven to 375°F (190°C). This helps your meatloaves cook evenly. While the oven heats, line a baking sheet with parchment paper. This makes clean-up easy and helps the meatloaves not stick. In a large bowl, mix together the ground chicken, breadcrumbs, and Parmesan cheese. Next, add in the finely chopped onion and minced garlic. Crack in one egg, then pour in the Worcestershire sauce. Sprinkle the dried Italian herbs, salt, and pepper over the mix. Use your hands to combine everything well. You want all the flavors to blend nicely. Once mixed, divide the meat mixture into eight equal parts. Shape each part into a mini meatloaf. Place them on the lined baking sheet. In a small bowl, whisk together the ketchup, brown sugar, and apple cider vinegar until it’s smooth. Brush this glaze over the top of each meatloaf. This will give them a tasty finish. Now, it’s time to bake! Place the baking sheet in the oven and set a timer for 25-30 minutes. The meatloaves are done when their internal temperature hits 165°F (74°C). This ensures they are safe to eat and fully cooked. After baking, let the meatloaves rest for about 5 minutes. This helps keep them juicy. When ready, garnish with freshly chopped parsley. You can serve them with sides like mashed potatoes or a fresh salad for a complete meal. Enjoy your delicious mini glazed chicken meatloaves! To keep your mini meatloaves moist, use ground chicken with some fat. The fat adds flavor and keeps the meat tender. Mix in breadcrumbs and grated cheese for extra moisture. A large egg helps bind ingredients and adds moisture too. Avoid overmixing; just combine until blended. Boost the taste of your mini meatloaves with fresh herbs. You can add parsley, thyme, or basil for bright flavors. Consider mixing in diced bell peppers or carrots for sweetness and crunch. The Worcestershire sauce adds depth, but you can try soy sauce for a twist. Topping them with a tasty glaze, like a mix of ketchup, brown sugar, and apple cider vinegar, takes them to a new level. One common mistake is overcooking. Use a meat thermometer to check for 165°F. This ensures juicy meatloaves. Another mistake is not letting them rest after baking. Resting helps the juices redistribute, making each bite moist. Lastly, don’t skip the parsley garnish; it adds a lovely touch and freshness. Pro Tips Use Fresh Ingredients: Always opt for fresh garlic and herbs for enhanced flavor in your meatloaves. Customize Your Glaze: Feel free to experiment with different sauces or add spices to the glaze for a unique twist. Check for Doneness: Use a meat thermometer to ensure the meatloaves reach the safe internal temperature of 165°F (74°C). Rest Before Serving: Allow the meatloaves to rest for a few minutes after baking; this helps retain moisture and improves texture. {{image_2}} You can make this dish even healthier. Use ground turkey instead of ground chicken. It has less fat and is still tasty. Try whole wheat bread crumbs for extra fiber. You can also add finely chopped spinach or carrots for more nutrients. These swaps keep the meatloaf moist and flavorful. Want to mix it up? Change the herbs and spices. Use cumin and chili powder for a Mexican twist. Try adding some soy sauce and ginger for an Asian flair. You can even swap ketchup for barbecue sauce for a smoky taste. Each change can make the meatloaf unique. Make mini meatloaf muffins for fun shapes. Use a muffin tin for easy serving. Just follow the same steps but fill each cup halfway. Bake for about 20 minutes. The kids will love these little bites! They are perfect for lunchboxes or snacks. After cooking, let the mini glazed chicken meatloaves cool. Place them in an airtight container. They will stay fresh in the fridge for up to three days. For best taste, eat them within this time frame. You can also wrap each meatloaf in plastic wrap for extra protection. Want to save some for later? You can freeze the meatloaves. First, cool them completely. Then, wrap each one in plastic wrap. Place the wrapped meatloaves in a freezer-safe bag. They will stay good for up to three months. When you are ready to eat, thaw them in the fridge overnight. To reheat, place the meatloaves on a baking sheet. Preheat your oven to 350°F (175°C). Heat them for about 15-20 minutes. You want them warm all the way through. If you prefer a microwave, heat each meatloaf on a plate for about 1-2 minutes. Just make sure they are hot before serving! You can make mini glazed chicken meatloaves ahead of time. Mix all the ingredients as usual. Shape the loaves and place them on the baking sheet. Cover them and store in the fridge. You can prepare them a day before you bake. When you're ready, just glaze and bake as directed. Yes, you can use ground turkey instead of chicken. Ground turkey has a similar texture and flavor. Just keep in mind that it can be a bit drier. You may want to add some extra seasoning or moisture. To check if the meatloaf is done, use a meat thermometer. Insert it into the center of the meatloaf. It should read 165°F (74°C) to be safe to eat. If you don’t have a thermometer, cut into one. The meat should be no longer pink, and the juices should run clear. Yes, mini meatloaves are great for the freezer. After baking, let them cool completely. Wrap each meatloaf tightly in plastic wrap. Place them in a freezer bag or container. They can last up to three months in the freezer. Absolutely! You can use any sauce you like for glazing. Try barbecue sauce for a smoky flavor. Sweet chili sauce adds a nice kick. Even a mix of honey and soy sauce works well. Get creative with your favorite flavors! A juicy meatloaf comes from the right balance of ingredients. Using ground chicken with fat helps keep it moist. Adding breadcrumbs soaked in liquid also helps. Don’t skip the egg; it binds moisture in. Lastly, avoid overcooking to keep it tender. You learned the key ingredients for mini glazed chicken meatloaves and how to prepare them. We discussed easy steps for mixing, shaping, and baking, plus tips to make them moist. You can also use various flavor options and store leftovers effectively. Remember, these meatloaves are fun to make and delicious to eat. Enjoy experimenting with different garnishes and sides. Your meals can be quick, tasty, and satisfying. Now, go ahead and create your perfect mini meatloaf!

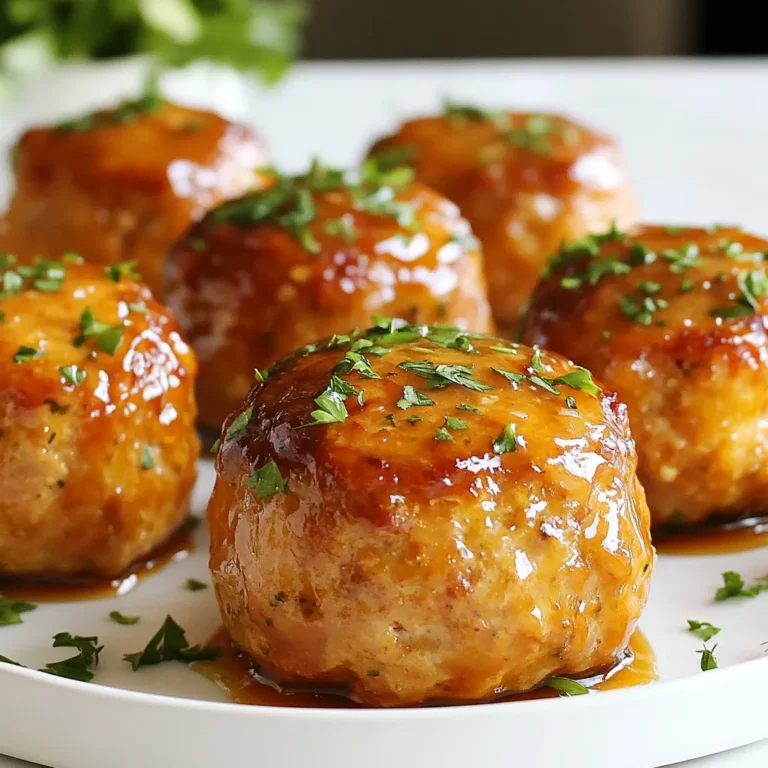
Mini Glazed Chicken Meatloaves Flavorful and Simple Recipe

To make One-Pot Veggie Pasta, gather these simple ingredients: - 12 oz spaghetti or any pasta of choice - 2 tablespoons olive oil - 1 medium onion, diced - 3 cloves garlic, minced - 1 bell pepper (any color), diced - 1 cup cherry tomatoes, halved - 1 medium zucchini, sliced - 1 cup corn (fresh or frozen) - 1 cup spinach, roughly chopped - 4 cups vegetable broth - 1 teaspoon Italian seasoning - Salt and pepper to taste - Fresh basil leaves for garnish - Grated Parmesan cheese (optional, for serving) These ingredients come together to create a colorful and tasty dish. Each veggie adds its unique flavor, making every bite a delight. The broth keeps everything moist and rich. You can mix and match veggies based on what you have. This flexibility helps you use fresh produce and minimize waste. Enjoy cooking! {{ingredient_image_1}} Start by heating 2 tablespoons of olive oil in a large pot over medium heat. Next, add 1 diced onion and sauté it for about 3 to 4 minutes. You want the onion to become translucent. Then, stir in 3 cloves of minced garlic. Cook for about 1 minute until it smells amazing. Now, it’s time to add some color! Toss in 1 diced bell pepper, 1 cup of halved cherry tomatoes, and 1 sliced zucchini. Sauté these veggies for about 5 minutes. You want them to be slightly tender but still vibrant. Pour in 4 cups of vegetable broth and bring it to a simmer. Next, add 12 ounces of spaghetti (or your favorite pasta) and 1 cup of corn. Make sure the pasta is fully submerged in the broth. Sprinkle in 1 teaspoon of Italian seasoning, and season with salt and pepper to taste. Cover the pot and reduce the heat to medium-low. Let it cook for about 10 to 12 minutes, stirring halfway through. This helps the pasta cook evenly. Once the pasta is al dente, stir in 1 cup of roughly chopped spinach. You want it to wilt and turn bright green. After that, taste your dish and adjust the seasoning. Add more salt or pepper if needed. Your One-Pot Veggie Pasta is ready to enjoy! To get your pasta just right, adjust cooking times based on the type you use. Thin pasta cooks faster than thicker types. If you use spaghetti, aim for about 10-12 minutes. Stirring halfway through helps keep the pasta from sticking. This simple step makes a big difference. To amp up the taste, think about adding spices. Red pepper flakes add heat. Fresh herbs, like thyme or oregano, brighten the dish. When it comes to broth, homemade is best. It has richer flavor than store-bought. But if you’re in a rush, a good quality store-bought broth works too. Make your dish look lovely with fresh herbs. Chopped basil adds a pop of color. A sprinkle of Parmesan cheese makes it feel special. Serve it warm in a nice bowl to impress your family or friends. Enjoy the beauty of your One-Pot Veggie Pasta! Pro Tips Cook Pasta Al Dente: To achieve the best texture, cook the pasta just until al dente. This will help it maintain a slight bite and prevent it from becoming mushy in the dish. Customize Your Veggies: Feel free to swap in seasonal vegetables or your favorites. Broccoli, asparagus, or even mushrooms can add great flavor and color to your pasta. Boost Flavor with Broth: Using vegetable broth instead of water enhances the overall flavor of the dish. If you want a richer taste, consider adding a splash of white wine to the broth. Garnish Wisely: Fresh herbs like basil or parsley add brightness. For a spicy kick, add red pepper flakes or a drizzle of chili oil when serving! {{image_2}} You can swap seasonal veggies for fresh flavors. Try using asparagus in spring or butternut squash in fall. If you want extra protein, add chickpeas or tofu. They help make the meal more filling and nutritious. Just toss them in when you add the other veggies. Mix and match to create your perfect dish. Pasta shape matters for texture. Spaghetti works great, but you can use penne or fusilli too. Each shape holds sauce differently, giving you a unique bite. If you need gluten-free options, try brown rice or chickpea pasta. They cook well and taste great in this recipe. Herbs can change the whole dish. Use fresh basil, oregano, or thyme to add depth. Each herb brings its own taste, so feel free to experiment. You can also switch up the broth. A mushroom broth gives a hearty flavor, while a light vegetable broth keeps it fresh and vibrant. Store any leftovers in airtight containers. This keeps the pasta fresh and tasty. In the fridge, it stays good for about 3 to 5 days. Make sure to cool it first before sealing it tight. To freeze One-Pot Veggie Pasta, let it cool completely. Then, place it in freezer-safe bags or containers. Remove as much air as possible. It lasts well for up to 2 months. When you’re ready to eat, thaw it in the fridge overnight. Reheat in a pot over low heat. Add a splash of broth or water to keep it moist. There are many fun ways to use leftover pasta! Try adding it to soups for extra flavor. You can also mix it into a salad for a quick lunch. Another idea is to bake it with cheese for a creamy pasta dish. The possibilities are endless! This dish takes about 25 minutes to make. The prep time is 10 minutes. You'll need about 15 minutes for cooking. Cook time includes sautéing the veggies and boiling the pasta. Yes, you can make this recipe gluten-free. Just use gluten-free pasta instead of regular pasta. Many brands offer various shapes, so you can choose what you like best. To add protein, consider chickpeas or diced chicken. You can also include cooked beans, like black beans or white beans. For healthy fats, try adding avocado or a drizzle of olive oil. Nuts or seeds can also boost nutrition. Yes, frozen vegetables can work well. They save time and are often just as nutritious. Just remember to adjust cooking times. Frozen veggies usually need a minute or two longer to cook since they are cold. We covered a simple and tasty One-Pot Veggie Pasta recipe from start to finish. You've learned about key ingredients, easy steps, and helpful tips to enhance flavor and texture. Don't forget the many ways to customize your dish with different veggies or pasta types. With a few easy swaps, you can make this recipe your own. Plus, it’s perfect for quick meals during busy days. Enjoy exploring new flavors and sharing this dish with loved ones!

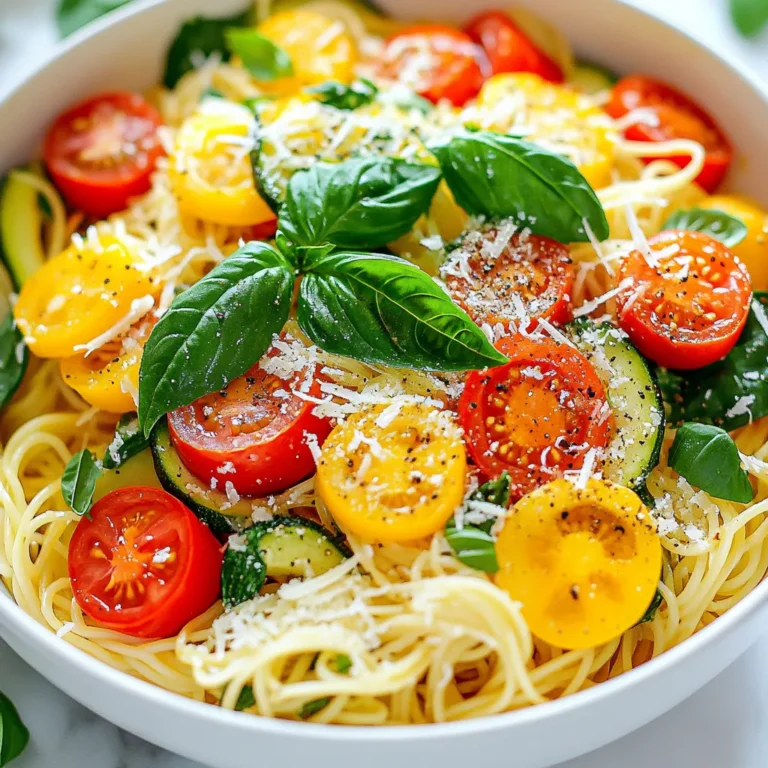
One-Pot Veggie Pasta Easy and Flavorful Meal

PREV 1 … 37 38 39 … 57 NEXT
go kitchen now

explore

DessertsDinnerAppetizersDrinks

Our Policies

  • Cookie Policy
  • Copyright Policy
  • Disclaimer
  • GDPR Policy
  • Terms Of Use
Back to Top
  • About
  • Contact Us
  • Privacy Policy
© 2025 go kitchen now