FREE DINNER EBOOK! Get your copy!
  • Cookie Policy
  • GDPR Policy
  • Disclaimer
  • Terms Of Use
  • Visit my other site: Fun Cookie Recipes
go kitchen now
  • Home
  • Dinner
  • Desserts
  • Drinks
  • Appetizers
  • Contact
  • About
  • Privacy Policy
  • Home
  • Dinner
  • Desserts
  • Drinks
  • Appetizers
  • Contact
  • About
  • Privacy Policy
  • Cookie Policy
  • GDPR Policy
  • Disclaimer
  • Terms Of Use
Visit my other site: Fun Cookie Recipes

HOME / CATEGORIES /

Latest

The main components of cheeseburger lasagna bake are ground beef, cheese, pasta, and seasonings. These ingredients create a rich and satisfying dish that everyone loves. Here’s a detailed list of what you need: - 9 lasagna noodles - 1 pound ground beef - 1 small onion, finely chopped - 2 cloves garlic, minced - 1 can (15 oz) tomato sauce - 1 cup ketchup - 1 tablespoon mustard - 1 teaspoon Worcestershire sauce - 1 teaspoon dried oregano - Salt and pepper to taste - 2 cups shredded cheddar cheese - 1 cup shredded mozzarella cheese - 1/2 cup pickles, diced (optional) - Fresh parsley, chopped for garnish (optional) You can add diced pickles for that classic burger taste. Fresh parsley also makes a great garnish. These additions bring freshness and crunch to your dish. {{ingredient_image_1}} First, preheat your oven to 375°F (190°C). This helps cook everything evenly. While the oven heats, cook the lasagna noodles. Follow the package instructions until they are al dente. Drain them and set them aside. This step is key to getting a great texture. Next, let’s focus on the meat sauce. In a large skillet, heat 1 pound of ground beef over medium heat. Add 1 small chopped onion and 2 minced garlic cloves. Cook until the beef is brown and the onion is soft, which takes about 5 to 7 minutes. Drain any extra grease from the skillet. This keeps the dish from being too greasy. Now, stir in 1 can of tomato sauce, 1 cup of ketchup, 1 tablespoon of mustard, and 1 teaspoon each of Worcestershire sauce and dried oregano. Add salt and pepper to taste. Let it simmer for 5 to 10 minutes. This step allows the flavors to mix well. Now it’s time to layer everything. In a 9x13 inch baking dish, spread a thin layer of meat sauce on the bottom. Then, place 3 lasagna noodles over the sauce. Top with one-third of the remaining meat sauce. Add a layer of 2 cups of shredded cheddar cheese and 1 cup of shredded mozzarella cheese. If you like, sprinkle some diced pickles over the cheese. Repeat this process two more times. Finish with a final layer of noodles, remaining sauce, and a generous sprinkle of cheese on top. Cover the dish with aluminum foil and bake for 25 minutes. Remove the foil and bake for 15 more minutes. This step makes the cheese bubbly and golden. Let it rest for 10 minutes before slicing. If you want, garnish with chopped parsley. Enjoy your delicious cheeseburger lasagna bake! To avoid a watery lasagna, make sure to drain excess grease from the beef. After cooking, let the meat sauce simmer longer. This helps reduce moisture. Layer the noodles carefully, too. If they're too wet, they might make your dish soggy. For the best cheeseburger flavor, I love using a mix of cheddar and mozzarella. Cheddar gives a sharp taste, while mozzarella adds creaminess. You can also try pepper jack for a spicy kick or gouda for a smoky flavor. Each cheese brings something special to the dish. Want to enhance the sauce? Add a pinch of crushed red pepper for heat. A splash of hot sauce can bring a nice kick too. Consider stirring in a teaspoon of smoked paprika for depth. Chopped herbs, like basil or thyme, can brighten up the flavor, making it even tastier. Pro Tips Use No-Boil Noodles: For even easier preparation, consider using no-boil lasagna noodles. They will absorb moisture from the sauce while baking, eliminating the need for pre-cooking. Customize Your Meat: Feel free to substitute ground beef with ground turkey or chicken for a leaner option. You can also mix in cooked bacon for added flavor! Make Ahead: This dish can be assembled ahead of time and refrigerated. Just add about 10 minutes to the baking time if baking straight from the fridge. Experiment with Toppings: Try adding different toppings like jalapeños, olives, or even a drizzle of barbecue sauce before serving for a unique twist on traditional flavors. {{image_2}} You can swap ground beef for ground turkey or chicken. This change cuts down on fat. If you want a gluten-free version, use gluten-free lasagna noodles. Other options include zucchini or eggplant slices. They work well in place of noodles. Many condiments can spice up this dish. Try adding barbecue sauce for a smoky flavor. You can also mix in some hot sauce if you like heat. For more depth, add smoked paprika or chili powder. These spices enhance the overall taste. To make a vegetarian cheeseburger lasagna bake, use lentils or mushrooms. They add a hearty texture. You can also use black beans for a protein boost. Replace the meat sauce with a mix of tomato sauce and veggies. This gives you a delicious veggie version everyone will enjoy. To store leftovers, cool your cheeseburger lasagna bake to room temperature. Then, place it in an airtight container. You can also cover the baking dish tightly with plastic wrap or aluminum foil. Proper storage helps keep the flavors fresh. Your leftovers will stay good in the fridge for up to four days. If you want to freeze your lasagna, let it cool completely. Cut it into portions for easy reheating. Wrap each piece in plastic wrap and then in aluminum foil. This double layer prevents freezer burn. You can freeze it for up to three months. To reheat, thaw it in the fridge overnight. Then, pop it in the oven at 350°F (175°C) until heated through. When stored correctly, your cheeseburger lasagna bake can be delicious for a while. In the fridge, it lasts about four days. If you freeze it, it stays tasty for up to three months. Remember to check for any signs of spoilage before eating. Enjoy your meals without waste! Yes, you can use different meats. Ground turkey or chicken works well. You can also use plant-based meat for a vegetarian option. Each meat adds a unique flavor. Just remember to cook it fully before mixing in the sauce. This gives you the best taste and texture. To add spice, you can use hot sauce or red pepper flakes. Mix these in with the meat sauce. For a stronger kick, add diced jalapeños. You could also try spicy cheese, like pepper jack. Experiment with spices to find your favorite heat level! The best way to reheat it is in the oven. Preheat your oven to 350°F (175°C). Cover the dish with foil to keep it moist. Heat for about 20 minutes or until warm. You can also microwave individual portions, but the oven keeps it crispy. Enjoy your cheesy goodness! This post covered ingredients, steps, tips, variations, and storage for cheeseburger lasagna. You learned about key components like beef and cheese, along with preparation and cooking methods. I shared easy tricks to avoid a watery dish and enhance flavor. Remember, you can customize this recipe to fit your taste and dietary needs. Whether you stick to the basics or choose alternatives, this dish can be a fun and delicious meal. Enjoy making your cheeseburger lasagna bake!

Cheeseburger Lasagna Bake Tasty and Easy Family Meal

- 200g rice noodles - 3 tablespoons vegetable oil - 6 cloves garlic, minced - 2 red chilies, finely chopped (adjust to taste) - 1 tablespoon ginger, grated - 3 tablespoons soy sauce - 1 tablespoon chili paste - 1 tablespoon sesame oil - 1 cup mixed vegetables (bell peppers, carrots, broccoli) In this dish, rice noodles serve as the base. They soak up all the flavors well. Using vegetable oil allows the garlic and ginger to shine. Fresh garlic and ginger add a warm, spicy note. Red chilies bring heat, and you can adjust them for your taste. Soy sauce and chili paste provide salty and spicy depth. Finally, mixed vegetables add color and nutrition. - Green onions, chopped for garnish - Sesame seeds for garnish - Lime wedges Garnishes make your dish pop. Green onions add freshness and crunch. Sesame seeds offer a nutty flavor and a nice visual touch. A squeeze of lime adds brightness and cuts the spice. These extras take your spicy garlic chili noodles to the next level! {{ingredient_image_1}} Start by boiling the rice noodles. Follow the package instructions to get them just right. Once they are soft, drain them and rinse under cold water. This step keeps them from sticking together. Set them aside while you prepare the rest. In a large skillet or wok, heat three tablespoons of vegetable oil over medium heat. Add six cloves of minced garlic, two chopped red chilies, and one tablespoon of grated ginger. Sauté these for one to two minutes. You want them to smell great but not burn. Now, toss in one cup of mixed vegetables. You can use bell peppers, carrots, and broccoli. Stir-fry these for about three to four minutes until they soften a bit. Next, add the cooked noodles to the skillet. Pour in three tablespoons of soy sauce, one tablespoon of chili paste, and one tablespoon of sesame oil. Toss everything together for about two to three minutes. Make sure the noodles are evenly coated and heated through. If you like, taste the dish and adjust the seasoning. Add more soy sauce or chili paste if you want extra flavor. Remove the skillet from heat and plate your spicy garlic chili noodles. Garnish with chopped green onions and sesame seeds for a lovely finish. To make this dish suit your taste, start with fewer chilies. You can increase the spice later. If you like it hot, add more chopped chilies or some chili paste. For a milder version, remove the seeds from the chilies. This will reduce some heat without losing flavor. Always taste as you go. Balance is key. To keep noodles from sticking, rinse them in cold water after cooking. This stops the cooking process and cools them down. When you add the noodles to the pan, make sure the oil is hot. This helps them stay loose. Stir gently but quickly to coat the noodles without breaking them. Serve your noodles in a deep bowl for a nice look. Drizzle with sesame oil to add shine. Sprinkle chopped green onions and sesame seeds on top for color and crunch. For a zesty touch, add lime wedges on the side. This adds a fresh flavor to each bite. Pro Tips Adjust the Heat: If you prefer a milder dish, reduce the number of red chilies or remove the seeds before chopping. Vegetable Variations: Feel free to customize the mixed vegetables based on your preference or seasonal availability. Snow peas or snap peas work great too! Fresh Herbs: Adding fresh cilantro or Thai basil at the end can enhance the flavor and add a fresh aroma to the dish. Leftover Noodles: This dish is perfect for using up leftover noodles. Just stir-fry them with the sauce and veggies for a quick meal! {{image_2}} To make Spicy Garlic Chili Noodles heartier, add protein. You can use chicken, shrimp, or tofu. - Chicken: Cut boneless chicken into small pieces. Cook it in the skillet before adding garlic and ginger. Let it brown for 5-6 minutes, then add your noodles. - Shrimp: Use peeled shrimp. Sauté them with garlic and ginger until they turn pink. This takes about 3-4 minutes. Then mix in the noodles. - Tofu: Choose firm tofu. Cut it into cubes and pan-fry until golden. Add it after the veggies so it warms through without breaking. Mixing up the veggies adds fun. You can swap or add any of your favorites. - Broccoli: Cut it into small florets. This veggie adds crunch and color. - Bell Peppers: Use any color. They add sweetness and a nice crunch. - Carrots: Thinly slice or julienne them. They bring a sweet bite to the dish. - Snow Peas: Toss these in for a fresh taste and bright color. You can play with the sauce for new flavors. - Teriyaki Sauce: This adds a sweet, tangy taste. Mix it in with the soy sauce. - Sriracha: Use this for extra heat. Add it to the chili paste for a spicy kick. - Peanut Sauce: Drizzle this over your noodles for a creamy texture. It pairs well with shrimp or chicken. Feel free to explore these variations. Each change makes the dish unique! Store your Spicy Garlic Chili Noodles in an airtight container. Let the noodles cool before packing. Refrigerate them for up to three days. When reheating, use a skillet or microwave. Add a splash of water or broth to keep them moist. Heat them just until warm to avoid overcooking. You can freeze Spicy Garlic Chili Noodles for up to a month. First, let them cool completely. Then, place the noodles in a freezer-safe bag or container. Squeeze out the air to prevent freezer burn. To thaw, move them to the fridge overnight. Reheat in a skillet or microwave. In the fridge, Spicy Garlic Chili Noodles last about three days. After that, the flavors may fade. If you notice any changes in smell or texture, throw them away. Always trust your senses when it comes to food safety. Yes, you can easily make Spicy Garlic Chili Noodles vegan. For plant-based substitutions, use vegetable oil instead of any animal fats. Replace soy sauce with a vegan version or tamari for gluten-free options. For protein, add tofu or tempeh. You can also use more mixed vegetables like mushrooms or snow peas for added texture and flavor. You can serve Spicy Garlic Chili Noodles with several tasty sides. A fresh cucumber salad adds crunch and coolness. You could also try spring rolls filled with veggies. If you're in the mood for more heat, pair it with kimchi. A light broth soup can balance the spiciness and round out the meal. To enhance the flavor of your Spicy Garlic Chili Noodles, consider these tips: - Add a splash of rice vinegar for tang. - Drizzle chili oil on top for extra spice. - Include fresh herbs like cilantro or basil for freshness. - Experiment with different sauces, like hoisin or oyster sauce, for more depth. These simple tweaks can elevate your dish to new heights! This blog post explored the key ingredients and steps to create Spicy Garlic Chili Noodles. You learned about rice noodles, the right oils, and aromatics like garlic and ginger. I shared tips for adjusting spice and avoiding sticky noodles. You can enhance your dish with proteins and different vegetables. Finally, I covered how to store your meal safely and answered some common questions. With this knowledge, you can now cook a flavorful dish that can adapt to your tastes. Enjoy crafting your perfect bowl of noodles!

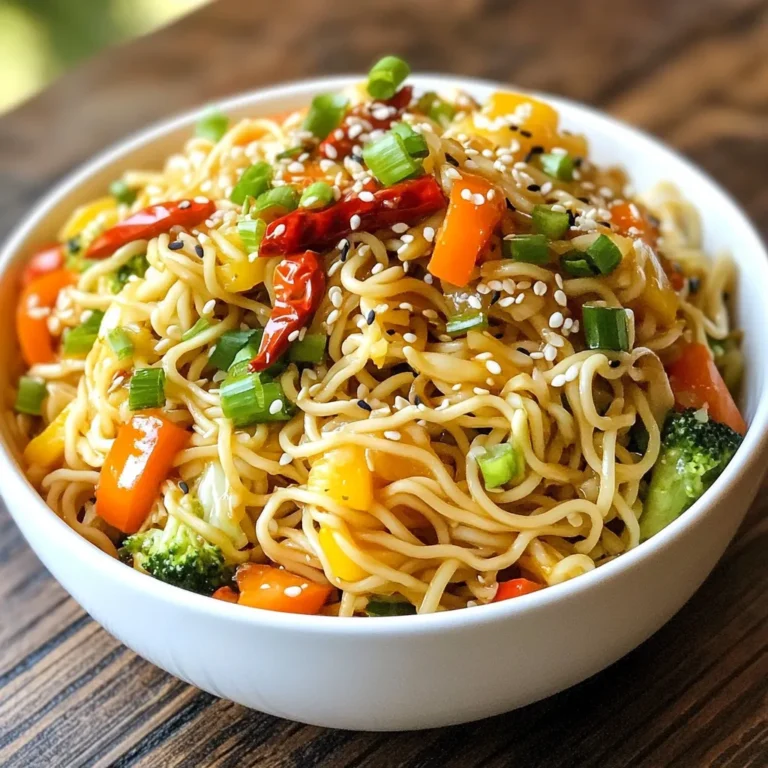
Spicy Garlic Chili Noodles Flavorful and Quick Meal

To make Cheesy Ranch Potatoes and Smoked Sausage, you will need: - 1.5 lbs baby potatoes, halved - 12 oz smoked sausage, sliced into rounds - 1 cup shredded cheddar cheese - 1/2 cup ranch dressing - 1 tablespoon olive oil - 1 teaspoon garlic powder - 1 teaspoon onion powder - 1/2 teaspoon paprika - Salt and pepper to taste - Fresh chopped parsley for garnish If you want to change things up, here are some great swaps: - Use sweet potatoes instead of baby potatoes for a sweeter taste. - Swap smoked sausage for turkey sausage or chicken sausage for a lighter dish. - Try different cheese like pepper jack or mozzarella for a new flavor. - Use Greek yogurt in place of ranch dressing for a tangy twist. - Fresh herbs like chives or cilantro can replace parsley for garnish. Each serving gives you a hearty meal with: - Calories: approximately 450 - Protein: 20g - Carbohydrates: 40g - Fat: 25g - Fiber: 4g - Sodium: 800mg This dish packs a punch of flavor while still being filling and satisfying. Enjoy every bite! {{ingredient_image_1}} Start by gathering all your ingredients. You need 1.5 lbs of baby potatoes, 12 oz of smoked sausage, and 1 cup of shredded cheddar cheese. Also, have 1/2 cup of ranch dressing, 1 tablespoon of olive oil, 1 teaspoon each of garlic powder and onion powder, and 1/2 teaspoon of paprika. Don’t forget salt and pepper for taste. Halve the baby potatoes and slice the smoked sausage into rounds. This setup makes cooking easy and fun. Preheat your oven to 400°F (200°C). In a large bowl, toss the halved potatoes with olive oil, garlic powder, onion powder, paprika, salt, and pepper. Ensure all the potatoes get coated well. Spread them out in a single layer on a baking sheet. Roast them in the oven for 25 minutes. When done, the potatoes should be tender and start to turn golden brown. This step sets a great flavor base. While the potatoes roast, heat a skillet over medium heat. Add the sliced smoked sausage to the skillet. Cook the sausage for about 5-7 minutes, until it turns brown and is heated through. The sausage adds a nice smoky flavor to the dish. Stir it occasionally so it cooks evenly. After roasting the potatoes, take them out of the oven. Add the cooked smoked sausage right onto the baking sheet with the potatoes. Drizzle the ranch dressing over everything, making sure it covers well. Next, sprinkle the shredded cheddar cheese on top. Return the baking sheet to the oven. Bake for another 10-15 minutes until the cheese is melted and bubbly. Once it's done, let it cool for a few minutes. Garnish with fresh chopped parsley before serving. Enjoy your flavorful Cheesy Ranch Potatoes and Smoked Sausage! To get the best roasted potatoes, always cut them evenly. I like to halve the baby potatoes. This way, they cook at the same rate. Toss them with olive oil and spices. Make sure they are well-coated. Spread them in a single layer on your baking sheet. This helps them crisp up nicely. If they are too crowded, they will steam instead of roast. For perfect melted cheese, use fresh shredded cheddar. Pre-shredded cheese has anti-caking agents. These can prevent it from melting smoothly. Sprinkle the cheese on top of the dish just before finishing in the oven. This way, it melts beautifully and gets bubbly. If you want extra flavor, mix in some grated Parmesan with the cheddar. Here are some tools I find helpful when making this dish: - Large mixing bowl - Baking sheet - Skillet for browning sausage - Spatula or spoon for mixing - Knife and cutting board for chopping These tools make your cooking easier and keep your kitchen organized. Having the right tools can make a big difference! Pro Tips Use Fresh Herbs: Fresh chopped parsley adds a burst of flavor and color. You can also try using chives or cilantro for a different twist. Adjust Spice Levels: If you like it spicy, consider adding a pinch of cayenne pepper or red pepper flakes to the seasoning mix. Cheese Variations: Experiment with different types of cheese such as Monterey Jack or pepper jack for a unique flavor profile. Perfectly Cooked Sausage: Make sure the smoked sausage is well-browned for added flavor. This step enhances the overall taste of the dish. {{image_2}} You can easily turn this dish into a vegetarian delight. Instead of smoked sausage, use your favorite plant-based protein. Options like seitan, tempeh, or even hearty mushrooms work well. For added flavor, season your protein with some smoked paprika. The key is to ensure the flavors balance well with the cheesy ranch sauce. Feel free to mix up the seasonings! Instead of garlic and onion powder, try using Italian herbs like oregano and basil. For a spicy kick, add a pinch of cayenne pepper. You can also top with different cheeses like pepper jack or mozzarella for a unique twist. Fresh herbs like chives or cilantro can brighten the dish. This dish is versatile for any season. In fall, serve it alongside a pumpkin soup for a cozy meal. In summer, pair it with a crisp salad and fresh tomatoes. For winter gatherings, add a warm bread basket for a comforting feast. You can also use holiday-themed serving dishes to make it festive! To store leftovers, let the dish cool down first. Then, transfer it to an airtight container. Keep it in the fridge for up to three days. Make sure to cover it well to keep the flavors fresh. You can also separate the potatoes and sausage if you prefer. For the best taste, reheat in the oven. Preheat the oven to 350°F (175°C). Place the leftovers in an oven-safe dish. Cover it with foil to keep it moist. Heat for about 15-20 minutes until warm. You can also use the microwave for quick reheating. Just heat in short bursts and stir in between. You can freeze this dish for later. First, let it cool completely. Then, place servings in freezer-safe bags or containers. Remove as much air as possible before sealing. Label the bags with the date. It can stay fresh in the freezer for up to three months. When ready to eat, thaw in the fridge overnight and reheat as described above. To make Cheesy Ranch Potatoes and Smoked Sausage in a slow cooker, start by preparing the ingredients. Cut the baby potatoes in half and slice the smoked sausage into rounds. In the slow cooker, combine the potatoes, sausage, ranch dressing, garlic powder, onion powder, paprika, salt, and pepper. Mix well to coat everything. Cook on low for 4-6 hours or on high for 2-3 hours. When done, sprinkle the cheese on top and cover until it melts. Yes, you can use any type of sausage you like. Chicken sausage, turkey sausage, or even veggie sausage work well. Each will give the dish a unique flavor. Just be sure to slice it into rounds for even cooking. Adjust cooking time if needed, based on the sausage type you choose. Cheesy Ranch Potatoes and Smoked Sausage pair well with many sides. Consider serving a fresh garden salad or steamed green beans for balance. Roasted vegetables like broccoli or carrots add color and nutrition. You can also serve cornbread or garlic bread for a hearty meal. To make this dish healthier, consider these tips: - Use less cheese or opt for a lower-fat cheese. - Substitute ranch dressing with a lighter version or Greek yogurt. - Add more vegetables like bell peppers or spinach for extra nutrients. - Use leaner sausage options to reduce fat content. This blog covered key parts to make Cheesy Ranch Potatoes and Smoked Sausage. We listed ingredients, cooking steps, and helpful tips. I shared ways to adapt the dish and store leftovers. Remember, cooking is fun, and there are many ways to enjoy your meal. Try new flavors or swap ingredients to fit your taste. Enjoy your cooking journey and be proud of your tasty creations!

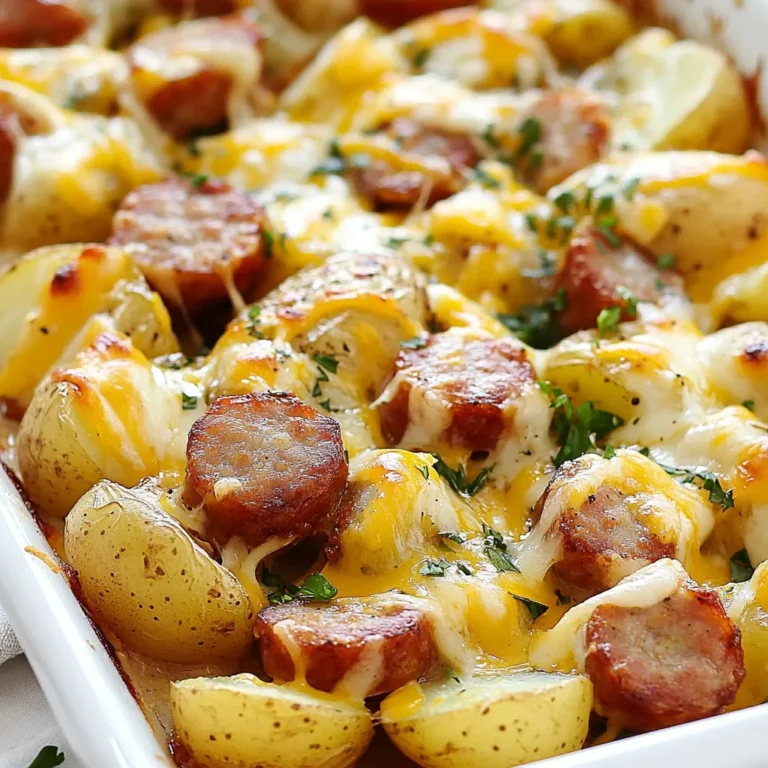
Cheesy Ranch Potatoes and Smoked Sausage Delight

- 1 lb ground chicken - 1 tablespoon olive oil - 1 small onion, finely chopped - 2 cloves garlic, minced - 1 tablespoon chili powder - 1 teaspoon cumin - 1 teaspoon paprika - 1 teaspoon salt - ½ teaspoon black pepper - ½ cup chicken broth - 12 mini taco shells These main ingredients create a tasty base. Ground chicken gives a soft texture. Olive oil adds richness and helps cook the onion and garlic. The onion and garlic bring sweetness and aroma. Spices like chili powder, cumin, and paprika add warmth and depth to the dish. Salt and black pepper enhance all the flavors. Chicken broth gives moisture and a rich taste. - 1 cup shredded cheese (cheddar or Mexican blend) - 1 cup diced tomatoes - ½ cup sour cream - ¼ cup chopped fresh cilantro These toppings make the tacos fun and colorful. Shredded cheese melts beautifully on top, adding creaminess. Diced tomatoes bring freshness and crunch. Sour cream adds a cool touch, balancing the spices. Fresh cilantro gives a burst of flavor and color. Together, they create a delicious bite. - Add jalapeños for heat. - Use black beans for a vegetarian twist. - Swap ground chicken for turkey or beef. These optional ingredients allow you to customize your tacos. If you like spice, add jalapeños. For a meat-free option, black beans work well. Different meats can change the taste and texture. Enjoy experimenting with flavors! {{ingredient_image_1}} To start, heat a tablespoon of olive oil in a large skillet over medium heat. Add one finely chopped onion. Sauté it for about 3-4 minutes until it softens. Then, add two minced garlic cloves and cook for another minute. This step brings out a nice aroma. Next, stir in one pound of ground chicken. Cook it until the chicken turns brown and is no longer pink. This step takes about 5-7 minutes. Now it’s time to mix in the spices. Add one tablespoon of chili powder, one teaspoon of cumin, one teaspoon of paprika, one teaspoon of salt, and half a teaspoon of black pepper. Pour in half a cup of chicken broth. Stir well to combine everything. Let it simmer for about 3-4 minutes. This makes the filling flavorful and slightly thick. Take a baking sheet and arrange 12 mini taco shells on it. Fill each shell with the cooked chicken mixture. Once filled, sprinkle one cup of shredded cheese over the top of each taco. Bake in the preheated oven at 375°F for 10-12 minutes. The cheese should melt, and the taco shells will get crispy. After baking, let them cool for a few minutes before serving. Top each taco with diced tomatoes, a dollop of sour cream, and chopped fresh cilantro for added flavor. Enjoy your tasty mini tacos! To make the chicken filling juicy and tasty, follow these steps: - Use fresh ground chicken for the best flavor. - Sauté onion and garlic until soft to enhance the taste. - Season the meat well. Use chili powder, cumin, and paprika. - Add chicken broth to keep the filling moist. This mix creates a rich flavor and a perfect texture for your tacos. If you want to try different shells, here are some ideas: - Use corn tortillas for a classic taste. - Consider lettuce wraps for a low-carb option. - Try baked tortilla chips for a crunchy twist. These choices can make your tacos healthier or fit special diets. To make your meal even better, serve with sides or drinks: - Pair tacos with a fresh salad for a light meal. - Offer rice and beans for a filling option. - Serve with refreshing drinks like iced tea or lemonade. These additions will round out your meal and please your guests. Pro Tips Use Fresh Ingredients: Fresh herbs and vegetables enhance the flavor of your tacos significantly. Opt for fresh cilantro and ripe tomatoes for the best taste. Customize the Spice Level: Adjust the amount of chili powder and cumin based on your heat preference. For extra heat, consider adding diced jalapeños or a splash of hot sauce. Make Ahead: You can prepare the chicken mixture in advance and store it in the fridge. Just fill the taco shells and bake when ready to serve! Experiment with Toppings: Get creative with toppings! Try avocado slices, pickled onions, or a squeeze of lime juice for added flavor and texture. {{image_2}} You can swap the ground chicken for plant-based meat or beans. This makes a great vegetarian taco. Use black beans or lentils for protein. You can also add corn for sweetness. To create unique tastes, try adding different spices or sauces. A dash of hot sauce or smoked paprika can change the flavor. You can also mix in taco sauce for a tangy kick. Consider using fresh herbs like oregano or basil for a fresh twist. Incorporate seasonal vegetables or herbs for extra flavor. In summer, add zucchini or bell peppers. In fall, try roasted butternut squash or sweet potatoes. Fresh cilantro or parsley can brighten your tacos any time of year. Store your mini baked chicken tacos in an airtight container. Let them cool to room temperature before sealing. If you have extra tacos, freeze them in a freezer-safe bag. This method keeps them fresh for later meals. For best results, use them within three days when refrigerated. To reheat your tacos, place them in the oven. Preheat the oven to 350°F (175°C). Bake for about 10 minutes. This method keeps the taco shells crispy. Avoid using a microwave, as it can make the shells soggy. When stored properly, mini baked chicken tacos last up to three days in the fridge. In the freezer, they can last for up to three months. Always check for any signs of spoilage before eating. Enjoy your tasty leftovers safely! Yes, you can use tortillas! Just choose small ones, like corn or flour tortillas. If you want a crispy texture, bake them a bit before filling. You can also roll the tortillas for a fun twist. Keep an eye on the baking time, as they may cook faster than taco shells. These tacos have a mild spice level. The chili powder adds flavor without too much heat. If you want more spice, add some diced jalapeños or a dash of hot sauce to the filling. You can also mix in cayenne pepper for an extra kick. Adjust to your taste! Absolutely! You can prepare the filling a day ahead. Store it in the fridge in an airtight container. When you're ready to serve, fill the taco shells and bake them. This saves time and lets flavors blend well. Just remember, the shells will be crispier if baked fresh! You learned how to make delicious mini baked chicken tacos. We covered the key ingredients, from ground chicken to tasty toppings. You saw step-by-step instructions to prepare the filling and bake the tacos to perfection. Tips on flavoring and storage will help you keep them fresh. You can customize them for different diets and tastes. Now, it’s time to try making these tacos and enjoy sharing them with friends and family. Simple, fun, and tasty, these tacos can quickly become a favorite meal.

Mini Baked Chicken Tacos Flavorful and Easy Recipe

To make these tasty cranberry turkey stuffing balls, gather the following items: - 2 cups stale bread, cubed - 1 cup cooked turkey, shredded - 1/2 cup dried cranberries, chopped - 1/4 cup chopped celery - 1/4 cup onion, finely chopped - 1/2 teaspoon dried sage - 1/2 teaspoon thyme - 1/4 teaspoon garlic powder - 1 egg, beaten - 1/4 cup chicken broth - Salt and pepper to taste - 1 tablespoon olive oil (for drizzling) You can swap ingredients if needed. Here are some easy options: - Use fresh bread instead of stale for a softer texture. - Substitute rotisserie chicken for cooked turkey to save time. - Replace dried cranberries with raisins or chopped apples for a twist. - Use vegetable broth in place of chicken broth for a vegetarian option. Using fresh ingredients makes a big difference. Fresh bread gives better flavor and texture. Fresh veggies add crunch and taste. Dried herbs should not be too old. They lose flavor over time. When you use fresh items, your stuffing balls will taste amazing. Always choose ingredients that are in good shape. This will make your dish shine. {{ingredient_image_1}} 1. First, preheat your oven to 375°F (190°C). Line a baking sheet with parchment paper. This makes cleanup easy. 2. In a large bowl, combine 2 cups of stale bread cubes, 1 cup of shredded turkey, and 1/2 cup of chopped dried cranberries. 3. Add 1/4 cup of chopped celery and 1/4 cup of finely chopped onion to the bowl. 4. Sprinkle in 1/2 teaspoon of dried sage, 1/2 teaspoon of thyme, and 1/4 teaspoon of garlic powder. Add salt and pepper to taste. Mix everything well. 5. In another bowl, whisk together 1 beaten egg and 1/4 cup of chicken broth. Blend until smooth. 6. Pour the egg mixture into the bread and turkey mix. Stir gently until everything is moistened but not mushy. 7. With your hands, form the mixture into small balls, about 1.5 inches in size. Place them on the lined baking sheet. 8. Drizzle the tops with 1 tablespoon of olive oil. This helps them brown nicely in the oven. 9. Bake for 20-25 minutes, or until the balls turn golden brown and feel firm when touched. - Space the stuffing balls evenly on the baking sheet. This allows hot air to flow around them. - Rotate the baking sheet halfway through baking for even heat distribution. - Keep an eye on the color. You want them golden brown but not burnt. To make great stuffing balls, use stale bread. Fresh bread can make them soggy. Cut the bread into small cubes, about half an inch. This helps them hold together better. Mix your dry ingredients first. This ensures even flavor in each bite. When you add the liquid, do it slowly. This way, the bread absorbs the moisture without getting too wet. Form the balls gently. Too much pressure can make them dense. Aim for about 1.5 inches in size for even baking. If your stuffing balls fall apart, you might need more moisture. Try adding a bit more chicken broth or egg. If they are too dry, add a splash of broth. If they don’t brown well, make sure to drizzle olive oil on top before baking. This helps them get that nice, golden color. If they taste bland, add a bit more salt and herbs. Taste your mixture before baking to adjust flavors. Mixing is key for the right texture. Use your hands to gently combine the ingredients. This keeps the bread from getting too mushy. Make sure all the pieces of turkey and cranberries are evenly spread. When shaping, use a light touch. Roll the mixture into balls without squeezing too hard. Place them on the baking sheet with some space between them. This helps them cook evenly and get crispy edges. Always bake in a preheated oven. This ensures they cook through and brown nicely. Pro Tips Use Day-Old Bread: Stale bread is key for the best texture; it absorbs moisture without becoming soggy. Customize Your Add-Ins: Feel free to add nuts, apples, or other dried fruits for extra flavor and texture. Don’t Overmix: Mix just until combined to keep the stuffing balls tender and prevent them from becoming dense. Check for Crispiness: For extra crunch, broil the stuffing balls for an additional 2-3 minutes at the end of baking. {{image_2}} You can swap ingredients to suit your taste. If you want a twist, try using cornbread instead of stale bread. Cornbread adds a light, sweet flavor. You can also use leftover chicken if turkey is not available. For a fruity kick, add chopped apples or pears. They pair well with cranberries and turkey. For a gluten-free option, use gluten-free bread. Many brands make great gluten-free bread that works well in this recipe. If you want a vegetarian version, replace turkey with cooked mushrooms or chickpeas. These alternatives add texture and protein. Use vegetable broth instead of chicken broth for added flavor. To boost flavor, add fresh herbs like parsley or rosemary. They brighten the dish and add a nice aroma. A splash of lemon juice can also enhance the taste. For a spicy kick, sprinkle in some red pepper flakes. This gives your stuffing balls a bit of heat and depth. To keep your leftovers fresh, place them in an airtight container. Make sure they cool down first. Store them in the fridge for up to three days. Label the container with the date. This helps you track how long they have been stored. When you’re ready to eat, preheat the oven to 350°F (175°C). Place the stuffing balls on a baking sheet. Heat them for about 10-15 minutes. This warms them up nicely and keeps them crisp. You can also microwave them, but they may not stay as crunchy. To freeze, first let the stuffing balls cool completely. Place them in a single layer on a baking sheet. Freeze them for about an hour. Once frozen, move them to a freezer bag. Remove as much air as possible. They can last for up to three months. When you’re ready to eat, thaw them overnight in the fridge before reheating. Yes, you can make these stuffing balls ahead of time. Prepare the mixture up to step 6. Form the balls and place them on a baking sheet. Cover them tightly with plastic wrap or foil. Store them in the fridge for up to 24 hours. When you’re ready to bake, just drizzle with olive oil and bake as directed. Cranberry Turkey Stuffing Balls pair well with many dishes. Here are some great ideas: - Roast turkey or chicken - A warm green salad - Mashed potatoes or sweet potatoes - A side of cranberry sauce for dipping - Steamed or roasted vegetables These sides add color and flavor to your meal. To check if your stuffing balls are done, look for a golden brown color. They should feel firm to the touch. You can also use a food thermometer. Insert it into the center of a ball. It should read 165°F (74°C). If they are not done, bake them for a few more minutes. In this blog post, we explored how to make Cranberry Turkey Stuffing Balls. We covered the key ingredients, including options for substitutions and the importance of freshness. The step-by-step instructions ensured clear cooking methods. We shared helpful tips to improve your results and variations to fit different diets. Finally, we discussed proper storage and reheating. Remember, using fresh ingredients leads to better taste. Enjoy making this dish and impress your guests!

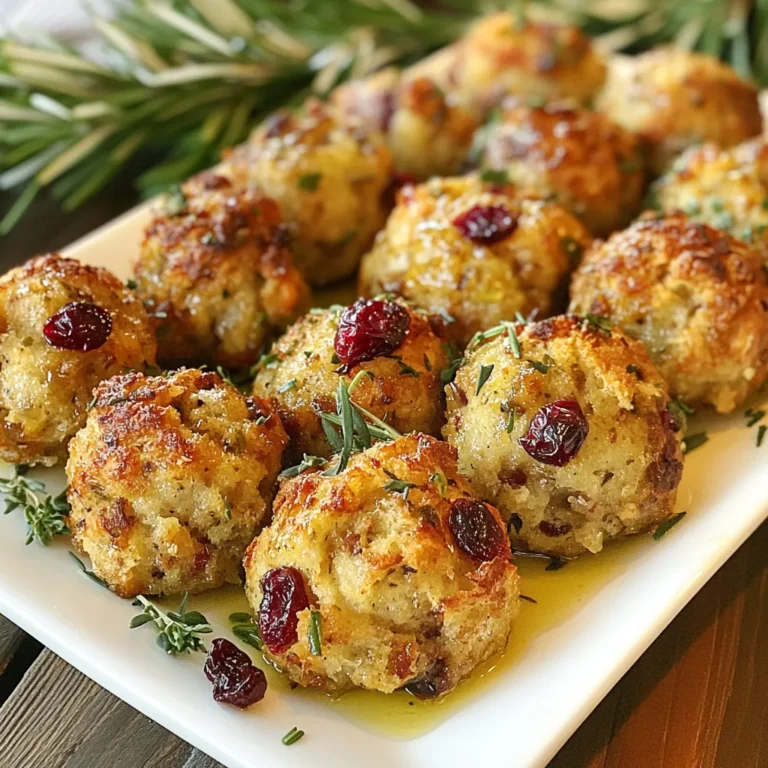
Cranberry Turkey Stuffing Balls Savory Holiday Treat

- 4 boneless, skinless chicken breasts - 2 tablespoons olive oil - 4 cloves garlic, minced - 1 cup cherry tomatoes, halved - 2 cups fresh spinach - 1 cup heavy cream - 1 tablespoon Italian seasoning - ½ cup grated Parmesan cheese - Salt and pepper to taste - Fresh basil leaves for garnish The ingredients for Creamy Garlic Tuscan Chicken are simple yet flavorful. The chicken breasts serve as the main protein. I love using boneless and skinless chicken breasts for a tender texture. Olive oil adds richness and helps in cooking the chicken beautifully. Garlic is key here. It adds depth and flavor. The minced garlic should be fresh for the best taste. Cherry tomatoes brighten the dish with a burst of sweetness. They soften when cooked, adding a lovely sauce base. Fresh spinach brings a vibrant green color and a slight earthiness. The heavy cream is what makes the sauce rich and creamy. It balances the flavors perfectly. Italian seasoning adds a mix of herbs, enhancing the taste. Parmesan cheese thickens the sauce and adds a salty kick. Don’t forget salt and pepper! They are essential for seasoning. Finally, fresh basil leaves finish the dish with a fragrant touch. - Large skillet - Measuring cups and spoons - Tongs - Spoon for stirring You need a large skillet to cook everything evenly. It allows enough space for the chicken and sauce. Measuring cups and spoons ensure you add the right amounts. Tongs help you flip the chicken without losing any moisture. A sturdy spoon is great for mixing the sauce. Make sure you have these tools ready. They make the cooking process smooth and fun! {{ingredient_image_1}} To start, season the chicken breasts with salt, pepper, and Italian seasoning. Make sure to coat both sides well. This step adds great flavor before cooking. For the best taste, let the chicken sit for about 10 minutes after seasoning. This helps the spices soak in, giving you a richer flavor. Next, heat a large skillet over medium-high heat. Add the olive oil and let it warm up. Once hot, place the chicken breasts in the skillet. Sear each side for about 6-7 minutes until they turn golden brown. To check if they are done, cut into one piece. The inside should be white, not pink. This shows the chicken is fully cooked. Remove the chicken from the skillet and set it aside. Now, reduce the heat to medium. In the same skillet, add the minced garlic. Sauté it for about 30 seconds until it smells great. Then, toss in the halved cherry tomatoes. Cook them for 2-3 minutes until they start to soften. Next, pour in the heavy cream. Stir it well to mix with the garlic and tomatoes. Gradually add the fresh spinach. Let it wilt before mixing in the grated Parmesan cheese. Stir until it melts completely, creating a creamy sauce. Return the seared chicken to the skillet. Spoon the creamy sauce over the chicken. Let it simmer for about 3-4 minutes to heat everything through. This allows the flavors to meld together perfectly. For a pretty touch, garnish with fresh basil leaves before serving. To make a perfect creamy sauce, you need the right blend. Start with heavy cream and simmer it gently. This helps it thicken. If the sauce is too thick, add a splash of chicken broth. If it’s too thin, let it cook longer. Adjust the seasoning by adding more salt or pepper as needed. Searing chicken well gives it great flavor. Cook chicken breasts for about 6-7 minutes on medium-high heat. Look for a golden-brown color on each side. Use a meat thermometer to check for doneness; it should read 165°F. To prevent drying out, don’t overcook the chicken. If it starts to look dry, remove it from the heat. A beautiful presentation makes the meal special. Garnish with fresh basil leaves for color. Serve the chicken on a bed of pasta or alongside garlic bread. Drizzle extra sauce over the chicken for an appealing look. Pair with a light salad or a nice white wine for a complete meal. Pro Tips Use Fresh Ingredients: Always opt for fresh spinach and ripe cherry tomatoes for the best flavor and texture in your creamy sauce. Perfectly Sear the Chicken: Ensure your skillet is hot enough before adding the chicken to achieve a golden-brown crust. Adjust the Creaminess: If you prefer a lighter sauce, substitute half of the heavy cream with chicken broth or milk. Garnish for Flair: Fresh basil not only adds color but also enhances the dish's aroma, making it more appetizing. {{image_2}} You can swap heavy cream for many options. Try using coconut milk for a lighter touch. Half-and-half also works well, giving good creaminess without too many calories. For greens, spinach shines, but you can use kale or arugula. They add a nice twist and different flavors to the dish. Baby kale wilts well and gives a hearty bite. Want some heat? Add red pepper flakes for a spicy kick. It brings warmth and depth to the sauce. If you like bold flavors, smoked paprika works great, too. For extra freshness, add herbs like thyme or oregano. Chopped fresh parsley also brightens the dish. A squeeze of lemon juice at the end can really lift the flavors. To make this dish gluten-free, just check your seasoning labels. Most are gluten-free, but it’s always good to be sure. For a dairy-free option, use cashew cream or almond milk in place of heavy cream. Nutritional yeast can replace Parmesan cheese for a cheesy flavor without dairy. You can boost health by adding mushrooms or bell peppers. These add nutrition and great taste, making the meal more colorful and fun. To store leftovers safely, let the chicken cool first. Place it in an airtight container. This helps keep it fresh. Use a container that seals well to prevent spills. You can keep it in the fridge for up to three days. The best way to reheat is on the stove. Heat it over low to medium heat. Stir gently to keep the sauce creamy. If it seems thick, add a splash of cream or water. This helps refresh the dish and keeps the flavor intact. For long-term storage, you can freeze the chicken. Make sure it is completely cool. Cut it into portions and place it in freezer bags. Try to remove as much air as possible. To thaw, place it in the fridge overnight. This ensures it thaws safely before reheating. It takes about 15 minutes to prep and 30 minutes to cook. You can serve this dish in under an hour. This timing includes seasoning the chicken, searing it, and making the creamy sauce. Yes, you can prepare this dish ahead of time. Cook the chicken and sauce, then store them in the fridge. Keep the chicken and sauce separate until you are ready to serve. This helps keep the chicken juicy. When you are ready to eat, simply reheat everything gently. I recommend serving this dish with pasta or garlic bread. Both options soak up the creamy sauce well. You could also add a fresh salad or steamed veggies for some crunch and color. Enjoy your meal with a glass of white wine for a complete experience! This blog post covered how to make Creamy Garlic Tuscan Chicken. We explored the main ingredients and essential kitchen tools. I shared step-by-step instructions, helpful tips, and tasty variations. You can adjust this recipe to fit your needs and preferences. In closing, this dish is simple yet delicious. It pleases the palate and is perfect for any meal. Enjoy this cooking adventure and make it your own!

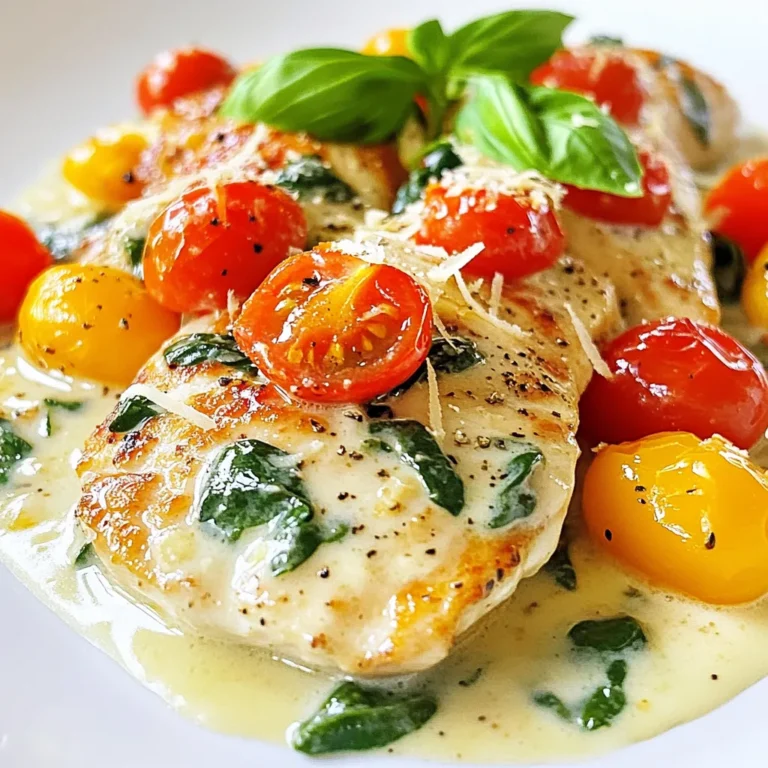
Creamy Garlic Tuscan Chicken Flavorful Dinner Delight

To make One-Pot Creamy Tomato Pasta, you will need some simple yet tasty ingredients. Here’s what you will gather: - 12 oz (340g) pasta (penne or fusilli work well) - 1 can (14 oz) crushed tomatoes - 1 cup vegetable broth - 1 cup heavy cream - 1 medium onion, diced - 3 cloves garlic, minced - 1 tsp dried oregano - 1 tsp dried basil - ½ tsp red pepper flakes (optional for heat) - 1 cup fresh spinach - ½ cup grated Parmesan cheese - Salt and pepper to taste - Fresh basil leaves for garnish These ingredients create a rich and creamy dish. The pasta is the star, soaking up all the flavors. Crushed tomatoes give a nice base, while heavy cream adds creaminess. Fresh spinach adds color and nutrition. Don't skip the Parmesan cheese; it brings the whole dish together. You can customize the recipe too. Use whole wheat pasta for a healthier option. If you want more spice, add more red pepper flakes. The key is to have fun and make it your own! {{ingredient_image_1}} - Sauté onion and garlic: Start by heating a large pot or deep skillet over medium heat. Add the diced onion and minced garlic. Cook for 3 to 4 minutes. You want the onion to turn soft and clear. This step builds a great base for flavor. - Combine crushed tomatoes and broth: Next, pour in the can of crushed tomatoes and the cup of vegetable broth. Add dried oregano, dried basil, and red pepper flakes if you like some heat. Stir everything together until it mixes well. - Add pasta and cook: Bring the mixture to a gentle simmer. Then, add 12 ounces of your chosen pasta, like penne or fusilli. Stir the pasta to ensure it is fully covered in the liquid. Cook according to the package instructions, usually around 10 to 12 minutes. Stir occasionally to keep the pasta from sticking to the pot. - Stir in heavy cream: Once the pasta is tender and most liquid is absorbed, reduce the heat to low. Slowly stir in the cup of heavy cream. Mix until the sauce becomes rich and smooth. This makes the dish creamy and comforting. - Incorporate spinach and Parmesan: Add one cup of fresh spinach to the pot. Stir until the spinach wilts down. Then, sprinkle in half a cup of grated Parmesan cheese. Mix until the cheese melts and blends into the sauce. - Season and serve: Finally, taste your dish. Add salt and pepper as needed. Serve hot, garnished with fresh basil leaves and a bit more Parmesan if you like. Enjoy this delicious one-pot meal! - How to prevent pasta from sticking Stir the pasta often while it cooks. This keeps it from clumping together. You can also add a little olive oil to the water before boiling. - Ensuring a creamy sauce Always add the heavy cream after the pasta cooks. This helps the sauce stay smooth. Stir it in gently, so it mixes well. - Adjusting seasoning levels Taste the dish as you cook. Add more salt, pepper, or herbs if it needs flavor. Remember, seasoning can change with the cream and cheese added. - Using fresh herbs for enhanced flavor Fresh basil adds a bright taste. Add it at the end of cooking to keep its flavor strong. You can also use fresh oregano if you have it. Pro Tips Use Fresh Herbs: Fresh basil can elevate the flavor; add it at the end for a vibrant taste. Adjust Creaminess: If you prefer a lighter sauce, reduce the amount of heavy cream or substitute with half-and-half. Add Protein: For a heartier meal, consider adding grilled chicken, shrimp, or chickpeas for extra protein. Leftover Storage: Store any leftovers in an airtight container in the fridge for up to 3 days; reheat gently on the stove. {{image_2}} You can easily change this recipe to fit what you have at home. Here are some great ideas: - Alternative pasta types: You can use any pasta you like. Try spaghetti, rotini, or gluten-free options. Each type will give a new twist to the dish. - Dairy-free options with coconut cream: If you want a dairy-free meal, swap the heavy cream for coconut cream. This will add a slight sweetness and keep it creamy. - Adding protein (chicken or shrimp): For extra protein, mix in cooked chicken or shrimp. Add them near the end of cooking to warm them up without overcooking. - Vegetables to mix in (bell peppers, mushrooms): You can add more veggies too. Bell peppers, mushrooms, or zucchini work well. Sauté them with the onion and garlic for added flavor and nutrition. These simple swaps can make your One-Pot Creamy Tomato Pasta unique and tailored to your taste! To keep your One-Pot Creamy Tomato Pasta fresh, follow these steps. First, let the pasta cool down to room temperature. Next, place it in an airtight container. Make sure to seal it well. This way, your pasta stays moist and tasty for up to three days in the fridge. When you want to reheat, use a pot over low heat. Add a splash of water or extra cream to help it warm evenly. Stir gently until it's hot. You can also use the microwave. Just cover it and heat in short bursts. Stir in between to avoid hot spots. If you plan to store it longer, freezing is a great option. Place the cooled pasta in a freezer-safe container. You can also use freezer bags. Remove as much air as possible to prevent freezer burn. This dish can last for up to three months in the freezer. When ready to eat, thaw it in the fridge overnight. Then, reheat as described above. Enjoy your creamy pasta anytime! Can I make this recipe in advance? Yes, you can make this dish ahead of time. Cook it fully and cool it down. Store it in the fridge for up to three days. Reheat it on the stove or in the microwave. What can I pair with One-Pot Creamy Tomato Pasta? This pasta pairs well with garlic bread or a fresh salad. You can also serve it with grilled chicken or sautéed shrimp for extra protein. How do I make it spicier? To add heat, use more red pepper flakes. You can also add hot sauce or diced jalapeños to the pot. Start with a little and taste as you go to find your perfect spice level. Can I use fresh tomatoes instead of canned? Yes, fresh tomatoes work great! You will need about 2-3 cups, diced. Make sure to cook them down until they are soft and juicy before adding the broth and pasta. What if I don’t have vegetable broth? You can use chicken broth or even water if you have no broth. Just add a bit more seasoning to keep the flavor strong. Is this recipe suitable for meal prep? Absolutely! This dish stores well and is perfect for meal prep. Just divide it into portions and store them in airtight containers. You can have a delicious meal ready to go! This blog post provided a clear and easy recipe for One-Pot Creamy Tomato Pasta. We covered key ingredients like pasta, tomatoes, and heavy cream. I shared step-by-step instructions for cooking and tips for perfecting your dish. We explored ingredient substitutions for different tastes and explained how to store leftovers properly. Remember, this dish is simple, tasty, and customizable. You can enjoy it in many ways. Now, grab your ingredients and start cooking a delicious meal today!

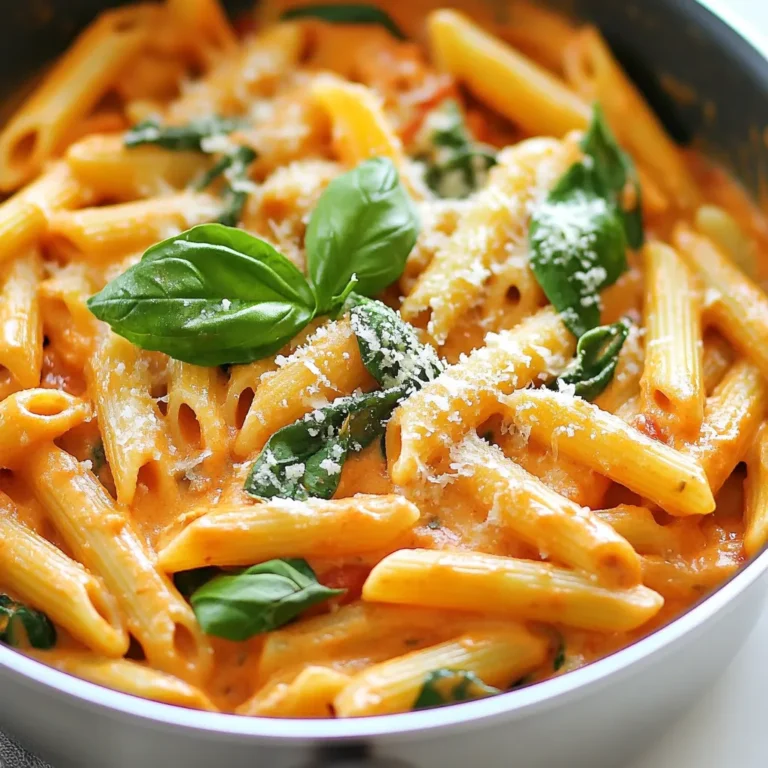
One-Pot Creamy Tomato Pasta Flavorful and Easy Dish

To make Creamy Smothered Chicken and Rice, you need some simple ingredients. Here’s what you'll need for this tasty dish: - 4 boneless, skinless chicken thighs - 1 cup long-grain rice - 1 small onion, diced - 2 cloves garlic, minced - 1 cup chicken broth - 1 cup heavy cream - 1 teaspoon paprika - 1 teaspoon Italian seasoning - 1 tablespoon olive oil - Salt and pepper, to taste - 2 cups fresh spinach - 1/2 cup grated Parmesan cheese - Fresh parsley, for garnish These ingredients come together to create a warm, comforting meal. The chicken thighs add richness, while the rice soaks up all the flavors. Onion and garlic give it a nice aroma. The heavy cream makes everything creamy and smooth. Don't forget the spinach for a pop of color and nutrients. Finally, the Parmesan cheese adds a salty, savory kick. Using fresh ingredients makes a big difference. Always choose high-quality chicken and fresh veggies for the best taste. With this list, you can make a delicious dinner that everyone will love. {{ingredient_image_1}} To start, season the chicken thighs with salt, pepper, and paprika. This adds great flavor. Heat olive oil in a large skillet over medium-high heat. Add the chicken thighs to the skillet. Cook them for about 5 to 7 minutes on each side. You want them browned and fully cooked. Once done, remove the chicken from the skillet and set it aside. This step builds a tasty base for your dish. Next, we will make the base for our creamy dish. In the same skillet, add diced onion and minced garlic. Sauté these for 3 to 4 minutes. You want the onion to be soft and fragrant. This will add a wonderful aroma to your meal. After that, stir in the long-grain rice. Cook it for 2 minutes to lightly toast it. Toasting the rice adds depth to its flavor. Now, it’s time to simmer our dish. Pour in the chicken broth and bring it to a boil. Lower the heat, cover the skillet, and let it simmer for 15 to 20 minutes. This allows the rice to soak up the broth. The rice should be tender and fluffy when done. After that, stir in the heavy cream, Italian seasoning, and fresh spinach. Cook for another 3 to 5 minutes until the spinach wilts. This adds a lovely creaminess and color to the dish. Return the cooked chicken thighs to the skillet. Nestle them into the creamy rice mixture. Finally, sprinkle grated Parmesan cheese on top. Cover for another 2 to 3 minutes to melt the cheese. This gives the dish a rich, cheesy finish. Adjust the seasoning with salt and pepper if needed. Your creamy smothered chicken and rice is now ready to enjoy! - Ensuring chicken is perfectly cooked: Use a meat thermometer. Chicken should reach 165°F. This ensures it is safe to eat. Cook it for about 5-7 minutes on each side. Look for a golden brown color. This step adds flavor and texture. - Achieving creamy rice texture: Use long-grain rice for the best results. Toasting the rice for a few minutes adds depth. Make sure to cover the skillet while simmering. This keeps the steam in and helps the rice cook evenly. Stir in the heavy cream slowly for a rich finish. - Alternative spices and seasonings: Try adding garlic powder or onion powder for more flavor. A dash of cayenne pepper gives a nice kick. You can also use herbs like thyme or rosemary. These will add new layers of taste without straying far from the original recipe. - Recommended side dishes to serve with: Pair this dish with a fresh green salad for balance. Roasted vegetables are also a great choice. They add color and nutrition to your meal. For a heartier option, serve with crusty bread to soak up the creamy sauce. Pro Tips Perfectly Cooked Rice: Rinse the rice under cold water before cooking to remove excess starch. This will help achieve a fluffier texture. Chicken Thighs: Opt for boneless chicken thighs for added flavor and tenderness. They remain juicy even after cooking longer than other cuts. Adding Spinach: Add the spinach towards the end of cooking to preserve its vibrant color and nutrients. It will wilt beautifully in the creamy sauce. Garnishing: For an extra touch, use freshly grated Parmesan and a squeeze of lemon juice before serving to enhance the dish's flavors. {{image_2}} You can replace heavy cream with several options. Use half-and-half for a lighter texture. Coconut milk adds a nice twist and keeps it dairy-free. For a low-fat option, try Greek yogurt. It will give a creamy feel without the calories. Feel free to mix in other vegetables. Peas, bell peppers, or mushrooms work well. You can also use kale instead of spinach for added nutrients. Adding carrots can give a sweet touch and vibrant color to your dish. To make this dish gluten-free, substitute regular rice with brown rice or quinoa. Always check the chicken broth for gluten-free labels. This ensures you enjoy a safe and tasty meal. If you're looking for a low-calorie version, use skinless chicken breasts instead of thighs. Swap heavy cream for low-fat yogurt or almond milk. Reducing the cheese or using nutritional yeast can also help cut calories without losing flavor. Enjoy your creamy smothered chicken and rice while staying healthy! After you finish your meal, let the creamy smothered chicken and rice cool down. Place it in an airtight container. This keeps your dish fresh and tasty. Store it in the fridge for up to 3 days. Always check for any strange smells or colors before eating. You can freeze creamy chicken and rice for later. Just make sure it’s completely cool first. Transfer the dish to a freezer-safe container. It can stay good for about 2 months in the freezer. When you’re ready to enjoy it again, thaw it in the fridge overnight. Reheat it in a pan over low heat. Add a splash of chicken broth to make it creamy again. Stir it well until heated through. Enjoy your delicious meal! Can I use chicken breasts instead of thighs? Yes, you can use chicken breasts instead of thighs. Chicken breasts will cook faster, so check them after 5-6 minutes. They should be juicy and tender. However, thighs give a richer flavor and stay moist better. How do I prevent the rice from sticking? To prevent the rice from sticking, rinse it under cold water before cooking. This removes excess starch. Also, avoid stirring too much while it cooks. Keep the lid on during simmering. This helps the rice absorb the broth evenly. Can I make this recipe in advance? Yes, you can make this dish in advance. Cook it fully and let it cool. Store it in an airtight container in the fridge for up to three days. To reheat, warm it in a skillet with a bit of broth or cream for added moisture. This blog post covered a delicious creamy smothered chicken and rice recipe. We discussed the key ingredients, from chicken thighs to Parmesan cheese. I outlined simple step-by-step instructions to cook the dish perfectly. You learned helpful cooking tips and how to customize the recipe to fit your needs. In conclusion, this meal is easy to make and fun to share. Enjoy the rich flavors and feel free to experiment. You can create a dish that suits your taste. Happy cooking!

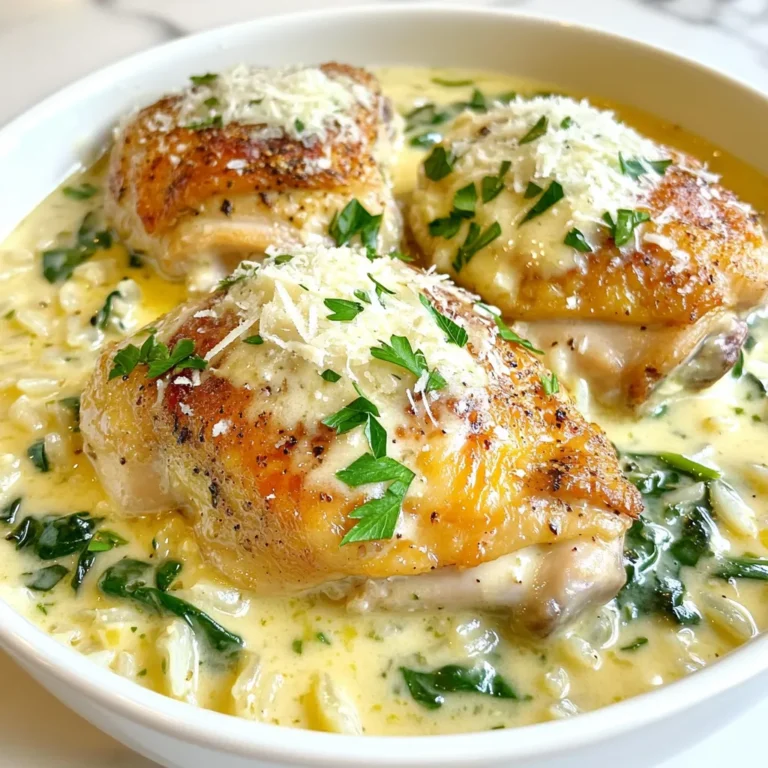
Creamy Smothered Chicken and Rice Flavorful Dinner Dish

- 2 cups cooked chicken, shredded - 1 cup frozen mixed vegetables (peas, carrots, corn) - 1 cup cream of chicken soup - 1 cup shredded cheddar cheese - 1 package of refrigerated crescent roll dough - 1 teaspoon garlic powder - 1 teaspoon onion powder - 1 tablespoon fresh thyme, chopped (or 1 teaspoon dried thyme) - 1 tablespoon olive oil - Salt and black pepper to taste Gathering the right ingredients is key to a great Cheesy Chicken Pot Pie Casserole. Start with cooked chicken. You can use leftovers or rotisserie chicken for ease. Frozen mixed vegetables add color and nutrition. Choose a mix with peas, carrots, and corn for the best taste. Cream of chicken soup serves as the base, giving this dish its creamy texture. Shredded cheddar cheese is a must for that cheesy goodness. Lastly, the crescent roll dough provides a flaky crust on top. Don’t forget your seasonings! Garlic powder and onion powder enhance flavor. Fresh thyme can brighten the dish, but dried thyme works too. Use olive oil to help the dough brown nicely. Salt and pepper add the final touch, boosting all the flavors in this comforting meal. {{ingredient_image_1}} To ensure even cooking of the dough, roll it out flat. Press the seams together firmly. This helps keep the filling in while baking. You want the dough to cook nicely without sogginess. Using leftovers for the filling is smart and saves time. Cooked chicken from last night’s dinner works great. You can also use leftover veggies or even rotisserie chicken. Just shred or chop them up. This adds flavor and cuts down on waste. For plating, cut the casserole into squares. Add a sprinkle of chopped fresh parsley on top. This adds a nice touch of color and flavor. Pair with a simple side salad. A light salad with greens and a tangy dressing balances the richness of the casserole. You can also serve it with crusty bread to soak up any sauce. You can switch up the chicken in this dish. Turkey works well too. Rotisserie chicken saves time and adds flavor. Just shred it and mix it in. For vegetables, feel free to get creative. Green beans, broccoli, or bell peppers can brighten the dish. Use what you like or have on hand. Frozen veggies are easy, but fresh ones taste great too. If you're gluten-free, use gluten-free crescent rolls. Check the label to be sure. You can also add gluten-free flour to thicken the sauce if needed. For a dairy-free version, use dairy-free cheese and milk. Many brands offer good cheese alternatives. Make sure the cream of chicken soup is also dairy-free. There are great options available now. Pro Tips Use Rotisserie Chicken: For a quicker preparation, opt for store-bought rotisserie chicken. It saves time and adds great flavor to your casserole. Customize Your Veggies: Feel free to swap the frozen mixed vegetables with your favorites, such as broccoli or green beans, to suit your taste. Get Creative with Cheese: Experiment with different types of cheese, like Monterey Jack or mozzarella, for a unique flavor twist in your casserole. Check Dough Sealing: Ensure the seams of the crescent roll dough are well pressed together to prevent filling from leaking during baking. {{image_2}} To keep your Cheesy Chicken Pot Pie Casserole fresh, store it properly. Here are some guidelines: - Refrigeration: Place leftovers in an airtight container. They can last 3 to 4 days in the fridge. Make sure to let the casserole cool before sealing it. - Freezing: If you want to save it for later, freeze the casserole. Use a freezer-safe container or wrap it tightly in foil. It stays good for up to 3 months. Thaw it in the fridge overnight before reheating. When it's time to enjoy your leftovers, reheating is key. Here are the best methods: - Best methods for reheating: The oven is the best way to reheat your casserole. Preheat it to 350°F (175°C). Place the casserole in a baking dish and cover it with foil. Heat for about 20-25 minutes. - Maintaining texture and flavor: To keep the crust from getting soggy, avoid microwaving. If using a microwave, heat in short increments and check often. Add a splash of milk before reheating to keep it creamy. Yes, you can prepare this dish ahead of time. Just mix the filling and layer it in the casserole dish. Cover it tightly with plastic wrap. Store it in the fridge for up to 24 hours. When ready to bake, remove the wrap and add the crescent roll dough before baking. To reheat leftovers, preheat your oven to 350°F (175°C). Place the casserole in an oven-safe dish. Cover it with foil to keep it moist. Heat for about 20 minutes, or until warmed through. You can also use a microwave, but the oven keeps the crust crispy. If you don’t have cream of chicken soup, you can use cream of mushroom soup. Another option is to mix equal parts milk and sour cream with seasonings. This gives a creamy texture and flavor to your casserole. Yes, you can make this dish vegetarian! Substitute cooked chicken with cooked lentils or chickpeas. You can also add more mixed vegetables like broccoli or bell peppers. Use vegetable broth instead of cream of chicken soup for a tasty base. In this blog post, I shared a simple recipe for Cheesy Chicken Pot Pie Casserole. You learned about key ingredients like chicken, veggies, and cream soup. I also detailed tips for cooking, serving, and storing. You can customize it with different meats or veggies and even make dietary adjustments. Remember to enjoy leftovers and reheat them well. This dish is great for family dinners or gatherings. With these steps, you can make a warm, tasty meal easily. I hope you enjoy trying this recipe!

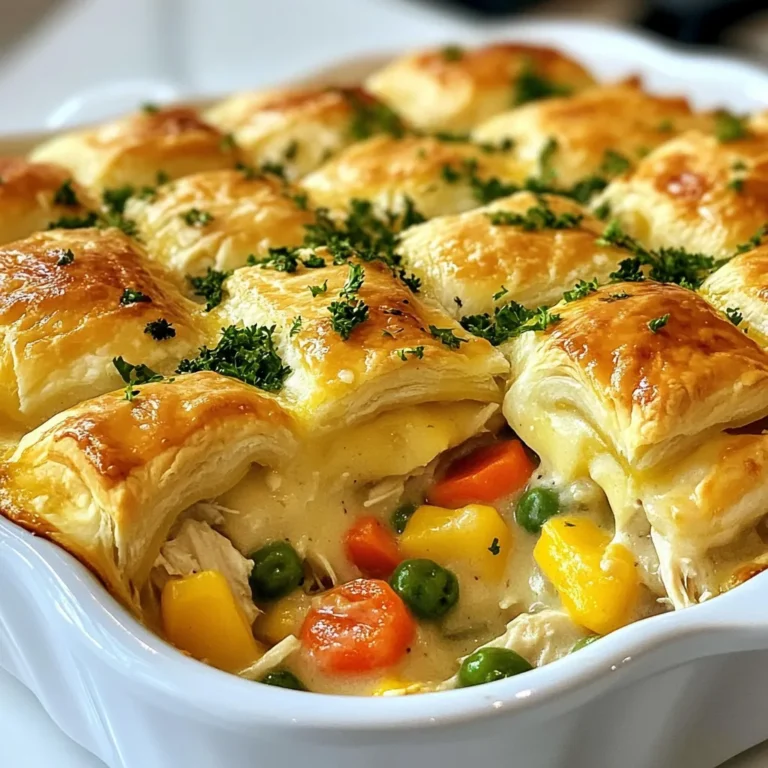
Cheesy Chicken Pot Pie Casserole Easy Comfort Meal

- 1 lb flank steak - 2 tablespoons olive oil - 3 tablespoons lime juice - 2 teaspoons chili powder - 1 teaspoon garlic powder - 1 teaspoon cumin - 1 teaspoon smoked paprika - Salt and pepper to taste - Fresh cilantro, chopped (for garnish) - Lime wedges (for serving) I picked flank steak for its rich flavor and tenderness. This cut cooks quickly and is great for grilling. The olive oil helps the spices stick and adds moisture. Lime juice brings a fresh, zesty taste that brightens the meat. Chili powder adds heat, while garlic powder and cumin deepen the flavor. Smoked paprika gives a nice, smoky touch. Salt and pepper enhance all the flavors. Fresh cilantro adds a burst of freshness, making each bite delightful. Lime wedges are perfect for squeezing on top. When choosing flank steak, look for a bright red color. The meat should have some marbling but not too much fat. This marbling helps keep the steak juicy. Choose a cut that feels firm to the touch. Avoid any meat with a dull color or brown spots. Ask your butcher for help if you’re unsure. Fresh meat always makes a better meal. {{ingredient_image_1}} Start by making the marinade. In a medium bowl, mix olive oil, lime juice, chili powder, garlic powder, cumin, smoked paprika, salt, and pepper. Whisk it well so all ingredients blend. Next, take your flank steak and place it in a resealable bag or shallow dish. Pour the marinade over the steak, making sure it covers all sides. Seal the bag or cover the dish. Place it in the fridge for at least 30 minutes. If you have more time, let it marinate for up to 2 hours. This helps the meat soak up all the tasty flavors. While the steak marinates, preheat your grill. Set it to medium-high heat. If using a grill pan, place it on the stove and turn the heat to medium-high. It’s crucial to have the grill hot before adding the steak. This helps create a nice sear, which locks in juices and flavor. Once the grill is ready, take the flank steak out of the marinade. Let the excess marinade drip off. Place the steak on the grill. Grill for about 4 to 5 minutes on one side for medium-rare. Flip the steak only once during cooking. If you like it more done, adjust the time. Using a meat thermometer can help. Aim for 130°F for medium-rare. After grilling, remove the steak from the grill. Let it rest for about 5 minutes. Resting is key. It allows the juices to redistribute, making the steak juicy. Once rested, slice the steak against the grain into thin strips. This cuts through the fibers and makes the meat tender. Top with fresh cilantro and serve with lime wedges for extra zest. Enjoy your delicious meal! To get the best flavor from your flank steak, marinate it well. The marinade combines olive oil, lime juice, chili powder, and spices. Let the steak sit in the marinade for at least 30 minutes. If you can wait longer, go for two hours. This gives the meat time to soak up the flavors. Use fresh lime juice for a bright taste. The smoky notes from the paprika enhance the overall profile. Grilling can be easy, but some mistakes can ruin your steak. First, don’t skip preheating the grill. A hot grill helps sear the meat and locks in juices. Second, avoid flipping the steak too often. Flip it just once to get those nice grill marks. Lastly, don’t rush the resting time. Resting allows the juices to settle, making every bite juicy. When it’s time to serve, slice the steak against the grain. This method keeps the meat tender. Add fresh cilantro on top for a pop of color and freshness. Lime wedges on the side let guests add more zest if they like. Serve the steak with tortillas, rice, or a fresh salad for a complete meal. Enjoy this dish with friends and family for a fun meal! Pro Tips Marination Time: For best flavor, marinate the flank steak for at least 1 hour, but if you have more time, letting it sit for up to 2 hours will enhance the taste even further. Grill Temperature: Make sure your grill is preheated to medium-high heat. This ensures a good sear and helps lock in the juices. Slicing Technique: Always slice the steak against the grain. This makes the meat more tender and easier to chew. Resting Period: Allow the steak to rest for at least 5 minutes after grilling. This helps the juices redistribute, resulting in a juicier steak. {{image_2}} You can switch up the marinade to change the flavor. Try using soy sauce for a savory twist. A mix of orange juice and ginger gives a sweet and spicy taste. You can also add honey for a touch of sweetness. If you like it hot, add more chili powder or some diced jalapeños. Experimenting with different herbs, like basil or thyme, can also give a fresh feel. Grilling is great, but you can also cook flank steak in the oven. Preheat your oven to 400°F. Place the marinated steak on a baking sheet. Bake for about 15 to 20 minutes. Use a meat thermometer to check for doneness. For a broiler method, place the steak on a broiler pan. Broil for 4 to 5 minutes per side, keeping an eye on it to avoid burning. Each method gives a unique taste and texture. If you want a vegetarian dish, try using portobello mushrooms. They have a hearty texture and soak up marinades well. Marinate them the same way as the steak. Grill or roast them until tender. Cauliflower steaks are another option. Slice cauliflower into thick pieces and season with the same marinade. Cook them on the grill or in the oven for a tasty alternative. Both options will satisfy your craving for bold flavors. To store leftover flank steak, let it cool first. Cut the steak into slices. Place the slices in an airtight container. Add a piece of parchment paper to keep it fresh. Store it in the fridge for up to three days. This keeps the meat tasty and safe to eat later. When you want to eat the leftover steak, reheat it gently. You can use a skillet on low heat. Add a splash of water or broth to keep it moist. Cover the skillet with a lid. Heat for about 5 minutes. You can also use the microwave. Place the steak on a microwave-safe plate. Cover it loosely and heat for 30 seconds at a time. Check often to avoid overcooking. If you want to keep the steak longer, freezing is a great option. Wrap the steak tightly in plastic wrap. Then, place it in a freezer bag. Remove as much air as possible before sealing. This helps prevent freezer burn. You can keep it in the freezer for up to three months. When you’re ready to eat, thaw it in the fridge overnight. This way, your steak stays juicy and flavorful. You should marinate flank steak for at least 30 minutes. For better flavor, try to marinate it for up to 2 hours. The longer it sits, the more it soaks in the tasty chili and lime flavors. Just remember, don’t marinate for too long, or the meat can become mushy. The best cooking temperature for flank steak is medium-high heat. This allows the steak to sear well and cook evenly. Aim for about 145°F for medium-rare. Use a meat thermometer to check. This ensures the steak remains juicy and tender. Yes, you can use other cuts of meat. Skirt steak or sirloin works well too. Just remember that different cuts may need different cooking times. Choose a cut with good flavor and tenderness for best results. Great side dishes include rice, beans, or grilled veggies. You can also serve it with a fresh salad or corn tortillas. These sides balance the flavors and make the meal more filling. Feel free to mix and match based on your taste! In this post, we covered how to select great flank steak and marinate it well. I shared grilling tips and common mistakes to avoid. You also learned about delicious variations and how to store or reheat leftovers. Flank steak is tasty and versatile. Try different marinades or cooking methods for fun. With these tips, you can enjoy making a perfect meal every time. Happy grilling!

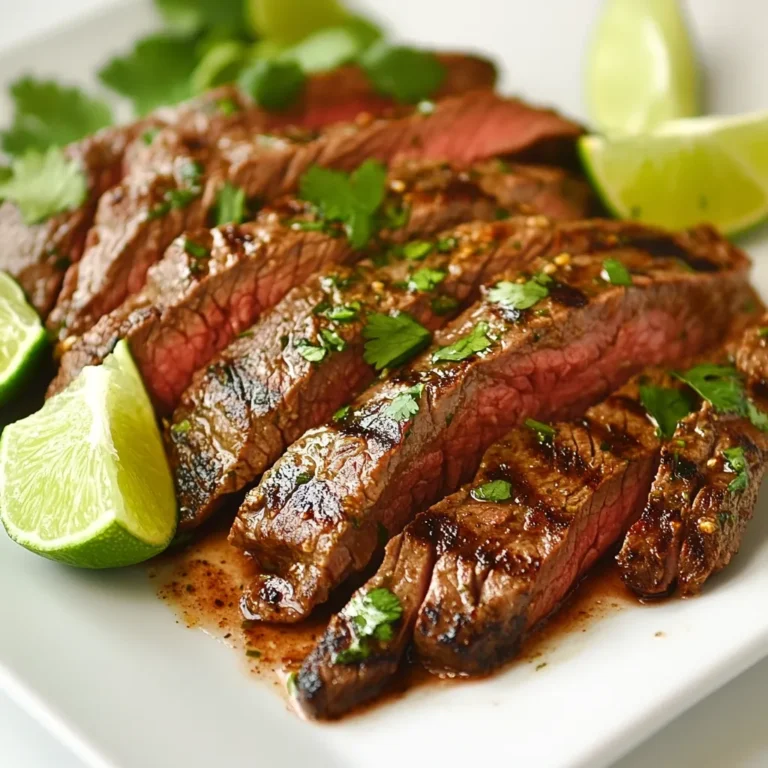
Minute Chili Lime Flank Steak Quick and Tasty Recipe

PREV 1 … 43 44 45 … 56 NEXT
go kitchen now

explore

DessertsDinnerAppetizersDrinks

Our Policies

  • Cookie Policy
  • Copyright Policy
  • Disclaimer
  • GDPR Policy
  • Terms Of Use
Back to Top
  • About
  • Contact Us
  • Privacy Policy
© 2025 go kitchen now