FREE DINNER EBOOK! Get your copy!
  • Cookie Policy
  • GDPR Policy
  • Disclaimer
  • Terms Of Use
  • Visit my other site: Fun Cookie Recipes
go kitchen now
  • Home
  • Dinner
  • Desserts
  • Drinks
  • Appetizers
  • Contact
  • About
  • Privacy Policy
  • Home
  • Dinner
  • Desserts
  • Drinks
  • Appetizers
  • Contact
  • About
  • Privacy Policy
  • Cookie Policy
  • GDPR Policy
  • Disclaimer
  • Terms Of Use
Visit my other site: Fun Cookie Recipes

HOME / CATEGORIES /

Latest

- 1 pound store-bought potato gnocchi - 2 tablespoons olive oil - 1 medium onion, diced - 3 cloves garlic, minced - 1 zucchini, diced - 1 bell pepper (any color), diced - 1 cup cherry tomatoes, halved - 2 cups baby spinach - 1 teaspoon dried Italian herbs (oregano, basil, thyme) - Salt and pepper to taste - ½ cup grated Parmesan cheese (optional) - Fresh basil leaves for garnish Potato gnocchi is the star of this dish. These soft dumplings add a nice texture and taste. Olive oil helps cook the veggies and adds flavor. The onion and garlic create a tasty base for the dish. Zucchini and bell pepper bring color and crunch. Cherry tomatoes add sweetness and juiciness. Baby spinach gives a fresh, green touch. Italian herbs mix well, enhancing all the flavors. Parmesan cheese, if used, adds richness. Fresh basil leaves complete the dish with a burst of flavor. Choose firm zucchini and bell peppers. They should feel heavy for their size. Look for shiny cherry tomatoes with bright color. Fresh spinach should be vibrant, not wilted. When picking herbs, look for bright green leaves. Avoid any with brown spots or wilting. Fresh veggies will make your gnocchi skillet dinner taste amazing! {{ingredient_image_1}} Start by boiling a large pot of salted water. Once it boils, add 1 pound of store-bought potato gnocchi. Let them cook until they float. This means they are done! Drain them and set them aside. In a large skillet, heat 2 tablespoons of olive oil over medium heat. Add 1 medium diced onion and cook for 3-4 minutes. You want it soft and clear. Then, add 3 minced garlic cloves and cook for one more minute. The smell will be great! Next, add 1 diced zucchini and 1 diced bell pepper. Sauté these for about 5-7 minutes until they are soft. Now it’s time to add more color! Toss in 1 cup of halved cherry tomatoes and 2 cups of baby spinach. Cook for 3-4 minutes until the spinach wilts and the tomatoes soften. Gently fold the cooked gnocchi into the skillet with the veggies. Sprinkle in 1 teaspoon of dried Italian herbs, along with salt and pepper to taste. Toss everything carefully. You don’t want to break the gnocchi! If you like cheese, add ½ cup of grated Parmesan on top. Let it melt a bit. Finish by removing from heat and adding fresh basil leaves before serving. Enjoy your delicious meal! To ensure your gnocchi turns out soft and fluffy, follow these steps: - Choose Quality Gnocchi: I recommend store-bought gnocchi for ease. Look for brands that use real potatoes. - Cook in Batches: Do not overcrowd the pot. Cook small batches in boiling water. This helps them cook evenly. - Salt the Water: Add salt to boiling water. It enhances the flavor of the gnocchi. - Watch the Float: Once they float, they are ready! Do not overcook them, or they may become mushy. You can easily boost the flavors in your dish: - Use Fresh Herbs: Fresh basil adds a bright taste. Toss it in right before serving. - Add Heat: A pinch of red pepper flakes gives it a nice kick. Add it to the oil while cooking the onions. - Experiment with Cheese: Besides Parmesan, try feta or goat cheese for a different flavor. - Balance the Flavors: A dash of lemon juice can brighten the dish. Just a little goes a long way. Serving your gnocchi well makes it even more enjoyable: - Plate It Right: Use a large bowl for a family-style presentation. - Garnish Generously: Top with fresh basil leaves and a sprinkle of cheese. - Pair It Up: Serve with a simple side salad. A light vinaigrette complements the dish. - Wine Pairing: A crisp white wine, like Sauvignon Blanc, pairs nicely. It enhances the flavors without overpowering them. These tips will help you create a delightful and satisfying meal with your gnocchi skillet dinner! Pro Tips Use Fresh Ingredients: Fresh vegetables enhance the flavor and nutrition of your dish, so opt for seasonal produce whenever possible. Don't Overcook the Gnocchi: Gnocchi should only be cooked until they float to the surface; overcooking can make them mushy. Add Protein: For a heartier meal, consider adding grilled chicken, shrimp, or tofu to the skillet along with the vegetables. Customize the Herbs: Feel free to experiment with different herbs like fresh rosemary or parsley to give the dish your unique twist. {{image_2}} If you need a gluten-free option, look for gnocchi made from rice or chickpeas. Many stores sell these kinds of gnocchi. They taste great and work well in this recipe. Just follow the cooking instructions on the package. To make this dish vegan, skip the cheese. You can add nutritional yeast for a cheesy flavor. This gives the dish a nice taste without using dairy. You can also replace the olive oil with vegetable broth for sautéing. This keeps it light and healthy. Feel free to mix in other veggies. Broccoli, asparagus, or peas are great choices. You can also try mushrooms for an extra umami kick. Just remember to adjust cooking times, as some veggies cook faster than others. The goal is to keep everything tender and tasty. To store leftovers, first let the dish cool down. Then, put it in an airtight container. You can keep it in the fridge for up to three days. Make sure to cover it well. This helps to keep the flavors fresh and tasty. When you want to reheat your gnocchi skillet dinner, use a skillet on medium heat. Add a splash of olive oil to the pan. This keeps the gnocchi from sticking. Heat for about 5-7 minutes, stirring often. You can also use the microwave. Just cover the dish and heat for 1-2 minutes. Stir and check if it's warm enough. You can freeze this meal if you want to save some for later. First, let it cool completely. Then, put it in a freezer-safe container. It will be good for up to three months. To eat it later, thaw it in the fridge overnight. Then, reheat as described above. Enjoy your easy, tasty meal anytime! Gnocchi is made from potatoes, flour, and sometimes egg. The mixture forms small dumplings. The potatoes give gnocchi a soft, pillowy texture. You can also find gnocchi made with sweet potatoes or even spinach. Yes, you can use homemade gnocchi in this recipe. Just make sure it is cooked properly. Fresh gnocchi cooks quickly, so keep an eye on it. If you make your own, you can adjust the flavors to your liking. You can easily adjust the recipe for picky eaters. Try these simple swaps: - Omit vegetables they don’t like. - Add their favorite veggies, like peas or carrots. - Use a different sauce, like marinara or alfredo. - Swap cheese for a dairy-free option if needed. These changes will help make the meal more appealing to everyone. This blog post covered the essentials of making a great gnocchi skillet dinner. We looked at the key ingredients, how to cook everything step by step, and useful tips for perfection. Remember to choose fresh produce and consider variations like gluten-free or vegan options. Making this dish is simple, fun, and tasty. Enjoy trying new flavors and adapting it to your taste. You’ll impress everyone at your table with this easy recipe. Your cooking will shine!

Pillowy Gnocchi Skillet Dinner Simple and Delicious Meal

- 1 package of puff pastry (2 sheets), thawed - 8 oz Brie cheese, cut into small cubes - 1/2 cup cranberry sauce (homemade or store-bought) - 1/4 cup chopped pecans (optional) - 1 egg, beaten (for egg wash) - Fresh thyme leaves for garnish - Salt and pepper to taste Puff pastry gives these bites a light and flaky feel. If you can't find puff pastry, you can use phyllo dough instead. This will change the texture slightly, but it still tastes great. For the cheese, Brie is rich and creamy. You can swap it for Camembert if you prefer. If you want a sweeter bite, use a fruit spread instead of cranberry sauce. You can also leave out the pecans if you're nut-free or prefer a smoother texture. Fresh thyme adds a nice touch, but dried thyme works too if that's what you have. You will need a few tools to make these bites. First, grab a baking sheet and line it with parchment paper. This helps with easy cleanup. You will also need a rolling pin to roll out the puff pastry. A knife is key for cutting the pastry into squares and cutting the Brie. Lastly, a pastry brush helps apply the egg wash for a lovely golden finish. Having these tools ready will make your cooking experience smooth and fun! {{ingredient_image_1}} Start by preheating your oven to 400°F (200°C). This ensures even cooking. Next, line your baking sheet with parchment paper. This makes for easy cleanup and prevents sticking. Take the thawed puff pastry and roll it out on a floured surface. Cut it into 3-inch squares. You should have about 12 squares. Place one square on the lined baking sheet. In the center of each square, add a cube of Brie cheese. Follow that with a spoonful of cranberry sauce. If you want some crunch, sprinkle chopped pecans on top. Now fold the corners of the pastry over the filling. Pinch them together to form a pouch. Make sure some filling stays visible on top for a nice look. Brush the tops of each pastry with the beaten egg. This gives them a beautiful golden color. Finally, sprinkle a little salt and pepper for added flavor. Place the baking sheet in the preheated oven. Bake the bites for 15 to 18 minutes. They are done when they look puffed and golden brown. When they come out of the oven, let them cool for a few minutes. Garnish with fresh thyme leaves before serving. The best temperature for baking your bites is 400°F (200°C). This heat helps the pastry puff up nicely. Bake them for 15 to 18 minutes. Keep an eye on them. You want a golden color on top. If they brown too fast, lower the heat a bit. To avoid soggy pastry, do not use too much cranberry sauce. A spoonful is enough. Make sure to leave some filling visible on top. This helps the steam escape. Also, brush the bites with beaten egg. This will create a barrier and keep the pastry crisp. Lightly season your bites with salt and pepper. This brings out the flavor of the Brie. You can also add fresh thyme leaves. They add a nice herbal note. If you like nuts, sprinkle chopped pecans on top. They add crunch and a nutty flavor. Pro Tips Choose the Right Brie: Use a high-quality Brie cheese for a creamier texture and richer flavor, enhancing the overall taste of your bites. Customize the Filling: Feel free to experiment with other fillings like fig jam or apple butter for a unique twist on traditional flavors. Perfect Puff Pastry: Ensure your puff pastry is cold before baking to achieve maximum puffiness and flakiness during cooking. Garnish Wisely: Fresh herbs like thyme or rosemary not only add flavor but also a beautiful presentation—don't skip this step! {{image_2}} You can swap brie for other cheeses. Goat cheese adds a tangy taste. Cream cheese gives a smooth texture. Cheddar brings sharpness and pairs well with cranberry. Experiment with your favorites. Each cheese offers a new flavor twist. Adding ingredients can change the flavor profile. Consider using caramelized onions for a savory punch. Apples or pears can bring sweetness. A drizzle of honey adds extra richness. For a spicy kick, try jalapeños or a dash of hot sauce. Mix and match to find your favorite combo. You can make this recipe gluten-free easily. Use gluten-free puff pastry instead of regular. For a vegan option, choose a plant-based cheese. Use a mix of almond or coconut cream for a creamy texture. These swaps let everyone enjoy this tasty treat! To store your leftover baked cranberry brie bites, let them cool first. Place them in an airtight container. You can keep them in the fridge for up to three days. Make sure to layer them with parchment paper to prevent sticking. To reheat the bites, preheat your oven to 350°F (175°C). Place the bites on a baking sheet. Bake for about 10 minutes, or until they feel warm and crispy. This keeps the pastry nice and flaky. Avoid microwaving, as it can make the pastry soggy. You can freeze these bites before baking. Assemble them as per the recipe but do not bake. Place them on a baking sheet and freeze until solid. Then, transfer them to a freezer bag. They can stay in the freezer for up to a month. When you’re ready to enjoy, bake them straight from the freezer. Just add a few extra minutes to the baking time. Yes, you can make these bites ahead of time. Assemble them and place them on a baking tray. Cover the tray with plastic wrap and store it in the fridge. You can bake them later when you need a quick snack. Just remember to add a few extra minutes to the baking time if they are cold. You can use other soft cheeses if you don’t have brie. Cream cheese works well and gives a nice texture. Goat cheese is another tasty option and adds a tangy flavor. You can even try camembert for a similar taste. These bites will last for about 3 days in the fridge. Wrap them tightly to keep them fresh. If you want them to last longer, consider freezing them. Just remember to reheat them in the oven for the best taste. You now know how to make delicious baked cranberry brie bites. We covered ingredients, tools, and step-by-step instructions. You learned tips to avoid soggy pastry and how to enhance flavor. Variations let you explore different cheeses and add-ins. Plus, storing and reheating tips keep your bites fresh. Try making these bites for your next gathering. They’re simple and sure to impress. Enjoy your cooking adventure!

Baked Cranberry Brie Bites Easy and Delicious Snack

For this Lemon Chicken Orzo, you need a few main items: - 1 lb boneless, skinless chicken breasts, cut into bite-sized pieces - 1 cup orzo pasta - 4 cups chicken broth (low sodium) - 1 cup spinach, chopped These ingredients form the heart of the dish. Chicken adds protein, while orzo gives a nice texture. Spinach adds color and nutrients. Next, let's boost the flavor: - 1 medium onion, finely chopped - 3 garlic cloves, minced - 1 lemon (zested and juiced) - 1 teaspoon dried oregano Onion and garlic create a strong base. Lemon adds a bright taste, while oregano gives an earthy touch. Together, they make each bite pop. Finally, we need some seasoning and garnish: - 2 tablespoons olive oil - Salt and pepper to taste - Fresh herbs for garnish (parsley or basil) Olive oil helps with cooking and adds richness. Salt and pepper enhance all the flavors. Fresh herbs on top make the dish look pretty and fresh. Gather these ingredients, and you're ready to make a tasty meal! {{ingredient_image_1}} To start, gather your ingredients. Cut the chicken into bite-sized pieces. This helps it cook evenly and quickly. Next, finely chop the onion. Mince the garlic cloves. Halve the cherry tomatoes and chop the spinach. Zest and juice the lemon. Fresh lemon gives the dish a bright taste. Make sure to have everything ready before you cook. Heat olive oil in a large pot over medium heat. Add the chopped onion and sauté for about 3-4 minutes. You want it to be soft and clear. Next, stir in the minced garlic for one minute. This makes your kitchen smell amazing. Now, raise the heat to medium-high. Add the chicken pieces. Season them with salt, pepper, and dried oregano. Cook until the chicken turns brown on all sides, which takes about 5-6 minutes. Pour in the chicken broth and add the orzo pasta and lemon juice. Bring this mix to a gentle boil. After that, lower the heat to low. Cover the pot and let it simmer for 10-12 minutes. This lets the orzo cook and soak up the broth. After the orzo is tender, add the cherry tomatoes and chopped spinach. Stir everything together and cook for an extra 2-3 minutes. You want the spinach to wilt nicely. Take the pot off the heat. Stir in the lemon zest for added flavor. Taste your dish and adjust the seasoning with more salt and pepper if needed. Let your Lemon Chicken Orzo rest for a few minutes. This helps the flavors meld together. Serve it in bowls, and garnish with fresh herbs. A lemon wedge on the side adds a nice touch. Enjoy your flavorful meal! To brown chicken well, use medium-high heat. This helps to seal in the juices. Cut the chicken into small, even pieces. This way, they cook quickly and evenly. Add salt and pepper before cooking. It adds flavor right away. For cooking orzo, use plenty of broth. This keeps the pasta moist and tasty. Stir the orzo as it cooks. This prevents it from sticking to the pot. You can change up the seasonings for new tastes. Try adding fresh herbs like thyme or dill. They add a fresh twist. If you like some heat, add a pinch of red pepper flakes. For a richer flavor, use garlic powder or onion powder. You can also mix in some grated Parmesan cheese. This gives a creamy texture and extra flavor. To serve Lemon Chicken Orzo beautifully, use deep bowls. This keeps the dish warm and looks nice. Sprinkle fresh herbs on top. This adds color and a fresh aroma. A lemon wedge on the side makes it pop. You can also drizzle a little olive oil for shine. These small touches make your dish look professional and inviting. Pro Tips Choose the Right Chicken: Opt for organic, free-range chicken for a more flavorful and tender result. Cook Orzo Al Dente: Be careful not to overcook the orzo; it should be tender but still firm to the bite for the best texture. Fresh Herbs for Flavor: Using fresh herbs like parsley or basil as a garnish not only adds a pop of color but also enhances the overall flavor profile of the dish. Adjust Lemon to Taste: Feel free to adjust the amount of lemon juice and zest according to your preference for brightness; it can really elevate the dish. {{image_2}} You can change the protein in this dish. Instead of chicken, try shrimp or turkey. For a vegan option, use chickpeas or tofu. Each swap brings a new taste and texture. Adjust cooking times as needed, especially with shrimp, which cooks fast. If you can’t find orzo, use other pasta shapes like ditalini or small shells. You can also try grains like quinoa or farro. These choices change the bite and feel of the dish while keeping it hearty and filling. To mix up the flavor, add different herbs or spices. Fresh basil or dill gives a nice twist. For heat, try red pepper flakes or a bit of smoked paprika. Adding these new flavors can make the dish feel fresh and exciting every time you make it. To store leftovers, place Lemon Chicken Orzo in an airtight container. This keeps it fresh and tasty. You can refrigerate it for up to 3 days. Make sure it cools down to room temperature before sealing. This helps avoid condensation, which can make the dish soggy. You can freeze Lemon Chicken Orzo for longer storage. Use a freezer-safe container or a heavy-duty freezer bag. Squeeze out as much air as possible. This helps prevent freezer burn. It can last up to 2 months in the freezer. When ready to enjoy, let it thaw overnight in the fridge before reheating. To reheat, you have a few options. You can use the microwave, stove, or oven. For the microwave, place the dish in a bowl and cover it. Heat in short bursts, stirring in between. On the stove, add a splash of broth or water in a pot. Heat over low until warm. If using the oven, cover with foil and bake at 350°F until heated through. Always stir well before serving to mix flavors. Yes, you can make Lemon Chicken Orzo ahead of time. This dish stores well in the fridge. Just let it cool down first. Place it in an airtight container. It will stay fresh for about three days. When you are ready to eat, reheat it on the stove or in the microwave. Add a splash of broth to keep it moist. Lemon Chicken Orzo is a complete meal, but sides can enhance your dinner. Here are some great ideas: - Green Salad: A fresh green salad with lemon vinaigrette adds crunch. - Roasted Vegetables: Carrots, zucchini, or asparagus roasted with olive oil pair well. - Crusty Bread: A slice of crusty bread is perfect for soaking up the broth. You can tell when orzo is cooked by its texture. It should be soft but still firm, often called "al dente." To check, taste a piece. If it is chewy and not mushy, it is perfect. Cooking usually takes about 10-12 minutes in simmering broth. Keep an eye on it during the last few minutes to avoid overcooking. This blog post shows you how to make Lemon Chicken Orzo. We explored key ingredients like chicken, orzo, and fresh herbs. You learned the cooking steps and valuable tips to boost flavor and presentation. There are many ways to alter the recipe too, such as different proteins or pastas. In summary, this dish is easy, flexible, and perfect for any meal. Enjoy your cooking journey and savor every bite!

Lemon Chicken Orzo Flavorful and Simple Recipe

For this tasty weeknight meal, we start with the main star: chicken. Use four boneless, skinless chicken breasts. They are easy to cook and soak up flavors well. To season the chicken, we need some spices to give it a kick. You will need: - 1 teaspoon garlic powder - 1 teaspoon cumin - ½ teaspoon smoked paprika - Salt and pepper to taste These spices add depth and warmth to the dish. The garlic powder brings out a savory taste, while cumin adds earthiness. Smoked paprika gives a subtle smokiness that pairs well with the chicken. Next, we’ll use salsa verde to create a fresh and zesty flavor. You’ll need one cup of salsa verde. It is bright and tangy, making the chicken shine. To top it off, we’ll add cheese for creaminess. Grab one cup of shredded Pepper Jack cheese. This cheese melts nicely and adds a bit of spice. It brings everything together in a delightful way. Garnishes elevate your dish and make it look stunning. For this recipe, fresh cilantro is a great choice. Chop some and sprinkle it on top for a burst of color and flavor. You can also serve lime wedges on the side. A squeeze of lime juice adds a refreshing zing to each bite. These simple touches make your Salsa Verde Pepper Jack Chicken even more enjoyable. {{ingredient_image_1}} Start by preheating your oven to 375°F (190°C). This step warms up the oven for even cooking. While it heats, grab four boneless, skinless chicken breasts. Season them with garlic powder, cumin, smoked paprika, salt, and pepper. Use your hands to rub the spices into the chicken for full flavor. Next, heat one tablespoon of olive oil in a large skillet over medium heat. Once hot, place the seasoned chicken in the skillet. Sear each side for about 4-5 minutes. Look for a golden brown color but don't cook it through yet. This step adds flavor and keeps the chicken juicy. After searing, remove the chicken from the skillet and place it in a baking dish. Pour one cup of salsa verde evenly over the chicken breasts. Make sure each piece is well coated. Then, sprinkle one cup of shredded Pepper Jack cheese over the top. Cover the baking dish with aluminum foil and place it in the preheated oven. Bake for 20-25 minutes, or until the chicken reaches an internal temperature of 165°F (75°C). After that, remove the foil and bake for another 5 minutes. This helps the cheese melt and brown slightly. Once done, take the dish out of the oven and let the chicken rest for a few minutes. Finish by garnishing with chopped cilantro and serve with lime wedges. Enjoy your flavorful and cheesy meal! To get the best chicken, start by seasoning it well. I like to use garlic powder, cumin, and smoked paprika. These spices add great flavor. Searing the chicken is key. Cook each side for 4-5 minutes until golden brown. This locks in juices and taste. After searing, bake the chicken in the oven. Bake it at 375°F (190°C) until it reaches 165°F (75°C). This ensures the chicken cooks evenly and stays tender. For a perfect cheese melt, use shredded Pepper Jack cheese. Shredded cheese melts faster and more evenly. After baking the chicken, remove the foil for the last 5 minutes. This helps the cheese brown nicely. Keep an eye on it. You want the cheese to be bubbly and slightly golden, not burnt. If it melts too fast, lower the oven temperature. Presentation matters! I suggest garnishing with fresh cilantro. It adds color and a fresh taste. Serve the chicken on a large platter for a family meal or on individual plates for guests. Drizzle extra salsa verde over the top for a pop of color. Lime wedges are great on the side; they add a zing when squeezed over the chicken. This simple step makes your dish look and taste amazing! Pro Tips Use Fresh Ingredients: Fresh chicken and high-quality salsa verde will enhance the flavor of your dish significantly. Let it Rest: Allowing the chicken to rest after baking helps retain its juices, making it more tender and flavorful. Experiment with Toppings: Feel free to add sliced jalapeños or olives on top before baking for an extra kick. Serve with Sides: Pairing this dish with a side of black beans or corn salad can create a well-rounded meal. {{image_2}} You can easily adapt this recipe to fit various diets. For a low-carb option, use cauliflower rice instead of regular rice. If you're dairy-free, try using a plant-based cheese that melts well. You can also swap chicken for tofu or tempeh for a vegetarian twist. This keeps the dish tasty while meeting different dietary needs. Boost the flavor with fresh ingredients. Add chopped jalapeños for extra heat. You can also mix in some lime juice for a fresh zing. For a smoky touch, consider adding chipotle peppers in adobo sauce. If you like it sweet, try a dash of honey or agave syrup to balance the heat from the salsa verde. Serving sides can enhance your meal. A fresh salad with avocado and lime pairs well with the chicken. You might also enjoy black beans and corn for a hearty option. If you're looking for something warm, serve it with fluffy rice or quinoa. These sides add flavor and texture, making your meal complete. After you enjoy your Salsa Verde Pepper Jack Chicken, you can store leftovers easily. Place the chicken in an airtight container. Make sure to cover it well. It stays fresh in the fridge for up to three days. If you want to keep it longer, freezing is a great option. When you’re ready to eat your leftovers, reheat them well. You can use the oven or a microwave. For the oven, preheat it to 350°F (175°C). Place the chicken in a baking dish and cover it with foil. Heat for about 15-20 minutes. If using a microwave, heat for 1-2 minutes, checking often. Make sure the chicken is hot throughout before serving. To freeze your Salsa Verde Pepper Jack Chicken, wrap it tightly in plastic wrap. Then, place it in a freezer-safe bag. This keeps out air and prevents freezer burn. It can last in the freezer for up to three months. When you want to eat it, thaw it in the fridge overnight. Then, follow the reheating instructions for a tasty meal. You can serve this chicken with many tasty sides. Rice is a great choice. It soaks up the salsa verde well. A fresh salad adds a nice crunch. You could also add some black beans for extra protein. Tortillas make a fun option, too. Just wrap the chicken in a tortilla for a delicious taco. For a zesty touch, squeeze some lime over the dish. Yes, you can use other cheeses if you like. Monterey Jack works great if you want a milder flavor. Cheddar cheese adds a sharper taste. If you want something bold, try using a spicy cheese like habanero jack. Just remember to keep the cheese meltable. It should melt well over the chicken. Check the chicken's internal temperature. It should reach 165°F (75°C) to be safe. You can use a meat thermometer for this. If you cut into the chicken, the juices should run clear, not pink. This means it is done. Let it rest for a few minutes after cooking. This helps keep it juicy. This blog post covered all you need for Salsa Verde Pepper Jack Chicken. We explored vital ingredients like chicken, spices, and garnishes. You learned step-by-step instructions on preparing and baking the dish. I shared tips for perfect chicken texture and melting cheese. You saw variations for diets and flavors, plus storage info for leftovers. Now, it’s time to enjoy your tasty creation. Take the recipes and make them your own. Happy cooking!

Salsa Verde Pepper Jack Chicken Tasty Weeknight Meal

- 4 bone-in chicken thighs, skin-on - 1 cup cherry tomatoes, halved - 1 medium red onion, sliced - 1 cup kalamata olives, pitted and halved - 2 bell peppers (1 red, 1 yellow), sliced The main ingredients in this dish create a colorful and tasty meal. The bone-in chicken thighs give you juicy meat and crispy skin. Cherry tomatoes add sweetness and a burst of flavor. The red onion brings a slight sharpness, while the bell peppers and olives add crunch and saltiness. - 2 tablespoons olive oil - Zest and juice of 1 lemon - 1 tablespoon dried oregano - 1 teaspoon paprika - ½ teaspoon salt - ½ teaspoon black pepper - ¼ cup feta cheese, crumbled For seasoning, olive oil and lemon juice keep things fresh and zesty. Dried oregano and paprika add depth to the dish. Salt and black pepper enhance all the flavors. Finally, the feta cheese on top provides a creamy, tangy finish. - Fresh parsley, chopped for garnish When serving, sprinkle fresh parsley on top. It adds a nice pop of color and freshness. You can pair this dish with crusty bread or a simple salad for a full meal. This dish shines on its own, but those sides can elevate your dining experience. {{ingredient_image_1}} 1. Preheating the oven First, set your oven to 400°F (200°C). This helps the chicken cook evenly and become crispy. 2. Preparing the vegetable mixture Grab a large mixing bowl. Add 1 cup of halved cherry tomatoes, 1 medium sliced red onion, and 1 cup of halved kalamata olives. Next, slice 2 bell peppers, one red and one yellow, and add them to the bowl. Finally, mince 4 cloves of garlic and toss them in. Drizzle 2 tablespoons of olive oil and the juice of 1 lemon over the veggies. Then, sprinkle in 1 tablespoon of dried oregano, 1 teaspoon of paprika, ½ teaspoon of salt, and ½ teaspoon of black pepper. Mix everything well, so all the flavors blend together. 1. Arranging chicken in the baking dish Take 4 bone-in chicken thighs and place them skin side up in a large baking dish. Pour the colorful vegetable mixture around the chicken. This way, the chicken absorbs all the tasty juices while cooking. 2. Baking and achieving crispiness Sprinkle lemon zest over the chicken and the veggies. Bake everything in the preheated oven for about 40-45 minutes. Check that the chicken reaches an internal temperature of 165°F (75°C). The skin should be golden and crispy, adding a nice crunch to each bite. 1. Adding feta cheese Once your dish is done baking, take it out of the oven. Sprinkle ¼ cup of crumbled feta cheese over the top. The cheese adds a creamy, tangy flavor that pairs perfectly with the chicken and veggies. 2. Resting before serving Let the dish rest for 5 minutes. This allows the juices to settle, making the chicken juicier. Before serving, garnish with fresh chopped parsley for a burst of color and taste. Serve warm and enjoy this delightful meal! - Achieving crispy chicken skin: Start with bone-in chicken thighs. The skin helps keep the meat moist while it cooks. Pat the skin dry with a paper towel. This helps it crisp up. When you bake, place the chicken skin side up. Bake it at 400°F for about 40-45 minutes. This high heat makes the skin nice and crispy. - Perfect seasoning balances: Use a mix of salt, pepper, and spices. I like dried oregano and paprika. These add great flavor. Don’t forget the lemon juice! It brightens up the dish. Be sure to coat the chicken and veggies well. A good mix makes every bite tasty. - Best sides to pair: Serve this dish with rice or crusty bread. Both soak up the tasty juices. A fresh salad adds a nice crunch. Try a simple cucumber and tomato salad. The freshness complements the bake well. - Garnishing tips for presentation: After baking, sprinkle crumbled feta cheese over the top. It adds a creamy texture. Fresh parsley makes it look vibrant. Chop it finely and scatter it over the dish. This makes it inviting and bright. - Prepping ahead of time: You can prepare the veggies and chicken earlier. Mix the veggies in the bowl and cover them. Marinate the chicken with spices overnight. This makes the flavors stronger. When you are ready, just bake it. - Quick reheat tips: If you have leftovers, reheat them in the oven. Set it to 350°F and cover the dish. This keeps the chicken moist. You can also microwave it, but it may not be as crispy. If you use the microwave, heat it in short bursts. Check often to avoid overcooking. Pro Tips Use Fresh Ingredients: Whenever possible, opt for fresh vegetables and herbs to enhance the flavor of your dish. Fresh ingredients can make a significant difference in taste. Chicken Skin Crispiness: For extra crispy skin, broil the chicken for the last 5 minutes of cooking. Keep an eye on it to prevent burning. Flavor Pairing: Experiment with different types of olives or add capers for additional flavor dimensions. Each variation can provide a unique twist to the dish. Resting Time: Allowing the dish to rest for a few minutes before serving helps the juices redistribute in the chicken, making it more tender and flavorful. {{image_2}} You can swap out the vegetables in this dish. Try zucchini, asparagus, or even eggplant. Each change adds a unique taste. For a twist on cheese, use goat cheese or mozzarella. Each option melts nicely and gives a different flavor. Want a bit of heat? Add red pepper flakes or cayenne pepper. These spices can wake up the dish. Marinating the chicken is another great idea. Use yogurt or lemon juice with herbs for added flavor. This step makes the chicken juicy and tasty. If you need gluten-free options, this dish is easy to adapt. The main ingredients are naturally gluten-free. For a dairy-free version, skip the feta cheese. Use nutritional yeast for a cheesy taste without dairy. If you are low-carb, focus on more veggies. Cut back on the olives and keep the chicken and peppers. This change still keeps it flavorful. To keep your Mediterranean chicken bake fresh, store leftovers in an airtight container. This will prevent moisture loss and keep flavors intact. Place the dish in the fridge within two hours of cooking. For freezing, wrap the chicken tightly in plastic wrap, then in aluminum foil. This method helps prevent freezer burn. You can also use freezer-safe bags, but remove as much air as you can. When reheating, keep the chicken moist by using the oven. Preheat your oven to 350°F (175°C). Place the chicken in a baking dish and cover it with foil. Heat for about 20-25 minutes. If using a microwave, use a microwave-safe plate. Cover the chicken with a damp paper towel to trap moisture. Heat in short bursts, checking often to avoid dry chicken. In the fridge, your Mediterranean chicken bake lasts about 3-4 days. Check for signs of spoilage, like off smells or a slimy texture. If you see any, it’s best to toss it out. When frozen, it can last up to 3 months. Always label containers with the date, so you know when to use them. Can I use boneless chicken thighs? Yes, you can use boneless chicken thighs. They will cook faster. Adjust the baking time to about 30-35 minutes. Check for an internal temperature of 165°F (75°C) to ensure they are safe to eat. What can I substitute for kalamata olives? If you don’t have kalamata olives, use green olives instead. They add a nice briny flavor. You can also try artichoke hearts for a unique twist. Why is my chicken not crispy? If your chicken is not crispy, it might be due to moisture. Ensure the skin is dry before baking. Bake on a wire rack for better airflow. You can also broil for a few minutes at the end for extra crispiness. What to do if it’s overcooked? If your chicken is overcooked, it may become dry. Serve it with a sauce or broth to add moisture. You can shred it and mix it into salads or wraps for a tasty solution. Approximate calories per serving This dish has about 400 calories per serving. It offers a hearty meal without too many calories. Breakdown of macronutrients Each serving contains roughly: - Protein: 30g - Carbohydrates: 15g - Fat: 25g This meal is balanced and provides good nutrition while being delicious. This recipe gives you a simple way to create a tasty dish. You learned about the main ingredients, step-by-step cooking, and helpful tips. Remember, crispy chicken and fresh flavors make every meal better. Don't forget the variations to switch things up based on what you have. Store leftovers right to keep them fresh longer. With these pointers, you can cook with ease and confidence. Enjoy your delicious meal and share it with friends!

Mediterranean Chicken Bake Flavorful and Easy Dish

To make Honey Garlic Shrimp Bowls, you need the following main ingredients: - 1 pound shrimp, peeled and deveined - 2 tablespoons honey - 3 tablespoons soy sauce - 3 cloves garlic, minced - 1 tablespoon fresh ginger, grated - 1 tablespoon sesame oil - 1 cup jasmine rice - 2 cups water or broth (for cooking rice) - 1 cup broccoli florets - 1 red bell pepper, sliced - 1 carrot, julienned These ingredients come together to create a sweet and savory meal. The shrimp adds protein, while the veggies give you color and crunch. For a finishing touch, consider these garnishes: - 2 green onions, sliced - Sesame seeds These garnishes not only enhance the look of your dish but also add fresh flavor. You can adjust the flavor with these optional seasonings: - Salt and pepper to taste Using these seasonings allows you to create the perfect balance of taste for your Honey Garlic Shrimp Bowls. Feel free to experiment to match your taste! {{ingredient_image_1}} Start by measuring 1 cup of jasmine rice. Rinse it under cool water until the water runs clear. This step removes excess starch and keeps the rice fluffy. In a saucepan, add the rinsed rice and 2 cups of water or broth. Bring it to a boil over high heat. Once boiling, lower the heat and cover the pot. Let it simmer for about 15 minutes. After that, take it off the heat and let it sit for 5 more minutes. Fluff the rice with a fork before serving. In a small bowl, combine 2 tablespoons of honey, 3 tablespoons of soy sauce, 3 minced cloves of garlic, and 1 tablespoon of grated ginger. Whisk these together until smooth. This sauce adds a sweet and savory flavor to the shrimp. Set it aside for now, as we will use it later. Heat 1 tablespoon of sesame oil in a large skillet or wok over medium heat. Add 1 cup of broccoli florets, 1 sliced red bell pepper, and 1 julienned carrot. Sauté these vegetables for about 5 to 7 minutes. You want them tender but still crisp. Lightly season them with salt and pepper. Once cooked, remove the veggies from the skillet and set them aside. In the same skillet, add 1 pound of peeled and deveined shrimp. Cook them for 2 to 3 minutes on each side. The shrimp should turn pink and opaque when done. Be careful not to overcook them, as they can become tough. Once cooked, they are ready for the sauce. Pour the honey garlic sauce over the shrimp in the skillet. Stir well to coat the shrimp evenly. Cook for another minute until the sauce thickens slightly. This will enhance the flavor of the shrimp and give it a nice glaze. Now, it’s time to build your bowls. Start with a layer of fluffy jasmine rice at the bottom of each bowl. Next, add the sautéed vegetables on top of the rice. Finally, spoon the honey garlic shrimp over the veggies. This layering creates a colorful and tasty dish. To finish, sprinkle sliced green onions and sesame seeds on top of each bowl. These garnishes add a nice crunch and a pop of color. Serve your Honey Garlic Shrimp Bowls hot and enjoy every bite! When cooking shrimp, freshness is key. Look for shrimp that smell like the ocean, not fishy. Always peel and devein them before cooking. This makes eating easier and tastier. Cook shrimp in a hot skillet. This helps them brown and keeps them juicy. Don’t overcrowd the pan. This can cause them to steam instead of sear. Aim to cook them for about 2-3 minutes per side. They are done when they turn pink and opaque. To make fluffy jasmine rice, rinse it first. Rinsing removes extra starch and keeps it from being gummy. Use a 1:2 ratio of rice to water or broth. This ensures it cooks evenly. Bring the water to a boil, then cover and reduce heat. Let it simmer for about 15 minutes. After cooking, let it sit covered for 5 more minutes. Fluff it with a fork to separate the grains. If you want a lower-carb option, swap rice for cauliflower rice. You can also use quinoa for a protein boost. For a vegan version, replace shrimp with tofu or chickpeas. Feel free to add more veggies too! Snow peas, zucchini, or bell peppers add color and crunch. Adjust the honey for sweetness to suit your taste. Pro Tips Use Fresh Ingredients: Always opt for fresh shrimp and vegetables to enhance the overall flavor and texture of your dish. Don't Overcook the Shrimp: Cook the shrimp just until they turn pink and opaque; overcooking can make them rubbery. Customize Your Veggies: Feel free to swap in your favorite vegetables or whatever you have on hand to make the dish your own. Let the Sauce Thicken: Allow the honey garlic sauce to simmer a little longer for a thicker, more flavorful coating on the shrimp. {{image_2}} You can swap jasmine rice for quinoa. Quinoa adds protein and fiber. Use 1 cup of quinoa instead of rice. Cook it with 2 cups of water or broth. Quinoa cooks in about 15 minutes. Fluff it just like rice. This change makes the dish even healthier. Feel free to add more veggies to your bowls! You can use snap peas, zucchini, or bell peppers. Just chop them up and sauté them with the other veggies. Adding extra vegetables boosts the flavor and nutrients. Try mixing colors for a beautiful dish. If you like heat, add chili flakes or sriracha. Mix a teaspoon of chili flakes into the honey garlic sauce. This will give your shrimp a spicy kick. You can also add jalapeños to the vegetables. Adjust the spice level to your taste. Enjoy your spicy twist! To keep your Honey Garlic Shrimp Bowls fresh, first let them cool down. Then, place the shrimp, rice, and veggies in airtight containers. Store them in the fridge for up to three days. This way, you can enjoy a tasty meal later! When you are ready to eat your leftovers, reheat them gently. You can use a microwave or a skillet. If using a microwave, heat in short intervals, stirring in between. If using a skillet, add a splash of water to keep it moist. Heat until warm, but don’t overcook! You can freeze these bowls for longer storage. Place the shrimp, rice, and veggies in freezer bags or containers. Make sure to remove as much air as possible. They can last for up to three months in the freezer. When ready to eat, thaw in the fridge overnight before reheating. If you want to swap shrimp, try chicken or tofu. Both can soak up the honey garlic sauce well. Cook the chicken until it’s no longer pink. For tofu, use firm tofu and press it to remove extra water. Cut it into cubes and sauté until golden. Yes, you can prep some parts ahead. Cook the rice and veggies beforehand. Store them in the fridge. When ready to eat, just heat them up and add the shrimp and sauce. This saves time! The recipe is not gluten-free due to soy sauce. To make it gluten-free, use tamari instead of soy sauce. This keeps the flavor while making it safe for gluten-sensitive eaters. Add red pepper flakes or sriracha for heat. You can mix these into the honey garlic sauce. If you love spice, try using spicy shrimp or add sliced jalapeños when cooking the veggies. Enjoy the kick! Honey garlic shrimp bowls are easy and tasty. We covered the main ingredients, garnishes, and seasonings. I shared steps for cooking jasmine rice, shrimp, and veggies. Tips helped ensure your shrimp and rice turn out great every time. You can even switch up the recipe with quinoa or add more veggies. Storing leftovers is simple, and I answered common questions for you. Enjoy making these bowls with your own twist. Now, grab your ingredients and cook something delicious!

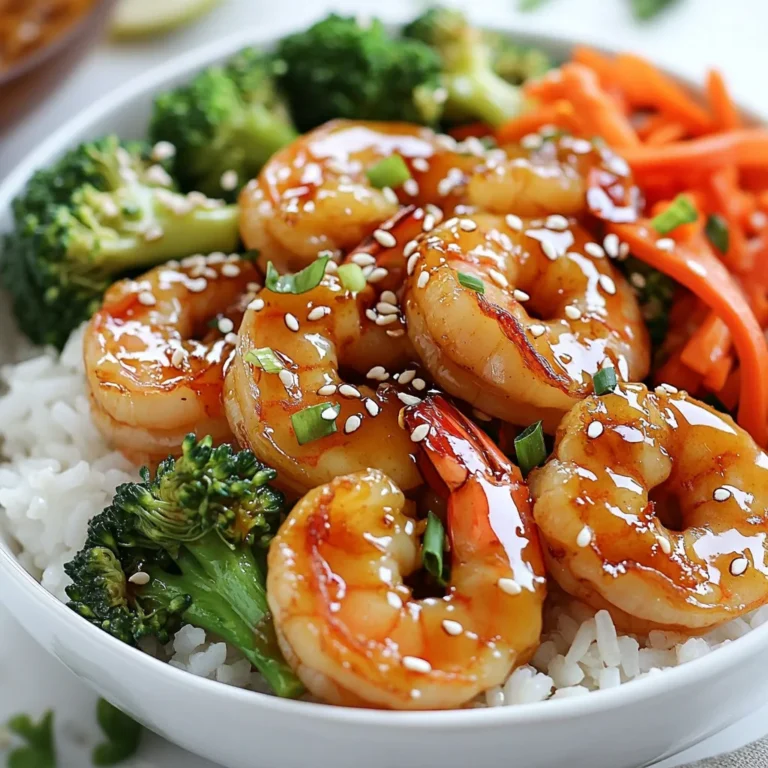
Honey Garlic Shrimp Bowls Flavorful Easy Dinner Idea

To make easy buffalo chicken dip, you need: - 2 cups cooked chicken, shredded - 1/2 cup cream cheese, softened - 1/2 cup Greek yogurt - 1/2 cup buffalo sauce - 1 cup shredded cheddar cheese - 1/4 cup chopped green onions - Salt and pepper to taste - Tortilla chips or celery sticks for serving When measuring ingredients, use dry measuring cups for solids. For liquids, use a liquid measuring cup. Always pack cream cheese lightly in the cup. This ensures you get the right amount. For shredded chicken, I suggest using leftovers. It saves time and adds flavor. You can swap Greek yogurt for sour cream if you prefer. If you want less spice, use a milder sauce. You can also replace cheddar with mozzarella for a different taste. For a vegetarian option, use jackfruit instead of chicken. {{ingredient_image_1}} 1. First, preheat your oven to 350°F (175°C). This warms the oven for baking. 2. Grab a large mixing bowl. Add the softened cream cheese and Greek yogurt. 3. Mix them together until smooth. You want a creamy base for your dip. 4. Next, stir in the buffalo sauce. Blend it well with the cream cheese mix. 5. Now, add the shredded chicken into the bowl. This gives the dip its main flavor. 6. Sprinkle in the shredded cheddar cheese and half of the chopped green onions. 7. Mix everything together until you see no more dry spots. It should look creamy and tasty. 8. Season with salt and pepper. Taste it to check if it needs more flavor. 9. Transfer the dip mixture into a baking dish. Spread it out evenly in the dish. 10. Bake in your preheated oven for 20-25 minutes. Look for bubbly edges and a golden top. 11. Once it’s done, take it out of the oven. Let it cool for a minute. 12. Garnish with the rest of the chopped green onions on top. This adds a fresh look. 13. Serve warm with tortilla chips or celery sticks. Enjoy your delicious Buffalo Chicken Dip! Serve your Buffalo chicken dip warm. I love to pair it with tortilla chips. Crispy celery sticks also work great. You can place them around the dip for a pretty look. This adds color and crunch. Want to spice it up? Add extra buffalo sauce for more heat. You can also mix in some ranch dressing for a creamy twist. If you like blue cheese, sprinkle some on top. This gives a bold flavor that many enjoy. Fresh herbs like cilantro can also brighten the dip. Don’t skip softening the cream cheese. It makes mixing easier. If you rush this step, your dip might be lumpy. Also, be careful with salt. Taste as you go to avoid over-seasoning. Lastly, don’t skip the baking. It helps meld all the flavors together. Pro Tips Use Leftover Chicken: Utilizing leftover rotisserie chicken can save time and add great flavor to your dish. Adjust the Heat: Modify the amount of buffalo sauce to your taste; for a milder dip, use less sauce or a milder variety. Cheese Variations: Experiment with different cheeses such as pepper jack for an extra kick or mozzarella for a milder flavor. Serving Suggestions: Pair the dip with a variety of sides like carrot sticks, bell pepper strips, and pita chips for a colorful platter. {{image_2}} If you love heat, try adding more buffalo sauce. You can also mix in diced jalapeños for extra spice. For a smoky flavor, add some chipotle powder. This twist brings a different kick to the classic dip. Want a veggie version? Use shredded jackfruit instead of chicken. It mimics the texture well. Replace buffalo sauce with a spicy vegan sauce. Use vegan cream cheese and yogurt for a dairy-free option. This way, everyone can enjoy the dip. You can mix in different cheeses for a new taste. Try adding pepper jack cheese for a cheesy kick. For a tangy touch, consider adding blue cheese crumbles. You can also toss in some ranch dressing for a creamier flavor. These little changes can make your dip unique and exciting. To keep your buffalo chicken dip fresh, store it in an airtight container. Let the dip cool first. Place it in the fridge if you have leftovers. It will stay good for up to three days. If you want to keep it longer, consider freezing. When you are ready to enjoy the dip again, take it out of the fridge. You can heat it in the oven or microwave. For the oven, preheat it to 350°F (175°C). Bake for about 15 minutes. Stir it halfway for even heating. If using the microwave, heat in short bursts. Stir in between to avoid hot spots. If you want to freeze the dip, use a freezer-safe container. Make sure it is tightly sealed. You can freeze it for up to three months. When ready to eat, thaw it in the fridge overnight. Reheat as mentioned above for tasty results. Yes, you can make buffalo chicken dip ahead of time. Prepare it up to the baking step. Store it in the fridge for up to two days. When you are ready to serve, bake it straight from the fridge. Just add a few extra minutes to the cooking time. If you want a different protein, try shredded turkey or even canned tuna. For a vegetarian option, use shredded jackfruit or chickpeas. Both options give you nice texture and flavor. Buffalo chicken dip lasts about three to four days in the fridge. Store it in an airtight container to keep it fresh. If you freeze it, it can last up to three months. Just remember to thaw it in the fridge before reheating. This blog covered how to make a great buffalo chicken dip. We listed ingredients and tips, helped with measurements, and shared substitutions. You learned step-by-step instructions for preparation and cooking. The tips & tricks section offered serving ideas and mistakes to avoid. We explored variations for spicy, vegetarian, and unique flavors. Lastly, we discussed storage, reheating, and answered common questions. Enjoy making this dip with your own twist!

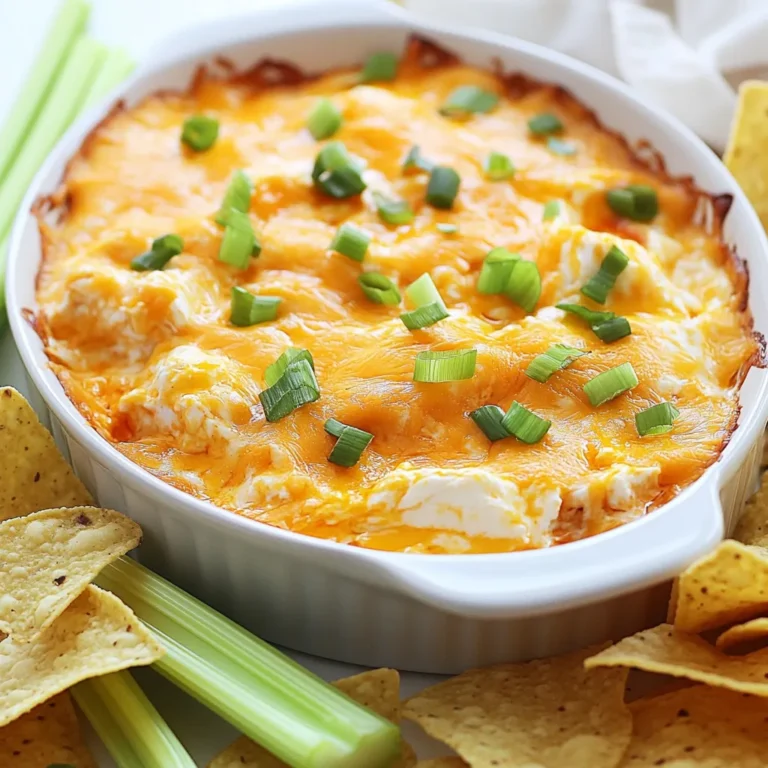
Easy Buffalo Chicken Dip Flavorful Party Pleaser

- 4 cups all-purpose flour - 1 packet (2 ¼ teaspoons) active dry yeast - ½ cup whole milk, warmed - ¼ cup granulated sugar - ½ cup unsalted butter, melted - 2 large eggs - 1 teaspoon salt - 1 tablespoon ground cinnamon - ½ cup packed brown sugar - ½ cup chopped pecans or walnuts (optional) - 1 cup powdered sugar - 2 tablespoons cream cheese, softened - 2 tablespoons milk (for glaze) You can swap some ingredients for a different taste. Use almond milk instead of whole milk. This gives a nice flavor. If you want to skip the eggs, use ¼ cup of applesauce. It works great in sweet doughs. For a nut-free version, leave out the pecans or walnuts. You can also add chocolate chips for a fun twist. Choose fresh yeast for the best rise. Look for yeast that has not expired. When picking flour, go for unbleached all-purpose flour. It has more flavor. Use unsalted butter for better control of salt. For the milk, whole milk works best. It makes the dough rich and soft. Always check the labels on sugar and cream cheese to avoid additives. {{ingredient_image_1}} Start by getting the yeast ready. In a small bowl, mix the warm milk, yeast, and 1 tablespoon of sugar. Let this sit for about 5 to 10 minutes. You want it to get frothy. This shows the yeast is alive and ready to rise. Next, grab a big mixing bowl. Add the flour, the rest of the sugar, and salt. Pour in the melted butter and eggs. Then, add the yeast mix. Stir it well until a dough forms. Now, transfer this dough to a floured surface. Knead it for about 5 to 7 minutes. You want it to be smooth and elastic. After that, place it in a greased bowl and cover it with a cloth. Let it rise in a warm spot for 1 hour. It should double in size. While the dough rises, let's make the filling. In a bowl, mix the brown sugar, ground cinnamon, and nuts if you like them. Stir it well until it’s all combined. This mix will give your rolls that sweet, warm flavor. Once the dough has risen, gently punch it down. Roll it out on a floured surface into a rectangle, about ½ inch thick. Spread the cinnamon mixture evenly over the dough, leaving a small edge. Roll the dough tightly into a log from one of the long sides. Cut this log into 12 equal pieces. Take a large round baking dish and grease it. Place the cinnamon roll pieces standing up in the dish. Cover it with a cloth and let the rolls rise again for 30 minutes. Preheat your oven to 350°F (175°C). Bake the rolls for 25 to 30 minutes, until they turn golden brown. After baking, let them cool a bit before adding the glaze. One common mistake is not letting the dough rise enough. This can make your rolls dense and dry. Always wait until the dough doubles in size. Another mistake is using too much flour while rolling. This can lead to tough rolls. Be gentle and use just enough flour to keep the dough from sticking. To get soft and fluffy rolls, use warm milk to activate the yeast. Yeast loves warmth and will help the dough rise well. Knead the dough until it is smooth and elastic. This process develops the gluten, which helps the rolls stay airy. Lastly, don’t skip the second rise. This step makes a big difference in texture. For the glaze, make sure your rolls are warm. This helps the glaze soak in and adds flavor. Use a whisk to mix the powdered sugar, cream cheese, and milk until smooth. If the glaze is too thick, add a bit more milk. Drizzle it over the rolls using a spoon or a squeeze bottle for a nice finish. Pro Tips Use Fresh Yeast: Ensure your yeast is fresh and active for the best rise and fluffiness in your rolls. Don’t Overroll: When rolling the dough, avoid rolling too tightly to allow room for the rolls to expand during baking. Perfect Glaze Consistency: Adjust the milk in the glaze for your desired consistency; add more for a thinner glaze or less for a thicker one. Storage Tips: Store leftovers in an airtight container at room temperature for up to 2 days or refrigerate for longer freshness. {{image_2}} If you want a nut-free version, simply skip the pecans or walnuts. The cinnamon roll pull-apart will still taste great. You can add more brown sugar or extra cinnamon for added flavor. This keeps it tasty and safe for those with nut allergies. Want to mix things up? You can add chocolate chips or fruits. Dark chocolate chips give a sweet twist. You might also try adding sliced apples or berries to the filling. Just sprinkle them evenly before rolling up the dough. This adds fun flavors and makes every bite special. The glaze can change with your mood. If you want something fruity, mix in lemon juice or zest. For a richer taste, add vanilla extract or almond extract to the cream cheese glaze. You can also use a simple milk and powdered sugar mix for a classic look. Each glaze can add a new layer of flavor to your pull-apart rolls. To keep your leftover pull-apart rolls fresh, place them in an airtight container. This helps keep moisture in and prevents them from drying out. If you don't have a container, wrap them tightly with plastic wrap. Store the rolls at room temperature for up to three days. For longer storage, consider the freezer. To reheat the rolls, preheat your oven to 350°F (175°C). Place the rolls on a baking sheet and cover them with foil. Heat for about 10-15 minutes or until warm. If you want a soft texture, you can also microwave a roll for about 20 seconds. Just be careful not to overheat it, or it may become tough. To freeze your cinnamon rolls, let them cool completely first. Wrap each roll in plastic wrap and then in foil. This double layer helps to keep them fresh. You can freeze them for up to three months. When ready to enjoy, thaw them in the fridge overnight and reheat as mentioned above. This way, you have a treat ready whenever you need it! Yes, you can make the dough ahead of time. Prepare the dough up to the first rise. Then, cover it tightly and place it in the fridge. The dough can stay there for up to 24 hours. When you are ready to bake, take it out and let it come to room temperature. Then, shape and let it rise again before baking. To check if the rolls are done, look for a golden brown color. You can also insert a toothpick in the center. If it comes out clean, the rolls are ready. The rolls should feel soft but firm. If you tap the top, it should sound hollow. You can serve cinnamon roll pull-apart with various delicious sides. Cream cheese icing is a classic choice. Fresh fruit, like berries or sliced bananas, adds a nice touch. You can also serve it with coffee or a glass of milk to balance the sweetness. Yes, you can use different types of flour. If you want a lighter roll, try bread flour. For a healthier option, whole wheat flour works well too. Just know that the texture may change slightly. Adjust the liquid in the recipe if needed. This blog post covered how to make share-size cinnamon roll pull-apart. We explored ingredients, substitutions, and tips for picking the best items. I shared step-by-step instructions for making the dough and rolling it out. You learned about common mistakes and options to make unique rolls. I also discussed how to store and reheat your creation. In the end, creating this dish can be fun and satisfying. Enjoy the process and get creative. Happy baking!

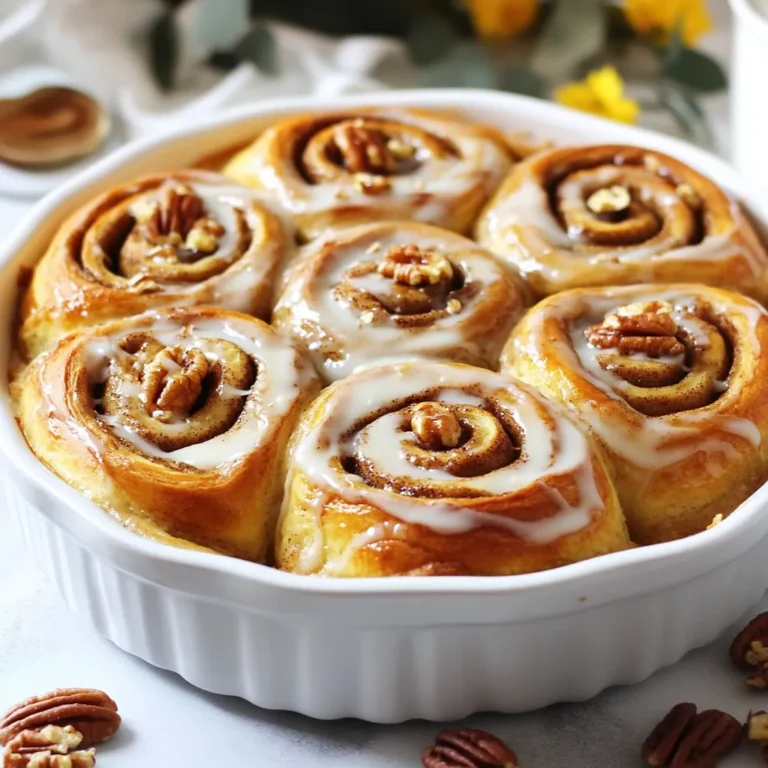
Share-Size Cinnamon Roll Pull-Apart Yummy Dessert Idea

Wild rice is the star of this dish. It adds a nutty flavor and chewy texture. Use 1 cup of wild rice, rinsed well before cooking. Rinsing helps remove excess starch and keeps the texture just right. Fresh veggies add color and taste. For this soup, I use: - 1 medium onion, diced - 3 cloves garlic, minced - 2 cups mushrooms, sliced (cremini or button) - 2 medium carrots, diced - 2 celery stalks, diced These vegetables bring great flavor and nutrients. The onion and garlic create a strong base. The mushrooms add depth, while carrots and celery give a sweet touch. Chicken adds heartiness to the soup. You will need: - 1 pound chicken breast, diced - 6 cups chicken broth The chicken broth is key for a rich taste. It forms the base of your soup and blends well with all other flavors. Seasoning makes everything pop. Use: - 1 teaspoon dried thyme - 1 teaspoon dried parsley - Salt and pepper to taste - 1 cup heavy cream or coconut milk (for a dairy-free option) Thyme and parsley give a fresh taste. The cream or coconut milk adds creaminess and richness. Adjust salt and pepper to fit your taste. {{ingredient_image_1}} Start by gathering all your ingredients. You will need wild rice, olive oil, onion, garlic, mushrooms, carrots, celery, chicken, chicken broth, thyme, parsley, salt, pepper, and heavy cream or coconut milk. Rinse the wild rice under cold water. Dice the onion, carrots, and chicken into small pieces. Slice the mushrooms and mince the garlic. In a large pot, heat the olive oil over medium heat. Add the diced onion and sauté for 2-3 minutes until it softens. Next, stir in the minced garlic and cook for one minute until it smells good. Then, add the sliced mushrooms. Cook them for 5-6 minutes until they release their moisture. Now, add the diced carrots and celery. Stir well and cook for another 3-4 minutes. This softens the vegetables a bit. After that, add the diced chicken breast. Cook until the chicken is no longer pink, which takes about 5 minutes. Pour in the chicken broth and add the rinsed wild rice, dried thyme, and dried parsley. Season with salt and pepper to taste. Bring the soup to a boil, then reduce the heat. Let it simmer for 30-40 minutes. The wild rice will become tender and burst open. Once the rice is ready, stir in the heavy cream or coconut milk. This adds creaminess to the soup. Let it simmer for another 5 minutes. Taste the soup and adjust the seasoning if needed. For serving, ladle the soup into deep bowls and top with fresh parsley for color. You can also serve it with crusty bread for dipping. Enjoy the warmth of this cozy dish! To get the best texture, cook the wild rice until it opens. Wild rice adds a nutty bite. Make sure to stir the soup often. This keeps everything evenly cooked. If the soup is too thick, add more broth or water. If it’s too thin, let it simmer longer to thicken. For richer flavor, sauté the garlic longer. Adding herbs like thyme and parsley boosts taste. Try adding a splash of lemon juice for brightness. A pinch of red pepper flakes can add warmth if you like spice. You can also use smoked chicken for a smoky twist. Serve your soup in deep bowls. A sprinkle of fresh parsley adds a nice touch. Crusty bread is great for dipping. You can also pair it with a simple salad. This soup is perfect for chilly days, making it a cozy meal to enjoy. Pro Tips Use Fresh Ingredients: Fresh vegetables and herbs enhance the flavor of the soup significantly. Whenever possible, opt for fresh over dried. Customize Your Protein: Feel free to substitute chicken with turkey or even add cooked sausage for a different flavor profile. Thicken It Up: If you prefer a thicker soup, you can blend a portion of the soup and then stir it back in for a creamy texture without the cream. Flavor Boost: Adding a splash of white wine or lemon juice just before serving can brighten the flavors of the soup. {{image_2}} To make a dairy-free version of this soup, simply swap the heavy cream for coconut milk. Coconut milk gives a rich and creamy texture without any dairy. It adds a hint of sweetness that pairs well with the savory flavors of the soup. This change keeps the soup light while still being hearty and comforting. You can easily turn this soup into a vegetarian dish. Replace the chicken with extra mushrooms or diced firm tofu. Use vegetable broth instead of chicken broth. This keeps the flavors rich and satisfying. You can also add more vegetables like spinach or kale for added nutrients. Feel free to get creative and add more ingredients. You can toss in peas, corn, or even diced potatoes. Each addition will bring a new texture and flavor. If you like heat, add a pinch of red pepper flakes for a spicy kick. For a fresh burst, stir in some lemon juice just before serving. After making your Mushroom Chicken Wild Rice Soup, store it in an airtight container. Let it cool to room temperature first. This soup stays good in the fridge for about 3 to 4 days. Always check for signs of spoilage before eating. If you want to save some soup for later, freezing is a great option. Pour the cooled soup into freezer-safe bags or containers. Leave some space at the top, as soup expands when frozen. It can last about 3 months in the freezer. Thaw it in the fridge overnight when you are ready to eat. To reheat, pour the soup in a pot over medium heat. Stir it often to heat evenly. If it seems thick, add a bit of chicken broth or water. You can also use the microwave. Heat it in a microwave-safe bowl for 2-3 minutes. Stir halfway through to warm it well. Enjoy your cozy meal again! Mushroom Chicken Wild Rice Soup lasts about 3 to 4 days in the fridge. To keep it fresh, store it in an airtight container. The flavors can deepen over time, making it even tastier! Yes, you can use brown rice. However, it cooks faster than wild rice. Adjust the cooking time to about 20-25 minutes. This change may alter the soup's texture, but it will still be delicious. This soup pairs well with crusty bread or a fresh salad. You can also serve it with crackers for a crunchy side. These options make the meal more filling and enjoyable. Yes, this soup can be gluten-free. Use gluten-free chicken broth and ensure your seasonings are gluten-free. This way, you can enjoy the soup without any gluten concerns. To store leftovers, let the soup cool first. Then, transfer it to an airtight container. You can keep it in the fridge for a few days or freeze it for later. Just remember to label the container with the date! This article explored the rich flavors of Mushroom Chicken Wild Rice Soup. We covered key ingredients, step-by-step cooking, and helpful tips. Remember to consider variations like dairy-free and vegetarian options. Proper storage will keep your soup fresh longer. Overall, this dish is versatile and easy to make. Enjoy the comforting taste and share it with others. Your kitchen will smell amazing, and your taste buds will thank you! Keep experimenting to make it your own.

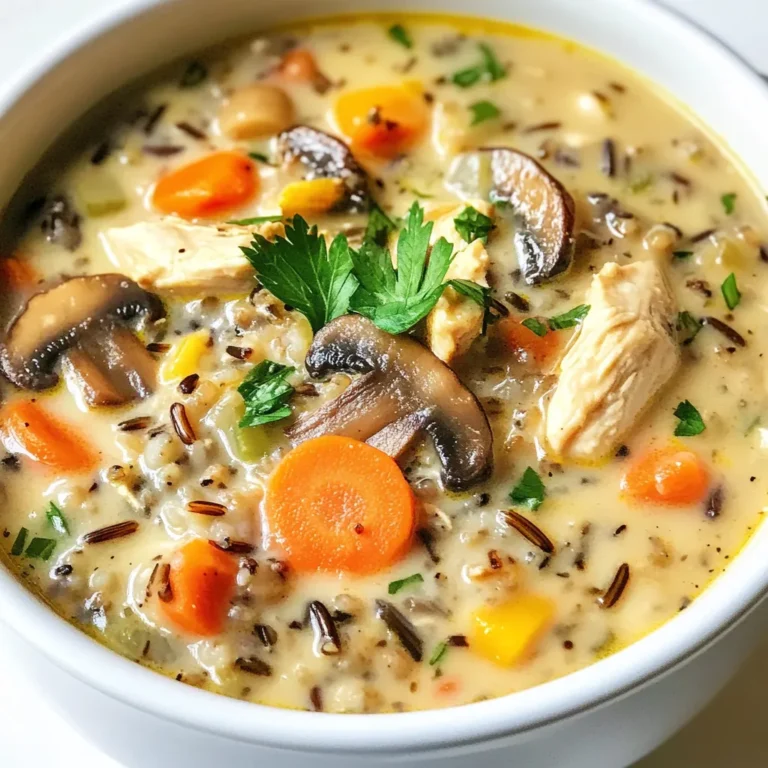
Mushroom Chicken Wild Rice Soup Cozy and Comforting Dish

- Cherry juice selection tips: Choose 100% cherry juice with no added sugars. This ensures a pure taste. Freshness matters, so check for quality brands. Avoid juices with added colors or preservatives. Look for juices labeled "pure" or "natural" for the best flavor. - Importance of using fresh garnishes: Fresh garnishes make your drink look great and add flavor. Use halved cherries, lemon slices, and mint leaves. They add color and a pop of freshness. Plus, they make your mocktail feel special for the festive season. - Optional ingredients for customization: You can add 1 tablespoon of maple syrup for extra sweetness. This is great if you like your drinks sweeter. Feel free to try other juices too, like cranberry or orange juice. Mixing juices can create fun flavors that your guests will love! {{ingredient_image_1}} First, we start by making the mocktail base. In a large pitcher, combine 1 cup of cherry juice, 1 tablespoon of freshly squeezed lemon juice, and 1 tablespoon of maple syrup if you want it sweeter. Stir all the ingredients well until they mix completely. This step is key! Mixing well helps you get all the great flavors in each sip. Next, let’s get your glasses ready. Fill each serving glass with ice cubes. This keeps your drink cold and refreshing. After that, pour the cherry juice mixture over the ice. Fill the glasses about two-thirds full. This leaves room for the sparkling water. Now for the fun part! Top each glass with 1 cup of sparkling water or club soda. Give it a gentle stir to mix everything together. This fizz adds a festive touch! Finally, let’s garnish to make it pretty. Add some freshly halved cherries, a slice of lemon, and a few mint leaves on top. These garnishes not only look great but also add a burst of flavor. Serve it right away and enjoy your Christmas Cherry Fizz Mocktail! To make your Christmas Cherry Fizz even better, try adding a splash of orange juice. This gives it a nice citrus twist. You can also use a hint of vanilla extract for warmth. Balancing sweetness is key. If your cherry juice is sweet, cut down on the maple syrup. Use lemon juice to add some zing. This helps balance the flavors and makes every sip refreshing. The right glass can make your mocktail pop! Use tall, clear glasses to show off the vibrant red color. You can also use festive mugs for a cozy look. Don’t skip the garnishes! Add fresh cherries, lemon slices, and mint leaves for a bright touch. These not only look great but also add extra flavor. A colorful straw can add that fun factor, too. You can prep your mocktail base ahead of time. Mix the cherry juice, lemon juice, and maple syrup in a pitcher. Store it in the fridge until you’re ready to serve. For the best fizz, wait to add the sparkling water just before serving. This keeps the bubbles fresh. If you have leftover ingredients, store them in airtight containers. This helps keep everything fresh for later use. Pro Tips Use Fresh Ingredients: For the best flavor, opt for fresh lemons and real cherries whenever possible. Fresh fruit enhances the overall taste and presentation of your mocktail. Chill Your Ingredients: Make sure your cherry juice and sparkling water are chilled before mixing. This will keep your mocktail refreshing and crisp without diluting it with melting ice. Adjust Sweetness: Taste your cherry juice mixture before serving. If you prefer a sweeter drink, feel free to add a little more maple syrup or even a splash of agave syrup to suit your taste. Experiment with Flavors: Don’t hesitate to add different herbs or fruits to your mocktail. A few basil leaves or a splash of orange juice can add a delightful twist to your Christmas Cherry Fizz. {{image_2}} You can switch up the cherry juice for other fruit juices. Try using cranberry juice for a tart kick. You might also enjoy pomegranate juice for a deep flavor and color. Seasonal juices, like apple or pear, add a fun twist. These juices bring their own unique tastes and scents. Every person has a different taste for sweetness. If you like it less sweet, skip the maple syrup. You could also try a small amount of honey or agave nectar. For those needing sugar-free options, use stevia or monk fruit. These choices let you enjoy the drink without added sugar. Exploring flavored sparkling waters can really elevate your mocktail. A lemon or lime sparkling water adds a fresh zing. You can also mix in other non-alcoholic drinks, like ginger ale or tonic water. These add new flavors while keeping the drink fizzy and fun. Try different combinations to find your favorite! To store leftover mocktail, pour it into a clean jar. Seal it tightly with a lid. Place the jar in your fridge. This helps keep it cool and fresh. The mocktail stays good for up to two days. After that, the fizz may go flat. For cherry juice, keep it in its original bottle. Store it in the fridge after opening. This keeps its flavor strong. Fresh garnishes, like cherries and mint, need care. Place them in a sealed bag. Store them in the fridge too. Use them within three days for the best taste. When hosting parties, you can make a large batch. Simply multiply the recipe by the number of guests. Mix everything in a big pitcher. Pour it over ice when serving. If you want to make juice ahead, freeze it. Pour juice into ice cube trays. Once frozen, pop them out and store in a bag. Use these cubes in drinks later! A mocktail is a drink that looks like a cocktail but has no alcohol. It offers fun flavors without the buzz. Mocktails are great for all ages and can be enjoyed at any holiday party. You can mix juices, sodas, and fresh ingredients. They are tasty and perfect for celebrations. Yes, you can prep some parts ahead. Mix the cherry juice, lemon juice, and maple syrup first. You can store this mix in the fridge for a day. Just add ice and sparkling water when you are ready to serve. This way, your drink stays fresh and fizzy. This mocktail is naturally gluten-free and vegan. Use 100% cherry juice with no added sugars. The garnishes, like cherries and mint, are also healthy options. If you want extra sweetness, maple syrup is a great choice. It is plant-based and adds flavor without guilt. This blog post covered everything you need to make a fantastic cherry mocktail. We explored ingredient selection, step-by-step preparation, and creative ways to enhance flavor and presentation. Remember to use fresh ingredients for the best taste. You can customize the drink to fit your preferences. Whether you enjoy making it for yourself or for guests, this mocktail can be a delightful option. With the tips shared, you can impress anyone with your drink-making skills. Enjoy the process, and have fun experimenting with flavors!

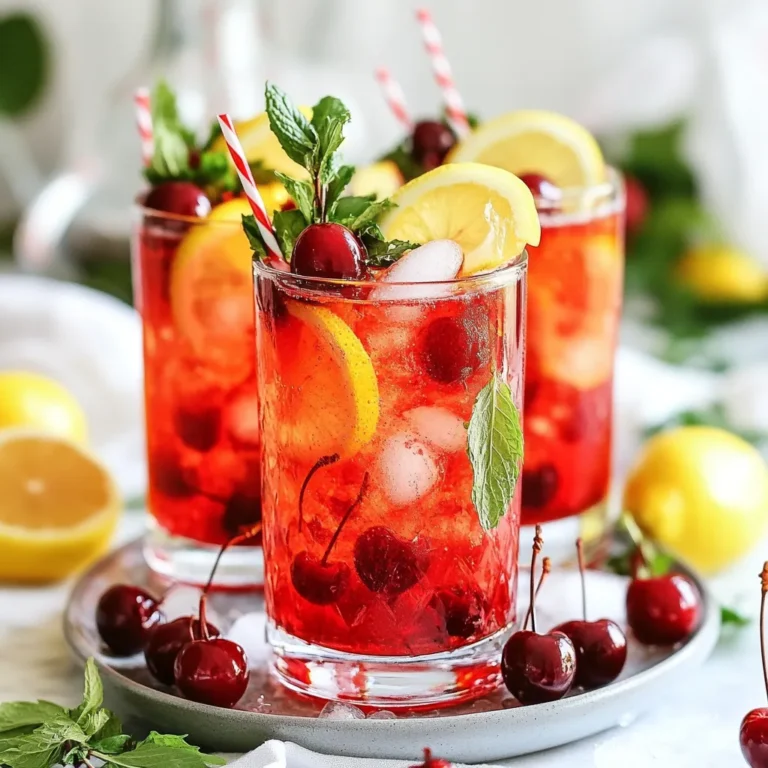
Christmas Cherry Fizz Mocktail Festive and Fun Drink

PREV 1 … 44 45 46 … 56 NEXT
go kitchen now

explore

DessertsDinnerAppetizersDrinks

Our Policies

  • Cookie Policy
  • Copyright Policy
  • Disclaimer
  • GDPR Policy
  • Terms Of Use
Back to Top
  • About
  • Contact Us
  • Privacy Policy
© 2025 go kitchen now