FREE DINNER EBOOK! Get your copy!
  • Cookie Policy
  • GDPR Policy
  • Disclaimer
  • Terms Of Use
  • Visit my other site: Fun Cookie Recipes
go kitchen now
  • Home
  • Dinner
  • Desserts
  • Drinks
  • Appetizers
  • Contact
  • About
  • Privacy Policy
  • Home
  • Dinner
  • Desserts
  • Drinks
  • Appetizers
  • Contact
  • About
  • Privacy Policy
  • Cookie Policy
  • GDPR Policy
  • Disclaimer
  • Terms Of Use
Visit my other site: Fun Cookie Recipes

HOME / CATEGORIES /

Latest

To make Cajun Potato Soup, gather these ingredients: - 5 medium-sized russet potatoes, peeled and diced - 1 medium onion, finely chopped - 2 cloves garlic, minced - 1 bell pepper (any color), diced - 2 stalks celery, diced - 4 cups vegetable broth - 1 cup heavy cream (or coconut milk for a dairy-free option) - 2 tablespoons Cajun seasoning - 1 teaspoon smoked paprika - 1 bay leaf - Salt and pepper to taste - 2 tablespoons olive oil - 1/4 cup fresh green onions, chopped (for garnish) - 1/4 cup shredded cheddar cheese (optional, for garnish) You can swap some ingredients if needed. Use yellow potatoes instead of russet potatoes. Red onions work well in place of yellow onions. If you want a lighter soup, use milk instead of heavy cream. For a dairy-free version, coconut milk is great. You can also skip the cheese. Use a small amount of nutritional yeast for a cheesy flavor. Using fresh ingredients makes a big difference. Fresh potatoes taste better and add nice texture. Fresh vegetables add flavor and nutrients. When you use fresh herbs, they enhance the soup's aroma. Fresh ingredients also make your dish look appealing. Always choose quality products to elevate your cooking. This way, your Cajun Potato Soup will be hearty and full of flavor. {{ingredient_image_1}} Start by gathering all your ingredients. You will need: - 5 medium-sized russet potatoes, peeled and diced - 1 medium onion, finely chopped - 2 cloves garlic, minced - 1 bell pepper (any color), diced - 2 stalks celery, diced - 4 cups vegetable broth - 1 cup heavy cream (or coconut milk for a dairy-free option) - 2 tablespoons Cajun seasoning - 1 teaspoon smoked paprika - 1 bay leaf - Salt and pepper to taste - 2 tablespoons olive oil - 1/4 cup fresh green onions, chopped (for garnish) - 1/4 cup shredded cheddar cheese (optional, for garnish) Next, peel and dice the potatoes. This helps them cook evenly. Chop the onion, garlic, bell pepper, and celery. Set these aside. In a large pot, heat olive oil over medium heat. Add the chopped onion and sauté for about 3-4 minutes. You want them to turn translucent. Then, stir in the garlic, bell pepper, and celery. Sauté these for another 3-4 minutes until they soften. Next, add the diced potatoes, vegetable broth, Cajun seasoning, smoked paprika, and the bay leaf to the pot. Bring everything to a boil. Once boiling, reduce the heat to low. Let it simmer for about 20-25 minutes. You want the potatoes to be fork-tender. After simmering, remove the bay leaf. Use an immersion blender to puree the soup. Blend until you reach your desired consistency. If you like a chunkier soup, only blend half of the mixture. Stir in the heavy cream or coconut milk. Then, season with salt and pepper to taste. Heat the soup through for an additional 5 minutes. Your Cajun potato soup is now ready! Serve it hot with chopped green onions and a sprinkle of cheddar cheese if you like. Enjoy! To make your Cajun potato soup pop, use fresh herbs. Add thyme or parsley for bright notes. Fresh green onions on top boost flavor and color. Try adding a splash of hot sauce for extra heat. A squeeze of lemon juice at the end adds brightness. Serve your soup with crusty bread for a complete meal. A side salad pairs well and adds freshness. For a fun twist, top with crispy bacon bits. A sprinkle of paprika or cayenne adds a nice touch, too. Avoid overcooking the potatoes; they should be tender, not mushy. Don't skip the bay leaf; it adds depth to the soup. If the soup is too thick, add more broth or cream. Taste as you go to avoid too much salt or spice. Pro Tips Use Fresh Ingredients: The flavor of your soup will be significantly enhanced by using fresh vegetables and herbs. Opt for fresh potatoes and aromatics for the best taste. Adjust Spiciness: If you prefer a milder soup, reduce the amount of Cajun seasoning. You can also add a touch of sugar to balance the heat. Make it Ahead: This soup tastes even better the next day! Consider making a larger batch and reheating for a quick meal. Experiment with Toppings: Get creative with your garnishes! Try adding crispy bacon bits, sour cream, or even a drizzle of hot sauce for an extra kick. {{image_2}} To make this soup dairy-free, swap the heavy cream for coconut milk. Coconut milk gives a rich and creamy taste. You can also try almond or cashew milk, but they will change the flavor a bit. If you want to keep it light, use vegetable broth and skip the cream altogether. This way, you still enjoy a tasty soup without dairy. Adding protein makes this soup heartier. You can mix in cooked sausage for a spicy kick. Andouille or smoked sausage works great. If you want chicken, shred cooked chicken into the soup. For a vegetarian option, use lentils or chickpeas. They add texture and protein without meat. You can adjust the spice level of your soup easily. For a mild version, use less Cajun seasoning. Start with one tablespoon and taste as you go. If you love heat, add a pinch of cayenne pepper or more Cajun spice. Fresh jalapeños also give a nice kick if you like heat. Balancing the spices makes this soup perfect for everyone. You can store leftover Cajun potato soup in the fridge. Use an airtight container. It stays good for about 3 to 5 days. Make sure to let it cool before you seal it. This keeps the soup fresh and tasty. Freezing is a great way to save extra soup. Pour it into freezer-safe bags or containers. Leave some space for expansion. Cajun potato soup will last up to 3 months in the freezer. To use it later, just thaw it in the fridge overnight. When reheating, do it slowly on the stove. Add a splash of broth or cream to keep it creamy. Stir often to prevent sticking. If using a microwave, heat in short bursts and stir in between. This keeps the flavor and texture just right. Cajun seasoning is a blend of spices. It usually includes paprika, cayenne, garlic powder, onion powder, oregano, and thyme. Some blends may have black pepper and salt too. This mix gives dishes a warm, spicy flavor that shines in Cajun potato soup. You can buy it or make your own at home. Just mix the spices to your taste. Yes, you can make Cajun potato soup in a slow cooker! Start by sautéing the onion, garlic, bell pepper, and celery in a pan. Then, add these to the slow cooker. Next, toss in the potatoes, vegetable broth, Cajun seasoning, smoked paprika, and bay leaf. Cook on low for 6-8 hours or high for 3-4 hours. Blend the soup at the end and stir in the cream. Cajun potato soup can last in the fridge for about 3-4 days. Store it in an airtight container to keep it fresh. If you want to keep it longer, consider freezing it. The soup can last for up to 3 months in the freezer. Just remember to thaw it in the fridge before reheating. The blog explored making Cajun Potato Soup step by step. We discussed ingredients, substitutions, and the need for freshness. You learned important preparation and cooking methods, plus blending techniques for the right texture. I shared tips to boost flavors and serving ideas, while warning about common mistakes. You also discovered variations for different diets and storage methods for leftovers. This soup is versatile, tasty, and a joy to share. Enjoy every bowl!

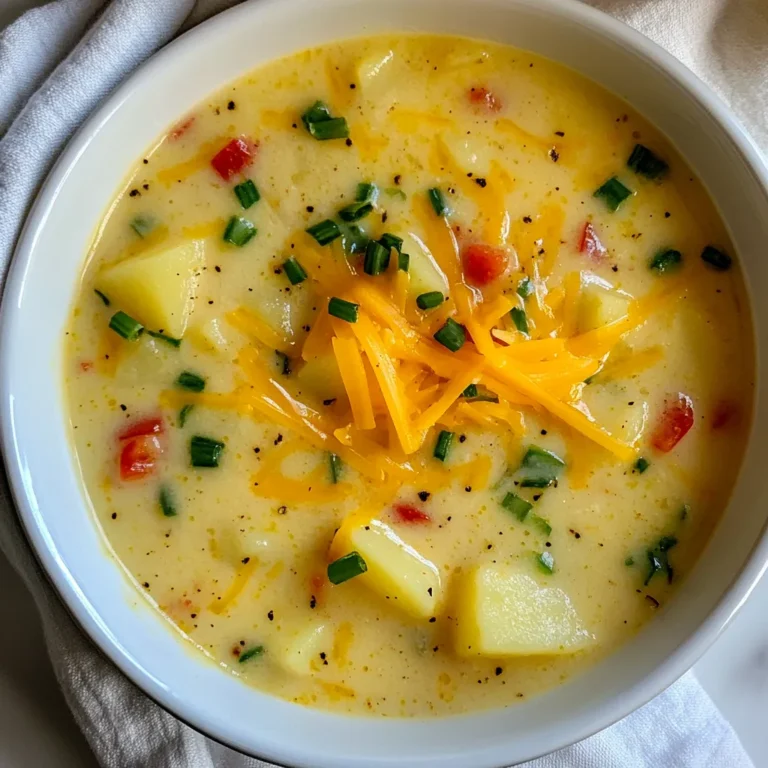
Cajun Potato Soup Hearty and Flavorful Comfort Food

To make homemade ramen noodles, you need a few key items. Here’s what to gather: - 2 cups all-purpose flour - 1/2 teaspoon salt - 1/2 teaspoon baking soda - 3/4 cup water - 1 teaspoon kansui (alkaline water) - Cornstarch (for dusting) These ingredients create a basic dough that transforms into tasty noodles. If you can’t find kansui, don’t worry. You can use a pinch of baking soda mixed with water instead. This substitution helps mimic the alkaline effect of kansui. It gives your noodles the right texture and color. When choosing flour, go for all-purpose flour. It works best for ramen. Look for a brand with good protein content. Higher protein helps the noodles stay firm and chewy. For water, use filtered or bottled water if possible. This ensures a clean taste without any odd flavors from tap water. The quality of your ingredients impacts the final dish, so select wisely! {{ingredient_image_1}} To make the best ramen dough, start with simple ingredients. In a bowl, sift the flour, salt, and baking soda together. This mix helps the noodles rise and gives them a nice texture. In another bowl, mix the water and kansui until it’s well blended. If you can't find kansui, a pinch of baking soda in water works too. Gradually add this mixture to the flour. Use a fork to stir it until a shaggy dough starts to form. Next, turn the dough onto a clean surface. Knead it for about 10 to 15 minutes. The dough should feel smooth and elastic. If it sticks, sprinkle a little more flour to help. Once ready, shape the dough into a ball. Wrap it in plastic wrap and let it rest for at least 30 minutes. This resting time is key for the noodles to become tender. After the dough has rested, it’s time to roll it out. Divide the dough into 2 to 4 pieces. This makes it easier to handle. On a floured surface, roll each piece until it’s about 1/8 inch thick. Dust the rolled dough lightly with cornstarch. This prevents sticking and helps keep the noodles separate later. Now, fold the dough into thirds, like an envelope. With a sharp knife, slice the folded dough into thin strips, about 1/4 inch wide. Unravel the noodles and dust them with more cornstarch. This keeps them from clumping together. You’ll see how fun it is to make your own noodles! To cook your noodles, bring a pot of water to a rolling boil. Once boiling, gently add the noodles. Cook them for about 2 to 3 minutes. You want them to be tender but still chewy. This is the perfect texture for ramen. Once done, drain the noodles and rinse them with cold water. This stops the cooking process and keeps them firm. Now, your homemade ramen noodles are ready! Serve them in a rich broth and add toppings like green onions, soft-boiled eggs, or fresh veggies. Enjoy your delicious creation! Making ramen noodles is fun, but some common mistakes can ruin your batch. Here are the key ones to watch out for: - Using the wrong flour: Always use all-purpose flour. Other types may not give you the right texture. - Skipping kansui: This alkaline water gives your noodles the perfect chew. Don’t skip it! - Not kneading enough: Knead the dough for at least 10 minutes. This builds the gluten, which is important for structure. Elasticity is key for great ramen. To achieve this: - Knead well: Your dough needs to be smooth and elastic. If it feels rough, keep kneading! - Rest your dough: After kneading, let it rest for at least 30 minutes. This helps relax the gluten. - Use kansui: This ingredient not only adds flavor but also helps with elasticity. Kneading and resting are crucial steps in making ramen noodles: - Knead on a clean surface: This helps you control the dough better. Use a little flour if it’s too sticky. - Knead until smooth: Don’t rush this part. You want the dough to be soft and pliable. - Cover the dough: After shaping it into a ball, wrap it in plastic. This keeps it from drying out while resting. These tips will help you create ramen noodles that are both tasty and fun to eat! Pro Tips Use High-Quality Flour: For the best texture and flavor, choose a high-protein all-purpose flour or even bread flour to give your noodles the perfect chewiness. Don't Skip the Resting Time: Allowing the dough to rest is crucial for gluten development, which makes the noodles easier to roll out and enhances their texture. Experiment with Thickness: Adjust the thickness of your noodles based on personal preference. Thicker noodles will have a chewier bite, while thinner noodles will cook faster and have a lighter texture. Storing Noodles: If you’re not using the noodles immediately, dust them generously with cornstarch and store them in an airtight container in the refrigerator for up to a week. {{image_2}} Ramen noodles can come in many shapes. You can make curly noodles or straight ones. Curly noodles hold broth well. They give you a fun bite. Straight noodles offer a smooth texture. They are great for lighter soups. You can try both types. It’s fun to see which you like more. Play with the thickness too. Thicker noodles give a heartier feel. Thinner noodles work well in delicate dishes. You can add flavor to your noodles. Mix in herbs and spices during the dough-making. Try adding garlic powder or onion powder for more taste. Dried herbs like thyme or basil work too. You can even use chili powder for a spicy kick. Just remember to keep the salt level balanced. This will help make every bite tasty. If you need vegan options, it’s easy to adapt. Use all-purpose flour made from chickpeas or rice. This works well for gluten-free noodles. You can still follow the same steps. Just swap regular flour for the gluten-free option. Make sure to check your other ingredients too. Some broths may not be vegan. Always read labels to be sure. Enjoy creating noodles that fit your diet! Uncooked ramen noodles need the right care to stay fresh. First, dust them lightly with cornstarch. This step keeps them from sticking. Then, place the noodles in an airtight container. You can also wrap them in plastic wrap for more protection. Store the container in the fridge. Uncooked noodles can last up to two days this way. If you want to store noodles for a longer time, freezing is a great option. Start by dusting uncooked noodles with cornstarch. Next, lay them flat on a baking sheet in a single layer. Freeze them for about an hour. Once frozen, transfer the noodles to a freezer bag. Remove as much air as you can before sealing. Frozen noodles can last for about three months. When you're ready to use them, cook them straight from the freezer. Reheating cooked noodles is simple. Start by boiling a pot of water. Once it’s boiling, add the cooked noodles for about 1-2 minutes. This method helps them regain their chewy texture. Drain the noodles and rinse them briefly under cold water. You can also reheat them in a pan. Add a splash of broth or oil to keep them moist. This way, they stay tasty and don’t dry out. Yes, you can use regular water. However, kansui adds a special flavor and texture. It helps the noodles get that unique chew. If you can't find kansui, mix a pinch of baking soda in water. It mimics the effect. Just remember, the flavor won’t be the same. You can store homemade ramen noodles for about 3 days in the fridge. Keep them in an airtight container to avoid drying out. If you want to store them longer, freeze the noodles. They can last up to 2 months in the freezer. When ready to use, just boil them straight from the freezer. Serve your ramen noodles with a rich broth. Top it with sliced green onions, soft-boiled eggs, and nori. You can also add fresh vegetables like bok choy or spinach. Feel free to get creative with your toppings! Each adds great flavor and color to your bowl. Making ramen noodles is a fun and rewarding process. In this guide, I covered essential ingredients like flour and kansui, and I shared step-by-step instructions for crafting perfect noodles. I also highlighted tips to avoid common mistakes and shared delicious variations. Now, you can enjoy tasty ramen at home. Remember, practice is key to mastering your technique. Don't be afraid to experiment with flavors and styles. Your homemade ramen journey starts now. Enjoy every bite!

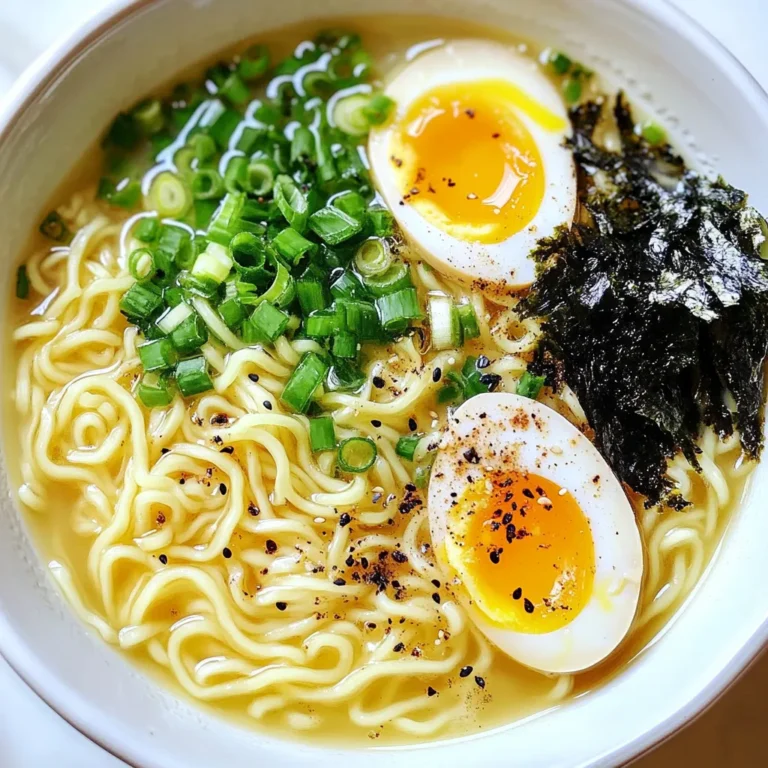
Homemade Ramen Noodles Simple and Flavorful Recipe

To make Ultimate Loaded Nachos, gather these key ingredients: - 1 bag tortilla chips - 2 cups shredded cheddar cheese - 1 cup black beans, rinsed and drained - 1 cup corn kernels (fresh or canned) - 1 jalapeño, sliced - 1 ripe avocado, diced - 1 cup salsa (your choice of heat) - 1 cup sour cream - 2 green onions, chopped - 1 teaspoon ground cumin - 1 teaspoon chili powder - Fresh cilantro, for garnish - Salt and pepper to taste These ingredients create a great base. The chips give crunch. The cheese adds creaminess. Beans and corn bring flavor and texture. You can make your nachos unique with these optional toppings: - Sliced olives - Diced tomatoes - Pickled jalapeños - Fresh lime juice - Hot sauce Feel free to mix and match. Each topping can add a new taste. You can even try different cheeses for a fun twist. To prepare these nachos, you will need: - A large baking sheet or oven-safe platter - A skillet - A spatula or wooden spoon - A knife and cutting board These tools help you cook and serve easily. A sturdy baking sheet holds the layers well. A skillet warms the bean and corn mix quickly. {{ingredient_image_1}} Start by preheating your oven to 350°F (175°C). This step warms up the cheese nicely. Next, spread a bag of tortilla chips evenly on a large baking sheet or an oven-safe platter. Make sure the chips cover the base well. This helps with even cooking and keeps them crispy. In a skillet, mix 1 cup of black beans, 1 cup of corn, 1 teaspoon of ground cumin, and 1 teaspoon of chili powder. Add a pinch of salt and pepper. Heat this mixture over medium heat for about 3 to 4 minutes. Stir often until it warms through and smells great. This mixture adds lots of flavor to your nachos. Now it’s time to layer. First, sprinkle half of the 2 cups of shredded cheddar cheese over the chips. Then, evenly spread the black bean and corn mixture on top of the cheese. Next, add sliced jalapeños for that spicy kick. Finally, cover everything with the remaining cheese. Place the nachos in the oven and bake for 10 to 12 minutes. You want the cheese to melt and bubble. Once done, remove the nachos from the oven. Top them with diced avocado, salsa, and dollops of sour cream. Finish with chopped green onions and fresh cilantro for extra color and taste. Enjoy your loaded nachos! To get cheese that melts well, use good quality cheddar cheese. Shred it fresh from the block. Pre-grated cheese has additives that can prevent melting. Layer cheese between other ingredients. This creates pockets of gooey goodness. Bake your nachos at 350°F for 10-12 minutes. Keep an eye on them. You want the cheese bubbly but not burnt. Presentation matters when serving nachos. Use a colorful platter for a fun look. Top with fresh avocado and salsa right before serving. This keeps toppings fresh and bright. Offer extra toppings on the side, like jalapeños or sour cream. Let everyone customize their own plate. This adds fun and excitement to the meal. Start by prepping all your ingredients first. This makes the cooking process smoother. Use parchment paper on your baking sheet for easy clean-up. After baking, let the nachos cool for a few minutes. This helps toppings stick better. For leftover nachos, store them in an airtight container. Clean as you go to keep your kitchen tidy. Pro Tips Layer Wisely: To prevent sogginess, layer cheese and toppings strategically. Start with cheese, then add toppings, and finish with more cheese on top before baking. Spice It Up: Adjust the heat level by choosing the right salsa or adding more jalapeños according to your taste preferences. Fresh is Best: Use fresh ingredients like ripe avocados and home-cooked beans for a more flavorful and nutritious nacho experience. Serve Immediately: For the best texture and taste, serve nachos straight from the oven while the cheese is still gooey and the chips are crisp. {{image_2}} For a tasty twist, make vegetarian-friendly loaded nachos. Use all the same ingredients but focus on the veggies. You can add more beans, like pinto or kidney beans, for protein. Try adding bell peppers or zucchini for a fresh crunch. Top it off with extra avocado and a sprinkle of lime juice. This keeps your nachos colorful and full of flavor. If you love heat, spicy loaded nachos are for you. Start with the classic recipe, but add more jalapeños or use spicy salsa. You could swap the cheddar cheese for pepper jack cheese. This cheese gives a nice kick! For even more heat, sprinkle some crushed red pepper flakes on top. You can also add hot sauce before serving to really turn up the flavor. To make healthier loaded nachos, switch some ingredients. Use baked tortilla chips instead of fried ones. Choose low-fat cheese or a dairy-free option if you want to cut calories. Instead of sour cream, try Greek yogurt for a creamy touch with more protein. You can add fresh veggies, like diced tomatoes or spinach, for added nutrients. These small changes keep the taste while making your nachos a bit lighter. To store leftover nachos, you need to keep them fresh. First, let the nachos cool down. Place them in an airtight container. If you have toppings like avocado or sour cream, store them separately. This helps keep the chips crispy and toppings fresh. Reheating nachos can be tricky. To keep them crispy, use the oven. Preheat your oven to 350°F (175°C). Spread the nachos on a baking sheet. Heat them for about 5 to 7 minutes. Check that the cheese melts but the chips don’t burn. Freezing loaded nachos is not the best idea. The chips become soggy when thawed. However, you can freeze the black bean and corn mix. Store it in a freezer-safe bag. When you’re ready, just reheat it and add fresh chips. This way, you can enjoy a quick meal without losing flavor. I recommend using sharp cheddar cheese. It melts well and adds great flavor. You can mix in Monterey Jack for a creamy touch. This blend gives your nachos a rich taste. Yes, you can! Tortilla chips are classic, but feel free to try corn chips or pita chips. Each chip adds a unique crunch. Just make sure they can hold the toppings without breaking. To prep nachos in advance, layer the chips and toppings. Skip baking until you’re ready to serve. Cover them well with plastic wrap. When you’re ready, bake at 350°F for 10 to 12 minutes. This keeps them fresh and warm for your guests. In this post, you learned how to make loaded nachos that wow. We covered key ingredients and fun toppings to fit your taste. I shared tips for the perfect cheese and great serving ideas. You explored tasty variations, from spicy to healthy options. Finally, we discussed storage and reheating so nothing goes to waste. Think about your favorite flavors and get creative. There’s no wrong way to enjoy nachos. Dive in and make your perfect plate soon!

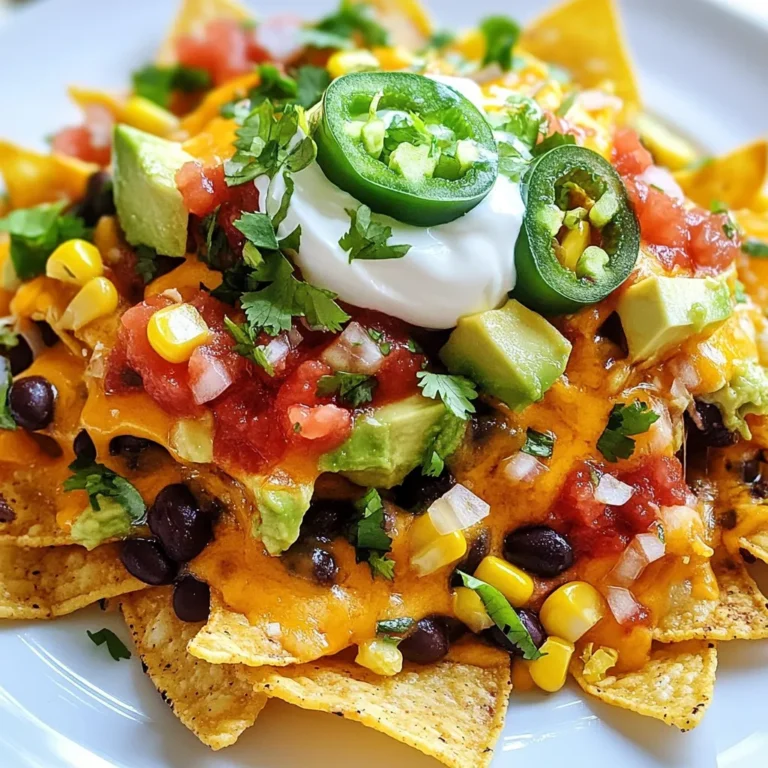
Ultimate Loaded Nachos Tasty Layered Flavor Feast

- 1 pound Italian sausage - 2 bell peppers (red and yellow) - 1 medium onion - 3 cloves garlic - 1 can (14 oz) diced tomatoes - 1 cup cooked quinoa or rice - 1 teaspoon dried oregano - 1 teaspoon dried basil - 1/2 teaspoon red pepper flakes (optional) - Salt and pepper to taste - 1 cup shredded mozzarella cheese - Fresh basil leaves for garnish Italian sausage brings a rich, savory flavor to this dish. You can choose mild or spicy based on your taste. I love using both red and yellow bell peppers for color and sweetness. The medium onion adds a nice base flavor. Garlic boosts the taste even more, adding depth. Diced tomatoes bring juiciness and tang. You can use quinoa or rice as a hearty base. For seasonings, dried oregano and basil give a classic Italian touch. Red pepper flakes add heat if you like spice. Salt and pepper balance all the flavors. Topping it with shredded mozzarella cheese makes it melty and delicious. Fresh basil as a garnish adds freshness and a pop of color. This mix of ingredients creates a dish that is hearty and flavorful. Each bite is a warm hug on a plate. {{ingredient_image_1}} - Preheat your oven to 375°F (190°C). This helps cook the dish evenly. - In a large skillet over medium heat, cook 1 pound of Italian sausage. Break it apart with a wooden spoon. Cook until it is browned and fully cooked, which takes about 5-7 minutes. If there’s extra grease, remove it. - Add 2 sliced bell peppers and 1 sliced medium onion to the skillet. Sauté these until they soften, about 5-6 minutes. - Next, incorporate 3 minced cloves of garlic. This will add a nice flavor to your dish. - Stir in 1 can of diced tomatoes (with juice), 1 cup of cooked quinoa or rice, 1 teaspoon of dried oregano, 1 teaspoon of dried basil, and red pepper flakes if you want some heat. Season with salt and pepper. Mix everything well. - Transfer the mixture to a greased 9x13-inch baking dish. Spread it evenly. Top it with 1 cup of shredded mozzarella cheese. - Cover the dish with aluminum foil. Bake it in the preheated oven for 25 minutes. After that, remove the foil. Bake for another 10-15 minutes. You want the cheese bubbly and golden brown. - Once done, take it out of the oven and let it cool for a few minutes. Garnish with fresh basil leaves before serving. - Choosing the right sausage: Pick Italian sausage that suits your taste. You can choose mild for a gentle flavor or spicy for a kick. The sausage brings the heartiness to this dish. - Ensuring even cooking: Cook the sausage in a large skillet. Break it apart with a wooden spoon as it cooks. This ensures it browns evenly and mixes well with the veggies later. - Adding more spices: If you want more flavor, add spices like garlic powder or Italian seasoning. A little extra red pepper flakes can also boost the heat. Taste as you go to find your perfect mix! - Suggestions for cheese alternatives: You can swap mozzarella with provolone or cheddar. Each cheese brings its own flavor, so feel free to experiment. - Serving suggestions: Serve the casserole in bowls for a warm, cozy feel. Add a side of crusty bread to soak up the flavors. It makes for a complete meal! - Garnishing tips: Top each bowl with fresh basil leaves. This adds color and a fresh taste that brightens the dish. You can also sprinkle some extra cheese on top for added richness. Pro Tips Use Fresh Ingredients: Fresh bell peppers and onions enhance the flavor and texture of the dish, making it more vibrant and tasty. Customize Your Spice Level: Adjust the amount of red pepper flakes based on your heat preference, or opt for spicy Italian sausage for an extra kick. Make Ahead: This casserole can be prepared in advance and stored in the refrigerator for up to 2 days. Just reheat before serving! Cheese Variations: Experiment with different types of cheese, such as provolone or cheddar, for a unique twist on the classic mozzarella topping. {{image_2}} You can easily make this dish meat-free. Substitute the Italian sausage with plant-based sausage. Many brands offer tasty options that mimic the flavors of traditional sausage. You can also use mushrooms for a hearty texture. The earthy taste of mushrooms pairs well with the peppers and spices. If you want to change the base, try brown rice or couscous instead of quinoa. Brown rice gives a nutty flavor and is very filling. Couscous cooks faster and adds a light, fluffy texture. Both options work well with the sauce and ingredients. Feel free to add more vegetables to the mix. Zucchini or mushrooms can enhance the dish. They soak up the flavors and add nutrition. You can also play with different herbs. Thyme or rosemary can give a nice twist. Don't be afraid to experiment and find your favorite combo. To store leftovers, let the casserole cool first. Then, cover it tightly with plastic wrap or transfer it to an airtight container. Place it in the refrigerator. It can stay fresh for up to three days. When you're ready to eat, check for any off smells or discolored bits before reheating. For longer storage, you can freeze the casserole. First, let it cool completely. Then, cut it into portions and wrap each piece in plastic wrap. Place the wrapped pieces in a freezer-safe bag or container. This way, you can enjoy the casserole for up to three months. Make sure to label the bag with the date so you know when to use it. Reheating is easy! You can use the oven or microwave. To use the oven, preheat it to 350°F (175°C). Place the casserole in a baking dish, cover it with foil, and heat for about 20 minutes. For the microwave, place a single serving on a plate. Heat it on high for 2-3 minutes. Check if it’s hot all the way through. If not, heat in 30-second bursts until warm. Enjoy the flavors again! Yes, you can prepare this casserole ahead of time. Cook the sausage and veggies, then mix them with the other ingredients. Place everything in a baking dish, cover it, and store it in the fridge. You can bake it the next day. Just remember to adjust the baking time. If it's cold from the fridge, it may take a few extra minutes. You can try other proteins like ground turkey or chicken. For a vegetarian option, use plant-based sausage. Ground beef or pork also works well. Just make sure to cook the protein fully before adding it to the casserole. Each protein will give a unique flavor to the dish. Yes, this casserole can be gluten-free. Use gluten-free sausage and ensure the quinoa or rice is certified gluten-free. The rest of the ingredients, like tomatoes and spices, are naturally gluten-free. This makes it easy to enjoy this dish without gluten, while still tasting great. In this post, we explored a tasty casserole with Italian sausage, bell peppers, and quinoa. We went through preparation steps, cooking tips, and flavor variations to make your dish shine. Remember to pick quality ingredients for the best results. Experiment with different grains and vegetables for fun twists. Whether you make it ahead or freeze leftovers, this casserole is convenient and delicious. Enjoy a hearty meal that you can share with family and friends. Happy cooking!

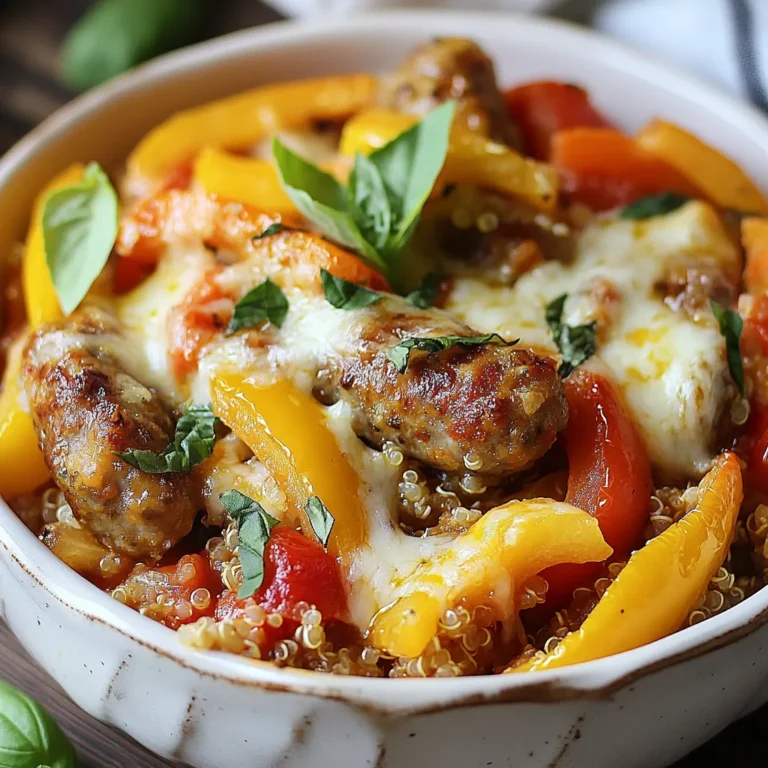
Italian Sausage Pepper Casserole Hearty and Flavorful Dish

- 2 pounds boneless, skinless chicken thighs - 1 packet ranch dressing seasoning mix - 8 ounces cream cheese, softened - 1 cup shredded cheddar cheese - 1/2 cup green onions, chopped - 1/2 cup bacon bits (optional for crunch) - 1 tablespoon garlic powder - 1 tablespoon onion powder - Salt and pepper to taste When I make Keto Crack Chicken, I love using boneless, skinless chicken thighs. They stay juicy and cook well. The ranch dressing mix adds a tasty kick. Cream cheese makes it rich and smooth. Don't forget the cheddar cheese; it melts beautifully. Green onions give a fresh touch, while bacon bits add a nice crunch. - Extra shredded cheddar cheese - Additional chopped green onions - Sliced jalapeños for heat - Sour cream for creaminess Feel free to get creative with toppings! Adding more cheese makes it even more decadent. Chopped green onions bring color and flavor. If you like spice, jalapeños are a fun choice. A dollop of sour cream can make each bite even better. This dish is great for a low-carb diet. Each serving has protein and healthy fats. The chicken provides lean protein, while cream cheese and cheddar add healthy fats. Overall, it's a filling meal that fits into a keto plan. - Approximate calories per serving: 400 - Carbohydrates: 3 grams - Protein: 30 grams - Fat: 30 grams This dish is not only tasty but also keeps you full without the carbs. It’s perfect for a busy weeknight or a hearty family dinner. {{ingredient_image_1}} First, gather all your ingredients. You will need: - 2 pounds boneless, skinless chicken thighs - 1 packet ranch dressing seasoning mix - 8 ounces cream cheese, softened - 1 cup shredded cheddar cheese - 1/2 cup green onions, chopped - 1/2 cup bacon bits (optional for crunch) - 1 tablespoon garlic powder - 1 tablespoon onion powder - Salt and pepper to taste Next, place the chicken thighs into your slow cooker or Instant Pot. Sprinkle the ranch mix, garlic powder, onion powder, salt, and pepper on top. After that, spread the softened cream cheese over the chicken. Make sure it covers as much chicken as possible. If you’re using a slow cooker, cover it and cook on low for 6-7 hours. You can also cook on high for 3-4 hours. The chicken will be tender and easy to shred when done. Once cooked, shred the chicken using two forks. Mix the cream cheese into the chicken until it is well combined. This will create a creamy texture. Next, stir in the shredded cheddar cheese and bacon bits, if you chose to use them. Mix until everything is melted and creamy. Finally, fold in most of the chopped green onions. Save some for garnishing later. For the Instant Pot method, seal the lid after adding the chicken and seasonings. Set it to high pressure for 15 minutes. When done, let the pressure release naturally. After the chicken is cooked, shred it with two forks. Mix the cream cheese into the chicken until well blended. Next, add the shredded cheddar cheese and bacon bits. Stir until melted and fully mixed. Lastly, fold in the majority of the green onions, reserving some for the top. This dish is creamy, savory, and perfect for a keto meal! To get the best texture in Keto Crack Chicken, use boneless, skinless chicken thighs. They stay juicy and tender. If you prefer, chicken breasts work as well but may dry out. Shredding the chicken after cooking is key. Use two forks to pull it apart. This helps mix in the cream cheese well. You can boost the flavor in many ways. Try adding spices like smoked paprika for warmth. Fresh herbs, like parsley or cilantro, can add a bright touch. If you like heat, add jalapeños or chili flakes. Don't forget to adjust salt and pepper to your taste. A squeeze of lemon juice can also brighten up the dish. One common mistake is overcooking the chicken. This makes it dry and tough. Always check the cooking time. If using a slow cooker, avoid opening the lid too often. This lets heat escape. Another mistake is not mixing the cream cheese well. Make sure to fold it in fully, so every bite is creamy and rich. Pro Tips Use Bone-In Chicken: For extra flavor, consider using bone-in chicken thighs instead of boneless. The bones will add richness to the dish as it cooks. Experiment with Cheese: Feel free to mix different types of cheese such as mozzarella or pepper jack for a unique twist on the flavor profile. Add Vegetables: Incorporate vegetables like bell peppers or spinach into the mix for added nutrition and color. Store Leftovers Properly: To keep the dish fresh, store leftovers in an airtight container in the fridge for up to 4 days. Reheat gently to avoid drying out the chicken. {{image_2}} You can easily change up the cheese in this dish. Try using mozzarella for a stretchy, gooey texture. Parmesan adds a nice nutty flavor. If you like blue cheese, it gives a bold taste. Mix and match your favorites for a fun twist! Want a kick? Add diced jalapeños or hot sauce to the mix. You can also use pepper jack cheese for creaminess and spice. Adjust the heat level based on your taste. This spicy version will wake up your taste buds! For a dairy-free option, swap cream cheese with coconut cream. Use nutritional yeast for a cheesy flavor. This makes the dish both dairy-free and paleo-friendly. You can still enjoy all the creaminess without the dairy! To keep your Keto Crack Chicken fresh, place leftovers in an airtight container. Make sure it’s cool before sealing. Store it in the fridge for up to four days. If you have a lot left, consider portioning it out for easy meals later. When you're ready to enjoy your leftovers, reheat them gently. You can use the microwave or stovetop. If you use the microwave, heat in short bursts to avoid drying it out. Stir occasionally for even heating. If using the stovetop, add a splash of water or broth to keep it moist. If you want to freeze it, make sure to cool the dish completely. Portion it into freezer-safe bags or containers. Label them with the date for easy tracking. You can freeze Keto Crack Chicken for up to three months. To reheat, let it thaw in the fridge overnight before warming it up. You can serve Keto Crack Chicken with many sides. A simple choice is steamed broccoli. Cauliflower rice is also great for a low-carb option. You might like a fresh salad with cucumber and tomatoes. For something warm, try zucchini noodles. These sides add color and nutrition to your meal. Yes, you can use chicken breasts. They will cook faster than thighs. Be cautious, as breasts can dry out more easily. If you use breasts, check for doneness sooner. Cooking times may vary, so adjust as needed. Use a meat thermometer to ensure they reach 165°F. To boost flavor, add spices like paprika or cayenne. Fresh herbs like parsley or basil add brightness. You could also mix in some hot sauce for a spicy kick. Try using smoked cheese for a deeper taste. Adding garlic cloves or sautéed onions can enhance the dish’s aroma, too. This blog post covered all you need to know about Keto Crack Chicken. We talked about the key ingredients, ways to cook it, and tips for the best results. Exploring variations lets you make it your own. Proper storage ensures your leftovers stay fresh. Keto Crack Chicken is tasty and easy to make. Try out the ideas here and enjoy your meal. Happy cooking!

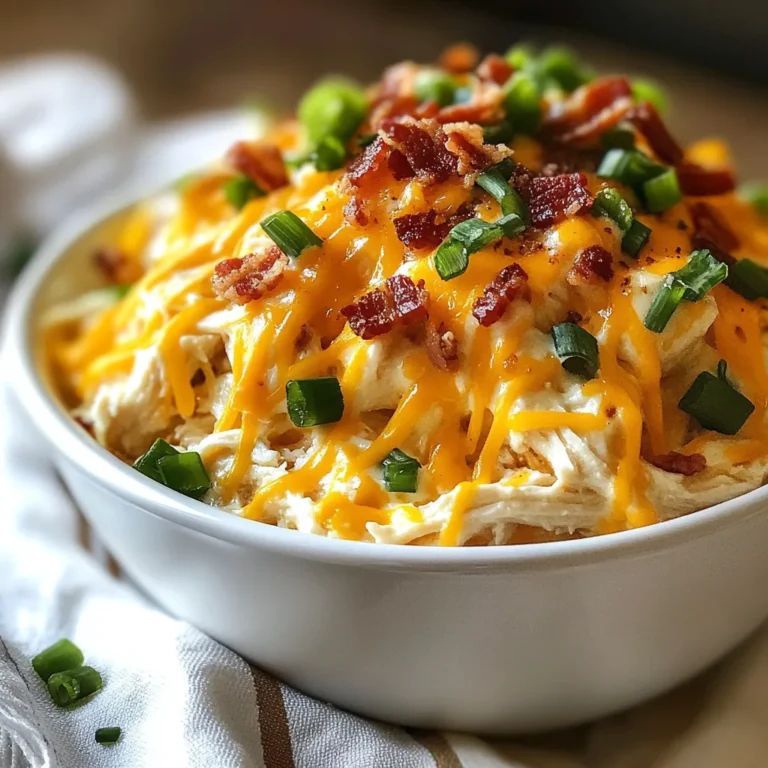
Keto Crack Chicken Flavorful and Easy Recipe Guide

- 12 corn tortillas - 1 lb ground beef or turkey - 1 can (15 oz) black beans, rinsed and drained - 1 can (15 oz) corn, drained - 1 cup diced tomatoes (fresh or canned) - 1 small onion, chopped - 2 cloves garlic, minced - 2 cups shredded cheese (cheddar or Mexican blend) - 1 tablespoon taco seasoning - 1/2 cup fresh cilantro, chopped - 1 jalapeño, diced (optional, for extra heat) - 1/2 cup sour cream (for serving) - Salt and pepper to taste You can make this dish even better with a few extras. Try adding: - Chopped bell peppers for sweetness - Black olives for a briny kick - Avocado slices for creaminess - Lime juice for a zesty touch Mexican lasagna is not just tasty; it offers great nutrition too. Here are some benefits: - Ground beef or turkey: Provides protein for muscle health. - Black beans: High in fiber and helps with digestion. - Corn: Offers vitamins and minerals, plus a sweet crunch. - Tomatoes: Packed with antioxidants and vitamins. - Cilantro: Adds flavor and may have health perks, like anti-inflammatory properties. These ingredients work together to make a meal that is both satisfying and good for you. Enjoying this dish means getting a mix of flavors and health benefits in one bite! {{ingredient_image_1}} Start by preheating your oven to 375°F (190°C). This is key for a nice bake. Next, grab a large skillet. Add the chopped onion and minced garlic. Sauté them over medium heat for about 3-4 minutes. You want the onion to turn translucent. Then, add the ground beef or turkey. Cook it until it's browned, breaking it apart while it cooks. This takes about 6-8 minutes. Make sure to drain any excess fat from the skillet. After that, stir in your taco seasoning, black beans, corn, and diced tomatoes. Mix well and let it simmer for 5 minutes. Season with salt and pepper to taste. In a 9x13-inch baking dish, spread a thin layer of the meat mixture on the bottom. Place 3 corn tortillas over the meat, overlapping them slightly. Sprinkle a third of the shredded cheese on top. Then, layer another portion of the meat mixture and a handful of chopped cilantro. Repeat this layering two more times. Make sure the final layer is tortillas topped with cheese. Cover the dish with foil. Bake in the preheated oven for 25 minutes. After that, remove the foil and bake for another 10-15 minutes. Look for the cheese to be bubbly and golden. Once your Mexican lasagna is out of the oven, let it cool for a few minutes before slicing. This helps it set. Serve it with a dollop of sour cream on top. You can also garnish with extra cilantro and diced jalapeño if you like heat. Enjoy each bite of this flavorful dish! To make your Mexican lasagna shine, focus on layers. Start with the meat mixture, then add tortillas. This keeps everything moist and tasty. Use fresh cilantro for a pop of flavor. If you like heat, add diced jalapeños throughout. Don't rush the baking time. Let the cheese bubble and turn golden for the best results. To save time, prep your ingredients first. Chop your onions and garlic in advance. You can also cook the meat mixture a day before. Just reheat it when you're ready to layer. Consider using store-bought taco seasoning for quick flavor. Pre-shredded cheese can cut down on prep time, too. For this recipe, you'll need a few key tools. A large skillet helps cook the meat evenly. A 9x13-inch baking dish is perfect for layering. Use a sharp knife for chopping veggies and a cutting board for safety. Don't forget a spatula for mixing and serving. A foil cover is essential for baking. These tools make the process easier and more enjoyable. Pro Tips Use Fresh Ingredients: Always opt for fresh vegetables and herbs to enhance the flavor of your Mexican lasagna. Layer Wisely: Make sure to evenly distribute the meat mixture and cheese in each layer for consistent flavor in every bite. Customize Your Heat: If you like it spicy, add more jalapeños or a dash of hot sauce to the meat mixture. Let It Rest: Allow the lasagna to cool for a few minutes before slicing; this helps it hold its shape and makes serving easier. {{image_2}} For a meat-free meal, use veggies instead of meat. You can add layers of zucchini, bell peppers, or mushrooms. Use black beans and corn for protein. This keeps the dish hearty and tasty. You might want to add extra cheese for creaminess. Fresh cilantro and tomatoes bring bright flavors. If you need a gluten-free dish, choose corn tortillas. They work great as a base. Make sure to check the labels for gluten-free assurance. You can also swap out the beans for lentils. This keeps the protein high while staying gluten-free. To turn up the heat, add diced jalapeños or sliced serrano peppers. You can mix in a chipotle sauce for a smoky flavor. If you love spice, add hot sauce to the layers. This makes each bite exciting and full of flavor. Remember, heat levels can be adjusted to fit your taste! After you make your Mexican lasagna, let it cool down. Cover it well with plastic wrap or aluminum foil. Store it in the fridge for up to 3 days. This keeps the flavors fresh and tasty. If you want to save a slice for lunch, this method works great. For longer storage, freeze your Mexican lasagna. First, let it cool completely. Then, wrap it tightly in plastic wrap and foil. You can store it in the freezer for up to 3 months. When you are ready to eat it, just thaw it in the fridge overnight. To reheat, preheat your oven to 350°F (175°C). Remove any plastic wrap but keep the foil on. Place it in the oven for about 25 minutes. If you want to reheat a single slice, use the microwave. Heat it for 1-2 minutes, checking that it's warm all the way through. Then, enjoy your delicious meal! Yes, you can use different meats in your Mexican lasagna. Ground beef is popular, but ground turkey works well too. You can even try chicken or pork for unique flavors. If you want a meatless option, use black beans or lentils instead. This choice makes the dish tasty and fits various diets. To change the heat level, add or remove jalapeños. If you like it spicy, include diced jalapeños in the meat mixture. You can also use hot taco seasoning. If you prefer milder flavors, skip the jalapeños and use mild seasoning. Taste the mix as you cook to find the right balance for you. Many sides go well with Mexican lasagna. A fresh salad adds crunch and flavor. You might enjoy a side of rice, like Spanish or cilantro-lime rice. Tortilla chips with salsa or guacamole make great snacks. For a fun twist, serve it with corn on the cob. These sides complement the rich flavors perfectly. To make Mexican lasagna, we explored key ingredients that add flavor and nutrition. I shared step-by-step instructions for preparing, cooking, and serving this dish. You learned tips to perfect your lasagna, including time-savers and tools. We discussed variations like vegetarian and gluten-free options. Lastly, I provided storage info and answered common questions. In summary, Mexican lasagna is flexible and easy. With these tips, you can create a tasty meal. Enjoy your cooking!

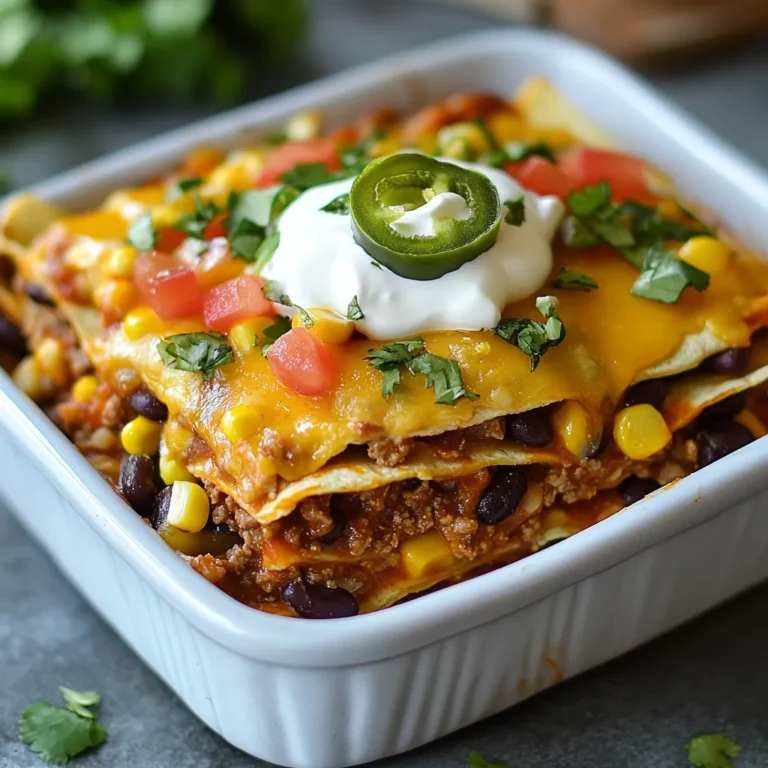
Mexican Lasagna Flavorful and Easy Dinner Recipe

- 4 cups fresh spinach, roughly chopped - 1 cup ricotta cheese - 1 cup mozzarella cheese, shredded - 1/2 cup grated Parmesan cheese - 2 large eggs - 1 teaspoon garlic powder - 1 teaspoon Italian seasoning - Salt and pepper to taste - 1 cup marinara sauce - 1 cup cherry tomatoes, halved - 1/4 cup fresh basil, chopped (for garnish) For this Italian Spinach Bake, fresh spinach is a must. It gives the dish a bright green color. Ricotta cheese adds creaminess, while mozzarella gives that stretchy, melty goodness. Parmesan cheese brings a nice sharp flavor. You’ll need two large eggs to bind it all together. Garlic powder and Italian seasoning add that classic flavor. Don’t forget salt and pepper to enhance the taste. Marinara sauce adds moisture and a rich tomato flavor. Cherry tomatoes are sweet and juicy, adding a pop of color. Finally, fresh basil brightens the dish and makes it look pretty. Gather all these ingredients before you start cooking. It makes the process smooth and fun. You’ll love how simple and tasty this dish is! {{ingredient_image_1}} First, preheat your oven to 375°F (190°C). This step is key for cooking. While the oven warms up, prepare your baking dish. I usually use a 9x9 inch glass dish. Next, grab a large mixing bowl. Combine the roughly chopped spinach, ricotta cheese, and 3/4 cup of the mozzarella cheese. Add in the grated Parmesan cheese, eggs, garlic powder, Italian seasoning, salt, and pepper. Mix it all well until it becomes a smooth mixture. Now it’s time to build your dish. Start by spreading half of the marinara sauce at the bottom of your baking dish. This helps the bake stay moist. Then, spoon the spinach mixture over the marinara sauce. Smooth it out with a spatula. Next, layer the rest of the marinara sauce over your spinach mix. Top this with halved cherry tomatoes and the remaining mozzarella cheese. This adds color and flavor to your bake. Cover the baking dish with aluminum foil. Bake it in your preheated oven for 20 minutes. This keeps the steam in for a tender bake. After 20 minutes, remove the foil. Bake for another 15 to 20 minutes. Look for that golden brown, bubbly top. Once done, let it cool for a few minutes before slicing. You can garnish it with fresh basil for a nice touch. Enjoy your Italian Spinach Bake! To get the right spinach texture, use fresh spinach. Wash it well and chop it roughly. Cook it in a pan for a few minutes to wilt it. This helps keep it from being too watery in the bake. If you use frozen spinach, make sure to squeeze out all the extra water. For the best cheese melt, use high-quality mozzarella. Shred it yourself for better meltability. Mix the mozzarella into the spinach mixture, but save some for the top. This creates a cheesy, gooey layer when baked. Pair this dish with a simple side salad. A fresh green salad adds a nice crunch. Garlic bread also works well, adding texture and flavor. The Italian Spinach Bake is perfect for family dinners. It also shines at potlucks or gatherings. Serve it warm, and let the cheese stretch as you slice it. Pro Tips Use Fresh Spinach: Fresh spinach gives the best flavor and texture. If using frozen spinach, ensure it is fully thawed and drained to avoid excess moisture. Cheese Variations: Feel free to mix different cheeses like feta or goat cheese for a unique twist on flavor. Just keep the total cheese amount consistent. Make Ahead: This dish can be prepared ahead of time. Assemble it and store in the refrigerator for up to a day before baking, making it a great option for meal prep. Perfect Baking: For a perfectly bubbly and golden cheese topping, broil the dish for the last 2-3 minutes of baking, but watch closely to prevent burning. {{image_2}} You can change this dish to fit your taste. Use different cheeses or greens. - Cheese Options: Try feta for a tangy twist. Goat cheese adds creaminess. - Greens: Kale or Swiss chard work well too. Mix in some arugula for a peppery bite. Adding proteins can make this bake heartier. - Proteins: Cooked chicken or sausage adds great flavor. You can also add beans for a vegetarian boost. - Other Veggies: Bell peppers, zucchini, or mushrooms are great additions. Just chop them small and mix them in. You can easily adapt this dish for different diets. - Gluten-Free: This recipe is naturally gluten-free. Just ensure your marinara sauce is gluten-free too. - Vegan Options: Replace eggs with flax eggs. Use tofu or cashew cheese instead of dairy cheese. For those watching carbs, make a few changes. - Low-Carb: Skip the marinara sauce. Use a low-carb sauce or just olive oil. Add more cheese and veggies for flavor. To store your Italian Spinach Bake, first let it cool completely. This step keeps moisture in check. You can use an airtight container or wrap it tightly with plastic wrap. Place it in the fridge for up to three days. This way, you can enjoy it later without losing flavor. If you want to keep it longer, consider freezing. Cut the bake into portions. Wrap each piece in plastic wrap, then place them in a freezer bag. Make sure to remove as much air as possible. This method helps prevent freezer burn. You can freeze it for up to three months. When it's time to eat your leftovers, you have two options: the microwave or the oven. If you're in a hurry, the microwave works well. Just place a portion on a microwave-safe plate and cover it with a damp paper towel. Heat it for about one to two minutes, checking to make sure it warms evenly. For the oven method, preheat it to 350°F (175°C). Place the dish in an oven-safe dish and cover it with foil. Bake for about 15 to 20 minutes. This method helps keep the dish moist, so the cheese stays melty. If you like a crispy top, remove the foil for the last few minutes of baking. Enjoy your delightful meal! Can I use frozen spinach instead of fresh? Yes, you can use frozen spinach. Just thaw it first and squeeze out extra water. This helps prevent a soggy bake. Frozen spinach is a great time-saver, and it still tastes good. How do I make it ahead of time? You can prepare the dish a day in advance. Just follow the steps to mix everything. Cover it and store in the fridge. When ready to bake, add extra time if it’s cold from the fridge. Can I make substitutions for dairy-free options? Yes, you can use dairy-free cheese like almond or coconut-based options. You can also swap ricotta for a tofu mix. Just blend tofu with lemon juice for a creamy texture. What's the best way to reheat leftovers? The oven is best for reheating. Set it to 350°F (175°C) and cover the dish with foil. This keeps the top from burning while warming the inside. Bake for about 15 minutes or until hot. This Italian Spinach Bake is easy to make with fresh ingredients and simple steps. Start by prepping your ingredients and follow the assembly instructions for a delicious dish. Use tips to perfect your bake and consider the variations to suit your taste or dietary needs. Don’t forget proper storage for leftovers. Enjoy cooking, and make this meal your own! Embrace the joy of sharing it with family and friends.

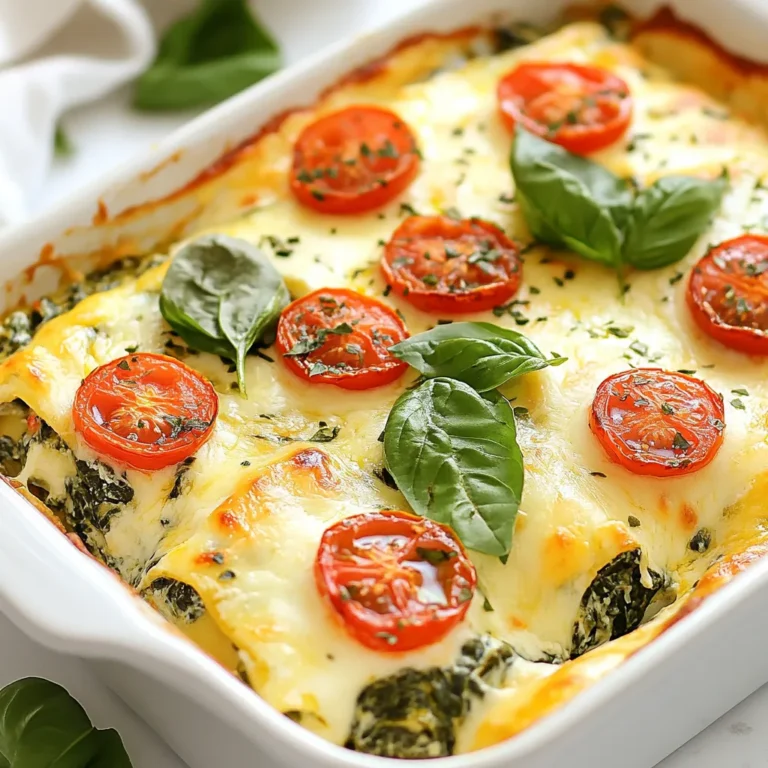
Italian Spinach Bake Simple and Flavorful Dish

- 10 oz (280g) pasta of your choice (spaghetti, rigatoni, or penne) - 2 cups cherry tomatoes, halved - 1 bulb of garlic, unpeeled - 3 tablespoons olive oil - 1 teaspoon red pepper flakes - Salt and pepper to taste - 1 cup fresh basil leaves, torn - 8 oz burrata cheese - Zest of 1 lemon - 2 tablespoons lemon juice - Freshly grated Parmesan cheese (for serving, optional) For this dish, I love using pasta like spaghetti, rigatoni, or penne. They hold the sauce well. Cherry tomatoes are key for this recipe. Halve them for even cooking and bursting flavor. Don't forget the garlic! Use a whole bulb, unpeeled. It gets sweet when roasted, adding depth. Olive oil is crucial for roasting. It helps tomatoes caramelize and brings out their sweetness. Red pepper flakes give a nice kick. Adjust the amount to your taste. Use salt and pepper to highlight the flavors. Now, let's talk about burrata cheese. It's creamy and rich, making it a star in this dish. Choose fresh burrata for the best taste and texture. The lemon zest and juice brighten up the pasta, balancing the creaminess. - Additional cheeses: Parmesan for serving - Herbs and spices: fresh basil and red pepper flakes Adding freshly grated Parmesan cheese enhances flavor. It adds a salty, nutty touch. Sprinkle it over the dish just before serving. Fresh basil brightens the entire meal. Use torn leaves for a fragrant finish. You can also add more red pepper flakes if you love spice. These optional ingredients elevate your dish and let you customize it to your taste. Now, you're all set to make a delicious burst tomato burrata pasta! {{ingredient_image_1}} Preheat your oven to 400°F (200°C). This high heat will make your tomatoes burst with flavor. For the best results, use fresh cherry tomatoes. Cut them in half and place them on a baking sheet. Also, add an unpeeled bulb of garlic. Drizzle everything with olive oil. Sprinkle with salt, pepper, and red pepper flakes. Toss to coat all the tomatoes evenly. Roast in the oven for about 20-25 minutes. Watch them closely until the tomatoes burst and the garlic becomes soft. Remove them from the oven and let them cool slightly. While the tomatoes roast, it's time to cook the pasta. Bring a large pot of salted water to a boil. Add 10 oz (280g) of your favorite pasta, like spaghetti or rigatoni. Cook until it is al dente, which means it should have a slight bite to it. This usually takes about 8-10 minutes. Don't forget to reserve about 1 cup of the pasta cooking water before draining the rest. This water will help you later in creating the sauce. Next, let’s make the sauce. Take the roasted garlic and squeeze it out of its skins into a large bowl. Add the burst tomatoes to the bowl. Now, it's time to bring in some brightness. Squeeze in 2 tablespoons of lemon juice and add the zest of one lemon. Use a fork to gently mash the mixture. You want it to be chunky, not smooth. This will give your sauce a great texture. Add the cooked pasta directly into the bowl with the tomato-garlic sauce. Toss everything together gently. If the sauce looks too thick, add some of the reserved pasta water. This will help reach your desired sauce consistency. Make sure every piece of pasta is coated well in the sauce. Now comes the fun part: serving! Plate the pasta and top each serving with a generous piece of burrata cheese. The creamy cheese will melt slightly into the warm pasta. Finish off the dish with fresh basil leaves for color and flavor. If you like, sprinkle some freshly grated Parmesan cheese on top. Enjoy your delicious burst tomato burrata pasta! To get tasty roasted tomatoes, you need good olive oil and seasoning. Olive oil keeps the tomatoes moist. It also helps them brown nicely. Salt and pepper bring out the natural flavor of the tomatoes. Red pepper flakes add a nice kick, too. Look for certain signs to know when your tomatoes are done. They should burst and look soft. The garlic should feel tender when squeezed. A sweet aroma will fill your kitchen, making your mouth water. If you have leftover pasta, store it in an airtight container. Keep it in the fridge for up to three days. To keep the pasta fresh, separate it from the sauce. This way, it won’t get soggy. When you want to reheat, use a pan on low heat. Add a splash of water or olive oil to help it heat evenly. Stir gently to avoid breaking the burrata. You can also use the microwave. Just cover the dish to keep moisture in. Pair this dish with a light white wine, like Sauvignon Blanc. Its acidity balances the richness of the burrata. If you prefer a drink without alcohol, try sparkling water with lemon. Serve with a simple side salad. A fresh green salad with a light vinaigrette works well. You could also add garlic bread for a tasty crunch. These sides will round out your meal perfectly. Pro Tips Use Seasonal Tomatoes: Opt for ripe, in-season tomatoes for the best flavor and sweetness in your pasta dish. Don't Overcook the Pasta: Cook your pasta just until al dente, as it will continue to cook slightly when combined with the hot sauce. Experiment with Cheese: If you can’t find burrata, try using fresh mozzarella or ricotta for a different texture and flavor. Save the Pasta Water: Always reserve some pasta cooking water; it helps to emulsify and create a silky sauce when mixed with the pasta. {{image_2}} You can add proteins to make this dish heartier. Shrimp is a great choice. Sauté the shrimp in olive oil with garlic until cooked. Grilled chicken also works well. Cube it and toss it with the pasta. For vegetarian options, try chickpeas or lentils. Both add protein and texture without meat. If you want a vegan version, swap out the burrata cheese. Use cashew cream or a nut-based cheese. These alternatives give a creamy texture. For the sauce, consider using nutritional yeast for a cheesy flavor. You can also use a tomato-based sauce for a different twist. Change up this recipe with seasonal veggies. In spring, add asparagus or peas. In fall, try roasted butternut squash. Each season brings new flavors. You can also play with herbs. In summer, use fresh oregano; in winter, add thyme. These small changes can make the dish feel new every time. You can store leftovers in an airtight container. Keep them in the fridge for up to three days. To maintain freshness, store the burrata separately. If you want to freeze it, do so without the cheese. The pasta can last up to two months in the freezer. Yes, you can use various tomatoes. Grape tomatoes are sweet and burst nicely. Roma tomatoes provide a thicker sauce. If you prefer, use heirloom tomatoes for a unique taste. Each type will bring its own flavor and texture to the dish. Absolutely! You can use gluten-free pasta made from rice or corn. These options will work well with the sauce. Just be careful to follow the cooking instructions on the package. This way, you will get the right texture and taste. To add heat, increase the red pepper flakes. You can also add sliced fresh chili peppers. Another option is to drizzle chili oil on top before serving. Adjust the spice to your liking for a kick in every bite. When reheating, add a splash of olive oil or water. This helps keep the pasta moist. Warm it up gently on the stove or microwave. You can also top it with fresh basil or more burrata for extra flavor. This blog post covers a delicious burst tomato burrata pasta recipe. You learned about essential and optional ingredients, how to roast tomatoes, and create a creamy sauce. I shared tips for perfecting your dish and various ways to customize it. Feel free to experiment with proteins or seasonal veggies. Store any leftovers properly for another meal. Cooking is about creativity, so make this recipe your own! Enjoy each bite and share your tasty results with friends.

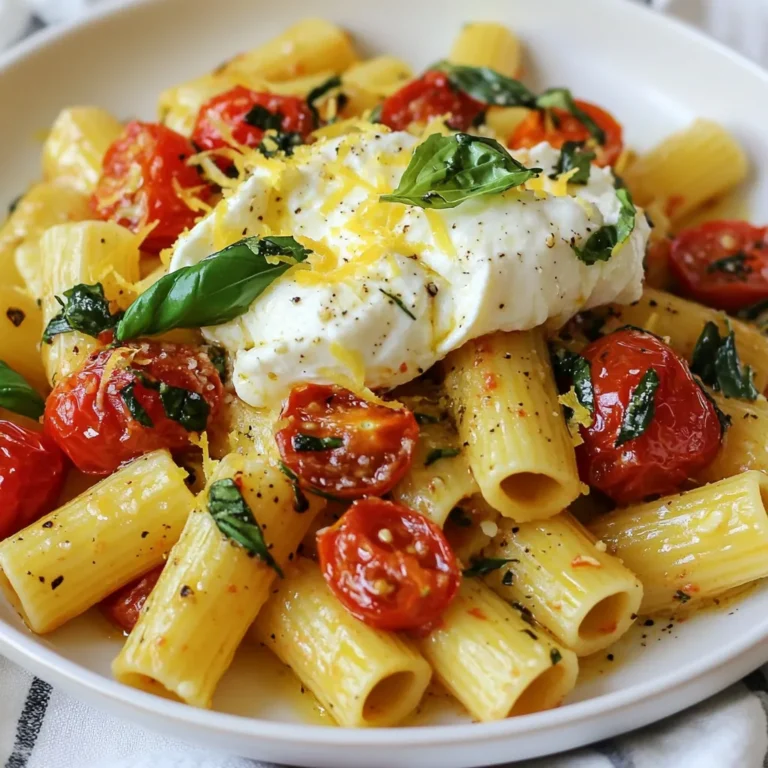
Burst Tomato Burrata Pasta Recipe for Flavorful Dinner

To make a tasty Fajita Chicken Casserole, you need the right ingredients. Here’s what you will use: - 2 cups cooked chicken, shredded - 1 red bell pepper, sliced - 1 green bell pepper, sliced - 1 medium onion, sliced - 1 can (15 oz) black beans, drained and rinsed - 1 cup corn (frozen or canned) - 1 tablespoon fajita seasoning - 1 cup salsa - 1 cup shredded cheddar cheese - 1 cup sour cream - 1 cup tortilla chips, crushed - Fresh cilantro, chopped (for garnish) Each ingredient plays a special role. The chicken adds protein, and the bell peppers and onion give sweetness and crunch. Black beans and corn add fiber and texture. Fajita seasoning brings a bold flavor, while salsa adds moisture and zest. The cheese and sour cream make it creamy and rich. Finally, the crushed tortilla chips give a nice crunch on top. This list keeps your casserole hearty and satisfying. You can find all these items at your local grocery store. If you’re ready, gather them up and let’s cook! {{ingredient_image_1}} - Preheat the oven: Start by setting your oven to 350°F (175°C). This will ensure your casserole cooks evenly. - Sauté vegetables: In a large skillet over medium heat, add sliced onion and bell peppers. Cook them for about 5-7 minutes until they soften. This step adds great flavor. - Combine ingredients in skillet: Next, add shredded chicken, fajita seasoning, black beans, corn, and salsa to the skillet. Mix well and cook for 3-4 minutes until everything is heated through. - Prepare sour cream and cheese mixture: In a separate bowl, mix sour cream with half of the shredded cheddar cheese until smooth. This will add creaminess to your casserole. - Layer the casserole: Grease a 9x13 inch baking dish. Start with half of the chicken mixture as the first layer. Then, add half of the crushed tortilla chips on top. - Bake the casserole: Spread the sour cream and cheese mixture over the tortilla chips. Next, add the remaining chicken mixture. Finally, sprinkle the rest of the crushed tortilla chips and the remaining cheddar cheese on top. Bake for 25-30 minutes until bubbly and golden. - Serve and garnish: Once baked, take it out of the oven and let it cool slightly. Garnish with chopped cilantro before serving. Enjoy your delicious fajita chicken casserole! - How to ensure chicken stays moist: Use cooked chicken that is shredded. This helps it soak up flavors. Add a bit of broth to the mixture to keep it juicy. - Best practices for layering: Start with a good base. Layer half of your chicken mix first. This keeps the bottom from getting soggy and helps with even cooking. - Tips for controlling spice levels: Use less fajita seasoning if you want a milder taste. You can also choose a mild salsa. Taste as you go to find the right heat for you. - Garnishing ideas: Fresh cilantro adds a nice touch. You can also use slices of lime for color and flavor. - Serving suggestions with sides: Serve with a simple salad or rice. These sides balance the meal well. - Best dishes to serve with fajita chicken casserole: Pair it with guacamole and chips for a great snack. You can also serve it with a fresh corn salad for added crunch. Pro Tips Use Leftover Chicken: This casserole is a perfect way to use up any leftover rotisserie or grilled chicken you have on hand, saving you time and effort. Customize the Veggies: Feel free to add or substitute other vegetables like zucchini, mushrooms, or spinach to tailor the casserole to your family's taste. Spice it Up: Adjust the heat level by adding jalapeños or a dash of hot sauce to the chicken mixture for a spicier kick. Make Ahead: Prepare the casserole in advance and store it in the refrigerator for up to 24 hours before baking. Just add a few extra minutes to the baking time if it's coming straight from the fridge. {{image_2}} You can easily swap out proteins in this dish. Try using turkey or beef if you want a change. Both will give a nice twist to the flavor. For a plant-based option, use plant-based chicken. It works great and keeps the dish hearty. If you want it dairy-free, replace sour cream and cheddar cheese with suitable alternatives. Many brands offer tasty dairy-free products that can mimic the creaminess. Experiment with different seasoning blends to jazz up your casserole. You can use taco seasoning or even a spicier blend. Adding veggies like zucchini or mushrooms can enhance the taste and nutrition. They add texture and flavor without overpowering the dish. For toppings, consider jalapeños for heat or olives for a briny kick. These simple changes can make each meal feel new and exciting. After making fajita chicken casserole, let it cool. Store leftovers in an airtight container. Place it in the fridge. It will last about 3 to 4 days. For best taste, eat it within this time. Make sure to label your container with the date. This way, you can keep track of how long it has been stored. When you want to eat it again, just take it out. Reheat it in the microwave or oven until hot. You can freeze fajita chicken casserole too. To do this, let it cool completely. Transfer it to a freezer-safe dish. Cover it tightly with plastic wrap or foil. This will help keep it fresh. It can stay in the freezer for up to 3 months. When you're ready to eat it, take it out. Thaw it in the fridge overnight. For reheating, bake it in the oven at 350°F (175°C) until it’s hot throughout. This keeps the flavors tasty and fresh. Can I make this casserole ahead of time? Yes, you can prepare the casserole a day before. Just cover it and store it in the fridge. When ready, bake it straight from the fridge. Add a few extra minutes to the cooking time. What can I serve with fajita chicken casserole? You can serve this casserole with a fresh salad or some rice. Chips and guacamole also pair well. If you want, add some salsa on the side for more flavor. How do I make it spicier? To spice it up, add more fajita seasoning. You can also mix in some chopped jalapeños or hot sauce. If you love heat, try using pepper jack cheese instead of cheddar. Can I use fresh vegetables instead of canned? Yes, using fresh veggies is a great choice. You can slice fresh bell peppers, onions, and even add zucchini. Just remember to sauté them until they're soft before mixing them in. How long do I bake it for? Bake the casserole for about 25-30 minutes. Look for it to be bubbly and golden on top. If you like it extra crispy, leave it in a bit longer. What is the best way to reheat leftovers? For leftovers, reheat them in the oven at 350°F. Cover the dish with foil to keep it moist. You can also use the microwave, but the oven gives it a better texture. Can I customize the cheese used in the recipe? Absolutely! Feel free to use any cheese you like. Monterey jack, mozzarella, or even a mix can work well. Just make sure it melts nicely for that gooey texture we all love. This blog covered a simple and tasty fajita chicken casserole. We looked at key ingredients, preparation steps, and provided tips for cooking and presentation. You can alter the recipe, store your leftovers, and customize it to fit your taste. In the end, this dish is easy to make and share. Enjoy your time in the kitchen and make this meal your own. You’ll love serving it to family and friends.

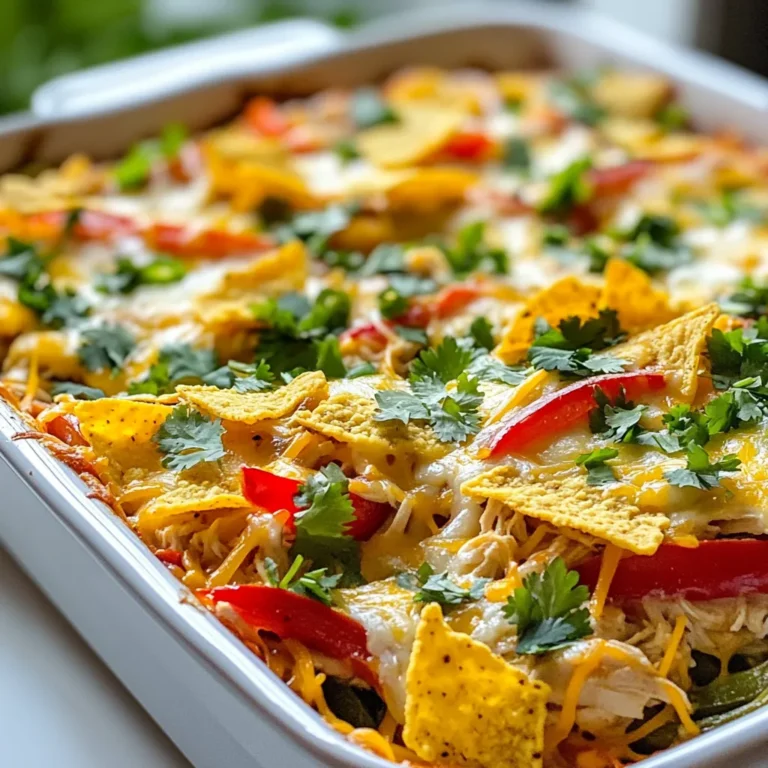
Fajita Chicken Casserole Easy and Hearty Meal

To make a tasty Chicken Caesar Sandwich, you'll need: - 2 boneless, skinless chicken breasts - 1 cup buttermilk - 1 cup breadcrumbs (panko for extra crunch) - 1/2 cup grated Parmesan cheese - 1 teaspoon garlic powder - 1 teaspoon onion powder - Salt and pepper to taste - 4 whole grain sandwich rolls - 1 cup romaine lettuce, chopped - 1/2 cup Caesar dressing (store-bought or homemade) - 1/4 cup cherry tomatoes, halved - Freshly cracked black pepper for garnish These ingredients work together to create a crunchy, creamy, and savory sandwich. The buttermilk tenderizes the chicken and adds a rich flavor. The breadcrumbs and Parmesan create a crispy crust that contrasts nicely with the creamy Caesar dressing. You can customize your sandwich with these fun options: - Avocado slices for creaminess - Sliced cucumbers for crunch - Bacon for extra flavor - Fresh herbs like basil or parsley for freshness These add-ins can enhance the taste and texture of your sandwich. Feel free to mix and match based on what you like! One Chicken Caesar Sandwich has about: - Calories: 550 - Protein: 36g - Carbohydrates: 42g - Fat: 25g This sandwich packs a good amount of protein from the chicken and cheese. It also has healthy fats and fiber from the whole grain rolls and lettuce. Enjoying this sandwich gives you a satisfying meal that can fit into a balanced diet! {{ingredient_image_1}} Start by marinating the chicken breasts in buttermilk for at least 1 hour. Marinating makes the chicken tender and juicy. You can even let it sit overnight for more flavor. Next, preheat your oven to 400°F (200°C). Line a baking sheet with parchment paper to make cleanup easy. In a shallow dish, mix breadcrumbs, grated Parmesan cheese, garlic powder, onion powder, and a pinch of salt and pepper. This mix gives the chicken a tasty crust. Take the chicken out of the buttermilk, letting the extra drip off. Dredge each breast in the breadcrumb mixture. Press the crumbs onto the chicken so they stick well. Place the breaded chicken on your baking sheet. Bake for 20-25 minutes. Check that the chicken is cooked through and the crust is golden brown. While the chicken bakes, prepare your sandwich rolls. Lightly toast them in a skillet or oven. This step adds great texture. Once the chicken is done, it's time to build your sandwiches. Spread a layer of Caesar dressing on the bottom half of each roll. Then, add the cooked chicken on top. Next, pile on the chopped romaine lettuce and halved cherry tomatoes. If you like, drizzle more dressing over the top. Finish your sandwich with freshly cracked black pepper. Place the top half of the roll on and press down gently. Slice the sandwich in half to make it easier to eat. Serve your sandwiches right away for the best taste. Use a wooden platter for a nice presentation. Garnish with extra lettuce and cherry tomatoes for color. A sprinkle of Parmesan cheese on top can make it look even better. Enjoy your Chicken Caesar Sandwich, a meal that is both tasty and satisfying! To get the best crispy chicken, start with good marination. Soak the chicken in buttermilk for at least one hour. This step makes the chicken juicy and full of flavor. Use panko breadcrumbs for an extra crunch. They give your chicken a nice texture. When breading, press down firmly to help the crumbs stick. Bake at 400°F for 20-25 minutes. This temperature helps the chicken cook evenly and get golden brown. Season your breadcrumbs for extra taste. Garlic powder and onion powder work well here. Mix these into your breadcrumbs along with Parmesan cheese. The cheese adds a savory touch. Don’t forget to season the chicken with salt and pepper before baking. This simple step boosts the overall flavor of the dish. You can also add herbs like oregano or thyme for a twist. For the best sandwich, toast your rolls before adding the filling. You can use a skillet or the oven. Lightly butter the rolls for added flavor. Toast them until they are golden and crisp. This will give your sandwich a nice crunch. It also helps hold the filling without getting soggy. Assemble your sandwich right after toasting for the best experience. Pro Tips Marinate for Maximum Flavor: The longer you marinate the chicken in buttermilk, the more tender and flavorful it will be. Aim for at least 1 hour, but overnight is even better! Use Panko for Extra Crunch: Opt for panko breadcrumbs instead of regular ones for a crunchier coating that adds great texture to your sandwich. Toast the Rolls: Lightly toasting the sandwich rolls enhances their flavor and adds a delightful crunch that complements the crispy chicken. Serve Fresh: For the best taste and texture, assemble the sandwiches just before serving to keep everything fresh and prevent sogginess. {{image_2}} You can easily spice up your Chicken Caesar Sandwich. Just add hot sauce to your Caesar dressing. This gives a nice kick. You can also marinate the chicken in buttermilk mixed with hot sauce. This adds flavor and heat. For an even bolder taste, sprinkle some cayenne pepper on the chicken before baking. Enjoy the heat! If you want to skip the chicken, try these options. Use grilled vegetables for a tasty twist. Zucchini, bell peppers, and mushrooms work well. You can also swap chicken for crispy tofu. Tofu takes on flavors well and adds protein. Use the same breading method for a crispy texture. A chickpea salad can also make a hearty base. Mix chickpeas with Caesar dressing and serve it on your roll. The bread you choose can change your sandwich's taste. Whole grain rolls bring a nutty flavor. Ciabatta or focaccia adds a nice chew. For a lighter option, use lettuce wraps. They are fresh and low-carb. You can also try a baguette for a crunchy bite. Each bread option gives a new twist to your Chicken Caesar Sandwich. To keep your leftover Chicken Caesar sandwiches fresh, wrap each one tightly in plastic wrap. You can also use aluminum foil. Place the wrapped sandwiches in an airtight container. Store them in the fridge for up to three days. This method keeps the bread soft and the chicken tasty. When it's time to eat your leftover sandwich, you want it warm and crispy. Preheat your oven to 350°F (175°C). Unwrap the sandwich and place it on a baking sheet. Heat for about 10-15 minutes. This will help the bread stay crunchy. You can also use a microwave, but it may make the bread soft. Heat it for about 30 seconds. If you want, you can toast the bread in a skillet for a crispy finish. If you want to save sandwiches for later, freezing is a great option. Wrap each sandwich tightly in plastic wrap, then place them in a freezer bag. Make sure to remove as much air as possible. You can freeze them for up to a month. When you're ready to eat, thaw the sandwich in the fridge overnight. Reheat as mentioned above for the best results. This way, you can enjoy a tasty Chicken Caesar sandwich anytime! A Chicken Caesar Sandwich is a tasty meal featuring crispy chicken, Caesar dressing, and fresh greens. It has a crunchy outside and juicy inside. The sandwich uses whole grain rolls for a healthy touch. You can enjoy it warm or cold. It’s a perfect mix of flavors and textures. To make homemade Caesar dressing, you need a few simple ingredients. Start with: - 1/2 cup mayonnaise - 2 tablespoons lemon juice - 1 tablespoon Dijon mustard - 1 teaspoon garlic, minced - 1/4 cup grated Parmesan cheese - Salt and pepper to taste Mix all ingredients in a bowl. Stir well until smooth. Taste and adjust seasoning. This dressing adds a fresh twist to your sandwich. Yes, you can use frozen chicken. Just remember to thaw it first. You can leave it in the fridge overnight. If you’re short on time, place it in cold water for a quick thaw. Once thawed, follow the same marinating and cooking steps. The chicken will still turn out crispy and tasty. This article covered how to make a tasty Chicken Caesar Sandwich. We discussed the main ingredients, add-ins, and the nutritional facts. I shared steps for prepping the chicken and assembling the sandwich. You also learned tips for crispy chicken and flavor boosts. We explored fun variations and how to store leftovers. Making this sandwich is simple and fun. Enjoy your cooking and savor every bite!

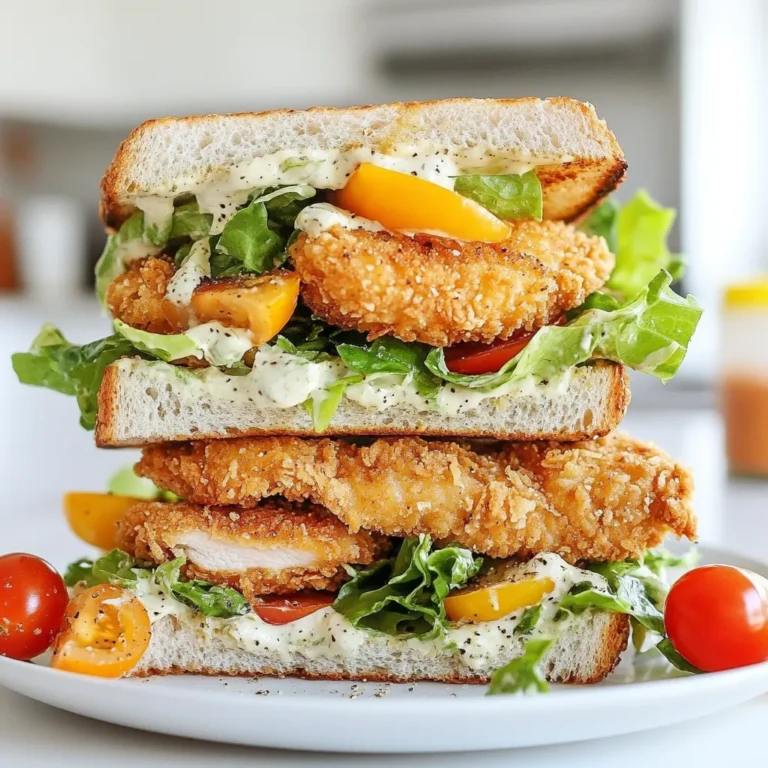
Chicken Caesar Sandwich Flavorful and Satisfying Meal

PREV 1 … 45 46 47 … 56 NEXT
go kitchen now

explore

DessertsDinnerAppetizersDrinks

Our Policies

  • Cookie Policy
  • Copyright Policy
  • Disclaimer
  • GDPR Policy
  • Terms Of Use
Back to Top
  • About
  • Contact Us
  • Privacy Policy
© 2025 go kitchen now