FREE DINNER EBOOK! Get your copy!
  • Cookie Policy
  • GDPR Policy
  • Disclaimer
  • Terms Of Use
  • Visit my other site: Fun Cookie Recipes
go kitchen now
  • Home
  • Dinner
  • Desserts
  • Drinks
  • Appetizers
  • Contact
  • About
  • Privacy Policy
  • Home
  • Dinner
  • Desserts
  • Drinks
  • Appetizers
  • Contact
  • About
  • Privacy Policy
  • Cookie Policy
  • GDPR Policy
  • Disclaimer
  • Terms Of Use
Visit my other site: Fun Cookie Recipes

HOME / CATEGORIES /

Latest

- 1 pound ground beef - 1/2 pound ground pork - 1 cup finely chopped green bell pepper - 1 cup finely chopped onion - 1 cup finely chopped mushrooms - 1 cup shredded provolone cheese - 1/2 cup breadcrumbs - 2 large eggs - 2 tablespoons Worcestershire sauce - 2 teaspoons garlic powder - 1 teaspoon salt - 1 teaspoon black pepper These main ingredients make your meatloaf juicy and full of flavor. Ground beef and pork give it a rich taste. Chopped veggies add color and texture. Provolone cheese melts into the meatloaf, making it creamy. - Fresh parsley, chopped (for garnish) - Additional provolone cheese slices for topping You can use fresh parsley to brighten your dish. Extra provolone cheese on top adds more cheesiness. - Sautéed peppers and onions - Barbecue sauce Sautéed peppers and onions make a great side. Drizzling barbecue sauce on your meatloaf adds a sweet kick. You can mix and match toppings to suit your family’s taste. {{ingredient_image_1}} First, you need to prepare your oven. Preheat it to 350°F (175°C). While the oven warms up, grab a loaf pan. Lightly grease it with oil or cooking spray. This helps the meatloaf come out easily after baking. Next, take out a large skillet. Set it over medium heat. Add chopped green bell pepper, onion, and mushrooms. Sauté these veggies for about 5-7 minutes. You want them to be soft and fragrant. Once done, remove the skillet from heat and let the mixture cool. In a large mixing bowl, combine the ground beef and ground pork. Then, add the sautéed veggies, shredded provolone cheese, and breadcrumbs. Crack in the two large eggs. Pour in Worcestershire sauce, garlic powder, salt, and black pepper. Mix everything well with your hands or a spatula until it’s all combined. Now it’s time to shape the meat mixture. Transfer it to the greased loaf pan. Use your hands to form it evenly in the pan. Bake the meatloaf in the preheated oven for 45-55 minutes. Check that the internal temperature reaches 160°F (70°C) to ensure it’s cooked through. About 10 minutes before the meatloaf is done, take it out. Lay slices of provolone cheese on top. Return it to the oven and let the cheese melt. This adds a tasty layer of gooey goodness. When finished, take it out and let it rest for 10 minutes. Then, slice and serve it with fresh parsley on top for a nice touch. To get a great texture, mix the meats well. Use ground beef and pork for flavor. The pork adds moisture to the meatloaf. Don't overmix, as this can make it tough. Make sure the vegetables are cooled before mixing. This keeps the meatloaf from getting too wet. Add Worcestershire sauce for depth and umami. Garlic powder boosts the savory notes. You can also try adding a splash of hot sauce for some heat. Fresh herbs like parsley can brighten the dish. For an extra cheesy bite, fold in more provolone cheese into the mix. Serve slices of meatloaf on a big platter. Add sautéed peppers and onions on the side. Drizzle your favorite barbecue sauce on top for added flavor. Pair it with mashed potatoes or a fresh salad for a complete meal. This dish is sure to impress your family! Pro Tips Use a Meat Thermometer: To ensure your meatloaf is perfectly cooked, use a meat thermometer to check that the internal temperature reaches 160°F (70°C). Variations on Cheese: Feel free to experiment with different cheeses like cheddar or mozzarella for a unique flavor twist. Resting Time is Key: Allow your meatloaf to rest for at least 10 minutes before slicing to help retain its juices. Leftover Makeover: Use leftover meatloaf in sandwiches, pasta, or even as a topping for pizza for a delicious second meal. {{image_2}} You can swap the ground beef and pork for other meats. Try ground turkey or chicken for a leaner dish. If you want more flavor, use a mix of meats. For the cheese, provolone is great, but you can use mozzarella or even cheddar. Each cheese gives a unique taste. Mix and match to find your favorite combo. To make a vegetarian meatloaf, use lentils or black beans. They provide a hearty texture. You can also add cooked quinoa for extra protein. Instead of meat, load up on veggies like bell peppers, onions, and mushrooms. Use plant-based cheese to keep that cheesy flavor without the meat. If you like heat, add jalapeños or banana peppers. Chop them finely and mix them into the meatloaf. You could also use pepper jack cheese for a spicy kick. This version packs a punch and is perfect for those who crave bold flavors. Enjoy the heat! After dinner, let the meatloaf cool down. Wrap it tightly in plastic wrap or foil. You can also place it in an airtight container. This helps keep it fresh and tasty for later. Store it in the fridge for up to four days. If you want to save it for longer, freezing works great. First, slice the meatloaf into portions. Wrap each slice in plastic wrap, then in foil. This prevents freezer burn. Label each package with the date. You can freeze the meatloaf for up to three months. When you’re ready to enjoy leftovers, take out what you need. If it’s frozen, let it thaw overnight in the fridge. To reheat, place the slice on a baking sheet. Preheat your oven to 350°F (175°C). Heat for about 15-20 minutes until warm. You can also use the microwave. Heat it on medium power for about 2-3 minutes. Always check that it’s hot all the way through before serving. Enjoy your tasty meal! Yes, you can use other meats. Ground turkey or chicken works well. Mixing meats adds flavor and texture. Just keep the total weight similar to the recipe. This meatloaf lasts for about three to four days in the fridge. Store it in an airtight container to keep it fresh. Absolutely! You can prepare the meatloaf a day ahead. Just mix the ingredients and store them in the fridge until you're ready to bake. You can serve this meatloaf with a side of sautéed peppers and onions. Mashed potatoes or a fresh salad also make great sides. Check the internal temperature with a meat thermometer. It should reach 160°F (70°C) for safe eating. The meatloaf should also be firm to the touch. Philly Cheesesteak Meatloaf combines rich flavors with ease. We covered essential ingredients, step-by-step instructions, and tips for perfect texture. We explored variations for different tastes and discussed storage methods for leftovers. This dish is fun to make and tastes great. Whether you're cooking for friends or family, this meatloaf is sure to satisfy. Enjoy the cooking process, and don't be afraid to get creative with your toppings or flavors.

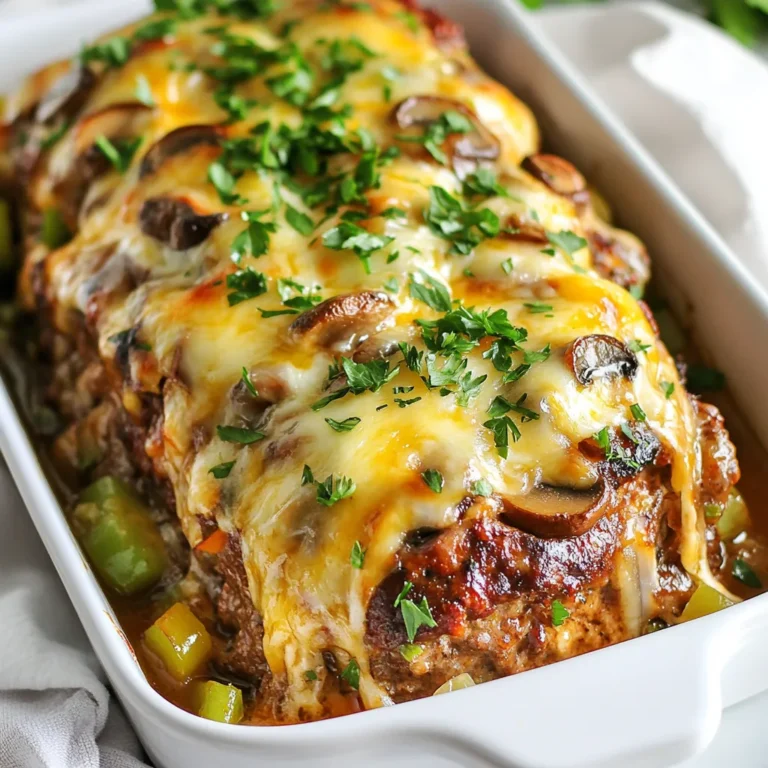
Philly Cheesesteak Meatloaf Tasty Family Dinner Treat

- 4 boneless, skinless chicken breasts - 1 cup fresh mozzarella cheese, sliced - 1 cup heavy cream - 2 tablespoons olive oil - 3 cloves garlic, minced - 1 teaspoon Italian seasoning - 1/2 cup chicken broth - 1/4 cup fresh basil leaves, chopped - Salt and pepper to taste The main ingredients for Mozzarella Chicken in Basil Cream Sauce are simple yet vital. First, boneless, skinless chicken breasts provide a lean and tender base. Next, fresh mozzarella cheese gives the dish its rich, creamy texture. Heavy cream rounds out the flavor, creating a sauce that is both luscious and satisfying. For seasoning, olive oil is essential. It enhances flavor and helps cook the chicken evenly. Garlic adds a warm aroma and depth. Italian seasoning brings a classic taste that complements the other ingredients. Don't forget the additional components! Chicken broth adds moisture and richness. Fresh basil leaves infuse a bright, herbaceous note, while salt and pepper balance all the flavors. Each ingredient plays a key role in making this dish a delightful experience. {{ingredient_image_1}} - Season both sides of the chicken breasts with salt, pepper, and Italian seasoning. This brings out great flavor. - For even cooking, pound the chicken lightly with a meat mallet. This helps all parts cook at the same rate. - Heat a large skillet over medium-high heat and add olive oil. The oil should shimmer but not smoke. - Add the chicken breasts and cook for 6-7 minutes on each side. You want a nice golden brown. - To check for doneness, cut into the thickest part. The juices should run clear and the meat should not be pink. - Lower the heat to medium and add minced garlic to the same skillet. Sauté for about 1 minute until you smell the garlic. - Deglazing the pan is key; scrape up any bits stuck to the bottom. This adds flavor to the sauce. Add chicken broth after sautéing the garlic. - Pour in the heavy cream and let it simmer. Stir often until the sauce thickens a bit, about 3-4 minutes. - Stir in chopped basil and season with salt and pepper. - Return the chicken to the skillet and place mozzarella slices on top. Cover the skillet and let the cheese melt for 2-3 minutes. - For serving, plate the chicken and spoon the sauce over it. Garnish with fresh basil leaves for a pretty touch. To keep the chicken juicy, avoid overcooking it. You want it golden brown, not dry. Use a meat thermometer. Aim for an internal temperature of 165°F. Let it rest after cooking. This helps seal in the juices. For the sauce, stir the heavy cream gently. You want it thick but not too thick. If it gets too thick, add a bit more chicken broth. This keeps it creamy and smooth. If you want a lighter dish, try using whole milk instead of heavy cream. It will change the taste slightly but still taste great. You can also use Greek yogurt for a tangy twist. Just mix it in slowly to avoid lumps. For cheese, swap fresh mozzarella with provolone or gouda. Each cheese brings its own flavor. Experiment to find your favorite! To make your dish pop, add fresh basil leaves on top. They add color and enhance flavor. You can also sprinkle some grated Parmesan cheese for a salty kick. For a touch of color, slice some cherry tomatoes and place them around the plate. They look nice and add a fresh taste. Enjoy making your meal beautiful! Pro Tips Use Fresh Ingredients: Always opt for fresh mozzarella and basil for the best flavor and texture in your dish. Monitor Cooking Time: Ensure not to overcook the chicken; it should be golden brown and juicy, not dry. Thicken Your Sauce: If you prefer a thicker sauce, let it simmer a bit longer or add a cornstarch slurry to achieve your desired consistency. Garnish for Presentation: A sprinkle of fresh basil leaves not only enhances flavor but also adds a beautiful touch to your plating. {{image_2}} You can boost your Mozzarella Chicken with veggies. Try bell peppers, spinach, or zucchini. - Recommended veggies to include: - Bell peppers - Spinach - Zucchini - Mushrooms When you add veggies, cook them before the sauce. Sauté them in the skillet for about 3-5 minutes. This way, they get soft and tasty before you add the cream. For some heat, spice it up! You can add red pepper flakes or cayenne pepper. - Adding heat with spices: - Red pepper flakes - Cayenne pepper - Hot sauce Pair the spicy chicken with a creamy sauce. It balances the heat. Consider using a spicy marinara or a chipotle sauce for extra flavor. Mix up the herbs. Instead of basil, use parsley, oregano, or thyme for new tastes. - Using different herbs instead of basil: - Parsley - Oregano - Thyme These herbs bring unique flavors. For a fresh twist, try rosemary with garlic. It adds a rich taste to the cream sauce. To store leftovers, let the mozzarella chicken cool down first. Place it in an airtight container. This keeps it fresh and avoids bad odors. In the fridge, it stays good for up to three days. Make sure to label the container with the date. This way, you know when to eat it. You can freeze mozzarella chicken for longer storage. First, cool it completely. Then, wrap it tightly in plastic wrap or foil. Place it in a freezer bag, removing as much air as possible. It can last up to three months in the freezer. When you are ready to eat, move it to the fridge to thaw overnight. This helps keep the flavor and texture intact. For reheating, I suggest using the oven. Preheat it to 350°F (175°C). Place the chicken in an oven-safe dish and cover it with foil. Heat it for about 20-25 minutes. This method warms the chicken evenly. If you want to keep the sauce creamy, add a splash of chicken broth or cream before reheating. This helps maintain the sauce's quality and prevents it from drying out. Yes, you can make Mozzarella Chicken ahead of time. Here are some best practices for pre-prepping the dish: - Cook the Chicken: Sear the chicken breasts as per the recipe. Let them cool completely. - Prepare the Sauce: Make the basil cream sauce and let it cool too. Store the sauce separately from the chicken. - Storage: Place the chicken and sauce in airtight containers. Keep them in the fridge for up to two days. - Reheating: When you're ready to serve, reheat the chicken in a skillet. Add the sauce and warm until heated through. This keeps the chicken juicy and the sauce creamy. Mozzarella Chicken pairs well with many sides. Here are some tasty accompaniments: - Pasta: A light pasta tossed in olive oil or garlic complements the dish. - Rice: Serve with fluffy white rice or a flavorful risotto. - Salad: A fresh green salad with a lemon vinaigrette balances the richness of the chicken. - Vegetables: Roasted or steamed vegetables add color and nutrition. Yes, you can substitute chicken with other proteins. Here are some recommended alternatives: - Turkey Breasts: Similar cooking time and flavor profile. - Pork Chops: A bit thicker, so cook them slightly longer. - Tofu: For a vegetarian option, use firm tofu. Cook until golden brown. Adjustments for cooking times may be necessary. Always ensure proteins reach safe internal temperatures. In this blog post, we explored a delicious mozzarella chicken recipe. You learned about key ingredients like chicken, mozzarella, and cream. I shared step-by-step instructions to help you prepare and cook the dish perfectly. We also discussed tips for variations and storage options. Making mozzarella chicken is simple and rewarding. With these insights, you can impress your family or friends at your next meal. Enjoy experimenting with flavors and making it your own!

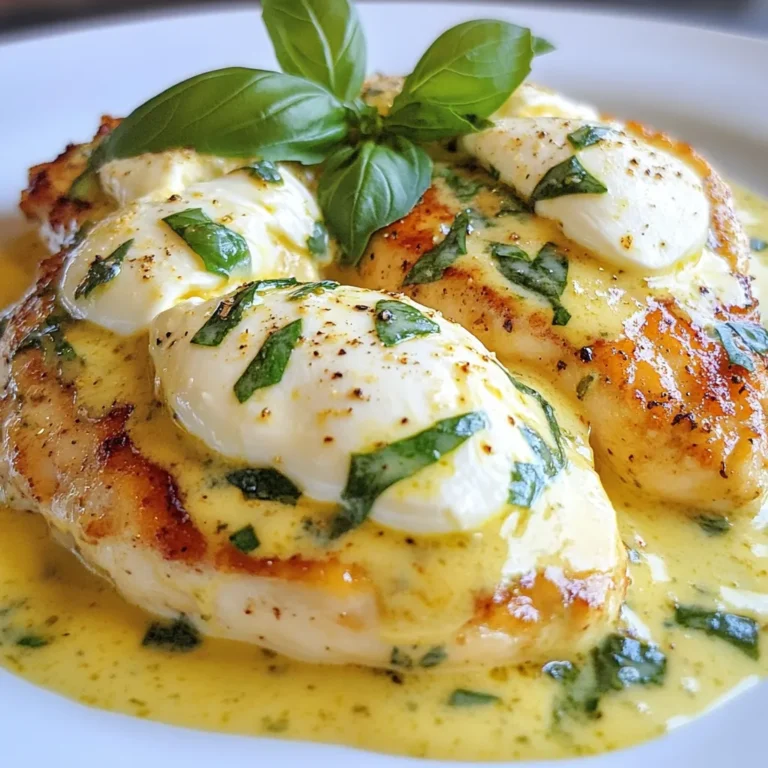
Mozzarella Chicken in Basil Cream Sauce Delight

You need 2 cups of fresh strawberries for this trifle. Make sure to hull and slice them. Fresh strawberries give the trifle bright flavor. They also add a lovely color. I like to mix the strawberries with 2 tablespoons of sugar. This helps bring out their juice. Let them sit for 15 minutes. For a rich, creamy layer, use 1 cup of heavy whipping cream. This cream whips up soft and fluffy. I mix in 1/2 teaspoon of vanilla extract for flavor. Adding 1 tablespoon of powdered sugar makes it sweeter. Be careful while whipping. Stop when you see soft peaks. You will need 2 cups of pound cake cut into cubes. You can use store-bought or homemade pound cake. The cake gives a nice base to the trifle. You also need 1/2 cup of strawberry jam. It adds sweetness and flavor between layers. Lastly, fresh mint leaves make a beautiful garnish. {{ingredient_image_1}} Start by washing your strawberries. Hull them and slice them into thin pieces. Place the sliced strawberries in a medium bowl. Add 2 tablespoons of sugar to the bowl. Toss the strawberries gently. Let them sit for about 15 minutes. This helps the strawberries release their sweet juices. You want them to be soft and juicy. In a separate bowl, pour in 1 cup of heavy whipping cream. Add 1/2 teaspoon of vanilla extract and 1 tablespoon of powdered sugar. Use an electric mixer to whip the cream. Mix until you see soft peaks form. Be careful not to over-whip the cream. If you do, it can turn grainy. Soft peaks give you the best texture. Take a large trifle dish or individual glasses. Start with a layer of pound cake cubes at the bottom. Use about 2 cups of pound cake. Next, spread a layer of strawberry jam over the cake. Then, add a layer of the macerated strawberries on top of the jam. Follow this with a generous layer of whipped cream. Repeat the layers until you use all your ingredients. Finish with a layer of whipped cream on top. For a beautiful touch, add a few fresh strawberries and mint leaves as garnish. For a stunning trifle, layer your ingredients with care. Start with a layer of pound cake at the bottom. Next, add a layer of strawberry jam. Then, pile on the macerated strawberries. Top it with fluffy whipped cream. Repeat these layers until you reach the top. If you use individual glasses, it lets everyone see the colorful layers. Finish with whole strawberries and mint leaves. This makes a beautiful focal point. Whipping cream can easily turn into butter if you aren’t careful. When you whip it, stop as soon as you see soft peaks. This means the cream should hold its shape but still look smooth. Use an electric mixer on low speed to help control the mixing. If you over-whip, the cream can become grainy and dry. It’s best to check often to get the perfect texture. Fresh strawberries make your trifle shine. Look for bright red berries with a shiny skin. They should feel firm and smell sweet. Avoid berries with dark spots or mushy areas. It’s best to buy local strawberries when they are in season. This way, you get the best flavor and freshness. Rinse them gently and remove the green tops before slicing. This will give you sweet and juicy strawberries for your dessert. Pro Tips Choose Ripe Strawberries: For the best flavor, select strawberries that are bright red and fragrant. Avoid any that have white or green patches, as they may be under-ripe. Whip Cream to Soft Peaks: Be cautious when whipping the cream; stop as soon as soft peaks form to ensure it remains light and airy for the trifle. Layering Technique: When layering, try to alternate the textures and flavors for a balanced taste. Start with cake, then jam, strawberries, and cream for a harmonious bite. Chill Before Serving: Allow the trifle to chill in the refrigerator for at least an hour before serving. This helps the flavors meld together and makes it more refreshing. {{image_2}} You can swap out strawberries for other fruits. Blueberries, raspberries, or peaches work well. Each fruit brings a new taste and look. Mix different fruits for a colorful trifle. This keeps your dessert fun and exciting. If you need a gluten-free option, use gluten-free pound cake. Many stores sell ready-made gluten-free cakes. You can also make your own using almond flour or gluten-free all-purpose flour. This way, everyone can enjoy the trifle without worry. You can change the flavor of the whipped cream easily. Try adding a splash of almond extract or a bit of cocoa powder. For a fruity twist, mix in some pureed fruit. Each option adds a new layer of taste to your trifle. Store leftover trifle in the fridge. Use an airtight container to keep it fresh. If you used individual glasses, cover them with plastic wrap. This helps protect the layers and flavors. Keep it away from strong-smelling foods to avoid unwanted tastes. When layering for storage, start with cake at the bottom. Then, add jam, strawberries, and cream. This order helps keep everything together. If you want to save some layers for later, store them separately. This keeps the cake from getting soggy. The trifle will last for about three days in the fridge. After that, the quality may drop. The strawberries can get mushy, and the cream may lose its fluff. For the best taste and texture, enjoy it within the first two days. Yes, you can make this dessert ahead of time. Prepare the trifle and store it in the fridge. It stays fresh for one day. The flavors blend well if you let it chill. Just add fresh mint and strawberries right before serving. To make a lighter version, use low-fat whipped cream. You can also use angel food cake instead of pound cake. Substitute sugar with a sweetener like stevia. This cuts calories while keeping the taste delightful. For gatherings, serve the trifle in clear cups. This shows off the layers nicely. You can also use a big trifle bowl for a stunning display. Add extra fruit on top for color. Pair it with a refreshing drink, like lemonade. This blog post covered how to make a delicious strawberry shortcake trifle. We explored the key ingredients, like fresh strawberries and heavy cream, and detailed simple steps for preparation and assembly. I shared tips to enhance your dessert's look and flavor while also discussing variations and storage options. In the end, this trifle is a fun dessert to enjoy anytime. You can easily make it your own!

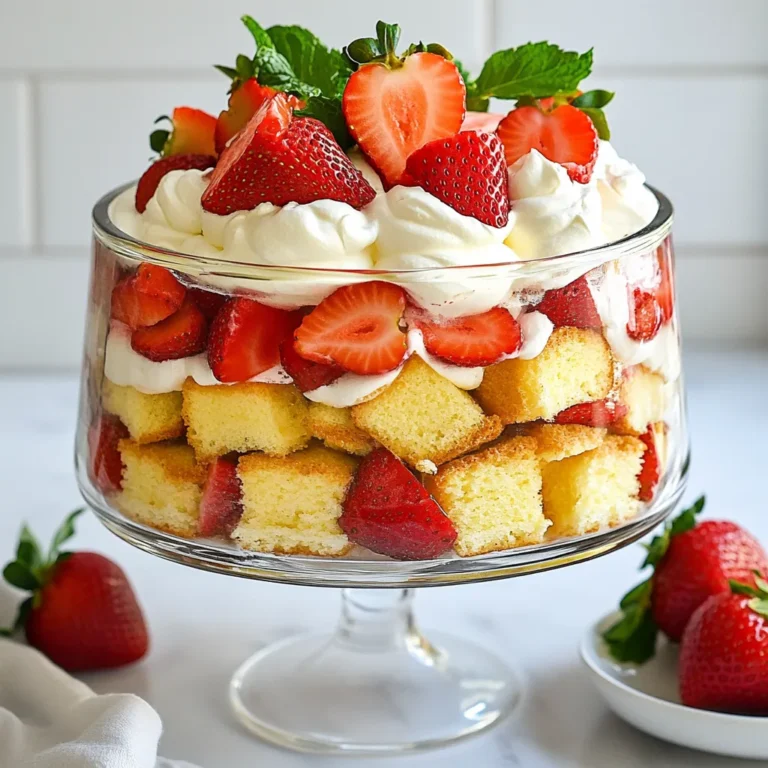
Strawberry Shortcake Trifle Delightful Dessert Recipe

To make this tasty sauce, you need: - 12 ounces fresh cranberries - 1 cup pure maple syrup - 1/2 cup orange juice (freshly squeezed) - 1 tablespoon orange zest - 1/2 teaspoon ground cinnamon - 1/4 teaspoon nutmeg - Pinch of salt - 1/4 cup chopped pecans (optional) These ingredients create a sweet and tangy sauce that pairs well with many dishes. You can try adding some of these to boost the flavor: - 1/4 cup bourbon - 1 tablespoon vanilla extract - 1/2 teaspoon ginger - A dash of cayenne pepper Each of these options brings a new twist. The bourbon adds warmth, while ginger offers a spicy kick. When measuring ingredients, use dry measuring cups for solids and liquid ones for liquids. If you run out of maple syrup, honey or agave syrup works well. Fresh orange juice is best, but bottled is okay in a pinch. For a nut-free sauce, simply leave out the pecans. Remember, cooking is about making it work for you! {{ingredient_image_1}} To start, you need fresh cranberries. Take 12 ounces of them and rinse them well under cold water. Make sure to remove any stems or bad berries. This step is key because only the good berries will make your sauce shine. Next, gather your other ingredients. You will need 1 cup of pure maple syrup, 1/2 cup of freshly squeezed orange juice, and 1 tablespoon of orange zest. You will also need 1/2 teaspoon of ground cinnamon, 1/4 teaspoon of nutmeg, and a pinch of salt. If you want, add 1/4 cup of chopped pecans for some crunch. Now, it's time to cook. Take a medium saucepan and add all the ingredients. Combine cranberries, maple syrup, orange juice, orange zest, cinnamon, nutmeg, and salt into the pan. Heat this mixture over medium heat. Stir it occasionally. As it heats, the cranberries will begin to pop. This is when they release their sweet juices. Keep cooking for about 10 to 15 minutes. You want the cranberries to soften and the sauce to thicken. If you like a thicker sauce, cook it a bit longer. When the sauce reaches your desired thickness, stir in the chopped pecans if you chose to use them. Then, remove the pan from heat. Let the sauce cool to room temperature. This step is important as it allows the flavors to blend well. Once cooled, transfer the sauce to a bowl or an airtight container. Refrigerate the sauce for at least an hour before serving. This chilling time enhances its taste. When ready to serve, I like to present the sauce in a rustic bowl. You can garnish it with whole cranberries or a sprig of fresh thyme for an elegant touch. Enjoy this sauce with your holiday meals or on desserts! Cooking cranberries can be easy and fun. Here are some tips: - Always rinse cranberries well. This removes dirt and bad berries. - Use fresh cranberries for the best taste. Frozen ones can work too, but fresh is best. - Cook over medium heat. This helps the cranberries burst evenly. - Stir often to prevent sticking. This keeps everything cooking smoothly. You can boost the taste of your cranberry sauce. Here are some ideas: - Add a splash of bourbon for richness. This gives a lovely depth to your sauce. - Try adding a pinch of clove for warmth. It pairs well with cinnamon. - Mix in a few chopped pecans. They add a nice crunch and flavor. - Use lemon juice instead of orange juice. This gives a bright twist. Serving your cranberry sauce nicely makes it more appealing. Here are some tips: - Use a rustic bowl. It gives a cozy, homemade feel. - Garnish with whole cranberries or fresh thyme. This adds color and style. - Serve it in small jars. This makes a charming gift or party treat. - Pair it with cheese or meats. This adds variety to your table. Pro Tips Freshness Matters: Use fresh cranberries for the best flavor and texture. Frozen cranberries can be used in a pinch, but may alter the sauce's consistency. Maple Syrup Quality: Opt for high-quality pure maple syrup, as it significantly enhances the flavor of the sauce compared to imitation syrups. Adjust Sweetness: Taste the sauce as it cooks and adjust the sweetness by adding more maple syrup or a splash of orange juice, depending on your preference. Flavor Infusion: For an even richer flavor, let the sauce sit overnight in the refrigerator. This allows the spices and citrus to meld beautifully. {{image_2}} You can swap maple syrup with honey or agave. These options add unique sweetness. Try brown sugar for a richer taste. You can also add fruits like apples or pears. They bring freshness to the sauce. If you want to skip the bourbon, simply leave it out. The sauce still tastes great. You can replace bourbon with more orange juice for extra zest. This keeps the flavor bold without the alcohol. This cranberry sauce pairs well with turkey or ham. It also brightens up a cheese platter. Use it as a topping for desserts, like ice cream or cheesecake. The sweet and tart flavors will make any dish shine! To keep your cranberry sauce fresh, cool it to room temperature first. Then, transfer it to an airtight container. Store in the fridge for up to one week. This method locks in flavor and keeps the sauce safe to eat. You can freeze cranberry sauce for later use. Place it in a freezer-safe container, leaving some space for expansion. Seal tightly and label with the date. It can last up to three months in the freezer. When ready to use, thaw it in the fridge overnight. Cranberry sauce can stay fresh in the fridge for about a week. If you freeze it, just remember to use it within three months. To reheat, warm it on the stove over low heat. Stir gently until heated through. You can also microwave it in short bursts, stirring in between. Enjoy your sauce warm or at room temperature! You can serve cranberry sauce with turkey, ham, or roast chicken. It pairs well with cheese, too. Try it on a cheese board with brie or goat cheese. You can also enjoy it on pancakes or waffles for breakfast. It adds a sweet twist to desserts like cheesecake or vanilla ice cream. Don’t forget about sandwiches! A layer of cranberry sauce can brighten up turkey or grilled cheese sandwiches. Yes, you can make cranberry sauce in advance. It tastes even better after sitting for a day. Make it up to three days before your meal. Just store it in an airtight container in the fridge. Let it cool completely before putting it away. This way, the flavors have time to blend. When you're ready to serve, simply take it out and enjoy the burst of flavor. Homemade cranberry sauce lasts about two weeks in the fridge. Store it in an airtight container to keep it fresh. If you want to keep it longer, you can freeze it. In the freezer, it can last up to six months. Just make sure to let it cool before freezing. When you are ready to eat it, thaw it in the fridge overnight. Enjoy the rich taste and texture as if it were freshly made! This blog post covered how to make a tasty cranberry sauce with maple bourbon. We explored the key ingredients, step-by-step cooking methods, and helpful tips to enhance flavor. I also shared ways to store your sauce and answered common questions about serving and shelf life. Cranberry sauce adds great taste to meals and can bring joy to any table. Make your own and enjoy the delicious flavors all season long.

Cranberry Sauce with Maple Bourbon Flavor Burst

To make these tasty bowls, you need: - 2 boneless, skinless chicken breasts - 1 tablespoon olive oil - 1 teaspoon chili powder - 1 teaspoon cumin - 1 teaspoon garlic powder - 1 teaspoon smoked paprika - Salt and pepper to taste - 1 cup quinoa or brown rice, cooked - 1 cup black beans, rinsed and drained - 1 cup corn (fresh or frozen) - 1 red bell pepper, diced - 1 avocado, sliced - 1/2 cup cherry tomatoes, halved - Fresh cilantro, chopped (for garnish) - Lime wedges (for serving) Each serving of these Southwest Chicken Bowls is packed with nutrition. It offers a good mix of protein and fiber. Here’s a rough breakdown per serving: - Calories: 450-500 - Protein: 30g - Carbs: 50g - Fiber: 12g - Fat: 15g This meal provides plenty of energy and keeps you full longer. If you need to make swaps, here are some ideas: - Chicken: Use tofu or tempeh for a veggie option. - Quinoa or brown rice: Try farro or couscous instead. - Black beans: Use kidney beans or chickpeas. - Red bell pepper: Swap for yellow or green peppers. - Avocado: Use guacamole for flavor. - Cilantro: Parsley works well if you dislike cilantro. These swaps keep the dish tasty and fun while fitting your needs. {{ingredient_image_1}} Start by marinating the chicken breasts. In a bowl, mix together olive oil, chili powder, cumin, garlic powder, smoked paprika, salt, and pepper. This mix gives the chicken a bold flavor. Make sure to coat the chicken breasts well with this spice mix. Let them sit in the fridge for at least 30 minutes. This helps the flavors soak in. Next, preheat your grill pan or skillet over medium heat. Once hot, place the marinated chicken breasts on the pan. Cook them for about 6 to 7 minutes on each side. You want to reach an internal temperature of 165°F (75°C). After they are done, take them off the heat. Let the chicken rest for 5 minutes before slicing. This step keeps the chicken juicy. Now it’s time to build your bowls! Start with a base of cooked quinoa or brown rice in each bowl. This gives a nice texture. Next, layer on the black beans, corn, diced red bell pepper, and cherry tomatoes. These add color and crunch. Slice the rested chicken breasts and place the slices on top of the veggies. To finish, add sliced avocado and sprinkle chopped cilantro on top. Serve with lime wedges on the side. This adds a zesty touch that brightens the dish. Enjoy your delicious Southwest Chicken Bowls! To cook chicken breasts just right, start with even thickness. If needed, pound the chicken to make it flat. This helps it cook evenly. Use a grill pan or skillet over medium heat. Cook for 6-7 minutes on each side. Check the inside with a meat thermometer; it should read 165°F. Let the chicken rest for 5 minutes before slicing. This keeps it juicy and tasty. Meal prep saves time and makes busy days easier. Cook a large batch of quinoa or rice at once. Store it in containers for the week. You can also grill several chicken breasts at once. Once cooked, slice them up for quick use. Keep black beans and corn on hand for easy assembly. This way, you can create a bowl in minutes. These bowls taste great with fresh toppings. Add sliced avocado for creaminess. Sprinkle chopped cilantro for a burst of flavor. Lime wedges are perfect for a zesty kick. You can also serve these bowls with a side of tortilla chips. For a crunch, add crushed chips on top. These simple extras make your meal more fun and delicious. Pro Tips Marinate Longer: For even more flavor, consider marinating the chicken for several hours or overnight. This allows the spices to penetrate the meat deeply, enhancing the overall taste. Perfectly Cooked Chicken: Use a meat thermometer to ensure the chicken reaches an internal temperature of 165°F (75°C) for safe consumption and optimal juiciness. Customize Your Veggies: Feel free to add or substitute any vegetables you like, such as zucchini, red onion, or jalapeños, to tailor the bowls to your taste. Fresh Lime Zest: For an extra zing, grate some lime zest over the bowls just before serving. It adds a refreshing brightness that complements the other flavors beautifully. {{image_2}} You can easily make a tasty vegetarian version of these bowls. Instead of chicken, use grilled tofu or tempeh. Both options soak up flavors well. You can also add more beans for protein. Black beans work great, but pinto beans are nice too. For a fresh twist, add roasted veggies like zucchini or bell peppers. They add color and flavor. Feel free to customize your Southwest chicken bowls. Spice up the chicken by adding cayenne pepper or smoked chipotle. Want more crunch? Toss in some tortilla strips or roasted nuts. You can also layer on fresh toppings like jalapeños or radishes. If you like cheese, sprinkle crumbled feta or shredded cheddar on top. Don’t forget the lime juice for extra zest! These bowls can also shine as a cold salad. Simply chill the cooked ingredients before serving. Layer the quinoa or rice at the bottom. Add the beans, corn, bell peppers, and tomatoes. Top with sliced avocado and cilantro. Drizzle with a lime vinaigrette for a refreshing taste. This makes a perfect lunch on a hot day! After your meal, let the bowls cool to room temperature. Place any leftovers in an airtight container. Store them in the fridge for up to three days. Keeping the chicken, veggies, and grains together helps the flavors blend more. If you want to save the bowls for later, freezing works well. First, let the leftovers cool completely. Then, use freezer-safe containers or bags. Label them with the date. These can stay good for about three months in the freezer. Just remember, the texture of the veggies may change after thawing. To reheat, take the container from the fridge or freezer. If frozen, let it thaw in the fridge overnight. For reheating, use a microwave or a stovetop. If using a microwave, cover the bowl to keep moisture in. Heat for about 2-3 minutes, stirring halfway. If you use the stovetop, warm it in a pan over low heat. Add a splash of water to keep it moist. Enjoy your Southwest Chicken Bowl just like fresh! Yes, you can swap quinoa or brown rice for other grains. Options include farro, barley, or couscous. These grains will add different textures and flavors. Each grain has its own cooking time, so check the package for best results. Experimenting can make your bowls more exciting. To add heat, use extra chili powder or try cayenne pepper. You can also add jalapeño slices for a fresh kick. Another option is to include spicy salsa as a topping. Adjust the spice to match your taste. Spicing it up can make each bite even more enjoyable. You can use many proteins in these bowls. Grilled shrimp or tofu work well. If you prefer meat, try steak or pork. For a plant-based option, chickpeas are great. These changes keep the dish fun and diverse. Mixing proteins can add new flavors to your meal. In this article, we explored how to make delicious Southwest Chicken Bowls. We covered ingredients, cooking steps, and helpful tips for perfecting your dish. I shared info on variations, storage, and common questions. If you try it, you can easily adjust flavors and add your favorite toppings. These bowls are great for meal prep and can fit any diet. Enjoying healthy meals at home can be simple and fun when you follow these steps. Now, get cooking and enjoy your tasty bowls!

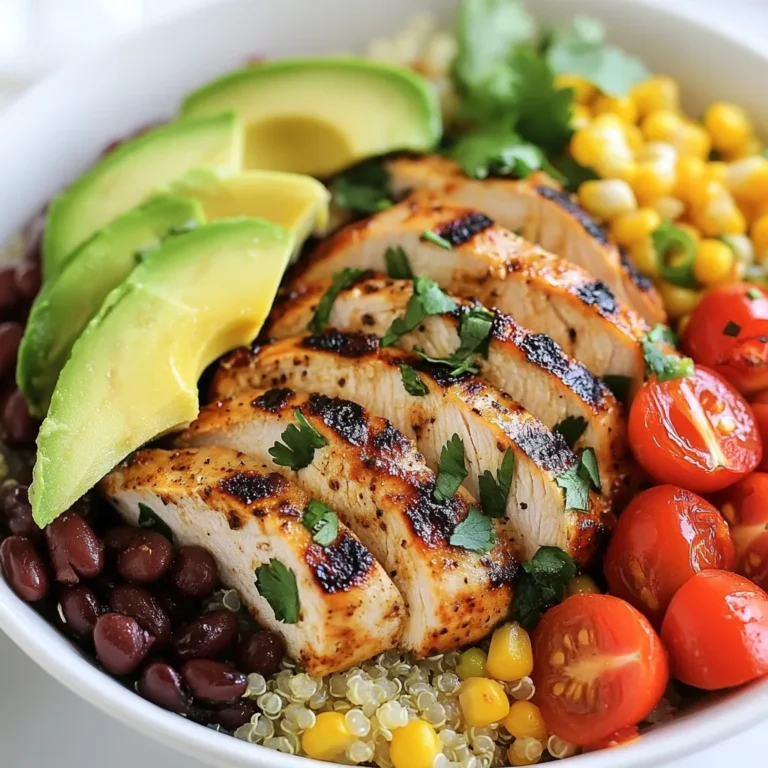
Southwest Chicken Bowls Flavorful and Easy Recipe

For these tasty roll-ups, you need simple, fresh ingredients. Here’s what you’ll need: - 1 lb thinly sliced beef steak (sirloin or ribeye works great) - 1 medium green bell pepper, sliced - 1 medium onion, sliced - 8 oz cream cheese, softened - 1 cup shredded mozzarella cheese - 8 large lettuce leaves (romaine or butter lettuce) These ingredients make the dish rich and filling, while keeping it low-carb. Seasonings bring out the best flavors in your roll-ups. Use: - 1 teaspoon garlic powder - 1 teaspoon onion powder - Salt and pepper to taste These spices add depth and enhance the taste of the beef and veggies. Choosing the right lettuce is key for the perfect wrap. I recommend: - Romaine lettuce for a crunchy texture - Butter lettuce for a softer bite Both options hold the filling well and add freshness to each roll-up. {{ingredient_image_1}} First, grab a skillet and set it over medium heat. Pour in 2 tablespoons of olive oil. Once the oil is hot, add the sliced onion and green bell pepper. Stir them gently. Sauté until they soften and turn a bit brown, about 5-7 minutes. Add 1 teaspoon of garlic powder, 1 teaspoon of onion powder, salt, and pepper to taste. Mix well and then remove the veggies from the skillet. Set them aside on a plate. Now, use the same skillet for cooking the steak. Add the thinly sliced beef steak to the pan. Cook for about 3-5 minutes, stirring often. You want it to brown nicely. Once done, season lightly with salt and pepper. This adds great flavor to the meat. In a medium bowl, combine 8 oz of softened cream cheese with 1 cup of shredded mozzarella cheese. Use a spatula to mix them together. You want a creamy, smooth texture. This mixture will add richness to your roll-ups. Lay out a large lettuce leaf on a clean surface. Spread a generous layer of the cheese mixture over the leaf. Next, add some of the sautéed vegetables on top. Then, place a portion of the cooked steak. Roll the lettuce tightly from the base to the tip, similar to a burrito. Repeat this process with the remaining ingredients. Your Keto Philly Cheesesteak Roll Ups are now ready to serve! When making Keto Philly Cheesesteak Roll Ups, the cut of beef matters. I like using sirloin or ribeye. These cuts are tender and have great flavor. They cook quickly and stay juicy. Avoid tougher cuts, as they may not be as enjoyable. Look for beef that is thinly sliced. This helps it cook evenly and blends well with the other ingredients. Sautéing the vegetables is a key step. Start with a hot skillet and add olive oil. This gives the veggies a nice sear. Cook the onions and bell peppers until soft. This usually takes about 5-7 minutes. Stir them often to prevent burning. Adding garlic powder and onion powder enhances the taste. Season with salt and pepper, but don’t overdo it. You want the beef to shine through. Keep your roll ups fresh by storing them in an airtight container. They last about three days in the fridge. To reheat, place them in a skillet over low heat. This warms them without making them soggy. You can also use a microwave, but be careful not to overcook them. Enjoy these tasty roll ups for lunch or dinner anytime! Pro Tips Choose the Right Meat: Opt for well-marbled cuts like ribeye for extra flavor and tenderness. Prep Ingredients Ahead: Pre-slicing the vegetables and beef can save time during cooking. Use Fresh Herbs: Garnishing with fresh herbs like parsley or basil can elevate the flavor profile of your dish. Experiment with Cheeses: Try different cheese blends like provolone or gouda for a unique twist on the classic flavor. {{image_2}} You can change the cheese in your Keto Philly Cheesesteak Roll Ups to fit your taste. Cream cheese makes it creamy, but you can use other cheeses too. Try provolone for a sharper flavor, or gouda for a smoky twist. Cheddar adds a nice bite. Each cheese brings its unique taste. Mix and match to find your favorite. Feel free to add more veggies to your roll ups. Mushrooms add a nice earthiness, while spinach can boost nutrients. You can also try jalapeños for a kick. Just sauté them with the onions and peppers. This not only adds flavor but also makes your meal more colorful and healthy. If you like heat, add hot peppers. Slice fresh jalapeños or use pickled ones. Add them to the sautéed veggies for a spicy punch. You can also sprinkle red pepper flakes on the cheese mixture. This change will give your roll ups an exciting twist. Adjust the heat to match your taste! To keep your Keto Philly Cheesesteak Roll Ups fresh, store them in the fridge. Use an airtight container to prevent them from drying out. Line the bottom with a paper towel to absorb any excess moisture. This helps keep the roll-ups crisp and tasty for longer. Freezing is a great option if you want to save some roll-ups for later. Wrap each roll-up tightly in plastic wrap. Then, place them in a freezer bag. Make sure to remove as much air as possible. This way, they won't get freezer burn. When you're ready to eat them, thaw in the fridge overnight before reheating. In the fridge, the roll-ups can last up to three days. If you freeze them, they can stay good for about three months. After this time, the quality may drop, but they will still be safe to eat. Check for any off smells or changes in texture before consuming. If you need a cream cheese substitute, try ricotta or cottage cheese. Both work well. You can also use vegan cream cheese for a dairy-free option. Just remember to adjust the texture and flavor to match the dish. Yes, you can use different meats for these roll-ups. Chicken, turkey, or pork all taste great. Just slice your meat thinly. Cook it the same way you would with beef. Each meat will bring its own flavor to the dish. To make these roll-ups dairy-free, skip the cream cheese and mozzarella. Use dairy-free cheese or avocado instead. You can also add hummus for creaminess. This keeps the dish rich while staying dairy-free. Making Keto Philly Cheesesteak Roll Ups is simple and fun. You learned about key ingredients and seasonings, plus suggested lettuce types. I shared steps for sautéing vegetables, cooking steak, and preparing cheese. You now know tips for choosing beef cuts and perfecting your sautéing. Explore variations with different cheeses or veggies to suit your taste. Remember, proper storage keeps your roll ups fresh and tasty. Enjoy crafting this delicious treat anytime!

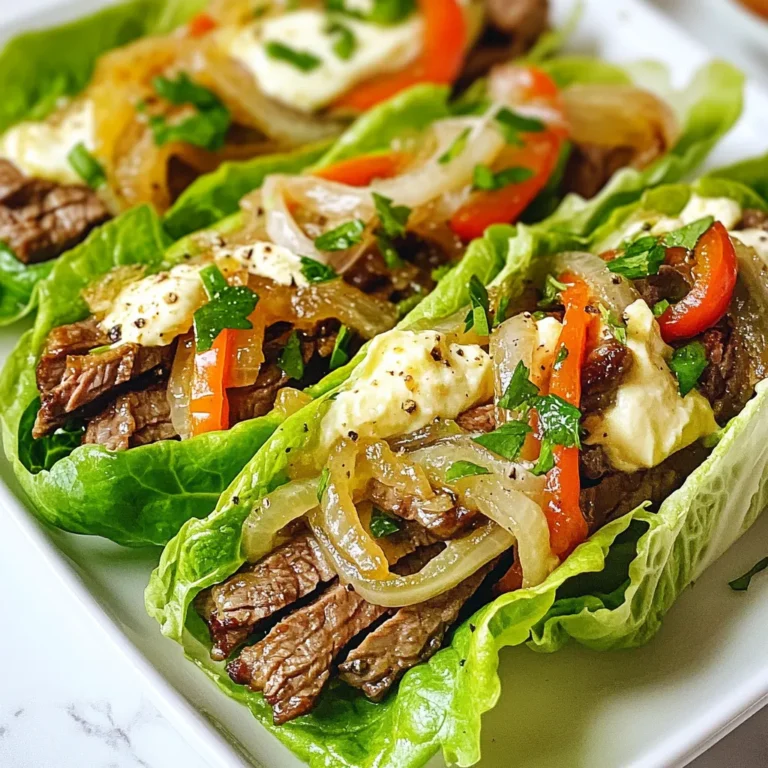
Keto Philly Cheesesteak Roll Ups Flavorful Low-Carb Dish

To make Slow Cooker Marry Me Chicken, start with these key ingredients: - 4 boneless, skinless chicken breasts - 1 teaspoon salt - 1/2 teaspoon black pepper - 1 teaspoon garlic powder - 1 teaspoon onion powder The chicken breasts provide a great base. Season them with salt, black pepper, garlic powder, and onion powder. These spices add flavor and help the chicken taste amazing. Next, for the creamy sauce, gather these items: - 1 cup sun-dried tomatoes, chopped - 1 cup heavy cream - 1 cup chicken broth - 1 cup grated Parmesan cheese - 1 teaspoon Italian seasoning Sun-dried tomatoes give a burst of flavor to the dish. The heavy cream, chicken broth, and Parmesan cheese form a rich, creamy sauce. Italian seasoning ties all the flavors together, making it taste truly special. Lastly, consider these garnishes and sides: - Fresh basil leaves, for garnish You can use fresh basil leaves to brighten up the dish. For sides, serve it with garlic bread or over pasta. These options make the meal complete and even more delicious. {{ingredient_image_1}} First, take the chicken breasts and rinse them under cold water. Pat them dry with a towel. Now, it's time to season. Sprinkle salt, black pepper, garlic powder, and onion powder over both sides of the chicken. This step adds flavor right from the start. Place the seasoned chicken at the bottom of your slow cooker. Make sure they lay flat for even cooking. Next, grab a bowl and whisk together the heavy cream, chicken broth, grated Parmesan cheese, and Italian seasoning. Mix until everything is well blended. This sauce will give the chicken a rich and creamy taste. After mixing, set it aside for a moment. You will pour it over the chicken later. Now, add the chopped sun-dried tomatoes over the chicken. Spread them out evenly. Pour the cream sauce on top of the chicken and tomatoes. Ensure that everything is well covered for maximum flavor. Cover the slow cooker and set it to cook on low for 6-7 hours or on high for 3-4 hours. When it's done, the chicken should be tender and cooked through. Once ready, use two forks to shred the chicken in the sauce. Mix it well to get all the flavors together. Serve hot and enjoy this easy and flavorful meal! To ensure juicy chicken, choose boneless, skinless chicken breasts. These cook evenly and stay tender. Always season the chicken well. Use salt, black pepper, garlic powder, and onion powder. This adds flavor right from the start. Arrange the chicken in your slow cooker without overcrowding. This helps it cook evenly. If you want more flavor, consider marinating the chicken a few hours before cooking. Even a quick 30-minute soak can make a difference. To create a creamy sauce, mix heavy cream, chicken broth, and Parmesan cheese. Whisk these ingredients well to avoid clumps. The sauce should be smooth and thick. If it seems too thin after cooking, you can thicken it. Try adding a bit more cheese or simmering it uncovered for a few minutes. Make sure to stir the sauce well after shredding the chicken. This helps the flavors blend nicely. Serve Slow Cooker Marry Me Chicken over pasta or rice. Both options soak up the sauce well. You can also pair it with garlic bread for a delicious meal. For a fresh touch, add a side salad. It balances the creaminess of the dish. Don’t forget to garnish with fresh basil leaves. They add a pop of color and a hint of freshness. Enjoy your meal! Pro Tips Use Fresh Herbs: Fresh basil not only adds color but also enhances the flavor of the dish. Add it just before serving for the best aroma. Adjust Creaminess: If you prefer a lighter sauce, you can substitute half of the heavy cream with Greek yogurt or sour cream for a tangy twist. Meal Prep Friendly: This dish stores well in the fridge and tastes even better the next day, making it perfect for meal prep or leftovers. Thicken the Sauce: To achieve a thicker sauce, remove the lid for the last 30 minutes of cooking to allow excess liquid to evaporate. {{image_2}} You can switch up the cheese in this dish. If you prefer a sharper taste, try using aged cheddar. For a milder flavor, go with mozzarella. Each cheese brings its own twist to the dish. You can even mix two types of cheese for a richer flavor. Want to spice things up? Add red pepper flakes for some heat. You can also toss in smoked paprika for a smoky flavor. If you love herbs, fresh thyme or rosemary can add a nice touch. Taste as you go to find your ideal blend. If you want a lighter version, use coconut cream instead of heavy cream. It adds a subtle sweetness. For a dairy-free option, try cashew cream. Blend soaked cashews with water until smooth. Both options keep the dish creamy and delicious! After you enjoy your Slow Cooker Marry Me Chicken, store leftovers in the fridge. Place the chicken in an airtight container. Make sure to cover it well. Leftovers stay fresh for up to four days. The creamy sauce keeps the chicken moist and tasty. For longer storage, you can freeze the leftovers. First, let the chicken cool completely. Then, place it in a freezer-safe bag or container. Make sure to remove as much air as possible. You can freeze it for up to three months. When you're ready to eat, just thaw it in the fridge overnight. To reheat, choose your method wisely. The best way is to use the stovetop. Place the chicken and sauce in a skillet over low heat. Stir gently until heated through. This keeps the chicken tender. You can also use a microwave. Heat in short bursts, stirring often to prevent dry spots. Enjoy your delicious meal again! Yes, you can use frozen chicken. Just note that it will take longer to cook. If you use frozen chicken, add an extra hour to the cooking time. Make sure the chicken reaches 165°F for safety. To make this dish healthier, try these tips: - Use skinless chicken thighs instead of breasts for more flavor. - Replace heavy cream with Greek yogurt or coconut milk for a lighter sauce. - Use low-sodium chicken broth to cut down on salt. - Add more veggies like spinach or bell peppers to boost nutrition. Marry Me Chicken pairs well with many sides. Here are some ideas: - Serve it over pasta or rice for a filling meal. - Garlic bread is great for soaking up the sauce. - A fresh salad adds a nice crunch and balance. - Roasted vegetables enhance the flavors and add color. In this post, we explored how to make Slow Cooker Marry Me Chicken. We covered ingredients, steps for preparing the chicken, and tips for a great sauce. You learned about variations and how to store leftovers for later. Marry Me Chicken is a dish full of flavor and options. Feel free to adjust it to your taste. Enjoy cooking and sharing this meal with family and friends.

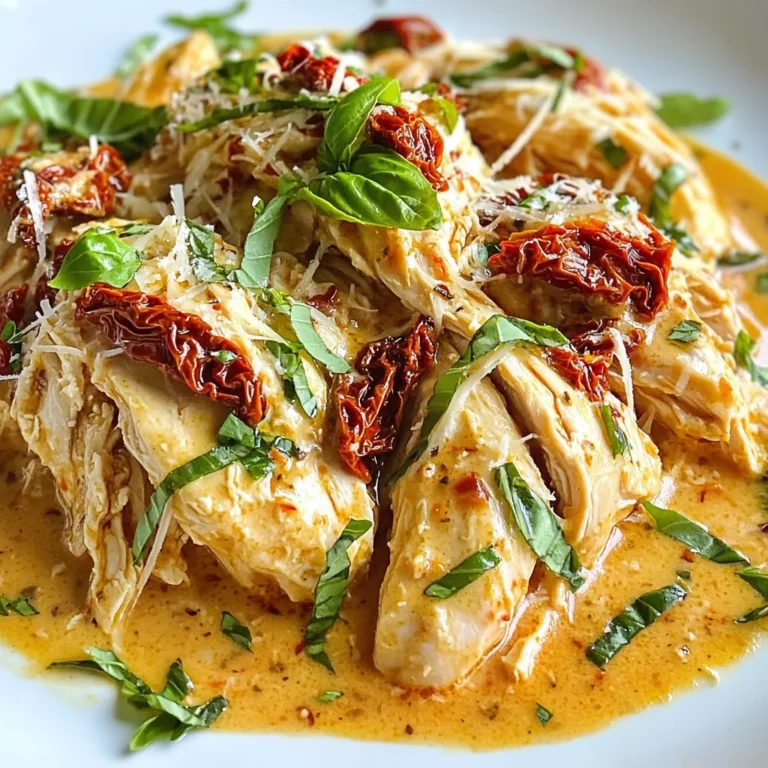
Slow Cooker Marry Me Chicken Easy and Flavorful Meal

To make a tasty Cheesy Taco Rice Skillet, gather these simple ingredients: - 1 cup uncooked long-grain rice - 1 pound ground beef or turkey - 1 tablespoon olive oil - 1 small onion, finely chopped - 2 cloves garlic, minced - 1 packet taco seasoning - 1 can (15 oz) black beans, rinsed and drained - 1 can (15 oz) diced tomatoes with green chilies - 1 cup corn (frozen or canned) - 2 cups chicken or vegetable broth - 1 cup shredded cheddar cheese - Fresh cilantro, for garnish - Salt and pepper, to taste These ingredients pack a punch of flavor. The ground meat gives a hearty base. The rice soaks up all the yummy juices. Black beans add fiber and protein. The tomatoes with chilies bring a nice kick. Don't forget the cheese! It melts into a creamy dream. You can personalize this with your favorite toppings. Fresh cilantro adds a pop of color. {{ingredient_image_1}} 1. Heating the skillet and sautéing onion Start by heating 1 tablespoon of olive oil in a large skillet over medium heat. Add 1 small chopped onion. Sauté it for about 3-4 minutes until it becomes soft and clear. 2. Cooking the garlic and meat Next, add 2 minced garlic cloves and 1 pound of ground beef or turkey to the skillet. Cook for 5-7 minutes. Break up the meat with a spatula. Make sure it is browned and cooked through. Drain any extra fat from the skillet. 3. Adding taco seasoning Stir in 1 packet of taco seasoning. Let it cook for another 2 minutes. This step helps the spices blend well with the meat. 4. Mixing in rice and other ingredients Now, add 1 cup of uncooked long-grain rice, 1 can of rinsed black beans, 1 can of diced tomatoes with green chilies, and 1 cup of corn. Pour in 2 cups of chicken or vegetable broth. Stir everything together until well combined. 5. Simmering until rice is cooked Bring the mixture to a boil. Once boiling, reduce the heat to low. Cover the skillet and let it simmer for 20-25 minutes. This allows the rice to cook and absorb most of the liquid. 6. Melting cheese and finishing the dish After the rice is tender, stir in 1 cup of shredded cheddar cheese. Cover the skillet again for 5 minutes. This helps the cheese melt nicely. 7. Final touches Taste your dish and add salt and pepper as needed. Before serving, garnish with fresh cilantro for a pop of color and flavor. - Choosing the best ground meat: Ground beef gives rich flavor. Ground turkey is leaner but still tasty. Choose what you like best! - Adjusting spice levels: Taco seasoning packs a punch. If you like it mild, use less. For more heat, add some cayenne or chili powder. - Ensuring rice cooks evenly: Rinse the rice before adding. This removes extra starch. It helps the rice stay fluffy and cook well. - Best practices for melting cheese: Add cheese at the end. Cover the skillet to trap heat. This melts the cheese perfectly without burning. - Ideas for garnishing with cilantro: Chop fresh cilantro finely. Sprinkle it on top for color and flavor. It adds a nice touch and freshness. - Serving suggestions with sides: Serve with tortilla chips or a side salad. You can also add sour cream or guacamole. These sides make the meal even more fun! Pro Tips Use Brown Rice: For a healthier option, substitute long-grain rice with brown rice. Just remember to increase the cooking time and liquid accordingly. Spice it Up: If you prefer extra heat, add some chopped jalapeños or a dash of cayenne pepper into the skillet when cooking the meat. Cheese Variations: Experiment with different types of cheese such as pepper jack for a spicier kick or Monterey Jack for a creamier texture. Meal Prep Friendly: This dish can be easily made ahead of time and stored in the refrigerator. Just reheat and serve for a quick weeknight meal! {{image_2}} You can easily change this dish to fit your needs. For a vegetarian option, replace the meat with diced mushrooms or lentils. Both add great flavor and texture. If you want a vegan dish, skip the cheese or use a plant-based cheese. You can also use vegetable broth instead of chicken broth for a full vegan meal. For gluten-free options, ensure your taco seasoning is gluten-free. Most brands are safe. This way, you can enjoy the dish without worry. To make your dish pop, try adding spices like cumin or smoked paprika. These spices can boost the taste and give warmth to the meal. You can also add veggies for extra nutrition. Chopped bell peppers or zucchini blend well. They add color and crunch. Just toss them in with the onion for a tasty boost. These variations make the Cheesy Taco Rice Skillet fun and different each time you cook it! To keep your Cheesy Taco Rice Skillet fresh, you need to cool it first. Allow the dish to sit at room temperature for about 30 minutes. This helps prevent bacteria growth. Once cooled, transfer the leftovers into airtight containers. Glass or plastic containers work well for storage. Make sure to fill them only halfway to allow for expansion when freezing. Label the containers with the date for easy tracking. When it’s time to enjoy your leftovers, use a safe reheating method. The stovetop is my favorite way. Place the skillet over low heat. Add a splash of broth or water to prevent sticking. Stir often to keep the rice from burning. You can also microwave it. Use a microwave-safe bowl and cover it with a damp paper towel. This keeps moisture in. Reheat for one minute, then stir and check if it’s warm. If not, heat in 30-second bursts until hot. This method helps maintain flavor and texture. Enjoy your meal just like it was fresh! How can I make Cheesy Taco Rice Skillet ahead of time? You can prepare the dish in advance. Cook it fully, then cool it down. Store it in an airtight container in the fridge. When ready to eat, just reheat it on the stovetop or in the microwave. Can I use brown rice instead of white rice? Yes, you can use brown rice. Just remember that it takes longer to cook. Add an extra 10-15 minutes to the simmer time. Also, use more broth to ensure it cooks well. What's the best way to freeze this dish? To freeze, let the dish cool completely. Then, place it in a freezer-safe container. You can also use freezer bags. Make sure to remove as much air as possible before sealing. How to customize the recipe for kids? Make it kid-friendly by cutting back on spices. You can also add more cheese for extra flavor. Serve it with tortilla chips or soft tortillas for fun eating options. Is it possible to make it in a slow cooker? Absolutely! Brown the meat and onions first, then put everything in the slow cooker. Cook on low for about 4-6 hours. Stir in the cheese just before serving. In this blog post, we covered a tasty Cheesy Taco Rice Skillet recipe, focusing on simple ingredients and clear steps. You learned how to prepare the dish, tips for perfecting the recipe, and variations for dietary needs. Remember, you can customize spice levels to fit your taste. Keep leftovers fresh with proper storage methods. This meal is not only easy but also fun to make and serve. Enjoy cooking and sharing this hearty dish with those you love!

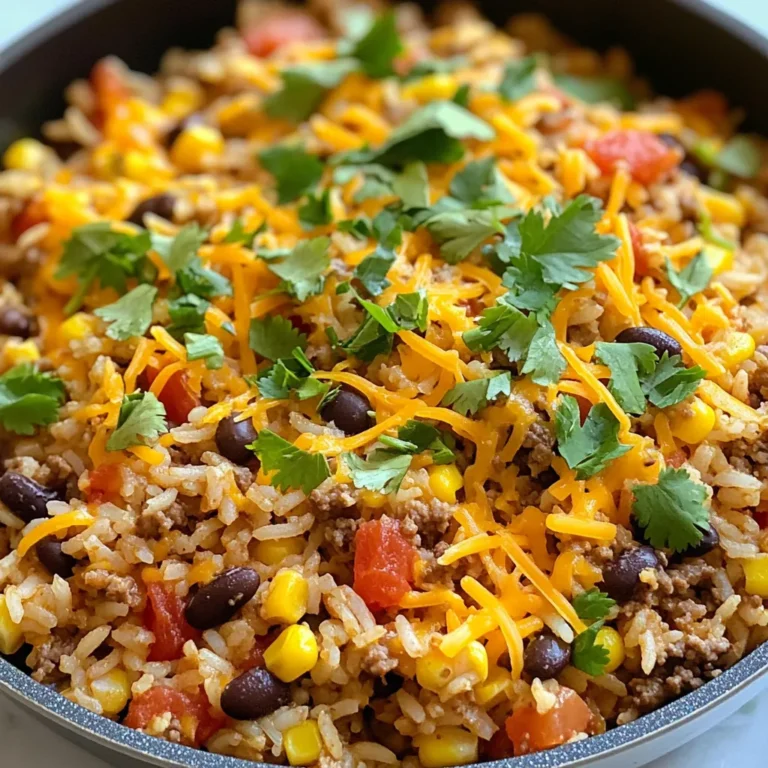
Cheesy Taco Rice Skillet Quick and Flavorful Meal

- 2 pounds beef sirloin, cut into bite-sized cubes - 1 cup beef broth - 1 medium onion, diced - 4 cloves garlic, minced - 1 tablespoon Worcestershire sauce - 1 teaspoon smoked paprika - 1 teaspoon dried oregano - 1 teaspoon garlic powder - 1 teaspoon black pepper - Salt to taste - 2 tablespoons olive oil - 1 cup bell peppers (assorted colors), chopped In this recipe, beef sirloin is the star. It has a great texture and flavor. Choose sirloin that has a nice marbling. This will keep the meat juicy and tasty. The beef broth adds depth and richness to the dish. The onion and garlic provide a strong base for the flavors. The seasonings are simple but powerful. Smoked paprika gives a warm, smoky taste. Dried oregano adds a hint of earthiness. Garlic powder boosts the savory notes. Black pepper and salt enhance all these flavors. Finally, the bell peppers add a pop of color and sweetness. They also provide some crunch to the dish. - Additional seasonings or herbs: Consider adding cayenne for heat or thyme for freshness. - Suggested garnishes: Fresh parsley adds a nice touch and brightens the dish. You can always play with the seasonings. If you like it spicy, add some cayenne pepper. For a fresh taste, try adding thyme. Fresh parsley not only looks nice, but it also adds a fresh flavor. - Calories: Approximately 300 per serving - Protein: 30 grams - Fat: 15 grams - Carbs: 10 grams This meal is packed with protein from the beef. It supports muscle health and keeps you full. The fat comes from the beef and olive oil, which adds flavor. The carbs are low, mainly from the vegetables. Eating this dish provides several health benefits. The beef gives you iron, which is good for blood health. The vegetables offer vitamins and fiber, which are key for digestion. Enjoy this dish as part of a balanced meal! {{ingredient_image_1}} - Preparing the beef Start by cutting 2 pounds of beef sirloin into bite-sized cubes. Make sure the pieces are even for uniform cooking. This helps ensure that every bite is tender and juicy. - Seasoning the meat In a large bowl, combine the beef cubes with 1 teaspoon of smoked paprika, 1 teaspoon of dried oregano, 1 teaspoon of garlic powder, 1 teaspoon of black pepper, and salt to taste. Toss the beef well to coat it evenly with the spices. This step adds a lot of flavor to your steak bites. - Searing in the skillet Heat 2 tablespoons of olive oil in a skillet over medium-high heat. Once the oil is hot, add the seasoned beef cubes in batches. Sear them for about 3-4 minutes until they are browned on all sides. This step locks in the juices and enhances the flavor. Transfer the browned steak bites to the crockpot as you finish each batch. - Transferring to the crockpot After searing, set the skillet aside. You will use it again for the onions and broth. Transfer all the browned steak bites to your crockpot. They will soak up all the tasty juices while cooking. - Cooking times and settings Set your crockpot to cook on low for 6-8 hours or high for 3-4 hours. The beef will become tender and full of flavor. Check the meat for doneness before serving. - Adding vegetables and broth In the same skillet, add 1 diced medium onion and sauté for about 2-3 minutes until it's translucent. Then, mix in 4 minced garlic cloves and cook for an additional minute. Pour in 1 cup of beef broth and 1 tablespoon of Worcestershire sauce, scraping up any browned bits from the skillet. Bring this mixture to a simmer. Now, pour the broth over the steak bites in the crockpot. Add 1 cup of chopped bell peppers and stir everything together. Cover the crockpot and let it do its magic! Browning meat adds flavor. This step locks in juices and creates a rich taste. To get a perfect sear, heat your skillet first. Use enough olive oil to cover the bottom. Cook the meat in batches. This helps the meat brown evenly. Do not crowd the pan; it will steam, not sear. Aim for a golden brown color, about 3-4 minutes per side. You can boost flavor with spices. Try adding a pinch of cayenne for heat. Fresh herbs like thyme or rosemary can work great too. Pair your steak bites with sauces like a creamy horseradish or tangy barbecue. These add a nice kick. Serve with sides like mashed potatoes or crusty bread. These options soak up the tasty broth. If your meat turns out overcooked, add some beef broth. This will help moisten the dish. If it tastes bland, sprinkle in more salt or seasoning. Always taste before serving. Adjustments make a big difference. Keep a simple spice mix handy to enhance flavor quickly. With these tips, you can enjoy a dish that tastes amazing every time. Pro Tips Marinate for Extra Flavor: For even more depth of flavor, consider marinating the beef cubes in the Worcestershire sauce and spices for a few hours or overnight before cooking. Use a Meat Thermometer: To ensure your steak bites are perfectly cooked, use a meat thermometer. Aim for an internal temperature of 135°F for medium-rare. Experiment with Vegetables: Feel free to add other vegetables like carrots, mushrooms, or zucchini to the crockpot for added nutrients and flavor. Save the Sauce: Don’t forget to save the flavorful broth! It’s perfect for drizzling over mashed potatoes or using as a base for a delicious gravy. {{image_2}} You can switch beef sirloin for other meats. Try chicken thighs for a lighter dish. Pork tenderloin also works great. Each meat brings its own flavor. If you want a vegetarian option, use hearty mushrooms. Portobello mushrooms can add great texture. You can also use cubed tofu for a protein boost. Changing seasonings can bring new life to your dish. Add chili powder for some heat. Swap Worcestershire sauce for soy sauce for a different taste. You can also mix in fresh herbs like thyme or rosemary. For veggies, try carrots or zucchini. They cook well and add color. Mixing different types of bell peppers can also enhance the flavor. Pair your steak bites with creamy mashed potatoes. They soak up the tasty broth. You can also serve with crusty bread for dipping. If you have leftovers, try them in a stir-fry. Chop the steak bites and toss them with rice and veggies. You can even add them to a salad for a filling lunch. To keep your steak bites fresh, store them in an airtight container. Place them in the fridge within two hours of cooking. They will stay good for about three to four days. If you want to keep them longer, freezing is a great option. - For freezing, use freezer-safe bags or containers. - Remove as much air as possible before sealing. - They can last up to three months in the freezer. When you reheat steak bites, keep them moist. The best way is to use the stove or microwave. - For the stove, place the bites in a pan over low heat. - Add a splash of beef broth to keep them juicy. - Stir occasionally until heated through. In the microwave, use a covered dish to trap steam. Heat in short bursts of 30 seconds. Check often to avoid overcooking. Leftovers can last in the fridge for up to four days. In the freezer, they can stay good for three months. Watch for signs of spoilage. - If the meat smells off or has changed color, it's time to toss it. - Always trust your senses. If in doubt, throw it out! You can add heat with a few ingredients. Try these options: - Cayenne pepper: Start with a pinch and go up to your taste. - Chili powder: This adds warmth and flavor. Use 1 teaspoon or more. - Hot sauce: A few drops in the broth can spice things up. - Jalapeños: Add diced jalapeños for a fresh kick. Mix and match these spices to find your perfect heat level. Just remember, always taste as you go! Yes, you can use frozen beef. However, there are some things to keep in mind: - Thawing: It’s best to thaw beef overnight in the fridge before cooking. - Cooking time: If you use frozen beef, add an hour to your cooking time. - Searing: Searing frozen beef can be tricky. It won’t brown as well. For the best flavor and texture, thaw the beef first. You can pair these steak bites with many great sides: - Mashed potatoes: Creamy potatoes soak up the broth well. - Rice: White or brown rice makes a nice base. - Crusty bread: Perfect for dipping into the tasty sauce. - Steamed veggies: Broccoli or green beans add color and crunch. These sides will help round out your meal and make it more filling. To keep the steak tender, follow these tips: - Sear the meat: Browning the beef adds flavor and locks in juices. - Cook low and slow: Use the low setting for 6-8 hours. This helps break down tough fibers. - Don’t lift the lid: Opening the lid lets heat escape. Keep it closed for best results. By using these techniques, you will get delicious, tender steak bites every time. This blog post covered many aspects of making Crockpot Steak Bites. You learned about the key ingredients and their health benefits. We also explored steps for preparation and cooking, along with tips for the perfect sear. Variations let you customize your dish, while storage info ensures freshness. Remember, practice makes perfect. Enjoy experimenting with flavors and techniques. Your delicious meal waits in the crockpot, ready to impress. Experiment, enjoy, and share your tasty results!

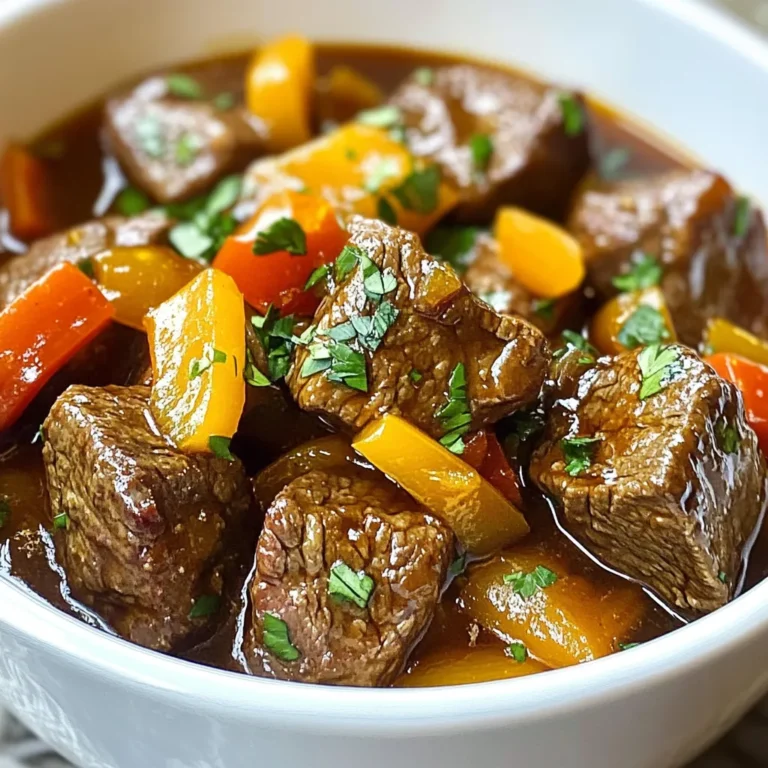
Crockpot Steak Bites Flavorful and Easy Recipe

- 8 oz rice noodles - 2 tablespoons vegetable oil - 6 cloves garlic, minced - 1-2 red chilies, finely sliced - 1 tablespoon ginger, grated - 3 tablespoons soy sauce - 2 tablespoons chili paste - 1 tablespoon sesame oil - 1 tablespoon honey (or maple syrup) - 1 cup mixed bell peppers, thinly sliced - 1 cup snap peas or green beans - 2 green onions, chopped - Sesame seeds The first step to making Spicy Garlic Chili Noodles is gathering your ingredients. Having everything ready helps speed up the cooking process. I love using rice noodles. They soak up flavors well. You can choose between snap peas or green beans for crunch. Mixed bell peppers add color and sweetness. The garlic and ginger give a great aroma. Red chilies bring heat, so adjust them to your taste. Soy sauce adds depth, while chili paste kicks up the spice. Honey or maple syrup balances the heat with sweetness. Finish with sesame oil and seeds for a nutty touch. Make sure to measure your ingredients before you start. It makes cooking smoother and more fun! {{ingredient_image_1}} To start, you need to cook the rice noodles. Bring a large pot of water to a boil. Add the rice noodles and cook them until they are al dente. This usually takes about 5-7 minutes. After cooking, drain the noodles and rinse them under cold water. This stops the cooking and keeps them from getting mushy. Set the noodles aside for later. Next, let’s make the sauce. In a small bowl, combine soy sauce, chili paste, sesame oil, and honey. Mix well until smooth. You can adjust the amount of chili paste based on how spicy you want it. If you like it hot, add more chili paste. Now, it's time to sauté the aromatics. Heat vegetable oil in a large pan or wok over medium heat. Add minced garlic, sliced red chilies, and grated ginger. Sauté these for about 1-2 minutes. You want them fragrant but not burnt. Keep an eye on them so the garlic does not turn dark. After the aromatics are ready, add in the sliced bell peppers and snap peas or green beans. Stir-fry these veggies for about 3-4 minutes. You want them to be tender yet still crisp. This gives your dish a nice texture. Next, add the cooked rice noodles to the pan with the veggies. Pour the sauce mixture over the noodles and toss everything together. Keep the heat on medium and stir for 2-3 minutes. Make sure the noodles and veggies are well coated with the sauce. Finally, it’s time to serve. Remove the pan from heat and transfer the spicy garlic chili noodles to deep bowls. For a tasty finish, garnish with chopped green onions and a sprinkle of sesame seeds. If you want, you can also add extra chili slices or a drizzle of sesame oil for more flavor. Enjoy your meal! To change the heat, use fewer or more chilies. Start with one chili if you want mild noodles. You can always add more spice later. Mix in extra chili paste for a kick. Taste as you go. This way, you control the spice perfectly. Cook the rice noodles just right. Follow the package instructions closely. Drain and rinse them under cold water to stop cooking. This keeps them firm and prevents clumping. Toss them with a bit of oil if needed. This helps keep them separate and ready for sauce. Garnishes add a lot of flavor and color. Use chopped green onions for a fresh taste. Sprinkle sesame seeds for a nice crunch. You can also add more chili slices for extra heat. A drizzle of sesame oil on top gives a lovely finish. These small touches make your dish shine! Pro Tips Adjust Spice Level: Start with less chili paste and add more gradually to achieve your preferred heat level without overpowering the dish. Perfect Noodle Texture: Rinse the noodles under cold water after cooking to stop the cooking process and prevent them from becoming mushy. Fresh Ingredients: Use fresh garlic and ginger for maximum flavor. If you can, opt for fresh vegetables instead of frozen for a vibrant dish. Garnishing Tips: For added texture and flavor, consider topping the dish with crushed peanuts or a squeeze of lime juice before serving. {{image_2}} You can easily make this dish vegetarian or vegan. Start by using vegetable oil for cooking. For the sweet touch, swap honey with maple syrup. The rest of the ingredients are plant-based. This keeps the dish vibrant and tasty. Want to add protein? Chicken or tofu works great here. For chicken, slice it thin and cook it before adding the garlic and ginger. If you choose tofu, use firm tofu. Cut it into cubes, fry until golden, and add it with the veggies. This adds a nice texture and flavor. Feel free to mix up the veggies! Broccoli, carrots, or zucchini all taste great. Just make sure to chop them into small pieces. This helps them cook evenly. You can also use frozen vegetables if you're in a hurry. They save time and still taste fresh. You can store your spicy garlic chili noodles in an airtight container. Make sure to let them cool first. They will stay fresh in the fridge for about three days. To reheat, add a splash of water or broth to a pan. Heat over medium heat until warm. Stir often to keep the noodles from sticking. You can also use a microwave. Place the noodles in a bowl with a little water, cover, and heat for one to two minutes. If you want to freeze the noodles, do it without the sauce and veggies. Place cooled noodles in a freezer bag or container. They can last for up to three months. When you're ready to eat them, thaw overnight in the fridge and reheat as usual. If you don’t have rice noodles, you can use several options. Regular wheat noodles work well. You can also try egg noodles or even zoodles. Zoodles are spiralized zucchini and are great for a low-carb dish. Each choice gives a unique taste to your meal. To reduce the heat, cut back on the red chilies and chili paste. You can also add more honey or maple syrup. This will balance the spice with sweetness. Adding more vegetables can help, too. Bell peppers and snap peas add bulk without heat. Yes, you can prepare parts of this dish ahead. Cook the rice noodles and store them in the fridge. You can also make the sauce in advance. When you’re ready, just stir-fry the veggies and mix everything together. This keeps your meal quick and easy. Pair your noodles with simple sides. Steamed broccoli or a fresh cucumber salad work well. You can also serve spring rolls or dumplings for a fun touch. These sides balance the heat and add variety to your meal. This post showed you how to make Spicy Garlic Chili Noodles. We covered all the key ingredients, from rice noodles to sesame seeds. I shared detailed steps to cook each part, plus tips to adjust spice and enhance flavors. Don't forget the variations you can try. You can add protein or swap in different veggies for a new twist. Enjoy this dish fresh, store leftovers properly, and reheat with care. With this recipe, you can impress family and friends with every bowl. Happy cooking!

Spicy Garlic Chili Noodles Flavorful and Easy Recipe

PREV 1 … 47 48 49 … 56 NEXT
go kitchen now

explore

DessertsDinnerAppetizersDrinks

Our Policies

  • Cookie Policy
  • Copyright Policy
  • Disclaimer
  • GDPR Policy
  • Terms Of Use
Back to Top
  • About
  • Contact Us
  • Privacy Policy
© 2025 go kitchen now