FREE DINNER EBOOK! Get your copy!
  • Cookie Policy
  • GDPR Policy
  • Disclaimer
  • Terms Of Use
  • Visit my other site: Fun Cookie Recipes
go kitchen now
  • Home
  • Dinner
  • Desserts
  • Drinks
  • Appetizers
  • Contact
  • About
  • Privacy Policy
  • Home
  • Dinner
  • Desserts
  • Drinks
  • Appetizers
  • Contact
  • About
  • Privacy Policy
  • Cookie Policy
  • GDPR Policy
  • Disclaimer
  • Terms Of Use
Visit my other site: Fun Cookie Recipes

HOME / CATEGORIES /

Latest

To make this creamy Reuben soup, gather these ingredients: - 1 tablespoon olive oil - 1 medium onion, diced - 2 cloves garlic, minced - 1 medium carrot, diced - 1 medium celery stalk, diced - 4 cups chicken broth - 2 cups shredded cooked corned beef - 1 cup sauerkraut, drained and rinsed - 1 teaspoon caraway seeds - 1 cup heavy cream - 1 tablespoon Dijon mustard - Salt and pepper to taste - 1 cup shredded Swiss cheese - Fresh parsley, chopped (for garnish) I love using fresh ingredients. You can swap olive oil for butter for a richer taste. If you want to cut down on fat, you can use half-and-half instead of heavy cream. If you can’t find corned beef, you can use shredded roast beef or turkey. For a vegetarian version, try using mushrooms and vegetable broth. Always choose fresh veggies. Look for firm carrots and crisp celery. If you buy sauerkraut, check the expiration date. For the best flavor, use fresh herbs when possible. Store any leftover cheese in an airtight container to keep it fresh. Enjoy your cooking, and let your ingredients shine! {{ingredient_image_1}} Making Creamy Reuben Soup is fun and easy. You will start by gathering all your ingredients. This recipe takes about 15 minutes to prep. The cooking time is around 25 minutes. You will need a large pot to cook everything together. 1. Heat the olive oil in a large pot over medium heat. 2. Add the diced onion, garlic, carrot, and celery. 3. Sauté for about 5-7 minutes. You want them soft and fragrant. 4. Pour in the chicken broth. Bring this mixture to a gentle boil. 5. Stir in the shredded corned beef, sauerkraut, and caraway seeds. 6. Let it simmer for 10-15 minutes. This helps the flavors meld together. 7. Reduce the heat to low. Now, add the heavy cream and Dijon mustard. 8. Stir until well combined. Simmer for an additional 5 minutes. 9. Season with salt and pepper to taste. 10. Stir in the shredded Swiss cheese. Wait until it melts and makes the soup creamy. 11. Remove from heat and let the soup cool slightly before serving. To make your soup extra tasty, focus on the sautéing step. This is where you build flavor. Use fresh, high-quality ingredients whenever possible. The chicken broth should be flavorful. Taste as you go, adding salt and pepper as needed. Caraway seeds add a unique taste, so don't skip them! Lastly, let the soup sit for a few minutes before serving. This helps the flavors to blend perfectly. To make your creamy Reuben soup shine, focus on the basics. Start with good olive oil for sautéing. It adds a nice depth. When cooking your veggies, let them soften well. This melds the flavors together. Add the caraway seeds early. Their warm, fragrant notes lift the soup. For a richer taste, use homemade chicken broth if you can. The flavor difference is worth it. Once you add the heavy cream, don't rush it. Let it simmer gently to blend in. This step creates a silky texture. Lastly, mix in the Swiss cheese slowly. This ensures it melts evenly, giving you a creamy finish. One big mistake is adding salt too soon. Wait until the end to taste. The corned beef and broth already add saltiness. Another common error is skipping the rinsing of sauerkraut. This removes excess salt and tanginess. Overcooking the soup can ruin it. Keep the heat low after adding cream. High heat can break down the cream, making it grainy. Lastly, don’t forget to garnish! A sprinkle of parsley adds color and freshness. To serve your soup right, use deep bowls. Ladle in the soup and add extra Swiss cheese on top. This way, the cheese melts beautifully. A touch of fresh parsley on top makes it pop. Pair your soup with crusty rye bread. This classic match brings out the Reuben's flavors. You can also add a side of pickles for that tangy crunch. If you want to impress, serve with a side of potato chips for a fun crunch. Enjoy! Pro Tips Use Quality Corned Beef: The flavor of your soup greatly depends on the quality of the corned beef. Opt for freshly cooked or high-quality deli meats for the best results. Adjust Creaminess: If you prefer a lighter soup, you can substitute half of the heavy cream with milk or use a lower-fat cream alternative without sacrificing too much flavor. Enhance Flavor with Spices: Consider adding a pinch of smoked paprika or a dash of hot sauce to give your soup an extra kick and depth of flavor. Serve with Toppings: Enhance the presentation and flavor by serving the soup with a dollop of sour cream or a sprinkle of crispy bacon bits on top. {{image_2}} You can make Creamy Reuben Soup lighter without losing flavor. Start by using low-fat cream or half-and-half instead of heavy cream. This change cuts calories but keeps it creamy. Also, consider using low-sodium chicken broth. It helps control salt without sacrificing taste. You can swap corned beef for shredded turkey. It’s leaner and still delicious. Adding more veggies like spinach or bell peppers boosts nutrients and flavor. If you want a meat-free version, go for plant-based ingredients. Replace corned beef with diced mushrooms or jackfruit. Both give a meaty texture. Use vegetable broth instead of chicken broth. This keeps it completely vegetarian. Sauerkraut remains a great ingredient for tangy flavor. You can also add some beans for protein. Try chickpeas or black beans; they add richness and fiber. For those who love heat, add red pepper flakes or a dash of hot sauce. Stir these in while simmering the soup. Add a pinch of smoked paprika for depth and warmth. You can also include fresh herbs like dill or thyme. They brighten the soup and add unique flavor notes. This way, your Creamy Reuben Soup becomes a delightful mix of flavors and spice! To keep your creamy Reuben soup fresh, let it cool first. Transfer it to an airtight container. Store it in the fridge for up to three days. Make sure to label the container with the date. This way, you’ll know when to enjoy it again. If you want to save your soup for later, freezing works well. Cool the soup completely before freezing. Use a freezer-safe container or zip-top bag. Leave some space at the top for expansion. The soup can last up to three months in the freezer. Don’t forget to label it! To reheat, first, thaw the soup in the fridge overnight if frozen. Pour it into a pot and heat on low. Stir often to prevent sticking. You can add a splash of cream for extra richness. Heat until it’s warm, and enjoy your comforting bowl again! Creamy Reuben Soup is a warm and rich dish. It combines the classic flavors of a Reuben sandwich into a comforting soup. You get tender corned beef, tangy sauerkraut, and creamy Swiss cheese. Each spoonful is a delight! The soup has a smooth texture, thanks to the heavy cream and Dijon mustard. The caraway seeds add a unique touch. This soup is perfect for chilly days or whenever you need comfort food. Yes, you can make this soup ahead of time. Prepare the soup, cool it, and store it in the fridge. It stays good for about three days. Just reheat it gently on the stove before serving. This way, the flavors get even better! You can also freeze the soup for up to three months. Thaw it overnight in the fridge before reheating. To adjust the recipe, double or triple the ingredients. This way, you can easily make more servings. For example, use 8 cups of chicken broth and 4 cups of shredded corned beef. Make sure to keep the same cooking times. This soup is great for gatherings or family dinners. Just remember to taste and adjust the seasonings as needed! This blog covered everything you need for Creamy Reuben Soup. You learned about key ingredients, cooking steps, and ways to enhance flavor. I shared tips for storing leftovers and answered common questions. Remember, you can adjust the recipe to suit your taste. Use fresh ingredients for the best results. With the right tweaks, this soup can fit any diet. Enjoy creating your delicious bowl of comfort!

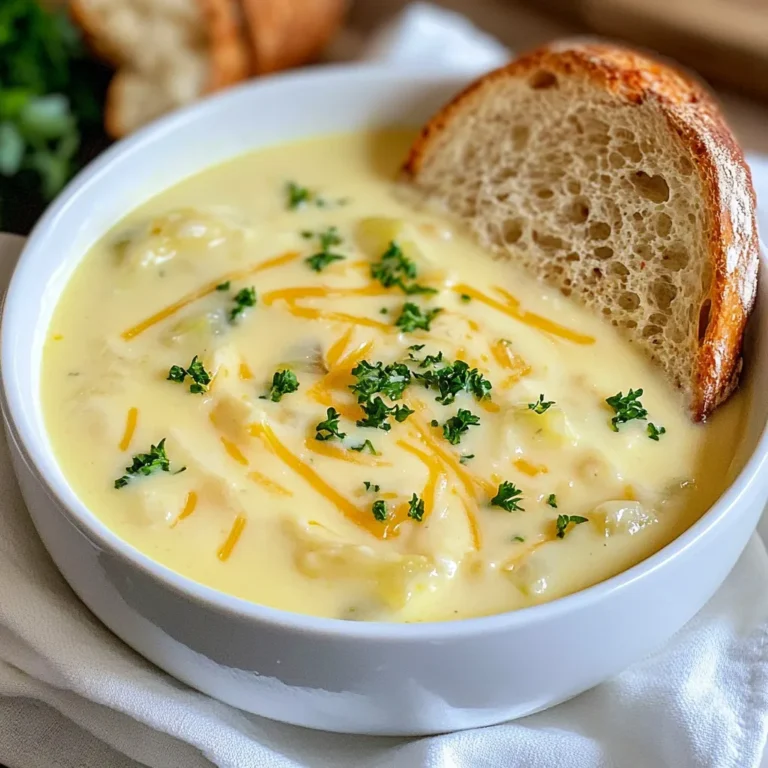
Creamy Reuben Soup Rich and Comforting Delight

To make these cookies, you will need: - 1 cup creamy peanut butter - ½ cup granulated sugar - ½ cup brown sugar, packed - 1 large egg - ½ teaspoon vanilla extract - 1 teaspoon baking soda - ½ cup all-purpose flour - ½ cup semi-sweet chocolate chips - ¼ cup caramel sauce (store-bought or homemade) - Sea salt for sprinkling (optional) You can easily swap some ingredients. If you like crunchy peanut butter, use that instead of creamy. If sugar is a concern, try using a sugar substitute like stevia. For a gluten-free option, use a gluten-free flour mix in place of all-purpose flour. If you want a different flavor, almond butter or cashew butter can replace peanut butter. You can also use dark chocolate chips for a richer taste. Choosing the right ingredients makes a big difference in flavor. Look for natural peanut butter with minimal ingredients. The best sugar is organic, as it often has a cleaner taste. For chocolate chips, choose a brand that uses real cocoa butter. If you can, make your caramel sauce at home for a fresher flavor. Always check for freshness on eggs and flour, as stale ingredients can ruin your cookies. {{ingredient_image_1}} Start by preheating your oven to 350°F (175°C). This step ensures even baking. Line a baking sheet with parchment paper. This makes for easy cleanup. In a large bowl, mix the peanut butter, granulated sugar, brown sugar, egg, and vanilla extract. Use a whisk or spoon until it is smooth. Add the baking soda and flour next. Mix until combined. Be careful not to overmix. Finally, gently fold in the semi-sweet chocolate chips. This adds a rich flavor. Now, take about a tablespoon of dough. Flatten it in your hand. Add about ½ teaspoon of caramel sauce in the center. Fold the dough around the caramel, sealing it well. Roll it into a ball and place it on the baking sheet. Keep each cookie about 2 inches apart. This space helps them bake evenly. If you like, press each cookie down with a fork. This creates a fun crisscross pattern on top. Place the baking sheet in the oven. Bake the cookies for 10-12 minutes. Look for lightly golden edges. The centers might seem a bit underbaked, but that's perfect! Once done, take them out of the oven. Let them cool on the baking sheet for about 5 minutes. This helps them set up. After that, transfer the cookies to a wire rack to cool completely. If you want, sprinkle a little sea salt on top while they are warm. This adds an extra burst of flavor. When baking these cookies, avoid using cold peanut butter. Room temperature peanut butter mixes better. Make sure to measure your ingredients correctly. Too much flour or sugar can change the texture. Don’t skip the chilling time; it helps the cookies hold their shape. Lastly, keep an eye on the baking time. Overbaking can dry them out. For chewy cookies, mix the dough just until combined. Don't over-mix after adding the flour. The right amount of caramel is key. Too much can make them soggy. If you want a crisp edge, slightly flatten the cookies before baking. This helps them spread evenly. Letting them cool on the baking sheet for a few minutes also helps them firm up. Use high-quality peanut butter. The creaminess adds to the taste. A touch of vanilla enhances the cookie's sweetness. Consider using sea salt on top for a sweet-salty combo. Adding more chocolate chips can also boost flavor. Don’t be afraid to experiment with different caramel sauces, too. Homemade caramel can add a special touch. Pro Tips Use Room Temperature Ingredients: Make sure your peanut butter and egg are at room temperature for a smoother dough consistency. Chill the Dough: If the dough is too sticky to handle, chill it in the refrigerator for 15-30 minutes before shaping the cookies. Experiment with Fillings: Feel free to swap the caramel sauce for other fillings like Nutella or fruit preserves for different flavor profiles. Storage Tips: Store the cookies in an airtight container at room temperature for up to a week, or freeze them for longer storage. {{image_2}} You can swap peanut butter for other nut butters. Almond butter gives a nutty twist. Cashew butter offers a creamier texture. Sunflower seed butter is great for nut-free diets. Each nut butter changes the taste, so try different ones to find your favorite. Mix-ins can add fun textures and flavors. Chopped nuts like walnuts or pecans add crunch. Dried fruit like cranberries or raisins brings sweetness. Try adding a little coconut for an extra layer of flavor. Just remember not to go overboard. Too many mix-ins can change the cookie’s texture. You can switch out the caramel sauce for other fillings. Chocolate sauce adds a rich, gooey center. Butterscotch sauce gives a sweet, buttery flavor. You can even try a fruit jam for a fruity surprise. Each sauce creates a unique taste that makes these cookies even more special. To keep your chocolate caramel peanut butter cookies fresh, store them in an airtight container. This helps keep them soft and chewy. You can layer them between sheets of parchment paper. This way, they won't stick together. Make sure to keep the container at room temperature. They will stay good for about a week. Freezing cookies is a great way to save some for later. First, let the cookies cool completely. Then, place them in a single layer on a baking sheet. Freeze them for about an hour until they are solid. After that, transfer the cookies to a freezer-safe bag. Remove as much air as possible. They can last up to three months in the freezer. When you are ready to enjoy your frozen cookies, take them out of the freezer. Let them thaw at room temperature for about 30 minutes. If you want to warm them up, preheat your oven to 350°F (175°C). Place the cookies on a baking sheet and heat for about 5-7 minutes. This will bring back their soft, gooey texture. Enjoy your cookies with a glass of milk for a perfect treat! Yes, you can make these cookies gluten-free. Just swap the all-purpose flour for a gluten-free flour blend. Many options work well, like almond flour or coconut flour. Make sure the other ingredients, like the baking soda and caramel sauce, are also gluten-free. This change keeps the cookies tasty and safe for those with gluten issues. You can tell if the cookies are done by checking the edges. They should be lightly golden brown. The middle might still look soft, which is okay. It will firm up as the cookies cool. Also, if you press gently on a cookie, it should feel set but still soft. This balance gives a great chewy texture. Leftover caramel sauce is a treat! You can drizzle it on ice cream, pancakes, or waffles for extra sweetness. It also works well in coffee or hot chocolate. Another idea is to use it in desserts, like brownies or cheesecakes. Just store it in the fridge in a sealed jar for up to two weeks. In this post, we covered key ingredients and how to choose them well. You learned step-by-step instructions for mixing, shaping, and baking delicious cookies. I shared tips to avoid common mistakes and achieve great texture and flavor. We explored fun ways to change the recipe with different nut butters or extra mix-ins. Lastly, I provided storage tips to keep cookies fresh. Baking is fun and rewarding. Enjoy your cookies, and happy baking!

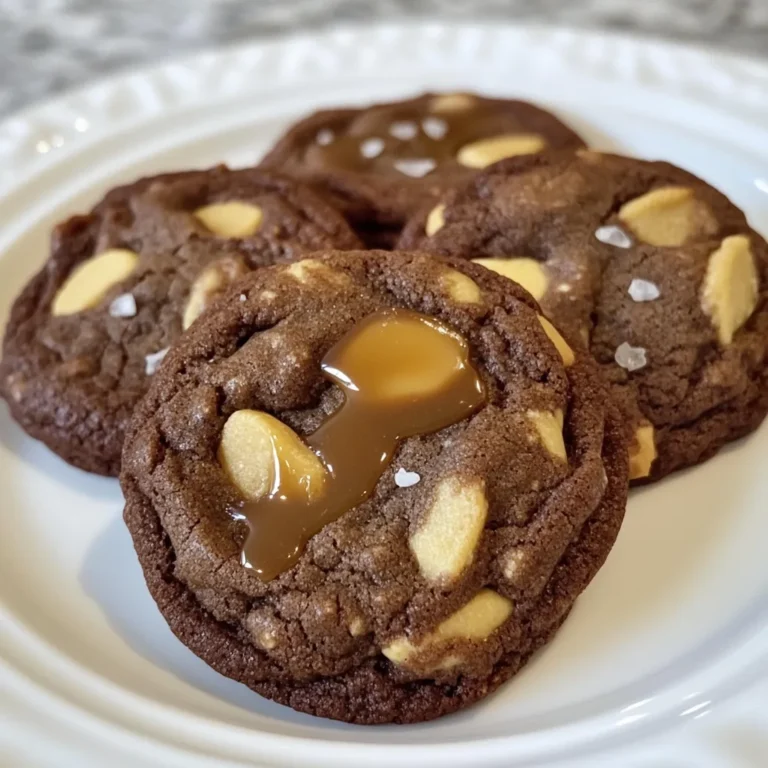
Irresistible Chocolate Caramel Peanut Butter Cookies

To make Classic Crack Chicken Gnocchi, you need a few key items: - 1 lb (450g) chicken breasts, cooked and shredded - 16 oz (450g) potato gnocchi - 8 oz (225g) cream cheese, softened - 1 packet (1oz) ranch seasoning mix - 1 cup (240ml) chicken broth - 1 cup (240ml) shredded cheddar cheese - 1 cup (150g) frozen peas - 2 tablespoons olive oil - 1/2 teaspoon garlic powder - Salt and pepper to taste - Fresh chives, chopped (for garnish) These ingredients work together to create a creamy, rich dish that is full of flavor. You can easily customize your Crack Chicken Gnocchi by adding more ingredients: - Cooked bacon bits for a smoky touch - Fresh spinach for added greens - Mushrooms for an earthy flavor - Sweet corn for a hint of sweetness These add-ins can enhance the dish and make it your own. For the best flavor, consider these seasonings: - Extra garlic powder for a stronger garlic taste - Dried herbs like thyme or oregano for depth - A pinch of red pepper flakes for heat These seasonings can elevate the dish, making it even more delicious. Try them out to find your favorite combination! {{ingredient_image_1}} Start by filling a large pot with water. Add salt to the water and bring it to a boil. Once boiling, add the potato gnocchi. Cook them based on package directions. You know they are ready when they float to the top. This means they are light and fluffy. Drain the gnocchi and place them aside for now. Next, grab a large skillet and add olive oil. Heat it over medium heat. Add the cooked and shredded chicken to the skillet. Sprinkle in the garlic powder and ranch seasoning mix. Stir everything together. Cook this mix for about 2-3 minutes. This helps the flavors blend well. Lower the heat to medium-low. Now, pour in the chicken broth and add the softened cream cheese. Keep stirring until the cream cheese melts and the sauce is smooth. Once the sauce is creamy, mix in the shredded cheddar cheese. Stir until the cheese melts completely. Now, carefully fold in the cooked gnocchi and frozen peas. Stir gently so everything combines well. Cook for an extra 3-5 minutes until it’s all hot and the peas are tender. Season with salt and pepper to your taste. Finally, remove from heat and sprinkle fresh chives on top. This adds a nice touch before you serve! To cook gnocchi just right, start with salted water. Bring it to a boil and watch for the gnocchi to float. This means they are done! Use a slotted spoon to remove them. If you want, toss them in a bit of olive oil to keep them from sticking. For a creamy sauce, use softened cream cheese. Add it to the skillet with the chicken broth. Stir slowly until the cheese melts completely. This will give you a smooth and rich sauce. If it seems too thick, add a splash more chicken broth. This keeps your sauce silky and light. Serve your Crack Chicken Gnocchi in a large bowl. Top it with extra cheddar cheese for a tasty touch. Add chopped chives for color and freshness. A side of crusty bread pairs well too. It’s perfect for dipping into the creamy goodness. Pro Tips Use Rotisserie Chicken: For a quicker preparation, consider using rotisserie chicken. It adds flavor and saves you cooking time! Customize Your Cheese: Feel free to experiment with different types of cheese! Pepper jack or mozzarella can add a unique twist to the dish. Fresh Herbs Matter: Adding fresh herbs like parsley or basil in addition to chives can elevate the dish and enhance the flavors. Make it a One-Pot Meal: To simplify cleanup, you can cook the gnocchi directly in the same pot as the sauce after adding the chicken broth! {{image_2}} You can easily make a vegetarian version of this dish. Start by swapping the chicken for a mix of colorful vegetables. I love using bell peppers, zucchini, and spinach. Cook the veggies in olive oil with garlic. Then, follow the same steps to create the sauce using cream cheese and broth. This way, you keep the creamy goodness while making it meat-free. If you like some heat, add spices to kick up the flavor. Try mixing in some diced jalapeños or crushed red pepper flakes. You can also add cooked sausage for extra flavor. Just sauté the sausage before adding the chicken or veggies. This spicy twist makes the dish exciting and fun! For a dairy-free option, replace cream cheese and cheddar with cashew cream or almond-based cheese. You can blend soaked cashews with some broth until smooth. Use this to create that creamy texture without dairy. Make sure to taste and adjust your seasonings, as dairy-free cheeses may vary in flavor. This keeps the dish rich and satisfying while being kind to those with dairy allergies. After you make Classic Crack Chicken Gnocchi, let it cool down. Store it in an airtight container. It stays fresh in the fridge for about 3 to 4 days. Make sure to label the container with the date. This way, you know when to eat it. You can freeze this dish too! Pack it in a freezer-safe container. It keeps well for up to 3 months. When you want to enjoy it again, thaw it in the fridge overnight. This helps keep the flavors intact and the texture nice. When you are ready to eat, reheat it gently. You can use the microwave or a stovetop. If using the microwave, warm it in short bursts. Stir in between to heat evenly. If on the stove, add a splash of chicken broth to keep it creamy. Heat until hot, but avoid boiling to keep the gnocchi from getting mushy. Enjoy your meal! Crack Chicken Gnocchi is a creamy, savory dish. It combines shredded chicken, potato gnocchi, and ranch flavors. The ranch seasoning gives it a unique taste that many love. The dish also has cheese and peas, adding richness and color. Yes, you can use fresh gnocchi instead of potato gnocchi. Fresh gnocchi cooks faster, so watch it closely. Boil it until it floats, just like the potato version. This switch can add a nice texture to your meal. To make this dish ahead, cook the gnocchi and chicken mixture separately. Store them in airtight containers. When ready to eat, heat the chicken and sauce, and then add the gnocchi. This keeps the dish fresh and tasty. Classic Crack Chicken Gnocchi pairs well with crusty bread. The bread is great for soaking up the creamy sauce. You can also add a simple side salad for some crunch. A green salad with a light dressing works well. This guide covered everything you need to know about making Crack Chicken Gnocchi. You learned the key ingredients, step-by-step cooking methods, and useful tips for the best results. I shared variations for different diets and ways to store leftovers. Now you can enjoy this dish anytime, with easy steps to follow. Remember, cooking is fun, and experimenting with flavors can lead to a new favorite. Enjoy your delicious recipe and share it with friends!

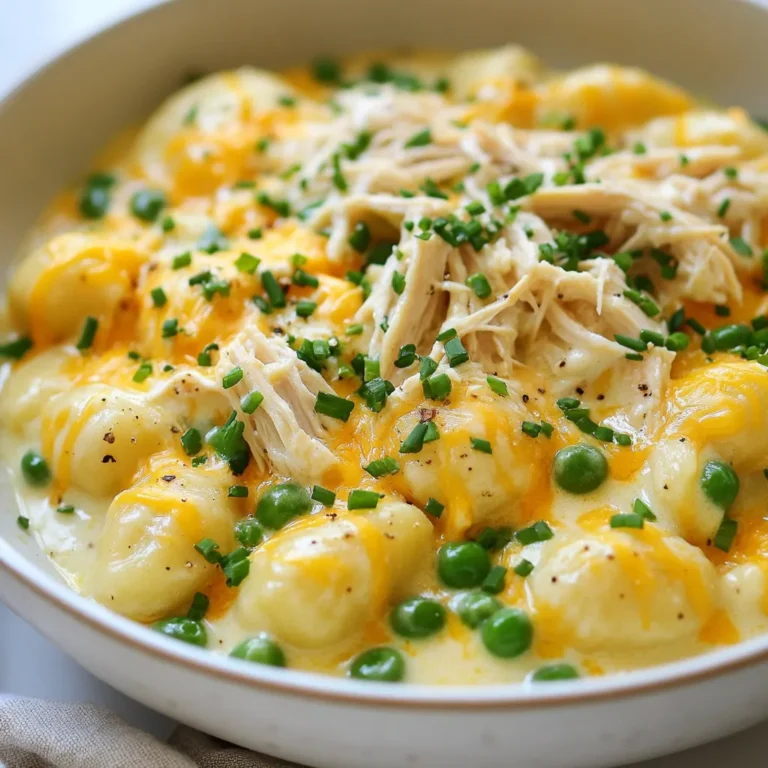
Classic Crack Chicken Gnocchi Flavorful Comfort Meal

- 1 lb (450g) beef sirloin, thinly sliced - 2 tablespoons black pepper, freshly ground - 2 tablespoons soy sauce - 1 tablespoon oyster sauce - 1 tablespoon cornstarch - 2 tablespoons vegetable oil - 1 bell pepper (red or green), sliced - 1 cup broccoli florets - 3 garlic cloves, minced - 1-inch piece ginger, grated - 2 green onions, chopped - Cooked jasmine rice, for serving When measuring ingredients, use dry measuring cups for solids and liquid measuring cups for liquids. Make sure to level off dry ingredients for accuracy. Use a scale for precise weight, especially for beef. This ensures your dish tastes just right. If you don’t have beef sirloin, try flank steak or chicken. For a vegetarian option, use tofu or tempeh. You can replace soy sauce with tamari for a gluten-free meal. If black pepper is too spicy, use less or switch to white pepper. For a sweet twist, add a dash of hoisin sauce. {{ingredient_image_1}} To start, you need to prepare the beef. Take 1 pound of beef sirloin and slice it thinly. In a bowl, mix the sliced beef with 1 tablespoon of cornstarch, 2 tablespoons of soy sauce, and half of the black pepper. This step helps the beef stay tender and flavorful. Let it sit for at least 15 minutes to soak in the flavors. Next, grab a large skillet or wok. Heat 1 tablespoon of vegetable oil over medium-high heat. Once hot, add the marinated beef. Stir-fry it for about 3 to 4 minutes. You want the beef to brown and cook through but not overcook. After it’s done, take the beef out and set it aside. Now, it’s time for the veggies. In the same skillet, add another tablespoon of vegetable oil. Toss in 3 minced garlic cloves and 1 inch of grated ginger. Sauté for about 30 seconds to get a nice aroma. Then, add 1 sliced bell pepper and 1 cup of broccoli florets. Stir-fry these for about 3 to 4 minutes. You want the vegetables to stay a little crisp. Finally, return the cooked beef to the skillet. Add 1 tablespoon of oyster sauce and the remaining black pepper. Stir everything well for another minute. This lets all the flavors meld together. Once done, remove from heat and garnish with chopped green onions. Serve the stir fry hot over cooked jasmine rice. Enjoy your tasty creation! To get tender beef, start with sirloin. Thin slices help a lot. Marinate the beef with soy sauce and cornstarch. This adds flavor and keeps it juicy. Let it sit for at least 15 minutes. This time helps the beef soak up the taste. Heat your skillet or wok well before adding oil. Hot oil makes a good sear. Stir-fry the beef quickly. Aim for just 3 to 4 minutes. Remove the beef once it turns brown. Don’t overcook it; you want it tender. After cooking the beef, add oil again for the veggies. Stir-fry them for 3 to 4 minutes too. This keeps them crisp and bright. Add more layers to your dish. Try a splash of rice vinegar for tang. A spoonful of sugar can balance heat. You can also toss in sesame oil for a nutty flavor. Fresh herbs, like cilantro, give a nice touch. If you want more heat, add chili flakes or diced peppers. Enjoy playing with these flavors! Pro Tips Marinate for Flavor: Allow the beef to marinate for at least 15 minutes, but if time permits, marinating for 30 minutes to an hour enhances the flavor even more. Use High Heat: Stir-frying requires high heat to sear the beef quickly, locking in juices and flavors. Ensure your skillet or wok is hot before adding the ingredients. Cut Vegetables Uniformly: Slice your vegetables into similar sizes to ensure even cooking. This helps achieve the perfect tender-crisp texture. Adjust Spice Levels: If you prefer a milder dish, reduce the amount of black pepper. For extra heat, consider adding red pepper flakes or a splash of chili sauce. {{image_2}} You can change the veggies and proteins for this stir fry. If you want a different taste, try these swaps: - Proteins: You can use chicken, shrimp, or tofu instead of beef. Each will bring its own flavor. - Vegetables: Add snap peas, carrots, or mushrooms. They all cook well and add color. These swaps keep the dish fresh and fun. You can mix and match based on what you have at home. If you want to change the heat in your dish, you can easily do it. Here are some ideas: - Add More Heat: Include red pepper flakes or sliced fresh chili. Start with a small amount and taste as you go. - Milder Option: Reduce the black pepper or skip it altogether. You can still enjoy the dish without the heat. Adjusting the spice level can make it perfect for your taste. You can make this dish fit various diets. Here are some simple swaps: - Gluten-Free: Use tamari instead of soy sauce. It has a similar taste but is gluten-free. - Low-Carb: Skip the rice and serve the stir fry over cauliflower rice or lettuce wraps. This way, you keep it low-carb and still tasty. These changes help you enjoy a delicious meal while sticking to your diet. After you enjoy your black pepper beef stir fry, let leftovers cool first. Use airtight containers for storage. This keeps the beef and veggies fresh. Place in the fridge for up to three days. Always label the containers with the date. This helps you know when to eat them. When you are ready to eat, you can reheat your stir fry. The best way is to use a skillet. Heat it on medium. Add a splash of water or oil to prevent sticking. Stir the beef and veggies for a few minutes until they are hot. You can also use a microwave. Place the stir fry in a bowl and cover it. Heat for one to two minutes. Stir halfway for even heating. If you have more leftovers than you can eat, freezing is a great option. Place the stir fry in freezer-safe bags or containers. Remove as much air as possible before sealing. This helps prevent freezer burn. You can freeze it for up to three months. To thaw, place it in the fridge overnight. Then reheat as mentioned. Enjoy your tasty meal anytime! Black Pepper Beef Stir Fry is a quick and tasty dish. It features beef sirloin and fresh veggies. The dish gets its bold flavor from black pepper and a simple sauce. The stir-fry is colorful and full of life. You can serve it over jasmine rice for a filling meal. To make Black Pepper Beef Stir Fry less spicy, reduce the black pepper. Start with one tablespoon instead of two. You can also add more veggies to balance the heat. Adding a dash of sugar can help tone down the spice too. Yes, you can use other cuts of beef. Flank steak, ribeye, or even ground beef work well. Just cut them into thin slices for quick cooking. Each cut has a unique texture and flavor, so feel free to experiment. Black Pepper Beef Stir Fry pairs well with jasmine rice. You could also serve it with noodles or a side salad. For a fresh touch, add cucumber or pickled vegetables. These sides can brighten up the meal and add variety. You learned how to make Black Pepper Beef Stir Fry from start to finish. We covered the key ingredients, measurement tips, and substitutions. The step-by-step guide helps you cook tender beef and sauté veggies perfectly. I shared tips for the best flavor and cooking practices. You can easily modify the recipe for different diets or spice levels. With proper storage and reheating tips, your leftovers stay tasty. Now, you have the tools to create this dish anytime! Enjoy your cooking adventure!

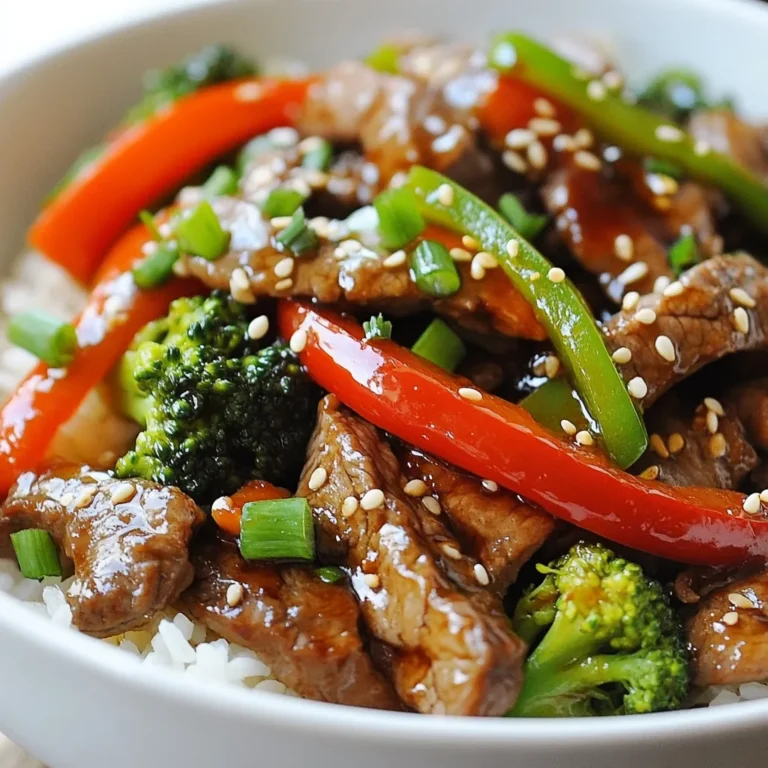
Black Pepper Beef Stir Fry Tasty and Simple Meal

To make Thai Coconut Red Lentil Soup, you need a few key items: - 1 cup red lentils, rinsed - 1 can (13.5 oz) coconut milk - 4 cups vegetable broth - 1 onion, diced - 2 cloves garlic, minced - 1 tablespoon fresh ginger, grated - 2 tablespoons red curry paste - 1 carrot, diced - 1 bell pepper (any color), diced - 1 cup spinach, roughly chopped - 2 tablespoons lime juice - 1 tablespoon soy sauce (or tamari for gluten-free) - 1 tablespoon coconut oil - Salt and pepper to taste - Fresh cilantro for garnish These ingredients create a rich, creamy, and flavorful soup. The red lentils provide protein and texture. Coconut milk adds a lovely creaminess. The vegetables and spices bring fresh and bold flavors. For added flair, you can use garnishes. Here are some great choices: - Fresh cilantro - Lime wedges - Sliced chili peppers - Crushed peanuts These garnishes not only look nice but also enhance the soup's taste. They add freshness and crunch. If you have special dietary needs, there are easy swaps. For a nut-free option, avoid coconut milk. Use oat milk or almond milk instead. For a gluten-free option, choose tamari instead of soy sauce. If you want to boost protein, add chicken or tofu. For a vegan version, stick with vegetable broth and coconut milk. Feel free to mix and match! These substitutions keep the soup tasty while meeting your needs. {{ingredient_image_1}} Gather all your ingredients first. Measure and rinse 1 cup of red lentils. Dice 1 onion and chop 1 carrot and 1 bell pepper. Mince 2 garlic cloves and grate 1 tablespoon of ginger. This prep will save you time later. 1. Heat 1 tablespoon of coconut oil in a large pot over medium heat. 2. Add the diced onion. Sauté it for about 5 minutes until it looks clear. 3. Next, stir in the minced garlic and grated ginger. Cook for 1-2 minutes until you smell their aroma. 4. Add 2 tablespoons of red curry paste. Stir constantly for about 1 minute to bring out the flavors. 5. Toss in the diced carrot and bell pepper. Cook for 3-4 minutes until they begin to soften. 6. Pour in the rinsed red lentils, 1 can of coconut milk, and 4 cups of vegetable broth. Stir to mix well. 7. Bring the mixture to a boil. Once boiling, lower the heat to simmer. Cover the pot and let it cook for 20-25 minutes until the lentils are soft. 8. Stir in 1 cup of chopped spinach, 2 tablespoons of lime juice, and 1 tablespoon of soy sauce. Season with salt and pepper. Cook for another 5 minutes until the spinach wilts. Once done, remove the pot from heat and let it cool a bit. Serve the soup hot in bowls. Garnish with fresh cilantro and a wedge of lime on the side. This adds brightness and flavor. Enjoy your delicious Thai Coconut Red Lentil Soup! To make your Thai coconut red lentil soup really pop, use fresh ingredients. Fresh garlic, ginger, and veggies give great taste. Toast the red curry paste in coconut oil. This step releases oils and boosts flavor. Always taste your soup as you cook. Adjust salt, lime juice, and spice to fit your taste. Fresh cilantro on top adds a bright finish. One common mistake is not rinsing the lentils. Rinsing helps remove grit and improves taste. Watch the heat while cooking; too high can burn the garlic. Avoid overcooking the vegetables; they should be soft but still vibrant. Lastly, don't skip the lime juice. It brightens the flavors and balances the soup. To get a creamier soup, blend a portion of it. Use an immersion blender to make it smooth. If you like it chunkier, just stir less. Adding more broth can help if the soup is too thick. For a heartier feel, toss in cooked chicken or tofu. This adds protein and makes it a meal. Pro Tips Rinse Your Lentils: Rinsing red lentils before cooking helps remove any dust or impurities, ensuring a cleaner soup. Customize the Spice Level: Adjust the amount of red curry paste based on your preference for spice; start with less and add more if desired. Add More Veggies: Feel free to include other vegetables such as zucchini or sweet potatoes for added nutrition and flavor. Store Leftovers Properly: Keep leftover soup in an airtight container in the fridge for up to 5 days, and reheat gently on the stove. {{image_2}} You can add proteins to your soup for extra flavor and nutrients. Chicken works well. Simply cook diced chicken in the pot before adding the onion. For a plant-based option, use tofu. Cube the tofu and sauté it with the onion. Both options make the soup heartier and more filling. Feel free to mix in your favorite vegetables. Sweet potatoes add a nice sweetness. Zucchini or green beans also work great. Just remember to chop them small so they cook evenly. You can use seasonal veggies to keep things fresh and exciting. Adjust the spice level to suit your taste. If you love heat, add more red curry paste. You can also add chopped fresh chilies. For a milder flavor, reduce the curry paste. Just start with a little and taste as you go. This way, you make the soup just right for you! After you enjoy your Thai coconut red lentil soup, store the leftovers. Let the soup cool to room temperature. Use an airtight container to keep it fresh. This method helps keep flavors intact. Store the soup in the fridge for up to five days. For best taste, consume it sooner. Reheating the soup is easy. Pour the soup into a pot. Heat over medium-low heat, stirring often. This method keeps the soup from sticking. You can also use a microwave-safe bowl. Heat in short bursts, stirring in between. Make sure it’s hot throughout before serving. If you want to save the soup for later, freezing is a great option. Allow the soup to cool completely. Then, use freezer-safe containers or bags. Leave some space at the top, as the soup will expand. Label the containers with the date. The soup can last in the freezer for up to three months. To use, thaw in the fridge overnight before reheating. Yes, you can make this soup ahead of time. It tastes even better the next day. The flavors blend well when it sits. Just cool it down after cooking. Then, store it in airtight containers. When ready to eat, reheat it on the stove or in the microwave. Absolutely! This soup is gluten-free. Use tamari instead of soy sauce for a gluten-free option. All the other ingredients are safe too. Enjoy this dish without worry if you avoid gluten. The soup lasts about 4 to 5 days in the fridge. Store it in an airtight container for best results. If you want to keep it longer, consider freezing it. Then, you can have a tasty meal ready anytime! In this article, we explored the joy of making Thai Coconut Red Lentil Soup. We covered key ingredients and possible garnishes. You learned simple steps for preparation and cooking. I shared tips to avoid mistakes and enhance flavor. We also discussed ways to customize the soup with proteins and vegetables. Lastly, we went over storage tips to keep it fresh. Enjoy making this soup, and don't hesitate to get creative with the recipe! Happy cooking!

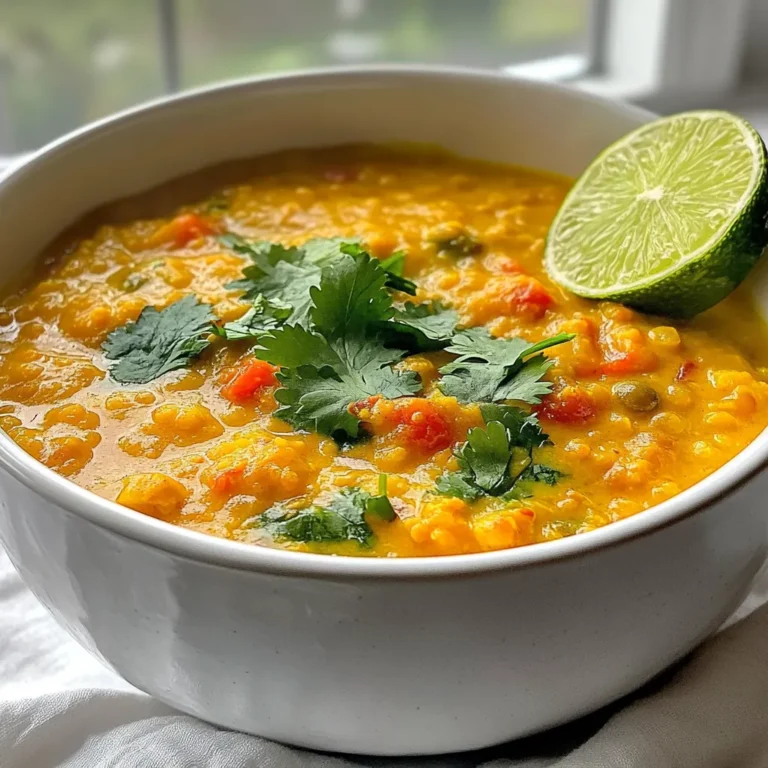
Thai Coconut Red Lentil Soup Flavorful and Simple Recipe

To make a Healthy Pesto Chicken Salad, you need fresh and tasty ingredients. Here’s what you will need: - 2 cups cooked chicken breast, shredded - 1 cup cherry tomatoes, halved - 1 cup cucumber, diced - 1/2 red onion, finely chopped - 1 avocado, diced - 1/4 cup fresh basil, chopped - 1/4 cup pesto (store-bought or homemade) - 2 tablespoons olive oil - Juice of 1 lemon - Salt and pepper to taste This mix of ingredients makes the salad light and full of flavor. The chicken gives you protein, while the veggies add crunch and freshness. Pesto ties it all together with its rich taste, and lemon juice adds a zesty kick. When you pick your chicken, go for cooked breast. It’s lean and easy to shred. The cherry tomatoes and cucumber bring color and juicy bites. The red onion gives a slight bite, and the avocado adds creaminess. Fresh basil brightens the dish with its herbal notes. You can use store-bought pesto or make your own. Homemade pesto often tastes better and is easy to make. Just blend basil, garlic, nuts, and cheese. Add oil until smooth. If you want a lighter dressing, use less oil. Gather these ingredients, and you’re ready to create a delicious salad. This Healthy Pesto Chicken Salad is perfect for lunch or a light dinner. Enjoy every bite! {{ingredient_image_1}} - Step 1: Combine Chicken and Vegetables In a large bowl, add the shredded chicken. Then, toss in the cherry tomatoes, cucumber, red onion, avocado, and fresh basil. This mix of colors and textures makes the salad pop. - Step 2: Make the Pesto Dressing In a small bowl, whisk together the pesto, olive oil, lemon juice, salt, and pepper. Focus on blending them well. This dressing is what brings all the flavors together. - Step 3: Toss Salad Together Pour the pesto dressing over the chicken and vegetable mix. Gently toss everything together. Ensure each piece gets coated in that tasty dressing. - Step 4: Chill and Serve Taste the salad and adjust seasoning if needed. Then, chill it in the refrigerator for at least 30 minutes. This helps the flavors blend perfectly. When ready, serve it and enjoy your healthy meal! Choosing the Right Chicken Use cooked chicken breast for the best taste. You can grill, bake, or poach it. Shredded chicken gives a nice texture. If you have leftovers, they work great too. Making the Best Homemade Pesto Homemade pesto is easy and full of flavor. Use fresh basil, garlic, pine nuts, and Parmesan cheese. Blend them with olive oil until smooth. Adjust the ingredients to your taste. Store any extra pesto in the fridge. Adjusting Seasoning for Taste Always taste your salad before serving. You might want more salt or pepper. A squeeze of lemon juice can brighten the flavors. Don’t be afraid to play with the seasoning. Storing Ingredients Separately Keep your ingredients in separate containers. This keeps everything fresh longer. You can mix them just before serving. It helps maintain the crispness of the veggies. Best Containers for Storage Use glass containers for meal prep. They seal well and keep food fresh. Look for containers that are easy to stack. This saves space in your fridge. Pro Tips Use Leftover Chicken: For a quicker meal, use leftover rotisserie chicken or any pre-cooked chicken you have on hand. Customize Your Veggies: Feel free to add or substitute your favorite vegetables like bell peppers or spinach for added flavor and nutrients. Make It Creamy: For a creamier salad, add a dollop of Greek yogurt or sour cream to the pesto dressing. Serve It Cold: Chilling the salad allows the flavors to meld beautifully, making it more delicious when served cold. {{image_2}} You can switch things up in your Healthy Pesto Chicken Salad. If you want a different protein, try tofu or chickpeas. Both options add a fun twist. Tofu is great for a plant-based meal. Chickpeas pack in fiber and protein. For a low-carb choice, think about using zucchini noodles. Spiralized zucchini gives a fresh taste. It also adds a nice crunch. You can still enjoy all the flavors of the salad without the carbs. To make your salad even better, consider adding cheese. Feta or mozzarella can elevate the taste. Feta adds a salty, tangy vibe. Mozzarella brings creaminess and richness. Both cheeses work well with pesto. Another fun idea is to toss in nuts or seeds. Pine nuts, sunflower seeds, or walnuts can add crunch. They also bring healthy fats to the dish. Just a handful can make a big difference in flavor and texture. To keep your Healthy Pesto Chicken Salad fresh, follow these tips: - Best Practices for Refrigeration: Place leftovers in an airtight container. This helps keep moisture out. Store it in the fridge for up to 3 days. Make sure to chill it within two hours of serving. This keeps the salad safe to eat. - Freezing Options: You can freeze the salad, but be aware that some ingredients may change texture. If freezing, store the chicken and dressing separately. This way, the salad stays fresher. Use freezer-safe containers and eat within 2 months for best quality. Understanding the shelf life of your ingredients helps with meal planning. - Freshness of Vegetables: Cherry tomatoes and cucumbers stay fresh for about 5 days in the fridge. Avocados should be eaten within 1-2 days after cutting. Red onions last longer, up to 2 weeks, if stored whole. - Longevity of Cooked Chicken and Dressing: Cooked chicken lasts about 3-4 days in the fridge. If you use homemade pesto, it will keep for 1 week. Store-bought pesto usually lasts longer, about 2-3 weeks, once opened. Healthy Pesto Chicken Salad lasts about 3 to 4 days in the fridge. To keep it fresh, store it in an airtight container. If you notice any changes in smell or color, it’s best to toss it. Enjoy it within this time frame for the best taste and safety. Yes, you can absolutely use homemade pesto in this recipe! In fact, homemade pesto adds a fresh taste that store-bought may lack. Just make sure your pesto is thick and rich. It will coat the chicken and veggies nicely. If you like, you can adjust the flavors in your homemade version to suit your taste. You can serve Healthy Pesto Chicken Salad with many sides. A simple green salad pairs well. You could also try whole-grain bread or pita for a light meal. Another option is to serve it with a side of quinoa or brown rice. These additions make for a complete and balanced meal. This blog post shared a simple and tasty Healthy Pesto Chicken Salad. We covered key ingredients, step-by-step instructions, and useful tips for perfecting your dish. You can easily customize it with different proteins or flavors. Remember to store leftovers properly to keep them fresh. This salad fits well into meal prep and healthy eating. Enjoy making it and feel great about your choices!

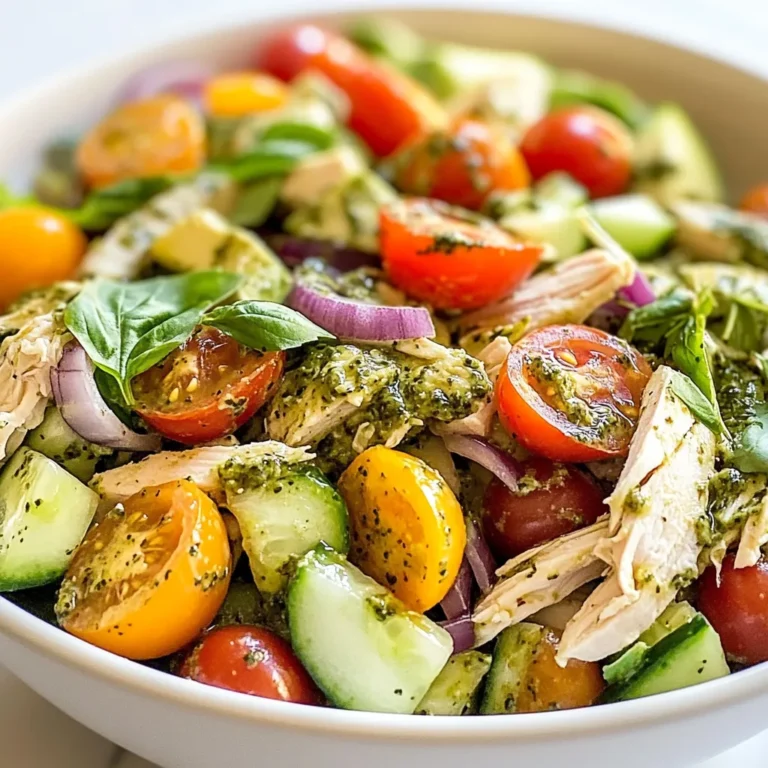
Healthy Pesto Chicken Salad Light and Flavorful Meal

- 2 cups cooked jasmine rice - 2 boneless, skinless chicken breasts - 1/4 cup honey - 1/4 cup BBQ sauce These main ingredients bring flavors together. Jasmine rice is soft and fragrant. The chicken adds protein and texture. Honey and BBQ sauce give sweetness and a smoky touch. - 2 tablespoons soy sauce - 1 tablespoon sesame oil - 1 teaspoon garlic powder - 1/2 teaspoon onion powder The marinade makes the chicken tasty. Soy sauce adds saltiness. Sesame oil gives a nutty flavor. Garlic and onion powder enhance the taste. These ingredients work well together. - 1/4 cup green onions, chopped - Sesame seeds Garnishes add color and crunch. Chopped green onions brighten the dish. Sesame seeds add a nutty bite. These simple touches make the meal look great. I love how these ingredients combine. Each one plays a role in making Honey BBQ Chicken Rice delicious. {{ingredient_image_1}} To start, you need to mix the marinade. In a bowl, combine the honey, BBQ sauce, soy sauce, sesame oil, garlic powder, onion powder, salt, and pepper. Stir until it blends well. Add the chicken breasts, making sure they are well coated. I suggest letting them marinate for at least 30 minutes. For a bigger flavor, let them sit overnight. Next, preheat your grill or skillet over medium-high heat. Remove the chicken from the marinade, but keep the marinade for the sauce later. Cook the chicken for 6-8 minutes on each side. You want the chicken to reach an internal temperature of 165°F (75°C). This ensures it’s fully cooked and safe to eat. Look for nice grill marks for a tasty finish. Now, let’s make the sauce. Take the reserved marinade and pour it into a small saucepan. Heat it over medium heat and let it simmer. Cook for about 5-7 minutes until the sauce thickens slightly. This will add a rich flavor to your dish. Once the chicken is cooked, let it rest for 5 minutes. This keeps the juices inside. Slice the chicken into strips. In a serving bowl, layer the cooked jasmine rice first. Then, place the sliced chicken on top. Generously drizzle the thickened honey BBQ sauce over the chicken and rice. This adds a sweet and tangy flavor that ties your dish together. To finish, sprinkle chopped green onions and sesame seeds on top. This adds a nice crunch and fresh flavor. For presentation, serve in deep bowls or plates. Arrange the rice neatly at the bottom, with chicken slices on top. Drizzle some extra sauce around the plate for a beautiful look. - Selecting the right type of chicken: I prefer boneless, skinless chicken breasts. They cook evenly and stay juicy. You can also use thighs for more flavor. - Finding quality honey and BBQ sauce: Look for pure honey without added sugars. Choose a BBQ sauce that fits your taste. Smoky or spicy sauces work great here. - Alternatives to grilling or using a skillet: You can bake the chicken too. Set your oven to 375°F (190°C) and bake for 25-30 minutes. This keeps the chicken tender and flavorful. - Ensuring chicken is cooked thoroughly: Always check the internal temperature. It should reach 165°F (75°C) for safety. A meat thermometer helps with this. - Tips for marinating longer: For the best taste, marinate your chicken overnight. This allows the flavors to soak in deeply. - Adding spices or herbs for extra taste: Try adding smoked paprika or fresh herbs. They can boost the dish's flavor profile and make it more exciting. Pro Tips Marinate Longer for More Flavor: If time allows, marinate the chicken overnight. This enhances the flavor and tenderness of the meat. Use a Meat Thermometer: To ensure your chicken is perfectly cooked, use a meat thermometer. The internal temperature should reach 165°F (75°C). Double the Sauce: If you love sauce, consider doubling the marinade recipe. This way, you’ll have extra for drizzling and dipping. Garnish for Visual Appeal: A sprinkle of green onions and sesame seeds not only adds flavor but also makes the dish look more inviting. {{image_2}} You can switch jasmine rice for other types. Brown rice adds more fiber. White rice gives a classic taste. For a low-carb option, try cauliflower rice. It cooks quickly and absorbs flavors well. This choice is great for those watching carbs. Feel free to experiment with different BBQ flavors. Try a sweet honey mustard or a spicy chipotle BBQ. You can also add heat with some cayenne pepper or chili flakes. For a sweeter touch, mix in some maple syrup or brown sugar. Want to change up the protein? Use tofu for a vegetarian option. It absorbs flavors well and offers a great texture. You can also try shrimp. Cook them quickly on high heat for a delicious twist. Adjust cooking times for each protein to ensure they are fully cooked. To keep your Honey BBQ Chicken Rice fresh, first let it cool. Spread it out in a bowl to speed up cooling. Once cool, put it in an airtight container. Glass or plastic containers work well. Seal it tight to avoid air getting in. This helps keep the flavors intact and the rice soft. You can freeze this dish for later use. Divide the rice and chicken into portions. Place them in freezer-safe bags or containers. Label them with the date. When you're ready to eat, thaw it in the fridge overnight. Reheat it in the microwave or on the stove. Make sure it's hot all the way through before serving. You can safely store leftovers in the fridge for about three to four days. If frozen, they last up to three months. Always check for signs of spoilage. Look for changes in color or smell. If anything seems off, it’s best to throw it away. Enjoy your meal safely! Yes, you can make this meal in advance. Cook the chicken and rice ahead of time. Store them separately in airtight containers. They will stay fresh in the fridge for up to three days. You can also marinate the chicken overnight for more flavor. Just follow these tips: - Cool the chicken before storing. - Keep the cooked rice in a sealed container. - Reheat everything gently before serving. Absolutely! This recipe works well for meal prep. You can prepare a big batch and store it for the week. Here are the best practices: - Cook the chicken and rice in bulk. - Divide into single servings. - Use clear containers for easy viewing. - Add garnishes like green onions right before serving. To spice up your Honey BBQ Chicken Rice, try these ideas: - Add cayenne pepper to the marinade. - Use a spicy BBQ sauce. - Mix in some chopped jalapeños. - Serve with hot sauce on the side. Many side dishes go well with Honey BBQ Chicken Rice. Try these: - Steamed broccoli or green beans for crunch. - A fresh garden salad for a light touch. - Grilled corn on the cob for sweetness. - Coleslaw for creaminess and texture. This recipe for Honey BBQ Chicken Rice is simple and delicious. You learned about key ingredients, like jasmine rice, chicken, honey, and BBQ sauce. We discussed marinating, cooking, and assembling this tasty dish. Using our tips, you can enhance flavors or try different proteins. Remember, storing leftovers properly keeps your meal fresh for longer. I hope you feel inspired to make this dish your own and enjoy sharing it with loved ones. Happy cooking!

Honey BBQ Chicken Rice Delightful and Simple Recipe

To make this Mediterranean Ground Chicken Skillet, you'll need: - 1 lb ground chicken - 2 tablespoons olive oil - 1 medium onion, diced - 2 cloves garlic, minced - 1 red bell pepper, diced - 1 zucchini, diced - 1 cup cherry tomatoes, halved - 1 teaspoon dried oregano - 1 teaspoon dried basil - 1 teaspoon smoked paprika - Salt and pepper to taste - ¼ cup Kalamata olives, pitted and sliced - ¼ cup feta cheese, crumbled - Fresh parsley or basil for garnish If you're missing an ingredient, don't worry! Here are some easy swaps: - Ground turkey can replace ground chicken. - Use avocado oil instead of olive oil for a different flavor. - Green bell pepper works if you don’t have red. - A mix of squash can replace zucchini. - Any small tomato can stand in for cherry tomatoes. - If you lack Kalamata olives, try green olives instead. - You can use any cheese if feta isn't available. Fresh herbs add bright flavor, but dried herbs are just as good. - If using fresh herbs, use three times the amount. - Fresh basil and parsley can uplift the dish's taste. - Dried herbs work nicely in cooked dishes like this skillet. - The choice depends on what you have on hand. Using a mix of both can create a great flavor profile! {{ingredient_image_1}} To start, gather all your ingredients. You need: - 1 lb ground chicken - 2 tablespoons olive oil - 1 medium onion, diced - 2 cloves garlic, minced - 1 red bell pepper, diced - 1 zucchini, diced - 1 cup cherry tomatoes, halved - 1 teaspoon dried oregano - 1 teaspoon dried basil - 1 teaspoon smoked paprika - Salt and pepper to taste - ¼ cup Kalamata olives, pitted and sliced - ¼ cup feta cheese, crumbled - Fresh parsley or basil for garnish Chop the onion, red bell pepper, zucchini, and garlic. Halve the cherry tomatoes too. Heat the olive oil in a large skillet over medium heat. Add the diced onion. Cook it for about 5 minutes until it looks clear. Next, stir in the minced garlic and cook it for 1 more minute. This will make your kitchen smell amazing. Now, add the ground chicken to the skillet. Season it with salt, pepper, oregano, basil, and smoked paprika. Cook this mix for 7 to 10 minutes. Break up the chicken with a spoon while it cooks until it turns brown. Once the chicken is cooked, add the diced red bell pepper and zucchini. Cook these for 3 to 5 minutes until they are soft. Stir in the cherry tomatoes and Kalamata olives next. Let this cook for another 2 to 3 minutes. You want the tomatoes to soften just a bit. Finally, sprinkle the crumbled feta cheese on top. Let it melt slightly before you serve. Remove the skillet from the heat and add fresh parsley or basil as a garnish. To get great browning on the chicken, make sure not to overcrowd the pan. If needed, cook in batches. Use a spatula to break the chicken apart as it cooks. This helps it brown evenly. Keep the heat at medium to avoid burning. You want a nice golden color for the best flavor. To boost the Mediterranean taste, use fresh herbs. Fresh basil and parsley add brightness. A squeeze of lemon juice brings a nice zing. You can also try adding capers for a briny touch. Consider using roasted red peppers for extra sweetness. They add depth to your dish. One common mistake is overcooking the chicken. This can dry out the meat. Cook it just until it’s no longer pink. Another mistake is skimping on seasoning. Don't forget to taste as you go. Also, avoid adding too many veggies at once. This can make them soggy instead of tender. Serve this dish with warm pita or rice. A side salad with cucumber and tomatoes pairs well. You can also add a dollop of tzatziki for creaminess. For a fun twist, try it in wraps. Wrap the chicken mix in lettuce leaves for a low-carb option. Enjoy your meal with a glass of chilled white wine! Pro Tips Use Fresh Herbs: Fresh parsley or basil not only adds color but also enhances the flavor profile of the dish. Add them just before serving for the best taste. Customize Your Veggies: Feel free to substitute the zucchini and bell pepper with other vegetables like spinach, eggplant, or mushrooms based on your preference or what's in season. Control the Heat: If you prefer a bit of spice, add a pinch of red pepper flakes along with the other seasonings to give your skillet a nice kick. Meal Prep Friendly: This dish is great for meal prep! You can make a larger batch and store leftovers in the refrigerator for up to 3 days or freeze for later use. {{image_2}} You can easily make this dish gluten-free. The ingredients are already gluten-free. Just ensure your feta cheese and olives are free from gluten. Many brands offer certified gluten-free products. For a vegetarian version, swap the ground chicken for lentils or chickpeas. Both options give great texture and flavor. If you're vegan, use plant-based feta cheese. You can also add more veggies like mushrooms or spinach for extra nutrients. If you want to try a different protein, use ground turkey or beef. Both work well with the Mediterranean flavors. You can also use ground lamb for a richer taste. Just adjust cooking times as needed. Each option adds a unique touch to the dish. After you enjoy your Mediterranean Ground Chicken Skillet, let it cool down. Transfer the leftovers to an airtight container. This keeps your dish fresh. Store it in the fridge for up to three days. If you want to save it longer, consider freezing. To reheat, use a skillet or microwave. If using a skillet, add a splash of water. Heat it on low until warm. If using a microwave, place it in a safe dish. Heat for one to two minutes, stirring halfway. This helps to heat evenly. If you freeze the skillet, use a freezer-safe container. Label it with the date. To thaw, place it in the fridge overnight. You can also use the microwave's defrost option. Once thawed, reheat as mentioned above. Enjoy the tasty flavors even after freezing! Yes, you can. Ground turkey or ground beef works well. If you prefer a leaner option, use turkey. Beef adds a richer flavor. Adjust the cooking time as needed. Always ensure the meat is cooked fully before serving. To add heat, try using red pepper flakes. You can also add diced jalapeños. Mix these in while you cook the onion. Adjust the amount based on your spice level. Always taste as you go. You can also use spicy feta cheese for added flavor. Several sides work great with this dish. Consider serving it over rice or quinoa. A simple salad with lemon dressing is fresh and light. You can also serve it with warm pita bread. For a heartier option, try roasted vegetables. Each adds their own delicious touch. This blog post covered everything you need for a Mediterranean Ground Chicken Skillet. We discussed the key ingredients and how to swap them. You learned step-by-step cooking methods and tips for perfect browning. We explored ways to enhance flavors and avoid common mistakes. Variations, like gluten-free or vegan options, opened more possibilities. Lastly, proper storage tips ensure your leftovers stay fresh. Embrace your creativity and enjoy each bite of this dish!

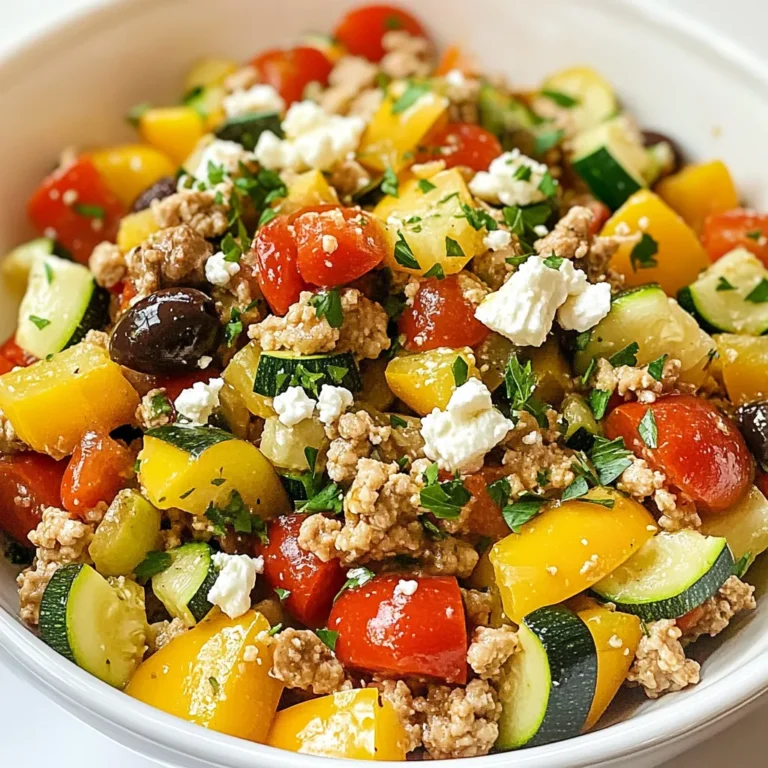
Mediterranean Ground Chicken Skillet Simple Recipe

Here is a list of ingredients you will need to make the Cheesesteak Tortellini Skillet: - 12 oz cheese-filled tortellini - 1 lb beefsteak, thinly sliced - 1 bell pepper (red or green), sliced - 1 small onion, sliced - 2 cloves garlic, minced - 1 tablespoon olive oil - 1 teaspoon Worcestershire sauce - 1 teaspoon oregano - Salt and pepper to taste - 1 cup shredded provolone cheese - Fresh parsley, chopped (for garnish) Each ingredient plays a key role in bringing this dish together. The cheese-filled tortellini adds a creamy texture, while the thinly sliced beefsteak gives it a hearty base. You can pick either a red or green bell pepper, depending on your taste. The onion and garlic lend a sweet, savory flavor that enhances the dish. The Worcestershire sauce and oregano add depth. Don't forget the provolone cheese! It melts beautifully and creates a rich topping. Finally, fresh parsley adds a pop of color and freshness when you garnish your meal. {{ingredient_image_1}} - Heat 1 tablespoon of olive oil in a large skillet over medium-high heat. - Add 1 pound of thinly sliced beefsteak. Cook for about 4-5 minutes until it is browned. - Remove the beef from the skillet and set it aside. - In the same skillet, add sliced onions and bell pepper. Cook them for about 3-4 minutes until they soften. - Add 2 cloves of minced garlic and stir for 1 more minute. - Bring a large pot of salted water to a boil. - Prepare 12 ounces of cheese-filled tortellini according to the package instructions, usually about 3-4 minutes. Drain and set aside. - Return the cooked beef to the skillet with the sautéed vegetables. - Add 1 teaspoon of Worcestershire sauce, 1 teaspoon of oregano, and salt and pepper to taste. - Stir everything together and let it heat for another 2-3 minutes. - Gently fold the cooked tortellini into the skillet, mixing well. - Evenly sprinkle 1 cup of shredded provolone cheese over the top. - Cover the skillet with a lid and let the cheese melt for about 2-3 minutes. - Once melted, remove from heat and sprinkle fresh chopped parsley on top for garnish. Choosing the right cut of beef is key. I recommend flank steak or sirloin. These cuts are tender and cook quickly. If you can, ask your butcher for thinly sliced beef. It makes a big difference in cooking time and flavor. Aim for slices no thicker than 1/4 inch. This thickness allows for even cooking and great texture. Cooking tortellini can be tricky if you're not careful. Always start with a large pot of salted water. Salt adds flavor to the pasta. Once the water boils, add the tortellini. Follow the package instructions closely, usually 3-4 minutes. Stir gently to prevent sticking. Test a piece for doneness; it should be soft but firm. Drain the tortellini right away to avoid overcooking. Melting cheese properly is an art. For this dish, use a lid that fits well. Cover the skillet before the cheese goes on. This traps steam and helps the cheese melt evenly. You want a gooey texture that binds all the flavors together. If your cheese isn’t melting well, lower the heat slightly. The key is patience; let it melt slowly for the best results. Pro Tips Slice Against the Grain: For tender beef, always slice your steak against the grain. This helps break down the muscle fibers and results in a more tender bite. Don’t Overcook the Tortellini: Since tortellini cooks quickly, be sure to keep an eye on it and avoid overcooking. They should be al dente for the best texture. Customize Your Veggies: Feel free to add or substitute other vegetables like mushrooms or spinach for added flavor and nutrients. Cheese Variations: While provolone is delicious, you can also experiment with mozzarella or a blend of cheeses for different flavor profiles. {{image_2}} For a tasty vegetarian version, use sliced mushrooms instead of beef. Mushrooms add a savory flavor. They absorb the spices well, giving you that rich taste. You can use portobello or cremini mushrooms. Just sauté them like the beef. This swap keeps the dish hearty and satisfying. You can play with toppings to change the flavor. Try using different cheeses like cheddar or mozzarella. Each cheese brings a unique taste. You can also sprinkle some red pepper flakes for heat. Or use Italian seasoning for extra flavor. Fresh herbs like basil or oregano can enhance the dish too. Adding a sauce can take this meal to a new level. Marinara sauce adds a nice tomato flavor. Alfredo sauce gives it a creamy texture. You can mix and match sauces based on your taste. This flexibility lets you create a new dish each time you make it. To store leftovers, let the dish cool first. Place the tortellini skillet in an airtight container. This keeps the meal fresh and tasty. Store it in the fridge for up to three days. If you want to keep it longer, consider freezing it. When reheating, do it slowly. Use a pan on low heat to warm it. Add a splash of water to keep the tortellini moist. Stir occasionally to prevent sticking. This helps keep the tortellini from becoming mushy. You can also use the microwave. Heat in short bursts, stirring in between. To freeze, let the skillet cool completely. Transfer the mix to a freezer-safe container. Label it with the date for easy tracking. You can freeze it for up to three months. When ready to enjoy, thaw it in the fridge overnight. Reheat it on the stove or microwave until hot. Yes, you can use pre-cooked steak. Just heat it in the skillet with veggies. This saves time and keeps your meal tasty. Make sure to slice it thin for even heating. If you can't find provolone, try mozzarella or Swiss cheese. Both melt well and add good flavor. You can also use cheddar for a sharper taste. Just remember to adjust the amount based on the cheese you choose. This dish lasts about 3 to 4 days in the fridge. Store it in an airtight container. When you're ready to eat, reheat it on the stove or microwave until hot. Absolutely! Feel free to add mushrooms, zucchini, or spinach. These veggies pair well with the flavors in this dish. Just sauté them with the other vegetables for best results. Yes, this dish is great for kids! The cheesy tortellini and meat make it a hit. You can adjust the seasoning to suit their taste. It's a fun way to get them to eat a balanced meal. You can prep the ingredients a day before. Cook the beef and veggies, then store them in the fridge. When you're ready to eat, just cook the tortellini and combine everything. Use a large skillet for even cooking. A non-stick pan works well to prevent sticking. Make sure it is big enough to hold all the ingredients comfortably. Yes, you can easily double the recipe. Just make sure your skillet is large enough. You may need to cook in batches if your skillet is small. This way, everything cooks evenly. This dish combines cheese-filled tortellini, flavorful steak, and colorful veggies. You learned how to cook each component to get the best flavors. We discussed tips for choosing the right beef and perfecting your tortellini. Options for vegetarian variations and different sauces add flexibility. Now, you can enjoy diverse recipes while making this meal your own. Experiment and find your favorite twist. Enjoy cooking!

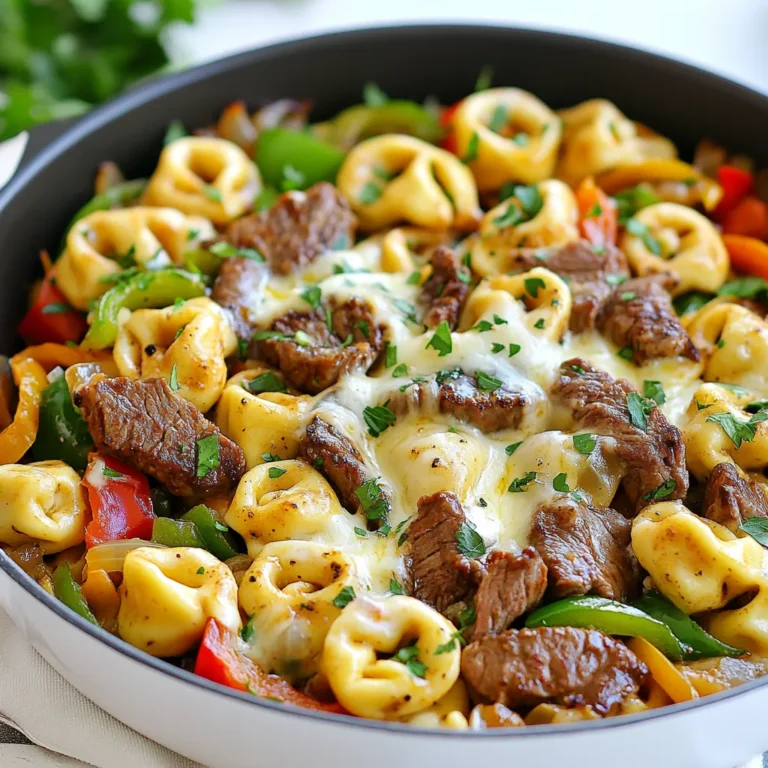
Cheesesteak Tortellini Skillet Rich and Savory Meal

To make Mexican Street Corn Shrimp, gather these ingredients: - 1 lb large shrimp, peeled and deveined - 2 cups corn kernels (fresh or frozen) - 2 tablespoons olive oil - 1 teaspoon smoked paprika - 1 teaspoon chili powder - 1 tablespoon lime juice - 2 tablespoons mayonnaise - 1/4 cup crumbled queso fresco - 1/4 cup fresh cilantro, chopped - Salt and pepper to taste - 2 green onions, sliced for garnish - Lime wedges for serving You can use fresh or frozen corn for this dish. Fresh corn gives a sweet crunch. It also adds a lovely bright color. If you use frozen corn, it saves time and is easy to find. Frozen corn works well in this recipe, too. It’s often picked at peak ripeness. That means it still tastes sweet and fresh. Queso fresco is a creamy cheese that adds flavor. If you can’t find it, you have options. Feta cheese works well in its place. It has a similar crumbly texture and tangy taste. Another option is cotija cheese, which is saltier but still delicious. You can also use ricotta for a milder taste, but it will change the dish's flavor. {{ingredient_image_1}} To start, take a large skillet and heat 2 tablespoons of olive oil over medium-high heat. Once the oil is hot, add 2 cups of corn kernels. You can use fresh or frozen corn. Sauté the corn for about 5-7 minutes. You want it slightly charred and tender. Next, season the corn with 1 teaspoon of smoked paprika, 1 teaspoon of chili powder, salt, and pepper. Stir everything together well. Once seasoned, remove the corn from the skillet and set it aside in a bowl. Now, it’s time for the shrimp. In the same skillet, add 1 pound of large shrimp that you have peeled and deveined. Cook the shrimp for about 2-3 minutes on each side. They should turn pink and opaque. As the shrimp cook, sprinkle 1 tablespoon of lime juice over them. This adds a zesty flavor that works well with the shrimp. Once they are done, reduce the heat to low and return the sautéed corn to the skillet. In a small bowl, mix together 2 tablespoons of mayonnaise, 1/4 cup of crumbled queso fresco, and 1/4 cup of chopped fresh cilantro. Stir until everything is well combined. Next, pour this mayo mixture over the shrimp and corn. Gently toss everything to coat well. Cook for one more minute to warm it through before you remove it from the heat. For presentation, serve the dish in a large bowl or on a platter. Garnish with sliced green onions and lime wedges on the side for extra zest. Enjoy your flavorful Mexican street corn shrimp! When picking shrimp, look for firm and shiny ones. Fresh shrimp should smell like the ocean, not fishy. If you buy frozen shrimp, ensure they are individually quick frozen (IQF). This keeps them fresh longer. Always check the size. Large shrimp work best for this dish. I love using smoked paprika and chili powder for a warm, smoky taste. These spices add depth and flavor. Don't forget to add salt and pepper. A squeeze of lime juice at the end brightens the dish. Feel free to experiment with other spices, but keep it simple. Timing is key when cooking shrimp. Cook them for 2-3 minutes on each side. They turn pink and opaque when done. Overcooked shrimp can be tough. For corn, sauté for 5-7 minutes until slightly charred. This gives it a sweet, caramelized flavor. Always keep an eye on both while cooking for the best results. Pro Tips Use Fresh Corn: For the best flavor, opt for fresh corn on the cob when in season. It enhances the sweetness and texture of the dish. Don’t Overcook the Shrimp: Keep an eye on the shrimp while cooking; they should be just pink and opaque. Overcooking can lead to rubbery shrimp. Customize the Spice Level: Adjust the chili powder according to your heat preference. You can also add jalapeños for an extra kick! Garnish for Presentation: Don't skip the garnishes! Fresh cilantro and lime wedges add vibrant color and zesty flavor to the final dish. {{image_2}} If you like heat, add some spice! Mix in diced jalapeños while cooking the corn. You can also sprinkle cayenne pepper on the shrimp. This adds a nice kick that pairs well with the creamy sauce. Adjust the amount of spice to fit your taste. You can make a tasty vegetarian version too. Replace the shrimp with grilled zucchini or mushrooms. Both options bring a great texture. Use the same spices to keep that bold flavor. This way, everyone can enjoy the dish, even non-meat eaters. Garnishes make your dish pop! Try adding sliced radishes for crunch and color. A sprinkle of chili powder over the top adds a nice touch. You can also use fresh avocado slices for creaminess. Don’t forget a squeeze of lime for extra zing! To store leftovers, let the Mexican street corn shrimp cool down first. Place it in an airtight container. It will stay fresh in the fridge for up to three days. If you want to enjoy it later, make sure to seal it well to avoid any moisture. When it's time to reheat, you have a few options. You can use the microwave for quick heating. Just place it in a bowl and cover it. Heat in short bursts, about 30 seconds, stirring in between. If you prefer the stovetop, use a skillet on medium heat. Add a splash of water to keep it moist and stir until heated through. Avoid overheating, as shrimp can become rubbery. Freezing is a great option for longer storage. First, let the dish cool completely. Then, portion it out in freezer-safe bags or containers. Remove as much air as possible before sealing. This dish can last up to three months in the freezer. To reheat, thaw it overnight in the fridge before using the microwave or stovetop method. Enjoy a quick meal anytime! Mexican Street Corn Shrimp is a fun and tasty dish. It combines shrimp with corn, spices, and creamy sauce. The corn gets a nice char, adding a sweet flavor. I love the mix of spices like smoked paprika and chili powder. They give the dish a warm kick. The creamy sauce has mayo, queso fresco, and cilantro for a fresh touch. You can serve it warm or at room temperature. It’s perfect for family dinners or a party. Yes, you can use different types of shrimp. I often choose large shrimp, but medium shrimp work well too. You can even use shrimp with shells on for extra flavor. Just remember to adjust the cooking time. If you use smaller shrimp, they will cook faster. If you prefer, you can also try shrimp that are already cooked. Just add them at the end to heat through. You can definitely make this dish ahead of time. Cook the corn and shrimp separately, then store them in the fridge. Keep the creamy sauce in a separate container. When you are ready to serve, warm the corn and shrimp in a skillet. Then, mix in the sauce right before serving. This way, your dish stays fresh and tasty. It’s a great method if you want to save time on busy days. In this blog post, we explored the vibrant flavors of Mexican Street Corn Shrimp. We looked at key ingredients like fresh corn and shrimp, plus tasty substitutes for queso fresco. I shared easy step-by-step instructions, tips on choosing shrimp, and ways to enhance flavor. Variations let you customize the dish, and storage tips help you save leftovers. This dish offers delight on your plate and is fun to make. Enjoy creating this tasty meal that everyone will love!

Mexican Street Corn Shrimp Flavorful and Easy Recipe

PREV 1 … 50 51 52 … 56 NEXT
go kitchen now

explore

DessertsDinnerAppetizersDrinks

Our Policies

  • Cookie Policy
  • Copyright Policy
  • Disclaimer
  • GDPR Policy
  • Terms Of Use
Back to Top
  • About
  • Contact Us
  • Privacy Policy
© 2025 go kitchen now