FREE DINNER EBOOK! Get your copy!
  • Cookie Policy
  • GDPR Policy
  • Disclaimer
  • Terms Of Use
  • Visit my other site: Fun Cookie Recipes
go kitchen now
  • Home
  • Dinner
  • Desserts
  • Drinks
  • Appetizers
  • Contact
  • About
  • Privacy Policy
  • Home
  • Dinner
  • Desserts
  • Drinks
  • Appetizers
  • Contact
  • About
  • Privacy Policy
  • Cookie Policy
  • GDPR Policy
  • Disclaimer
  • Terms Of Use
Visit my other site: Fun Cookie Recipes

HOME / CATEGORIES /

Latest

To make Cacio e Pepe, you need simple, fresh ingredients. Here’s what you will need: - 400g spaghetti or bucatini - 100g Pecorino Romano cheese, finely grated - 50g Parmigiano-Reggiano cheese, finely grated - 2 tablespoons freshly ground black pepper - Salt (for pasta water) - 2 tablespoons olive oil (optional for a richer sauce) These ingredients come together to create a dish that shines with flavor. Spaghetti and bucatini are the best options for this dish. Spaghetti is long and thin. It holds sauce well and is easy to twirl. Bucatini is similar, but it has a hollow center. This shape allows it to soak up more cheese and pepper. Both options give a great bite and texture. The cheese is what makes Cacio e Pepe special. Pecorino Romano brings a salty, sharp taste. It melts beautifully and gives the dish its creamy texture. Parmigiano-Reggiano adds a nutty flavor that balances the saltiness of Pecorino. Using both gives depth to the dish. You can try different brands, but these two are classic choices. {{ingredient_image_1}} To start, fill a large pot with water. Bring it to a boil. Add a generous amount of salt to the water. This is key for flavor. Then, add your spaghetti or bucatini. Cook it until it is al dente, as the package says. This should take around 8 to 10 minutes. Remember to reserve 1 cup of pasta water before you drain it. While your pasta cooks, grab a large mixing bowl. Add the finely grated Pecorino Romano cheese and Parmigiano-Reggiano cheese. These two cheeses blend well together. Then, add the freshly ground black pepper. Mix it all well. This mixture will give your pasta that rich, cheesy flavor. Once the pasta is ready, drain it but don’t rinse it. Add the hot pasta right into the mixing bowl with the cheese. Toss the pasta quickly to coat it with the cheese. Next, slowly add some of the reserved pasta water. Start with about 1/4 cup. Keep tossing the pasta until the cheese starts to melt. This creates that creamy sauce you want. If it is still too thick, add more pasta water a little at a time. For extra flavor, you can add olive oil while tossing. Finally, serve it warm in bowls. Top with more cheese and a sprinkle of black pepper. Enjoy your creamy Cacio e Pepe! To get the sauce just right, focus on the pasta water. Reserve one cup of it before draining the pasta. Start with a small amount—about 1/4 cup. Add it slowly while tossing the pasta. This helps the cheese melt and blend well. Keep adding more water as needed. Your goal is a creamy sauce that hugs every strand of pasta. One common mistake is using too much heat when mixing the cheese. High heat can clump the cheese instead of melting it smoothly. Another mistake is not reserving enough pasta water. This water is key to achieving the right sauce. Lastly, don’t skip the black pepper. It adds the signature kick of flavor! To save time, you can prep the cheese mixture while the water boils. Grate the cheeses and mix them with the pepper in advance. Use a large pot to boil water, so it heats faster. If you're short on time, consider using a pasta that cooks quickly, like thin spaghetti. This will speed up your meal prep! Pro Tips Use High-Quality Cheese: The flavor of Cacio e Pepe largely depends on the quality of the cheese. Opt for authentic, freshly grated Pecorino Romano and Parmigiano-Reggiano for the best results. Reserve Enough Pasta Water: Always reserve at least a cup of pasta cooking water. This starchy water is essential for achieving the creamy sauce that clings perfectly to the pasta. Perfectly Al Dente Pasta: Cook your pasta just until al dente, as it will continue to cook slightly when mixed with the cheese. This ensures a perfect texture. Toss Quickly: Work fast when combining the pasta with the cheese mixture. Tossing quickly helps the heat from the pasta melt the cheese, creating a smooth and creamy sauce. {{image_2}} Cacio e Pepe is a simple dish, but you can make it your own. Try using bucatini instead of spaghetti. Bucatini adds a fun texture with its hollow center. You can also mix the cheeses. Combine Pecorino Romano with a bit of Grana Padano for a unique flavor twist. Want to boost the flavor? Add minced garlic to the pasta while it cooks. This gives a nice depth. You can also drizzle truffle oil for a rich touch. Just remember to use it sparingly, as it can overpower the dish. If you're gluten-free, swap regular pasta for gluten-free pasta. Look for options made from rice or chickpeas. They work well and still taste great. You can also use nutritional yeast instead of cheese for a vegan version. Just mix it in with the pasta water to create a creamy sauce. After enjoying your Cacio e Pepe, let any leftovers cool down. Place the pasta in an airtight container. Make sure to seal it tightly. Store it in the fridge. It will stay fresh for up to three days. If you stored it right, it should taste good when you reheat it. To reheat your Cacio e Pepe, use a skillet for best results. Add a splash of water or olive oil to the pan. Heat it over medium heat. Stir the pasta gently to warm it. This method helps the creamy sauce come back to life. You can also microwave it, but it may dry out. Freezing Cacio e Pepe is not ideal, but you can do it. Place cooled pasta in a freezer-safe bag. Remove as much air as you can before sealing. It can stay in the freezer for up to a month. When ready to eat, thaw it in the fridge overnight before reheating. The texture may change slightly, but the flavor will still be there. Cacio e Pepe means "cheese and pepper" in Italian. It highlights the two main flavors. Cacio refers to cheese, usually Pecorino Romano. Pepe means black pepper, which gives it a nice kick. This dish is simple yet full of flavor. Its roots trace back to Rome. It’s a true comfort food! Yes, you can use different cheeses. If you can't find Pecorino Romano, try Parmigiano-Reggiano. Mixing cheeses adds depth to the flavor. Just keep the ratios similar to the recipe. The key is to use good quality cheese. Freshly grated cheese melts better than pre-grated. Cacio e Pepe is already vegetarian since it contains no meat. Focus on using good cheese. If you want more flavor, add mushrooms or spinach. Both pair well with this dish. You can also add a splash of vegetable broth for richness. Keep it simple, and enjoy! A crisp white wine works best with Cacio e Pepe. Look for a Pinot Grigio or a Sauvignon Blanc. These wines balance the richness of the cheese. If you prefer red, choose a light Chianti. Avoid heavy wines, as they can overpower the dish. Enjoy the meal with good company! Cacio e Pepe is a simple yet tasty dish, as outlined above. We covered the key ingredients, like the right cheese and pasta. I shared steps for perfecting the sauce and avoiding common mistakes. You can even try fun variations or make it fit your diet. Remember to store leftovers properly to enjoy later. With these tips, you'll make Cacio e Pepe like a pro. Enjoy your cooking journey!

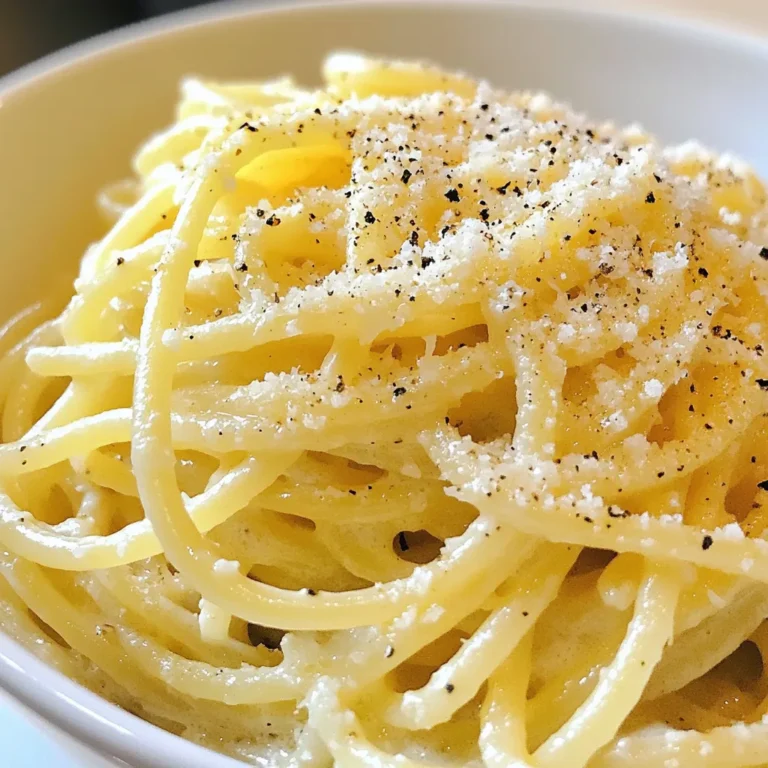
Cacio e Pepe Simple and Creamy Pasta Recipe

- 1 pre-made pizza crust (or homemade if preferred) - 1 cup refried beans - 1 cup cooked ground beef or turkey (seasoned with taco seasoning) - 1 cup corn kernels (canned or frozen, thawed) - 1 red bell pepper, diced - 1 small red onion, finely chopped - 1 cup shredded cheddar cheese - 1 cup shredded mozzarella cheese - 1 jalapeño, sliced (optional) - ½ cup salsa - Fresh cilantro, chopped, for garnish - Sour cream or Greek yogurt, for drizzle - Olive oil, for drizzling Using fresh, quality ingredients makes a big difference. Good ingredients enhance flavors and textures. For example, fresh veggies add crunch and brightness. Quality cheese melts beautifully, creating that perfect gooey layer. The taste of your pizza will shine when you focus on quality. You can customize your ingredients based on what you have. If you don’t have refried beans, try black beans or pinto beans. Ground turkey can swap with ground chicken or even lentils for a veggie twist. If you want more color, any bell pepper works. Don't forget, if jalapeños are too spicy, skip them or use mild peppers. {{ingredient_image_1}} Start by preheating your oven to 425°F (220°C). This step is key for a crispy crust. Next, roll out your pizza crust on a lightly floured surface. If you have a pre-made crust, just follow the package directions. Once your crust is ready, spread one cup of refried beans over it. Make sure to cover the whole crust, right to the edges. Now, layer one cup of your cooked ground beef or turkey seasoned with taco seasoning. This adds a savory flavor. Then, sprinkle one cup of corn, diced red bell pepper, and chopped red onion evenly over the meat. These veggies bring a nice crunch and color. Next, add one cup of shredded cheddar cheese and one cup of shredded mozzarella cheese. Cover every inch with cheese for a gooey finish. If you like some heat, add sliced jalapeños on top. Finally, drizzle a small amount of olive oil over the pizza for that golden look. Place your prepared pizza in the oven. Bake it for 15 to 20 minutes. Keep an eye on it until the crust turns golden and the cheese bubbles. This is when it reaches perfection! Once it's done, take it out and let it cool for a few minutes. Now it's time for the fun part! Drizzle salsa over the top for an extra kick. Then, sprinkle fresh chopped cilantro as a bright garnish. For a creamy touch, add dollops of sour cream or Greek yogurt around the pizza. Slice it up and serve hot. You’ll love every bite of this Fiesta Mexican Pizza! To get a great crust, use a hot oven. Preheat it to 425°F (220°C). If you want a crisp crust, roll out your dough thin. This helps it bake evenly. If you use a pre-made crust, follow the package directions. Drizzle some olive oil on top before baking. This adds flavor and color. Start with a layer of refried beans. This keeps the crust from getting soggy. Then add your seasoned meat. I love using ground beef or turkey. Next, sprinkle on corn, diced red bell pepper, and onion. Make sure to spread them evenly. The final touch is cheese. Use both cheddar and mozzarella. Cover every inch for a tasty bite. When your pizza is done, add salsa on top. Fresh cilantro gives it a bright look and taste. You can also drizzle sour cream or Greek yogurt around it. This adds creaminess and cools the spicy flavors. Slice it up and serve while hot for the best experience. Enjoy the burst of flavors in every bite! Pro Tips Perfectly Seasoned Meat: Make sure to season your ground beef or turkey well with taco seasoning for maximum flavor. Consider adding a splash of lime juice for a zesty kick. Cheese Combination: Mixing cheddar and mozzarella provides a great flavor and texture contrast. Try adding a bit of pepper jack for extra spice! Fresh Ingredients: Use fresh vegetables when possible. Fresh cilantro, in particular, adds a burst of flavor that dried herbs cannot replicate. Customize Your Heat: Adjust the heat level by adding more or fewer jalapeño slices. You can also use pickled jalapeños for a milder flavor. {{image_2}} You can make a tasty vegetarian Mexican pizza easily! Swap the meat for extra beans or veggies. Use black beans or pinto beans for a hearty base. Add more colorful veggies like zucchini, mushrooms, or spinach. You can also pile on the cheese for a rich flavor. A mix of cheddar and mozzarella works great. Want to turn up the heat? Add sliced jalapeños on top before baking. You can also use spicy salsa instead of regular salsa. For an extra kick, mix some chili powder into the refried beans. If you love heat, try adding crushed red pepper flakes. These simple changes will make your pizza fiery and fun! Think outside the box with toppings! Try using grilled chicken or shrimp for a different taste. You can also add fresh avocado slices after baking. Try pineapple for a sweet twist or olives for a salty bite. Experimenting with toppings can lead to your new favorite pizza! Don't be afraid to mix flavors and enjoy the process. To store leftover Mexican pizza, let it cool first. Wrap each slice in plastic wrap. You can also place slices in an airtight container. Store it in the fridge for up to three days. This keeps it fresh and tasty. You can freeze Mexican pizza for later use. First, let it cool completely. Then, slice the pizza and wrap each slice tightly in plastic wrap. Place the wrapped slices in a freezer bag. Label the bag with the date. Frozen pizza can last up to three months. When you're ready to eat it, thaw it in the fridge overnight. Reheat leftover Mexican pizza for the best taste. Preheat your oven to 350°F (175°C). Place the pizza slices on a baking sheet. Bake for about 10-15 minutes. This method keeps the crust crispy. You can also use a microwave, but the crust may get soft. If you use the microwave, heat it for 30 seconds to 1 minute. Enjoy your delicious pizza! Mexican pizza is a tasty fusion of pizza and Mexican flavors. It uses a pizza crust topped with refried beans, seasoned meat, cheese, and vegetables. The blend of spices and textures makes it unique. It’s a fun dish that combines comfort food with the zest of Mexican cuisine. Yes, you can easily make Mexican pizza without meat. Simply skip the ground beef or turkey. You can add more beans, corn, or veggies instead. Try black beans, bell peppers, or mushrooms. These ingredients will give your pizza a hearty texture and rich flavor. The best toppings for Mexican pizza include: - Refried beans - Cooked ground meat (beef or turkey) - Corn kernels - Diced bell peppers - Chopped red onion - Shredded cheese (cheddar and mozzarella) - Jalapeños (for heat) - Salsa - Fresh cilantro Feel free to mix and match according to your taste! To make your Mexican pizza healthier, you can: - Use whole wheat or cauliflower crust - Add more veggies like spinach or zucchini - Choose low-fat cheese or less cheese - Use turkey or plant-based meat instead of beef - Add avocado for healthy fats These changes keep the flavor but cut down on calories. Yes, Mexican pizza is very kid-friendly! Kids love the fun shapes and colors. They can help add their favorite toppings. Plus, the cheese and beans make it filling. You can adjust the spice level to suit their tastes too. In this post, we explored ingredients, steps, tips, and variations for making Mexican pizza. Quality matters; always choose the best toppings and substitutes. For the perfect crust, follow the steps carefully and enjoy the cooking process. Remember to experiment with toppings to find your favorite twist. Leftovers are easy to store and reheat. This dish is fun for everyone. With these insights, you can craft a delicious meal that delights your family and friends. Enjoy creating your tasty Mexican pizza!

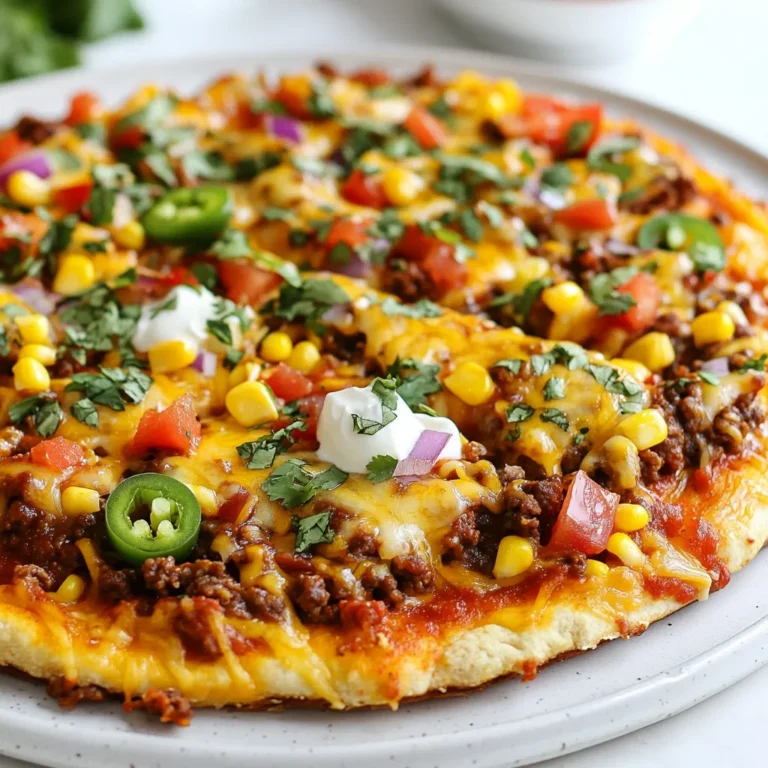
Mexican Pizza Delight Easy and Flavorful Recipe

Here are the tasty ingredients you need for this recipe: - 4 bone-in, skin-on chicken thighs - 2 cups baby potatoes, halved - 1 cup carrots, sliced - 1 cup broccoli florets - 1/4 cup unsalted butter, melted - 6 cloves garlic, minced - 1 teaspoon dried thyme - 1 teaspoon smoked paprika - Salt and pepper to taste - Fresh parsley, chopped (for garnish) You can adjust the number of chicken thighs based on how many people you serve. If you prefer, boneless thighs work well too. For veggies, feel free to swap in your favorites. Zucchini or bell peppers add a nice touch. You can also use olive oil instead of butter if you want a lighter option. When selecting chicken, look for thighs with firm skin and no discoloration. Fresh veggies should feel crisp and look vibrant. For potatoes, pick ones that are smooth and free of blemishes. Garlic should smell strong and not have any soft spots. Always check the parsley; it should be bright green and fresh. Using fresh ingredients makes your dish taste even better! {{ingredient_image_1}} First, I preheat the oven to 400°F (200°C). This step gets the heat ready for cooking. Next, I grab a large sheet pan. I make sure it is clean and dry. A good pan helps to cook everything evenly. In a small bowl, I mix the melted butter and minced garlic. I add dried thyme, smoked paprika, salt, and pepper. I stir well until the mixture is smooth. This garlic butter will give our dish a rich flavor. I place the chicken thighs in the center of the sheet pan. Then, I arrange the halved baby potatoes, sliced carrots, and broccoli florets around the chicken. Spacing them out helps with even cooking. I drizzle the garlic butter mixture over the chicken and veggies. I ensure everything gets a nice coating. I bake everything in the preheated oven for 35-40 minutes. I check that the chicken reaches 165°F (75°C) inside. The veggies should be tender and cooked too. For the last 2-3 minutes, I turn on the broiler. This step crisps the chicken skin, giving it a tasty crunch. After baking, I let the dish rest for 5 minutes. Finally, I garnish with chopped fresh parsley. This adds color and freshness to the meal. To make sure your chicken cooks well, choose bone-in, skin-on thighs. They stay juicy and flavorful. Avoid overcrowding the pan; this helps all the food cook evenly. Keep a close eye on the chicken. It should reach 165°F (75°C) to be safe to eat. For the veggies, cut them into similar sizes. This ensures they cook at the same rate. If you like crispy edges, broil them for the last few minutes. While garlic butter shines in this dish, you can add more flavors. Try adding lemon juice or zest for a bright taste. A sprinkle of red pepper flakes can give it a nice kick. You can also use fresh herbs, like rosemary or thyme, for a fresh taste. If you like a smoky flavor, add more smoked paprika. Just remember, start small. You can always add more later. Every oven is unique, and cooking times may vary. If your oven runs hot, check the chicken after 30 minutes. If it runs cool, you might need an extra 5-10 minutes. Use a meat thermometer for best results. It helps you avoid undercooked or overcooked chicken. Remember to let the dish rest for about 5 minutes after baking. This allows the juices to settle and makes for a more flavorful meal. Pro Tips Marinate for More Flavor: For an extra kick, marinate the chicken thighs in the garlic butter mixture for at least 30 minutes before cooking. This allows the flavors to penetrate the meat. Use Fresh Veggies: Fresh vegetables not only taste better but also provide more nutrients. Opt for seasonal produce for the best flavor and texture. Check for Doneness: Always use a meat thermometer to check if the chicken has reached an internal temperature of 165°F (75°C). This ensures it's safe to eat and not overcooked. Customize Your Veggies: Feel free to swap in your favorite vegetables, such as bell peppers or zucchini. Just make sure to cut them into similar sizes for even cooking. {{image_2}} You can swap in many different veggies. Think about using zucchini, bell peppers, or snap peas. These options add more colors and textures. You can also try asparagus or green beans for a fresh twist. Just cut them to similar sizes as the other veggies. This ensures even cooking. Keep the same cooking time, and enjoy the new flavors. Chicken thighs are tasty, but other proteins work well too. You can use chicken breasts, pork chops, or even salmon. Adjust the cooking time based on your protein. For example, chicken breasts cook faster than thighs. Salmon cooks quickly too, so watch it closely. This gives you great choices for any meal. The garlic butter sauce is key to this dish. You can change it up easily. Add lemon juice for a zesty kick or some red pepper flakes for heat. Fresh herbs like rosemary or basil can add a nice touch. Mix and match to find your favorite blend. The sauce makes the chicken and veggies shine, so have fun with it! After you enjoy your flavorful sheet pan garlic butter chicken and veggies, store any leftovers right away. Let the dish cool to room temperature first. Then, move the chicken and veggies into an airtight container. This helps keep them fresh. Always label the container with the date. You can store leftovers in the fridge for up to three days. To reheat your chicken and veggies, preheat your oven to 350°F (175°C). Place the leftovers on a baking sheet. Cover them with foil to keep the moisture in. Heat for about 15-20 minutes, or until the chicken is warm. You can also use a microwave. If using a microwave, heat for 1-2 minutes, checking often. This way, you avoid overcooking. If you want to save some for later, freezing is a great option. First, let the chicken and veggies cool completely. Then, pack them in freezer-safe bags or containers. Remove as much air as possible before sealing. You can freeze them for up to three months. When you’re ready to eat, thaw overnight in the fridge. Reheat as mentioned above for the best taste. Yes, you can use boneless chicken thighs. They cook faster than bone-in thighs. If you choose boneless, reduce the baking time to about 25-30 minutes. Always check the internal temperature to reach 165°F (75°C) for safety. You can use many vegetables. Zucchini, bell peppers, or green beans work well. Just make sure to cut them into similar sizes for even cooking. Also, adjust the cooking time if needed to keep them tender. To check if the chicken is done, use a meat thermometer. Insert it into the thickest part, avoiding bones. The chicken should reach 165°F (75°C). If you don’t have a thermometer, cut into the chicken. The juices should run clear with no pink inside. Yes, you can prep it ahead. Marinate the chicken and veggies in the garlic butter mix the night before. Store it in the fridge. When ready, just bake as directed. This can save time on busy nights. This blog post covered how to make sheet pan garlic butter chicken and veggies. We discussed ingredients, measurements, and the best fresh choices. You then learned step-by-step instructions for cooking and tips for perfect results. Variations included other veggies, proteins, and sauce tweaks. Finally, we talked about storing leftovers and reheating tips. Now, you can create a delicious meal with ease. Enjoy the flavors you made and feel proud of your cooking! It's tasty, simple, and sure to impress.

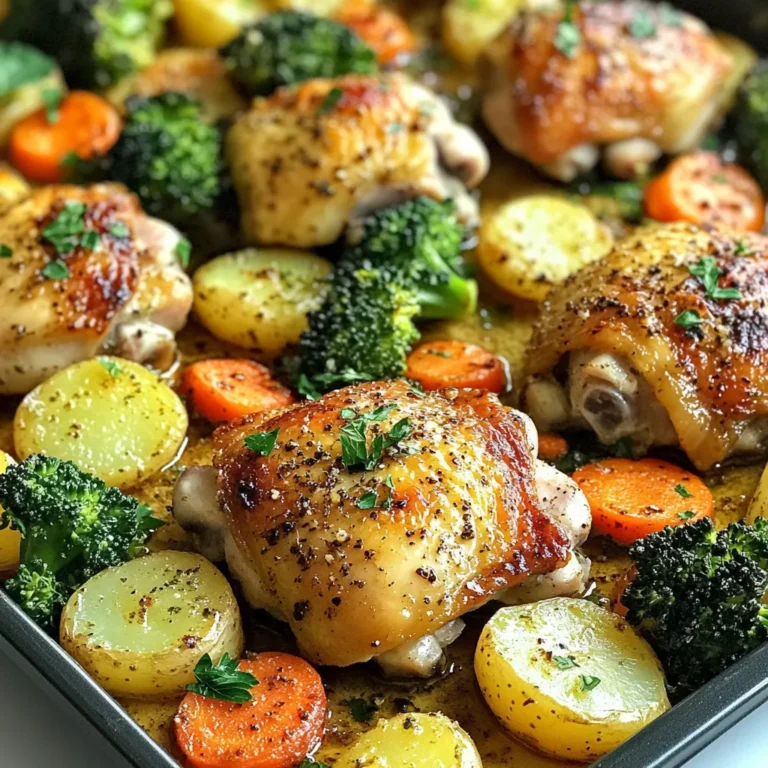
Flavorful Sheet Pan Garlic Butter Chicken and Veggies

- 500g boneless chicken thighs, cut into bite-sized pieces - 200g plain yogurt - 2 tablespoons garam masala - 1 tablespoon ground cumin - 1 tablespoon ground coriander - 2 teaspoons turmeric powder - 1 teaspoon chili powder - Salt and pepper to taste - 3 tablespoons vegetable oil - 1 large onion, finely chopped - 3 garlic cloves, minced - 1 inch ginger, grated - 400g canned tomatoes, pureed - 200ml coconut milk The main ingredients create a rich flavor. Chicken thighs give a juicy bite. Yogurt helps tenderize the meat and adds creaminess. The spices bring warmth and depth. Each spice plays a role in the dish's taste. - Fresh cilantro - Naan bread or basmati rice Garnishes add freshness and color. Fresh cilantro brightens the dish. Pairing with naan or rice offers a complete meal. These options soak up the sauce well. - Yogurt alternatives: Use dairy-free yogurt or sour cream. - Spice variations: Swap spices based on preference. Use curry powder or add more chili for heat. Substitutions keep the dish flexible. Experimenting with ingredients can lead to new flavors. Adjusting spices lets you customize the heat. {{ingredient_image_1}} To start, you need to prepare the marinade. In a bowl, mix the chicken pieces with yogurt, garam masala, cumin, coriander, turmeric, chili powder, salt, and pepper. This blend gives the chicken a great flavor. Cover the bowl and place it in the fridge. Let it marinate for at least 1 hour. If you can, marinate overnight. This longer time helps the chicken soak up all those spices. Next, you will cook the chicken. Heat vegetable oil in a large skillet over medium-high heat. Add the marinated chicken to the pan, but shake off any extra yogurt first. Cook the chicken for about 5 to 7 minutes. You want it lightly browned and fully cooked. Remove the chicken from the skillet and set it aside. The pan should be hot enough to give the chicken a nice color. Now, it’s time to prepare the sauce. In the same skillet, add the chopped onion. Sauté it for about 5 minutes until it becomes soft and golden. Then, stir in the minced garlic and grated ginger. Cook for 1 to 2 minutes more until you smell those great aromas. After that, add the pureed tomatoes to the skillet. Let it simmer for 5 minutes while stirring occasionally. This step builds a good base for your sauce. Next, pour in the coconut milk. Return the cooked chicken to the skillet, stirring well to combine everything. Reduce the heat to low and let it simmer for another 10 to 15 minutes. This helps the sauce thicken and blend the flavors together. For the final touch, taste the dish. Adjust the seasoning with salt and pepper if needed. You want a balanced flavor. Serve your Chicken Tikka Masala hot. I like to garnish it with fresh cilantro for a pop of color and flavor. Enjoy it with naan bread or basmati rice for a complete meal! - Tips for browning chicken: Use a hot skillet to get a nice sear. Don’t crowd the pan; this helps the chicken brown evenly. Cook in batches if needed. The chicken should sizzle when it hits the pan. This creates a delicious crust. - How to achieve thick sauce consistency: Let the sauce simmer low and slow. Coconut milk thickens as it cooks. If your sauce is too thin, let it simmer longer. Stir often to prevent sticking. - Using fresh spices: Always use fresh spices when possible. They give a better flavor. Toasting whole spices before grinding can boost aroma and taste. Keep spices stored in a cool, dark place for best results. - Importance of marinating time: Marinate the chicken for at least one hour. Longer marination, like overnight, makes the chicken tender. The spices seep into the meat, enhancing its flavor. - Best sides for Chicken Tikka Masala: Serve with warm naan bread or fluffy basmati rice. Both soak up the sauce well. You can also add a fresh cucumber salad for crunch. - Presentation ideas for an inviting dish: Use a deep bowl for serving. Sprinkle fresh cilantro on top for color. You can also place a lemon wedge on the side. This adds brightness to the dish. Pro Tips Marinate Overnight: For the best flavor, marinate the chicken overnight. This allows the spices to penetrate the meat thoroughly, resulting in a more flavorful dish. Use Full-Fat Coconut Milk: Using full-fat coconut milk will give your Chicken Tikka Masala a creamier texture and richer flavor. Avoid low-fat versions for this recipe. Adjust Spice Levels: If you prefer a milder dish, reduce the amount of chili powder used in the marinade. You can always add more spice later if desired. Garnish Generously: Fresh cilantro not only adds a pop of color but also enhances the flavor. Don’t skimp on the garnish for a restaurant-style presentation. {{image_2}} To make a delicious vegetarian version of Chicken Tikka Masala, you can substitute the chicken with tofu or chickpeas. Tofu absorbs flavors well and adds protein. Chickpeas offer a hearty texture. When using these substitutes, adjust the spices slightly. You may want more cumin and coriander to bring out the flavors in the vegetables. Adding a mix of bell peppers and spinach can enhance both taste and nutrition. If you love heat, you can add more chili or spicy ingredients. Use fresh green chilies for a sharper kick. You might also try adding cayenne pepper for extra warmth. Other spice blends, like curry powder or smoked paprika, can enhance the dish's depth. Don’t be shy to experiment! Just remember to taste as you go, so the spice level suits your preference. Different regions have their own styles of Chicken Tikka Masala. For example, the British version is creamier, while Indian styles often use yogurt. You can also explore alternative cooking methods. Grilling the chicken before adding it to the sauce adds a smoky flavor. This can give your dish a unique twist. Embrace these variations to find your favorite style! Chicken Tikka Masala lasts in the fridge for up to four days. To keep it fresh, place it in an airtight container. This helps prevent spills and keeps the flavors locked in. For freezing Chicken Tikka Masala, let it cool completely. Then, transfer it to freezer-safe bags or containers. Remove as much air as possible to prevent freezer burn. When ready to eat, thaw it overnight in the fridge. Reheat it gently on the stove or in the microwave. Stir it well to ensure even heating. For meal prep, divide the Chicken Tikka Masala into individual portions. This makes it easy to grab for lunches or dinners. Pair it with sides like naan bread or basmati rice for a complete meal. Having these ready makes weeknight dinners a breeze. To make Chicken Tikka Masala spicier, you can add more chili powder or fresh chilies. Consider using green chilies for a fresh kick. You can also try adding crushed red pepper flakes or a dash of hot sauce. These options will help you adjust the heat to your liking. Remember, start with small amounts. You can always add more spice, but it's hard to take heat out. Yes, you can use chicken breast. However, the texture and flavor will differ. Chicken thighs are juicier and more tender than breasts. This makes them perfect for absorbing flavors. Chicken breast can dry out if overcooked. If you choose breast, marinate it well and watch the cooking time closely. This way, you’ll still enjoy a tasty dish. There are many great sides for Chicken Tikka Masala. Naan bread is a classic choice. It’s perfect for scooping up the sauce. Basmati rice is another popular option. It helps balance the rich flavors of the dish. You can also serve a simple salad or raita to cool the palate. Consider adding some roasted vegetables for extra color and nutrition. This blog post covered how to make Chicken Tikka Masala using key ingredients like chicken thighs, yogurt, and spices. I provided step-by-step marinating and cooking instructions for rich flavors. You learned tips to enhance taste and how to adjust the dish for dietary needs. Remember, any meal can be personalized. Enjoy experimenting with new flavors and variations! Your cooking skills will grow, and your meals will impress everyone. Dive in and make your own Chicken Tikka Masala!

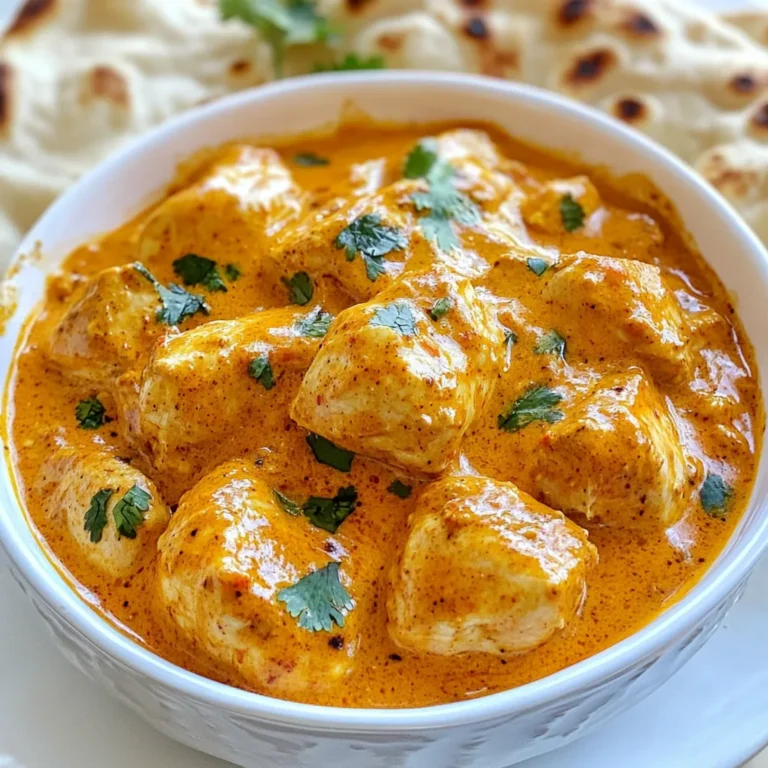
Gordon Ramsay Chicken Tikka Masala Flavor Packed Dish

For this tasty dish, you'll need: - 1.5 lbs boneless, skinless chicken thighs - 2 cups broccoli florets - 1 red bell pepper, sliced - 1 carrot, thinly sliced - 1 cup snap peas These ingredients bring great flavors and textures to your meal. The chicken thighs stay juicy and tender, while the veggies add crunch and color. The right seasonings make a big difference. Here are the must-haves: - 1 cup teriyaki sauce - 3 tablespoons olive oil - 2 cloves garlic, minced - 1 teaspoon ginger, minced - Salt and pepper, to taste The teriyaki sauce gives a sweet and salty taste. Olive oil helps the veggies roast nicely. Garlic and ginger add depth and warmth to the dish. Garnishes can make your dish look even better. Use these: - 2 tablespoons sesame seeds - Chopped green onions Sprinkling sesame seeds and green onions on top makes the meal pop. It adds a nice crunch and fresh flavor right before you serve it! {{ingredient_image_1}} Start by mixing the teriyaki sauce, minced garlic, minced ginger, and a bit of salt and pepper in a bowl. This blend gives your chicken a rich flavor. Place the chicken thighs in a large bag or dish. Pour half of the marinade over the chicken. Seal the bag or cover the dish. Let it marinate in the fridge for at least 30 minutes. If you have time, let it sit for up to 2 hours. This longer marinating time really boosts the flavor. While your chicken is soaking up the flavors, prepare the veggies. Use a large bowl to mix the broccoli florets, sliced red bell pepper, thinly sliced carrot, and snap peas. Drizzle with olive oil, and sprinkle with salt and pepper. Toss them well until they are coated. This step ensures that each bite has a nice taste and texture. Preheat your oven to 400°F (200°C). Line a large sheet pan with parchment paper or foil for easy cleanup. Arrange the marinated chicken on one side of the pan and the veggies on the other. Drizzle the remaining teriyaki sauce over the chicken. Roast in the oven for 25-30 minutes. The chicken should reach 165°F (75°C) and the veggies should be tender. Once done, you can drizzle more teriyaki sauce if you like. Garnish with sesame seeds and chopped green onions before serving. Let it rest for a few minutes to cool down before you dig in. To get juicy chicken, always use thighs. They have more fat than breasts. Marinate the chicken for at least 30 minutes. This helps the meat soak up the flavor. If you can, marinate for two hours. The longer, the better! When baking, check the chicken's temperature with a thermometer. It should reach 165°F (75°C). This ensures it’s safe to eat and perfectly cooked. For crispy veggies, cut them evenly. This helps them cook at the same rate. Toss the vegetables with olive oil, salt, and pepper. This adds flavor and aids in crispiness. Arrange the veggies in a single layer on the pan. Crowding them can lead to steaming instead of roasting. Roast them alongside the chicken for 25-30 minutes. This timing will make them tender yet crunchy. You can easily change the teriyaki flavor! Start with a good base. Use store-bought sauce or make your own. To enhance the taste, add more garlic or ginger. A splash of lime juice can give it a fresh kick. If you like heat, add some red pepper flakes. This will spice things up. Adjust the sweetness by adding honey or brown sugar. Tailor it to your taste! Pro Tips Marination Time: The longer you marinate the chicken, the more flavorful it will be. Aim for at least 2 hours if you have time to spare! Veggie Variations: Feel free to mix and match your favorite vegetables. Asparagus, zucchini, or bell peppers can work beautifully in this dish. Sheet Pan Lining: Lining your sheet pan with parchment paper or foil not only makes cleanup a breeze but also helps prevent sticking. Serving Suggestions: Serve this dish over rice or quinoa for a complete meal. Garnish with additional sesame seeds and green onions for extra flavor. {{image_2}} You can switch out chicken thighs for other meats. Try boneless chicken breasts for a leaner option. Pork tenderloin works well too. If you like beef, use thinly sliced flank steak. For a plant-based meal, try tofu or tempeh. These options soak up the teriyaki sauce nicely, giving you great flavor. You can change the veggies based on what’s in season. In spring, use asparagus and snap peas. In summer, add zucchini and bell peppers. Fall brings great options like squash and Brussels sprouts. Winter veggies like carrots and kale also add color and taste. Mix and match according to what you enjoy and what’s fresh. Making your own teriyaki sauce is simple and fun. Here’s a quick recipe: - 1/2 cup soy sauce - 1/4 cup honey or brown sugar - 1/4 cup rice vinegar - 2 cloves garlic, minced - 1 teaspoon minced ginger - 1 tablespoon cornstarch mixed with 2 tablespoons water (for thickening) Combine all the ingredients in a pot. Cook over medium heat until it simmers. Add the cornstarch mix to thicken. Let it cool before using. This sauce is easy to tweak for your taste! After your meal, let the dish cool down. Place leftover chicken and veggies in an airtight container. Store it in the fridge for up to three days. Keeping it sealed helps to lock in the flavors. If you used homemade teriyaki sauce, the taste will stay fresh longer. To reheat, use an oven or a stovetop. Preheat your oven to 350°F (175°C). Place the chicken and veggies on a baking sheet. Cover them with foil to keep them moist. Heat for about 15-20 minutes. Check that the chicken reaches 165°F (75°C) again. If using a stovetop, warm them in a pan over medium heat. Stir occasionally to heat evenly. You can freeze leftovers to enjoy later. Place the chicken and veggies in a freezer-safe bag. Squeeze out as much air as possible before sealing. They can last up to three months in the freezer. When ready to eat, thaw in the fridge overnight. Reheat using the oven or stovetop for the best flavor. Yes, you can use chicken breast. Chicken thighs add more flavor and stay juicier. If you choose breasts, reduce cooking time. Check the internal temperature to reach 165°F. You can use many vegetables. Zucchini, asparagus, or bell peppers work well. Use what you have on hand. Just keep the cooking time in mind for each vegetable. To make this dish gluten-free, use a gluten-free teriyaki sauce. Many brands offer gluten-free options. Always check the label to ensure it is safe for you. Yes, you can prepare the chicken and veggies ahead. Marinate the chicken for up to 2 hours. Chop the veggies and store them in the fridge. Just bake them when ready to eat. You learned how to make sheet pan teriyaki chicken from start to finish. We covered key ingredients, preparation, and cooking methods. I shared tips for juicy chicken and crisp veggies. You can customize the dish with different proteins and sauces, too. Proper storage keeps leftovers tasty. Remember, cooking is fun. Enjoy your meal and share it with friends. You’ll impress them with your skills!

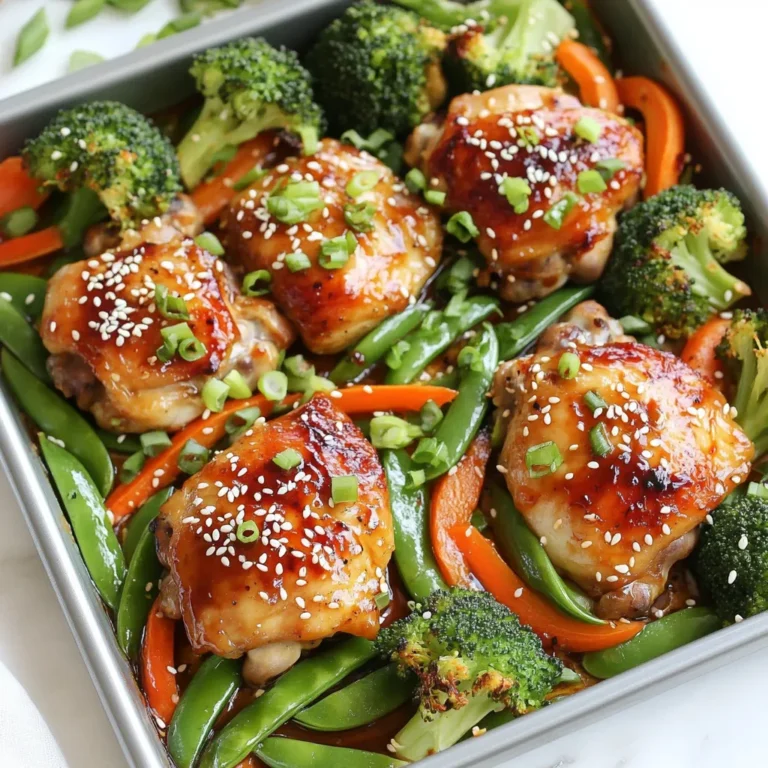
Sheet Pan Teriyaki Chicken & Veggies Flavor Boost

This recipe uses simple ingredients that pack a punch. Here is what you need: - 1 cup jasmine rice - 2 cups vegetable broth (or water) - 1 tablespoon olive oil - 1 medium onion, chopped - 2 cloves garlic, minced - 1 pound ground turkey (or black beans for a vegetarian option) - 1 tablespoon taco seasoning - 1 can (15 oz) black beans, drained and rinsed - 1 cup corn kernels (frozen or canned) - 1 large tomato, diced - 1 avocado, sliced - 1 cup shredded lettuce - 1/2 cup shredded cheese (cheddar or Mexican blend) - Salsa and sour cream for serving (optional) - Fresh cilantro for garnish (optional) Many of these items may already be in your kitchen. The key pantry staples include: - Jasmine rice - Vegetable broth (or water) - Olive oil - Taco seasoning - Canned black beans - Corn (frozen or canned) - Shredded cheese These staples make the recipe quick and easy. Fresh ingredients add flavor and color to your taco rice bowls. Here are some tips: - Use ripe avocados for a creamy texture. - Choose firm tomatoes for a juicy pop. - Fresh cilantro brightens the dish. - Opt for crisp lettuce to add crunch. With these fresh tips, your bowl will be vibrant and delicious. Enjoy every bite! {{ingredient_image_1}} Start by rinsing the jasmine rice. Use cold water until the water is clear. This step removes extra starch. Rinsing helps keep the rice fluffy. Next, combine the rinsed rice with vegetable broth in a medium saucepan. Bring the mixture to a boil over high heat. Once it boils, reduce the heat to low. Cover the pot and let it simmer for about 15 minutes. The rice will absorb the liquid and cook. After 15 minutes, turn off the heat. Let the rice sit, covered, for an extra 5 minutes. This resting time adds to the fluffiness. While the rice cooks, heat olive oil in a large skillet over medium heat. Add the chopped onion and sauté until it turns translucent, about 3 to 4 minutes. This step builds flavor in your dish. Add minced garlic and stir for about 30 seconds. You should smell the garlic as it cooks. Now, increase the heat to medium-high. Add the ground turkey or black beans at this point. Cook until the turkey is browned. If using beans, make sure they heat through. Break up the turkey with a spatula as it cooks. Then, stir in taco seasoning, black beans, and corn. Cook everything for about 3 to 4 minutes. This adds a burst of flavor. Once the rice and turkey (or beans) are ready, it’s time to assemble the bowls. Fluff the rice with a fork and divide it among serving bowls. Then, spoon the taco mixture over the rice. It’s now time to add the toppings. Start with diced tomatoes and sliced avocado. Next, sprinkle shredded lettuce and cheese on top. If you like, finish with salsa, sour cream, and fresh cilantro. Each layer adds color and flavor to your meal. Enjoy the vibrant look of your taco rice bowls! To get fluffy rice, rinse it well. Use cold water until it runs clear. This removes the extra starch. Then, cook it in vegetable broth for flavor. Keep the lid on while it cooks. Letting it rest after cooking makes it even better. Fluff it gently with a fork before serving. Add more zest to your taco rice bowls. Use fresh lime juice or zest for a bright taste. Fresh herbs like cilantro can boost flavor too. Try mixing in some diced jalapeños for heat. Spice lovers can add extra taco seasoning to the meat or beans. A dash of hot sauce can also spice things up! Make your taco rice bowls fun and colorful. Use bright bowls to catch the eye. Arrange toppings like a rainbow for a beautiful look. Serve with salsa and sour cream for extra flavor. You can also offer chips on the side for crunch. For a balanced meal, pair it with a fresh salad. Pro Tips Rinse Your Rice: Rinsing the jasmine rice removes excess starch, which helps achieve a fluffier texture when cooked. Customize Your Toppings: Feel free to get creative with toppings! Try adding sliced jalapeños, olives, or even a dollop of guacamole for extra flavor. Vegetarian Option: Substitute ground turkey with black beans or lentils for a protein-packed vegetarian option that still delivers on flavor. Meal Prep Friendly: This recipe is great for meal prep! Store the rice and taco mixture separately in the fridge for quick lunches throughout the week. {{image_2}} You can easily make this dish vegetarian or vegan. Instead of ground turkey, use black beans. They add protein and fiber. You can also use lentils for a different texture. Use vegetable broth for the rice to keep it vegan. For cheese, choose a plant-based option or skip it. Add more veggies, like bell peppers or zucchini, to boost flavor. If you're not in the mood for turkey, try ground beef or chicken. Ground beef adds a richer taste. Chicken is a lighter, leaner choice. For plant-based protein, try crumbled tofu or tempeh. Both soak up flavors well. You can even add quinoa for a unique twist. It’s packed with nutrients and adds a nice crunch. Feel free to mix and match ingredients. Swap jasmine rice for brown rice or quinoa. Brown rice gives a nuttier flavor and more fiber. You can also use frozen corn instead of canned for a fresher taste. If you like spice, add jalapeños or a dash of hot sauce. Don't forget to play with toppings. Try different types of cheese or fresh herbs like parsley or chives. Each swap can change the whole dish! To keep your taco rice bowls fresh, let them cool first. Place the rice and toppings in separate airtight containers. This helps keep everything tasty. Store the rice in the fridge for up to three days. Toppings like avocado should be used quickly. If you cut the avocado, it will brown fast. When you want to eat your leftovers, reheat them well. You can use the microwave or a skillet. If using a microwave, heat in short bursts. Stir the rice and toppings between bursts. This makes sure everything warms evenly. If you're using a skillet, add a splash of water. Cover it to keep the steam in. Heat on medium until hot. Freezing taco rice bowls is a great option! First, cool everything completely. Place the rice and turkey mixture in freezer-safe bags or containers. Squeeze out extra air before sealing. You can freeze it for up to three months. When ready to eat, thaw overnight in the fridge. Reheat as mentioned above. Enjoy your meal later with ease! To make rice fluffy, rinse it well. Rinse the jasmine rice under cold water until the water runs clear. This step removes extra starch. Starch can make rice sticky. After rinsing, cook the rice with vegetable broth in a covered pot. Bring it to a boil, lower the heat, and let it simmer. Once done, let it rest for five minutes. This helps the grains firm up and stay separate. Yes, you can use different beans! You can swap black beans for pinto beans or kidney beans. Chickpeas also work well for a different taste. Just be sure to drain and rinse any canned beans. This helps reduce sodium. You can mix and match beans based on what you have. This flexibility lets you customize your taco rice bowls. There are many tasty toppings you can choose! Here are some ideas: - Diced tomatoes - Sliced avocado - Shredded lettuce - Shredded cheese (like cheddar or a Mexican blend) - Salsa - Sour cream - Fresh cilantro Feel free to get creative! You can even add jalapeños for heat or lime wedges for a zesty kick. Enjoy making your taco rice bowls unique! You now have an easy path to make taco rice bowls. We covered key ingredients, cooking steps, and tips for great results. You can also customize it to your taste with fun swaps. If you store and reheat your leftovers right, they can last longer. With this guide, you can impress anyone with your cooking. Enjoy creating your own tasty taco rice bowls!

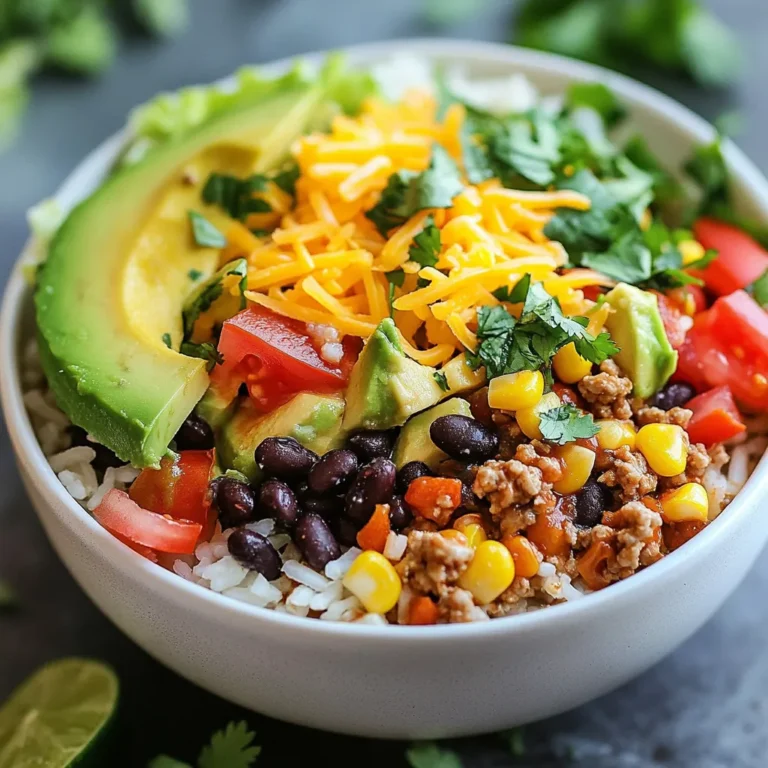
Easy Taco Rice Bowls Flavorful Meal to Enjoy Today

- 8 oz fettuccine pasta - 1 lb ground beef - 2 cups heavy cream - 1 ½ cups shredded cheddar cheese - ½ cup grated Parmesan cheese To create this loaded cheeseburger Alfredo, you need some key ingredients. First, grab 8 ounces of fettuccine pasta. This pasta holds the creamy sauce well. Next, use 1 pound of ground beef. It adds the classic cheeseburger flavor. You will also need 2 cups of heavy cream. This makes the dish rich and smooth. For cheesiness, get 1 ½ cups of shredded cheddar cheese. Lastly, don’t forget ½ cup of grated Parmesan cheese for extra depth. - 1 tablespoon olive oil - 1 teaspoon garlic powder - 1 teaspoon onion powder - 1 teaspoon paprika - Salt and pepper, to taste Now, let’s season our dish! You need 1 tablespoon of olive oil to cook the beef. This helps the meat brown nicely. Add 1 teaspoon of garlic powder for flavor. The onion powder adds a nice touch too. Use 1 teaspoon of paprika for a hint of smokiness. Finally, salt and pepper balance all the flavors. Adjust these to your taste. - ½ cup diced tomatoes - ¼ cup chopped pickles - ¼ cup chopped green onions - Optional: crushed red pepper flakes for heat For a fun twist, add some toppings! Use ½ cup of diced tomatoes. They add freshness and color. Chop ¼ cup of pickles for a tangy crunch. Then, sprinkle ¼ cup of chopped green onions for a burst of flavor. If you like heat, add crushed red pepper flakes. They give the dish a spicy kick. These ingredients come together for a hearty and creamy dish that pleases everyone. Enjoy the process of cooking this delightful meal! {{ingredient_image_1}} To cook fettuccine pasta al dente, start by boiling water in a large pot. Add a pinch of salt to the water for flavor. Once the water is boiling, add 8 oz of fettuccine pasta. Stir the pasta to prevent it from sticking. Cook it for about 8 to 10 minutes, or until it is tender but still firm. Test a piece to check if it’s al dente. When done, drain the pasta in a colander and set it aside. In a large skillet, heat 1 tablespoon of olive oil over medium heat. Once the oil is hot, add 1 lb of ground beef. Use a spoon to break up the beef as it cooks. Brown the beef for about 6 to 8 minutes. Ensure it is fully cooked and no longer pink. Now, sprinkle in 1 teaspoon of garlic powder, 1 teaspoon of onion powder, 1 teaspoon of paprika, and salt and pepper to taste. Stir well to mix the seasonings evenly into the beef. Lower the heat to low and pour in 2 cups of heavy cream. Stir continuously for about 2 to 3 minutes. This helps heat the cream without burning it. Gradually add 1 ½ cups of shredded cheddar cheese and ½ cup of grated Parmesan cheese. Keep stirring until the cheeses melt and the sauce is smooth and creamy. Now, it’s time to bring it all together! Add the cooked fettuccine to the skillet with the sauce. Toss the pasta gently to coat it in the creamy sauce. Next, stir in ½ cup of diced tomatoes and ¼ cup of chopped pickles. Mix well and let everything warm through for an additional 2 minutes. Your Loaded Cheeseburger Alfredo is now ready to enjoy! - To ensure perfect al dente pasta, cook the fettuccine according to package directions. Usually, this means boiling it for about 8-10 minutes. Test a piece; it should be firm but not hard. Drain the pasta and set it aside right away. This keeps it from cooking more. - To avoid curdling in the sauce, keep the heat low when stirring in the heavy cream. If the cream boils too much, it may separate. Stir continuously as you add the cheeses, letting them melt slowly into the sauce. This creates a smooth, creamy texture. - For extra flavor, consider adding spices like Italian seasoning or garlic salt. A dash of Worcestershire sauce can deepen the taste. You can also sprinkle in some crushed red pepper flakes for a little heat. - You can mix up the cheese options too. Try using gouda or Monterey Jack for a unique twist. Each cheese adds its own character, making your dish even more exciting. - Serve Loaded Cheeseburger Alfredo hot for the best taste. It will be creamy and comforting, perfect for a cozy meal. - Pair it with a fresh side salad or garlic bread. This balances the rich flavors and adds a nice crunch. Enjoy your meal with a cold drink for a complete experience. Pro Tips Use High-Quality Cheese: For the best flavor and creaminess, opt for freshly grated cheese instead of pre-shredded, as it melts better and enhances the sauce's texture. Cook Pasta Al Dente: Cooking the fettuccine just until al dente ensures it holds its shape and texture once mixed with the creamy sauce. Season to Taste: Adjust the seasoning of the beef and sauce according to your preferences. Don't hesitate to add more spices or even hot sauce for an extra kick! Add Veggies: Boost the nutrition by incorporating additional vegetables like spinach or bell peppers into the dish for added color and flavor. {{image_2}} You can swap ground beef for ground turkey or chicken. Both options offer a lighter taste. They still give that hearty feel. You will still enjoy the creamy sauce with these proteins. If you want a vegetarian dish, try plant-based ground meat. It tastes great and keeps the dish rich. While fettuccine is a classic choice, you can use other pasta types. Try penne or rotini for a fun twist. If you need gluten-free options, look for rice or corn pasta. These pasta types work well with the sauce. They keep the dish tasty and satisfying. Want some heat? Add jalapeños to spice things up. They add a nice kick and pair well with cheese. You can also mix in different veggies. Mushrooms or spinach add color and nutrients. Feel free to get creative with what you have! After enjoying your Loaded Cheeseburger Alfredo, let it cool down. This step helps keep the dish fresh. Once cool, place it in the fridge. Use airtight containers to store your leftovers. Glass or plastic containers work great. This keeps the flavors locked in and prevents spills. When you’re ready to eat again, reheating is key. The best method is using a skillet on low heat. Stir the dish often. This helps warm it evenly. If it seems dry, add a splash of milk or cream. This will bring back the creamy texture. You can also use a microwave. Heat it in short intervals. Stir in between to avoid hot spots. Freezing this dish is a smart option. However, freeze the noodles and sauce separately. This keeps the pasta from becoming mushy. Use freezer bags or containers for easy storage. When you want to eat it, thaw overnight in the fridge. Reheat in a skillet, adding a bit of cream to regain its creaminess. This way, you’ll enjoy a fresh taste every time! Loaded Cheeseburger Alfredo can last up to three days in the fridge. To keep it fresh, store it in an airtight container. Make sure it cools down before sealing. The flavors get better over time, but the pasta may soften. Yes, you can make Loaded Cheeseburger Alfredo in advance. Cook the dish, then let it cool. Store it in the fridge for up to three days. When ready to eat, reheat it on the stove or in the microwave. Add a splash of milk to keep it creamy. If you want a lighter version, you can use half-and-half instead of heavy cream. You can also try whole milk mixed with a bit of butter. This keeps the dish creamy, but it will be less rich. Yes, you can make Loaded Cheeseburger Alfredo in one pot. Start by cooking the ground beef in a large pot. Then add the pasta, cream, and cheeses. Cook everything together. This saves time and makes cleanup easy. Just be mindful of stirring to prevent sticking. In this guide, we explored the delicious Loaded Cheeseburger Alfredo. We covered the main ingredients, cooking steps, and various tips for success. You learned how to customize the dish to fit your taste and dietary needs. As you try this recipe, remember to have fun with it. Mix in your favorite flavors and enjoy every bite. With these steps, you’ll make a meal that everyone loves. Happy cooking!

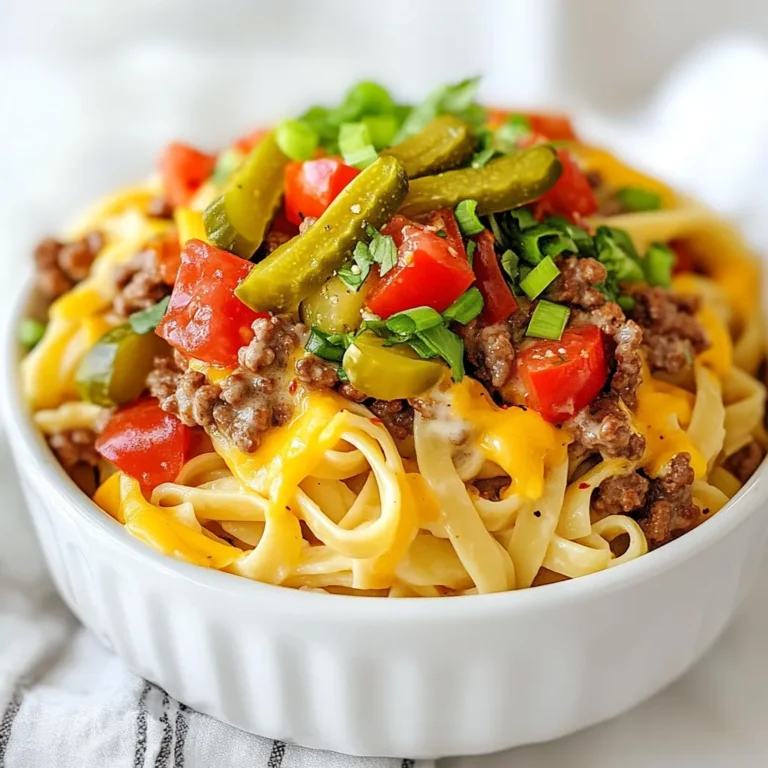
Loaded Cheeseburger Alfredo Creamy and Hearty Dish

- 2 boneless, skinless chicken breasts, cut into bite-sized pieces - 2 cups pasta (penne or fusilli works well) - 1 cup BBQ sauce (your favorite brand) - 1/2 cup honey - 4 cloves garlic, minced - 1 cup chicken broth - 1 cup cherry tomatoes, halved - 1 cup frozen corn - 1 bell pepper, diced (any color) - 1 teaspoon paprika - Salt and pepper to taste - Fresh parsley, chopped (for garnish) - Olive oil (for cooking) For this One Pot Honey Garlic BBQ Chicken Pasta, you need simple, fresh ingredients. Start with the chicken. I like using boneless, skinless chicken breasts. They cook quickly and stay tender. Cut them into small pieces for even cooking. Next, choose your pasta. Penne or fusilli are great options. They hold sauce well and add texture to the dish. BBQ sauce is key. Pick your favorite brand for the best flavor. A sweet sauce works well with the honey and garlic. Now, let's add some extra flavor. Honey brings sweetness, while garlic adds depth. You'll want four cloves, finely minced. For veggies, cherry tomatoes, frozen corn, and bell pepper add color and nutrition. They also add a nice crunch. Lastly, don’t forget your seasonings. Paprika gives warmth, and salt and pepper enhance the taste. Fresh parsley makes a lovely garnish too. With these ingredients ready, you’ll create a delicious, one-pot meal in no time! {{ingredient_image_1}} First, heat a drizzle of olive oil in a large pot over medium heat. Add the chicken pieces and spread them out evenly. Season the chicken with salt, pepper, and paprika. Cook until the chicken is browned on all sides, about 5 to 7 minutes. This step adds flavor and texture. Next, add the minced garlic to the pot. Sauté it for about one minute until it smells good. Now, pour in your BBQ sauce, honey, and chicken broth. Stir everything well to mix the flavors. This blend of sweet and savory will be the heart of your dish. Bring the mixture to a boil. Once it boils, add the pasta. Reduce the heat to low and cover the pot. Let it simmer for about 10 minutes, stirring occasionally. This will cook the pasta just right. In the last two minutes, add the cherry tomatoes, corn, and bell pepper. Stir everything to combine and heat through. This adds color and nutrition to your meal. - To ensure the chicken is cooked properly, use a meat thermometer. The chicken must reach 165°F. Cut the chicken into small pieces for even cooking. - Adjust cooking times for pasta based on the type you use. Penne or fusilli usually take about 10 minutes to cook. Stir occasionally while it simmers to prevent sticking. - For extra flavor, try adding spices like cayenne pepper or smoked paprika. A pinch of red pepper flakes can give it a nice kick. - If you want to experiment, use different BBQ sauces. A smoky sauce will add depth, while a sweet and tangy sauce can brighten the dish. Pro Tips Use Quality BBQ Sauce: Choose a BBQ sauce that you love, as it will significantly influence the flavor of the dish. A smoky or sweet variety can add depth to the overall taste. Don’t Overcook the Pasta: Since the pasta will continue to cook in the residual heat after you remove it from the stove, aim for al dente to prevent mushiness. Add Veggies for Extra Nutrition: Feel free to throw in any additional vegetables you have on hand, such as spinach or zucchini, to boost the nutritional value and flavor. Garnish for Freshness: Fresh parsley not only adds a pop of color but also a refreshing flavor. Consider using other herbs like cilantro or basil for a different twist! {{image_2}} You can easily change the protein in this dish. Shrimp or tofu works well. For shrimp, just cook it for a few minutes until it turns pink. If using tofu, sauté it until golden brown for flavor. You can also choose different pasta. Penne or fusilli are great, but you can use gluten-free pasta if needed. Just follow the cooking times on the package for the best results. Adding veggies can change the taste and boost nutrition. Zucchini or spinach are excellent options. Just chop them up and add them during the last few minutes of cooking. You can also play with the sauces. Try teriyaki for a sweet twist or marinara for a classic touch. Just remember to adjust the amount of honey if you use a sweeter sauce. This way, you keep the balance of flavors just right. To keep your One Pot Honey Garlic BBQ Chicken Pasta fresh, store leftovers in an airtight container. Place the pasta in the refrigerator within two hours of cooking to avoid bacteria growth. It will stay good for up to three days in the fridge. If you want to save it for longer, you can freeze it. For freezing, let the dish cool completely, then transfer it to freezer-safe bags. Squeeze out excess air before sealing. It can last up to three months in the freezer. When you're ready to enjoy your leftovers, reheating is easy. You can use the microwave or stovetop. For the microwave, place the pasta in a bowl and cover it with a damp paper towel. Heat in 30-second intervals, stirring in between, until warm. On the stovetop, add a splash of water or broth in a pan to help steam the pasta. Heat over medium until hot. This helps keep the flavors intact and prevents the pasta from drying out. Enjoy your meal just like the first time! Can I make this recipe in advance? Yes, you can make this recipe ahead of time. Cook the dish and let it cool. Store it in an airtight container in the fridge. It will last for up to three days. When you're ready to eat, just reheat it on the stove or in the microwave. How to adjust for a larger serving size? To make more servings, simply double or triple the ingredients. Just keep the same cooking steps. You may need a larger pot to hold everything. Make sure to taste for seasoning as you go. Can I substitute honey with another sweetener? Yes, you can use maple syrup or agave nectar instead of honey. These will add a nice sweetness without changing the taste too much. Just use the same amount as the recipe calls for. What if I don't have BBQ sauce on hand? If you lack BBQ sauce, you can make a quick mix. Combine ketchup, Worcestershire sauce, and a bit of honey. This gives a sweet and tangy flavor similar to BBQ sauce. You can also try a store-bought sauce that you like. In this blog post, we covered a tasty chicken and pasta dish. We discussed main ingredients like chicken breasts, BBQ sauce, and pasta options. You learned step-by-step instructions for cooking and combining the ingredients. My tips on cooking and flavor variations help you create your own version. Finally, proper storage and reheating methods ensure your meal stays fresh. Try this dish and let your taste buds explore new flavors! You’ll enjoy a fun cooking experience and a delicious meal.

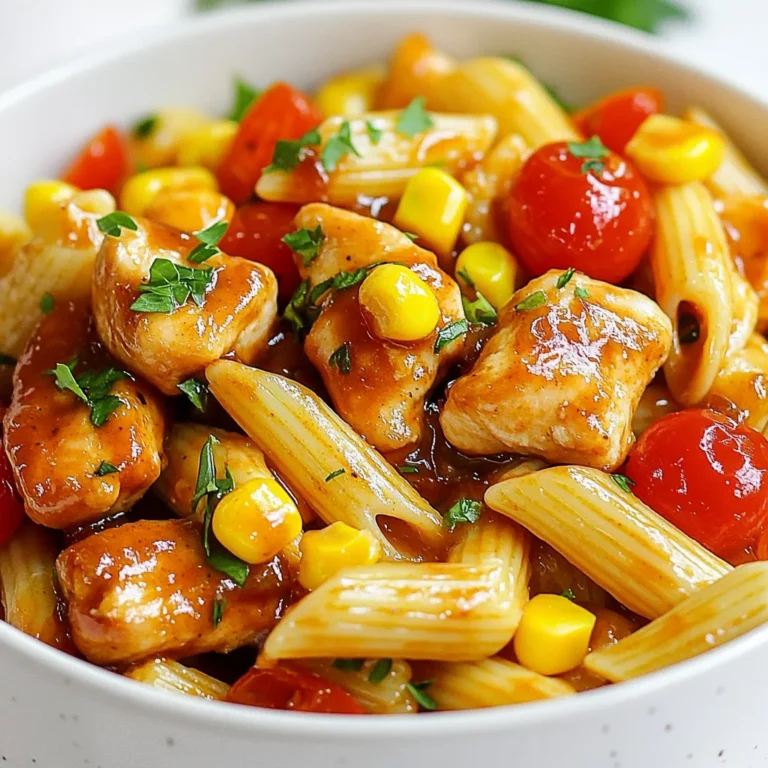
One Pot Honey Garlic BBQ Chicken Pasta Recipe

To make garlic butter pasta, you need the best ingredients. Here’s what you will gather: - 8 oz spaghetti or linguine - 6 tablespoons unsalted butter - 5 cloves garlic, minced - 1 teaspoon red pepper flakes (adjust to taste) - 1/2 cup grated Parmesan cheese - 1/4 cup fresh parsley, chopped - Salt and black pepper to taste - Zest of 1 lemon - Juice of 1/2 lemon These ingredients create a simple yet flavorful dish. The spaghetti or linguine serves as the perfect base. The unsalted butter adds a rich taste. Minced garlic brings a bold aroma. Red pepper flakes add a hint of spice, making it exciting. Grated Parmesan cheese gives the dish a creamy texture. Fresh parsley adds a pop of color and freshness. Salt and black pepper enhance all the flavors. Lemon zest and juice brighten up the dish, creating a balance. With these ingredients, you can make a meal that impresses. They work in harmony to create garlic butter pasta, a dish you’ll love! {{ingredient_image_1}} 1. Boiling salted water: Start by filling a large pot with water. Add a good amount of salt to the water. This helps flavor the pasta as it cooks. Bring the water to a boil over high heat. 2. Cooking to al dente: Once the water boils, add 8 oz of spaghetti or linguine. Stir it gently to keep it from sticking. Cook according to the package instructions, usually around 8-10 minutes. You want it to be al dente, which means it should be firm but not hard. 3. Reserving pasta water: Before draining the pasta, scoop out 1 cup of the pasta water. This starchy water will help the sauce stick later. Drain the pasta in a colander and set it aside. 1. Melting the butter: In the same pot or a large skillet, melt 6 tablespoons of unsalted butter over medium heat. This butter will add richness to your dish. 2. Sautéing garlic and red pepper: Add 5 cloves of minced garlic and 1 teaspoon of red pepper flakes to the melted butter. Stir it for 1-2 minutes until the garlic smells great and turns golden. Be careful not to burn the garlic! 1. Tossing pasta with garlic butter: Add your drained pasta to the skillet with the garlic butter. Toss it well to coat all the pasta in that tasty butter. 2. Adjusting consistency with pasta water: If the pasta looks too dry, slowly add some of the reserved pasta water. Mix it in until the pasta is creamy and well-coated. 1. Adding cheese, lemon zest, and juice: Sprinkle in 1/2 cup of grated Parmesan cheese, the zest of 1 lemon, and the juice of 1/2 lemon. Toss everything together until combined. 2. Seasoning to taste: Taste your pasta. Add salt and black pepper as needed for extra flavor. 1. Garnishing tips: Before serving, stir in 1/4 cup of fresh chopped parsley for a bright touch. 2. Presentation suggestions: Serve the pasta in warm bowls. Top with more Parmesan cheese and a sprinkle of parsley. A lemon wedge on the side adds a nice touch for those who enjoy a citrusy bite. - Ensuring perfect al dente pasta: Always use a large pot with plenty of water. This helps the pasta cook evenly. Check the pasta package for cooking time. Taste it a minute before the time is up. It should be firm but not hard. - Avoiding burnt garlic: Cook garlic on medium heat. Keep an eye on it. Once it turns golden, take it off the heat. Burnt garlic tastes bitter and ruins the dish. - Experimenting with additional spices: Try adding herbs like basil or oregano. A pinch of smoked paprika can also give a nice kick. Mix and match spices to find your favorite flavor. - Using different cheese types: Parmesan is great, but don’t stop there! Try Pecorino Romano for a sharper taste. A bit of feta can add a creamy texture too. - Prepping ingredients in advance: Chop garlic and parsley ahead of time. You can even cook the pasta earlier in the day. Just toss it in a bit of oil to keep it from sticking. - Storing leftovers properly: Place leftover pasta in an airtight container. It lasts in the fridge for about three days. To reheat, add a splash of water and warm it slowly. This keeps it moist and tasty. Pro Tips Tip for Perfect Pasta: Always salt your pasta water well; it should taste like the sea. This is essential for flavoring the pasta itself. Tip for Garlic: Be careful not to burn the garlic when sautéing. It should be lightly golden and fragrant for the best flavor. Tip for Creaminess: If you want an extra creamy sauce, add more reserved pasta water gradually until you reach your desired consistency. Tip for Freshness: Adding fresh herbs like parsley at the end of cooking preserves their bright flavor and color, enhancing the dish's overall appeal. {{image_2}} Incorporating Chicken Adding chicken to garlic butter pasta brings a hearty touch. You can use grilled or pan-seared chicken breast. Slice the chicken into strips. Toss it in with the pasta and garlic butter. This adds protein and makes the dish more filling. Adding Shrimp Shrimp adds a nice seafood flavor. Start by sautéing shrimp in the garlic butter before adding the pasta. Cook until the shrimp turns pink. This only takes a few minutes. The shrimp pairs well with the garlic and lemon, making it a favorite. Using Zucchini or Spinach For a veggie boost, add zucchini or spinach. You can spiralize zucchini into noodles. This creates a fresh base for your dish. If using spinach, toss it in just before serving. It wilts quickly and adds color. Creating a Creamy Version To make a creamy garlic butter pasta, add heavy cream. Mix it in with the garlic butter before tossing with the pasta. This creates a rich sauce. You can also add cream cheese for extra creaminess. This variation is perfect for those who love rich flavors. Using Zucchini Noodles Zucchini noodles are a great gluten-free option. They are low in carbs and very healthy. Use a spiralizer to make them. Cook them briefly in the garlic butter. This keeps them tender yet crisp. Exploring Gluten-Free Pasta Options You can also find gluten-free pasta made from rice or lentils. These options cook just like regular pasta. Follow the package instructions for best results. They hold the garlic butter sauce well, making a delightful dish. After you finish your garlic butter pasta, let it cool. Store leftovers in an airtight container. This keeps the pasta fresh. If you use glass or plastic containers, make sure they seal well. You can keep it in the fridge for about 3 to 4 days. To freeze your pasta, let it cool completely. Transfer it to freezer bags or containers. Remove as much air as you can before sealing. This helps avoid freezer burn. When you're ready to eat, thaw it overnight in the fridge. Reheat in a pan over low heat, adding a splash of water or broth to keep it moist. Garlic butter pasta lasts about 3 to 4 days in the fridge. Check for signs of spoilage before eating. If it smells sour or looks slimy, it’s best to throw it away. Always trust your senses to keep your meals safe. The best pasta for garlic butter sauce is spaghetti or linguine. Both types hold the sauce well. Their long strands catch the garlic butter, making each bite tasty. If you prefer a different shape, you can try fettuccine or even penne. Choose what you love most! Yes, you can make garlic butter pasta without cheese. Leave out the Parmesan to keep it dairy-free. The dish will still taste great with just garlic, butter, and lemon. If you want a different flavor, try adding nuts like pine nuts or walnuts for a crunchy twist. To make garlic butter pasta spicier, add more red pepper flakes. Start with a teaspoon and taste as you go. You can also include chopped fresh chili or even hot sauce. Adjust the spice to your liking for the perfect kick! Many sides pair well with garlic butter pasta. A fresh green salad adds crunch and balance. Garlic bread or crusty bread is great for mopping up sauce. Roasted or sautéed vegetables, like broccoli or asparagus, can also enhance your meal. Absolutely! Adding vegetables is a great way to boost nutrition. You can toss in spinach, cherry tomatoes, or zucchini. Saute them with the garlic for added flavor. This makes the dish colorful and even more delicious! This blog post highlighted simple ingredients and easy steps for making garlic butter pasta. You learned how to cook pasta, prepare the sauce, and serve it with flair. I shared tips to enhance flavors and variations for different diets. With storage advice, your leftovers will stay fresh. Remember, garlic butter pasta is versatile and fun to make. I hope you feel inspired to create your own delicious dishes. Enjoy experimenting with this recipe!

Garlic Butter Pasta Easy and Flavorful Delight

- 1 lb ground beef (85% lean) - 1 medium onion, diced - 2 cloves garlic, minced - 1 bell pepper (red or green), diced - 1 can (15 oz) kidney beans, drained and rinsed - 1 can (15 oz) black beans, drained and rinsed - 1 can (14 oz) diced tomatoes with green chilies - 2 tablespoons tomato paste - 1 cup beef broth - 2 tablespoons chili powder - 1 tablespoon ground cumin - 1 teaspoon paprika - 1 teaspoon oregano - 1/2 teaspoon cayenne pepper (adjust to taste) - Salt and pepper to taste - Shredded cheese - Sour cream - Sliced jalapeños - Chopped cilantro The right mix of ingredients makes this chili great. Ground beef gives it a nice, meaty texture. I like using 85% lean beef for the best flavor and less grease. Fresh vegetables like onion, garlic, and bell pepper add a sweet taste and crunch. The canned beans and tomatoes bring in depth and body. Spices are the secret to a bold flavor. Chili powder gives heat, while cumin adds a warm, earthy taste. Paprika and oregano add layers of flavor, and cayenne pepper can spice things up. Adjust it to fit your taste. Don’t forget the toppings! Shredded cheese melts and adds creaminess. Sour cream cools the heat. Jalapeños give an extra kick, and cilantro adds freshness. These little details make your chili shine. {{ingredient_image_1}} First, heat one tablespoon of olive oil in a large pot over medium heat. Add one medium onion, diced, and one diced bell pepper. Sauté for 5-7 minutes until they soften. Next, add two minced garlic cloves and cook for one more minute. This step builds the base flavor of your chili. Now, add one pound of ground beef to the pot. Cook it, breaking it apart with a spoon, until it turns brown. This should take about 7-10 minutes. If there’s too much fat, drain what you don’t need. Browning the beef adds richness to the chili. Mix in two tablespoons of tomato paste, along with the spices. Add two tablespoons of chili powder, one tablespoon of cumin, and one teaspoon of paprika. Stir in one teaspoon of oregano and half a teaspoon of cayenne pepper. Season with salt and pepper to taste, then cook for 2-3 minutes. This lets the spices bloom and enhances the flavor. Now, add one can of diced tomatoes, kidney beans, black beans, and one cup of beef broth. Stir well to combine all the ingredients. Bring the mixture to a boil over high heat. Once boiling, reduce the heat to low and cover the pot. Let it simmer for at least 30 minutes. For richer flavor, let it simmer for up to an hour. Stir occasionally to prevent sticking. Taste and adjust the seasoning if needed. Add more salt, pepper, or cayenne for extra heat. This step is crucial for developing deep flavors in your chili. For great flavor and texture, use ground beef with 15% fat. This mix gives a juicy taste. If you want, you can also use ground turkey or chicken. These lean options work well, too. To boost the taste, add a dash of smoked paprika or a sprinkle of cayenne. These spices can wake up your chili. Simmering for at least 30 minutes is key. The longer it simmers, the richer the flavor. Serve your chili with cornbread or tortilla chips for crunch. You can also add toppings like cheese, sour cream, or sliced jalapeños. Fresh cilantro adds a nice touch, too. It's all about what you love! Pro Tips Use Fresh Ingredients: Fresh vegetables and spices can significantly enhance the flavor of your chili, making it more vibrant and aromatic. Adjust the Heat: If you prefer a spicier chili, consider adding fresh diced jalapeños or a splash of hot sauce to the mix for an extra kick. Let It Rest: For even better flavor, allow your chili to rest for a few hours or overnight in the fridge. Reheat before serving to let the flavors meld together. Experiment with Toppings: Don't be afraid to get creative with toppings! Avocado, lime wedges, or even crushed tortilla chips can add unique textures and flavors. {{image_2}} You can switch up the meat in your chili. Ground turkey or chicken works well. These options are leaner but still tasty. If you want a vegetarian version, try using lentils or chickpeas. These will add protein and fiber without meat. Want your chili mild or hot? You can easily change the spice level. For mild chili, use less cayenne pepper. Start with just a pinch and taste as you go. If you like heat, add more cayenne or even some diced jalapeños. Adjust until it’s just right for you. To make a meat-free chili, replace the ground beef with a mix of beans. Use kidney beans, black beans, and some lentils for texture. You can also add more veggies, like zucchini or corn. This will give your chili great flavor and substance without the meat. To store your chili, let it cool down first. This helps keep it fresh. Use a clean, airtight container. Pour the chili into the container, leaving some space at the top. This allows for expansion when the chili freezes. Seal the container tightly. Place it in the fridge. Your chili stays good for up to four days. Always reheat only what you plan to eat. Freezing your chili is simple and keeps it tasty. Start by letting it cool completely. Use freezer-safe containers or zip-top bags. If using bags, squeeze out the air before sealing. Label the bags with the date. You can freeze chili for up to three months. When you're ready to eat, thaw it overnight in the fridge. Reheat it in a pot over low heat. Stir occasionally until hot. You can also use the microwave for quick reheating. For the best flavor, eat your refrigerated chili within four days. If frozen, try to use it within three months. After this time, the taste may fade. Always check for off smells or changes in color before eating. Enjoy your chili while it's fresh for the best experience! To thicken your chili, try these simple tips: - Add more beans: Use extra kidney or black beans. - Mash some beans: Take a few beans and mash them with a fork. - Use cornmeal: Stir in a tablespoon of cornmeal. - Simmer longer: Let it cook uncovered to reduce liquid. These methods help you reach your desired thickness. Always taste and adjust as you go. Yes, you can make chili in advance. Here are some benefits: - Better flavor: Chili tastes even better the next day. - Easy meal prep: Prepare it ahead for busy days. - Convenient storage: You can refrigerate or freeze it. Making chili in advance saves time and keeps your week stress-free. Chili pairs well with many sides. Here are some great options: - Cornbread: Soft and sweet, it’s a classic choice. - Rice: Serve it over steamed white or brown rice. - Tortilla chips: Crunchy chips add texture and fun. - Salad: A fresh side salad balances the meal. These sides enhance your chili experience and make it more enjoyable. This blog post covered how to make a great chili. We started with key ingredients like ground beef and vegetables. Then, we shared simple steps for cooking and flavoring. Tips helped enhance your dish, while variations offered options for different tastes. Finally, we addressed storage and answered common questions. Chili is flexible and fun. You can always adjust it to fit your tastes. Now, it’s time to cook and enjoy your delicious creation!

Best Ground Beef Chili Flavorful and Hearty Recipe

PREV 1 … 53 54 55 56 NEXT
go kitchen now

explore

DessertsDinnerAppetizersDrinks

Our Policies

  • Cookie Policy
  • Copyright Policy
  • Disclaimer
  • GDPR Policy
  • Terms Of Use
Back to Top
  • About
  • Contact Us
  • Privacy Policy
© 2025 go kitchen now