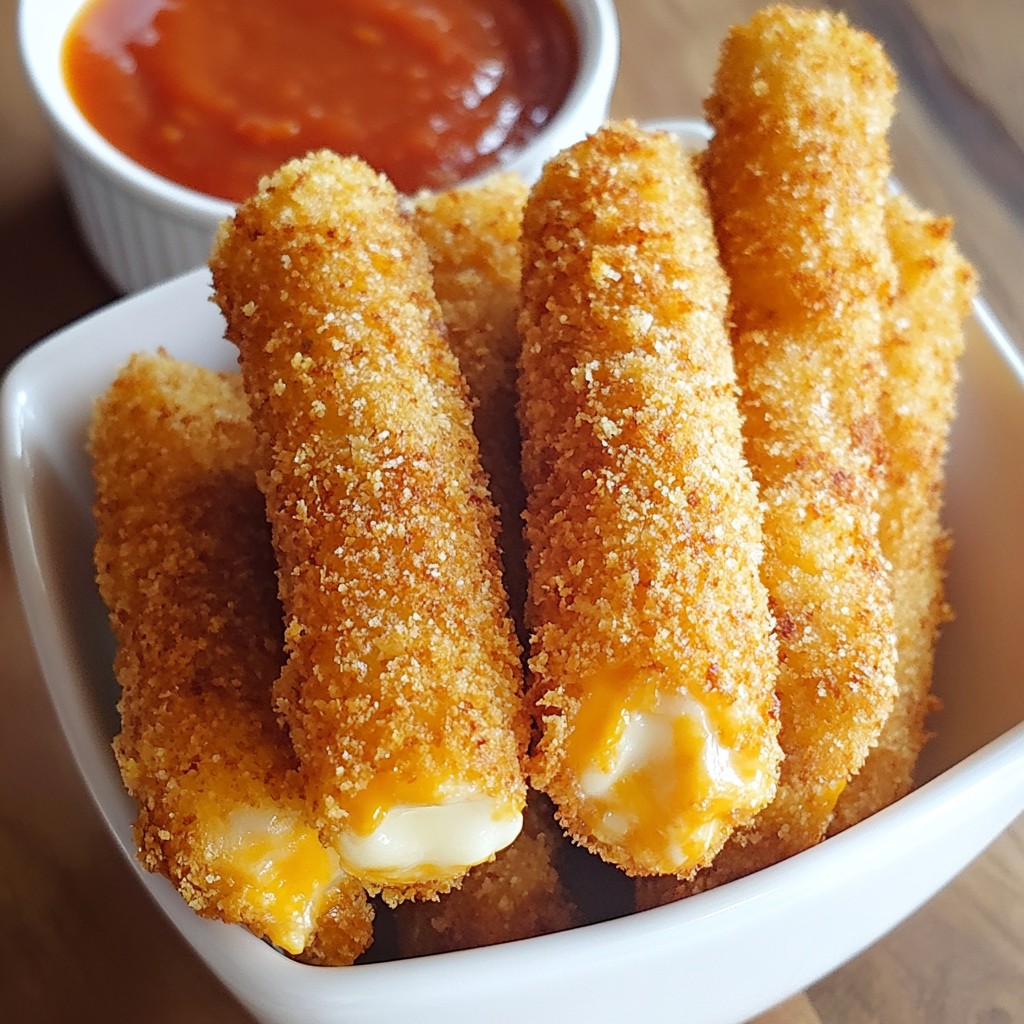
Looking for a fun snack that’s easy to make? Baked ham and cheese sticks are the perfect treat! With just a few simple ingredients like deli ham and string cheese, you can create a crunchy delight that everyone will love. Whether you’re feeding the kids after school or prepping for a party, these crispy bites will be a hit. Let’s dive into how you can whip up this tasty recipe in no time!
Why I Love This Recipe
- Easy to Make: This recipe requires minimal ingredients and simple steps, making it perfect for a quick snack or appetizer.
- Cheesy Goodness: The combination of ham and melted cheese creates a deliciously savory flavor that’s hard to resist.
- Crispy Texture: Using panko breadcrumbs gives these sticks a delightful crunch, elevating the eating experience.
- Perfect for Sharing: These cheesy ham sticks are great for parties or gatherings, making them a hit among friends and family.
Ingredients
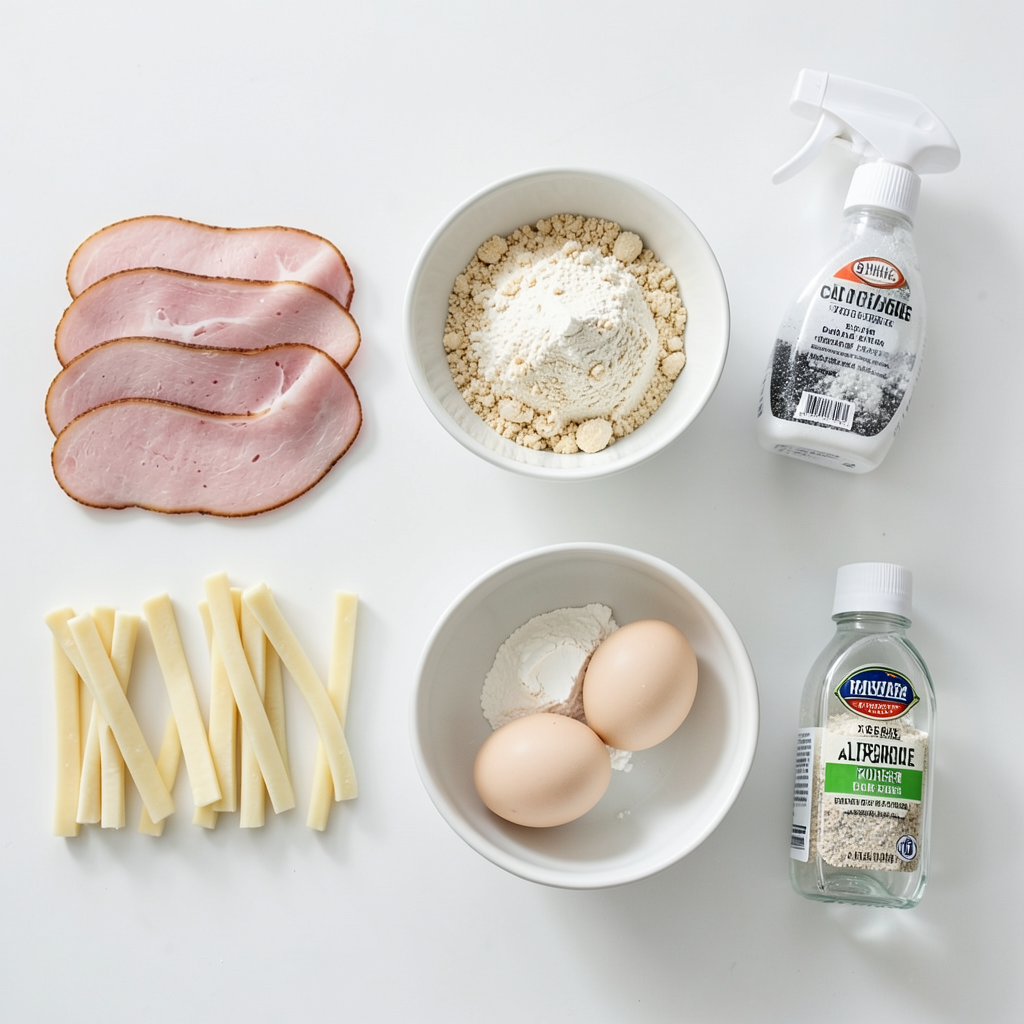
List of Necessary Ingredients
- 8 slices of deli ham
- 8 string cheese or mozzarella sticks
- 1 cup of breadcrumbs (preferably panko for extra crunch)
- 1/2 cup of all-purpose flour
- 2 large eggs, beaten
- 1 teaspoon garlic powder
- 1 teaspoon onion powder
- Salt and pepper to taste
- Cooking spray or olive oil for baking
These ingredients come together for a tasty treat. The deli ham wraps around the cheese, making every bite a delight. Using string cheese or mozzarella sticks gives a nice melt. I recommend panko breadcrumbs for that perfect crunch. The egg and flour help the coating stick well. The garlic and onion powders add a nice twist. Don't forget the salt and pepper to bring out those flavors!
Before you start, gather everything to make the process smooth. Having your ingredients ready will help you move fast. This way, you’ll have warm, cheesy goodness in no time!
Step-by-Step Instructions
Preparation Steps
First, we need to get ready. Preheat your oven to 400°F (200°C). This step is key for even cooking. Next, line a baking sheet with parchment paper. This helps keep the sticks from sticking.
Now it’s time to mix the breadcrumb coating. In a shallow dish, combine 1 cup of breadcrumbs with 1 teaspoon of garlic powder, 1 teaspoon of onion powder, salt, and pepper. This blend adds great flavor.
Wrapping the Cheese
Now, let's wrap the cheese. Take a slice of deli ham and put a cheese stick at one end. Roll the ham around the cheese stick tightly. Make sure it’s snug. This keeps the cheese inside while baking.
Breading Process
Let’s move on to coating. First, put 1/2 cup of all-purpose flour in a shallow dish. Dip the ham-wrapped cheese stick into the flour, covering it fully. Next, dip it into 2 beaten eggs. Let any extra egg drip off. Finally, roll the stick in the breadcrumb mix. Press gently to make sure it sticks well.
Baking the Sticks
With all the sticks coated, it’s time to bake. Place them on your lined baking sheet. Lightly spray the sticks with cooking spray or drizzle them with olive oil. This helps them crisp up nicely. Bake in the oven for 15-20 minutes. They should turn golden brown and the cheese should melt. Once baked, allow them to cool slightly before serving. Enjoy these crunchy treats fresh from the oven!
Tips & Tricks
Achieving the Perfect Texture
To get that nice crunch, I always use panko breadcrumbs. They add a light, crispy layer that makes each bite so satisfying. Regular breadcrumbs can work, but they won't give you the same crispiness. The panko's airy texture helps the sticks cook evenly and become golden brown. So, if you want the best results, go for panko!
Serving Suggestions
These baked ham and cheese sticks look great on the table. You can serve them in a tall glass or stand them upright on a plate. This makes it easy for guests to grab one. I love to garnish with fresh parsley for a pop of color. It makes the dish look even more appealing!
Dipping Sauce Recommendations
Dipping sauces can really enhance the flavor. I recommend marinara sauce for a classic touch. Its tangy flavor pairs well with the salty ham and creamy cheese. If you want something different, ranch dressing adds a nice creaminess. You can even try a spicy aioli if you like a kick!
Pro Tips
- Use Fresh Ingredients: Always opt for fresh deli ham and quality cheese sticks to enhance the flavor of your Cheesy Ham Delight Sticks.
- Experiment with Cheese: Try different types of cheese like pepper jack or cheddar for a unique twist on flavor.
- Double Dip for Extra Crunch: For an even crunchier coating, dip the sticks a second time in the egg and breadcrumbs before baking.
- Serve with Dipping Sauces: Pair these sticks with a variety of dipping sauces like barbecue, ranch, or spicy mustard for a fun experience.
Variations
Ingredient Swaps
You can mix it up with different cheeses and meats. Try cheddar cheese for a sharper taste. Gouda adds a nice smokiness. If you want a lighter option, use turkey ham instead of deli ham. This swap keeps the dish tasty and cuts calories. You can even use cooked chicken or beef if you prefer. Just make sure whatever you choose wraps well around the cheese.
Seasoning Adjustments
Adding spices can elevate your baked ham and cheese sticks. For a kick, include cayenne pepper or chili powder. If you like herbs, try dried oregano or basil. These spices add depth and new flavors. You can also experiment with paprika for a sweet or smoky touch. Just remember to balance your flavors. A little goes a long way!
Air Fryer Method
Cooking these sticks in an air fryer is quick and easy. Preheat your air fryer to 375°F (190°C). Prepare the sticks just like you would for baking. Place them in a single layer in the air fryer basket. Cook for about 10-12 minutes, checking halfway through. You want them golden and crispy. This method helps cut down on oil while keeping the crunch. Enjoy your air-fried snack with less guilt!
Storage Info
Storing Leftovers
To keep your baked ham and cheese sticks fresh, follow these tips. First, let the sticks cool completely. Next, place them in an airtight container. You can separate layers with parchment paper to avoid sticking. Store them in the fridge for up to three days. If you want to keep them longer, you can freeze them. Wrap each stick in plastic wrap, then place them in a freezer bag. They can last up to two months in the freezer.
Reheating Tips
When you're ready to enjoy leftover baked ham and cheese sticks, reheating them is key. For the best taste, use the oven. Preheat it to 350°F (175°C). Place the sticks on a baking sheet and cover them lightly with foil. Heat for about 10-15 minutes or until warm. This method keeps them crunchy. You can also use a microwave if you're in a hurry. Just heat them for 30 seconds to 1 minute. However, they may not be as crispy. Enjoy your tasty treat!
FAQs
Can I use different types of cheese?
Yes, you can! Experiment with different cheeses for unique flavors. Cheddar or pepper jack adds a nice kick. You can even try gouda for a rich taste. Just make sure the cheese melts well. This way, you’ll still enjoy that gooey texture inside the ham. Mixing cheeses can also create fun flavor combos. So, be creative and find your favorite mix!
What is the best way to freeze these sticks?
To freeze, let the sticks cool first. Place them on a baking sheet in a single layer. This prevents them from sticking together. Freeze for about one to two hours. After that, transfer them to a freezer bag. Make sure to remove as much air as possible. When you're ready to enjoy, thaw them in the fridge overnight. Bake them straight from the freezer for a quick snack!
How long does it take to bake?
Baking these sticks takes about 15 to 20 minutes. Preheat your oven to 400°F (200°C). Check them after 15 minutes. They should be golden brown and the cheese melted. If they need more time, keep an eye on them. You want the perfect crunch without burning. Enjoy the aroma as they bake!
You now know how to make tasty cheese and ham sticks. We covered ingredients, steps, and tips. The baking method gives a crunchy treat you can enjoy. Remember, you can swap cheeses and experiment with flavors. Try serving with dips for added zest. Proper storage helps keep leftovers fresh. With these simple instructions, you can impress your friends and family. Enjoy your cooking journey!