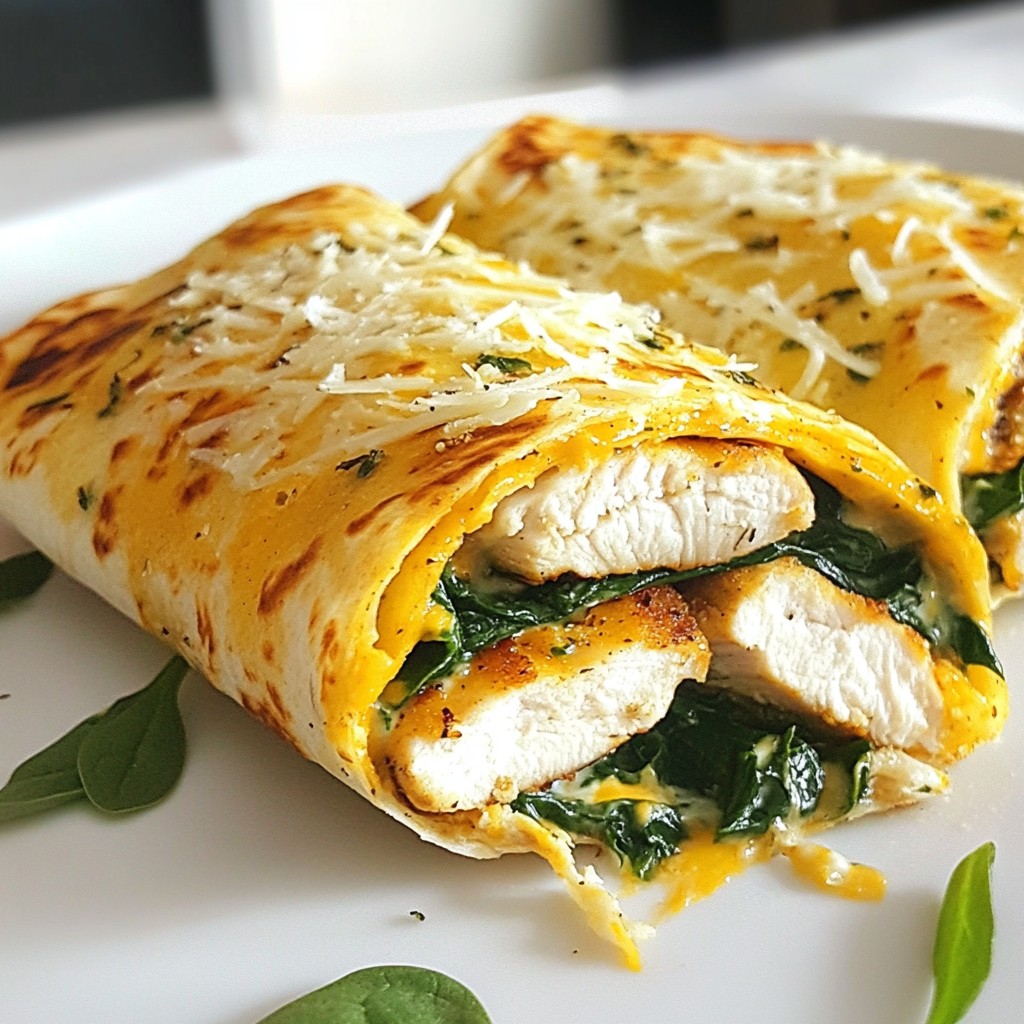
If you love quick and tasty meals, you’ll adore these Cheesy Garlic Chicken Wraps! This easy recipe packs flavor into every bite and is perfect for busy nights. I’ll share the full ingredient list, step-by-step instructions, and tips to elevate your wraps. Plus, I’ve added variations and storage tips to make this dish even more versatile. Ready to impress your family at dinner? Let’s dive in!
Why I Love This Recipe
- Quick and Easy: This recipe comes together in just 30 minutes, making it perfect for busy weeknights.
- Cheesy Goodness: With both mozzarella and Parmesan cheese, these wraps are a cheesy delight that everyone will love.
- Customizable: You can easily add your favorite veggies or spices to make it your own!
- Kid-Friendly: These wraps are sure to be a hit with kids, making it a great family meal option.
Ingredients
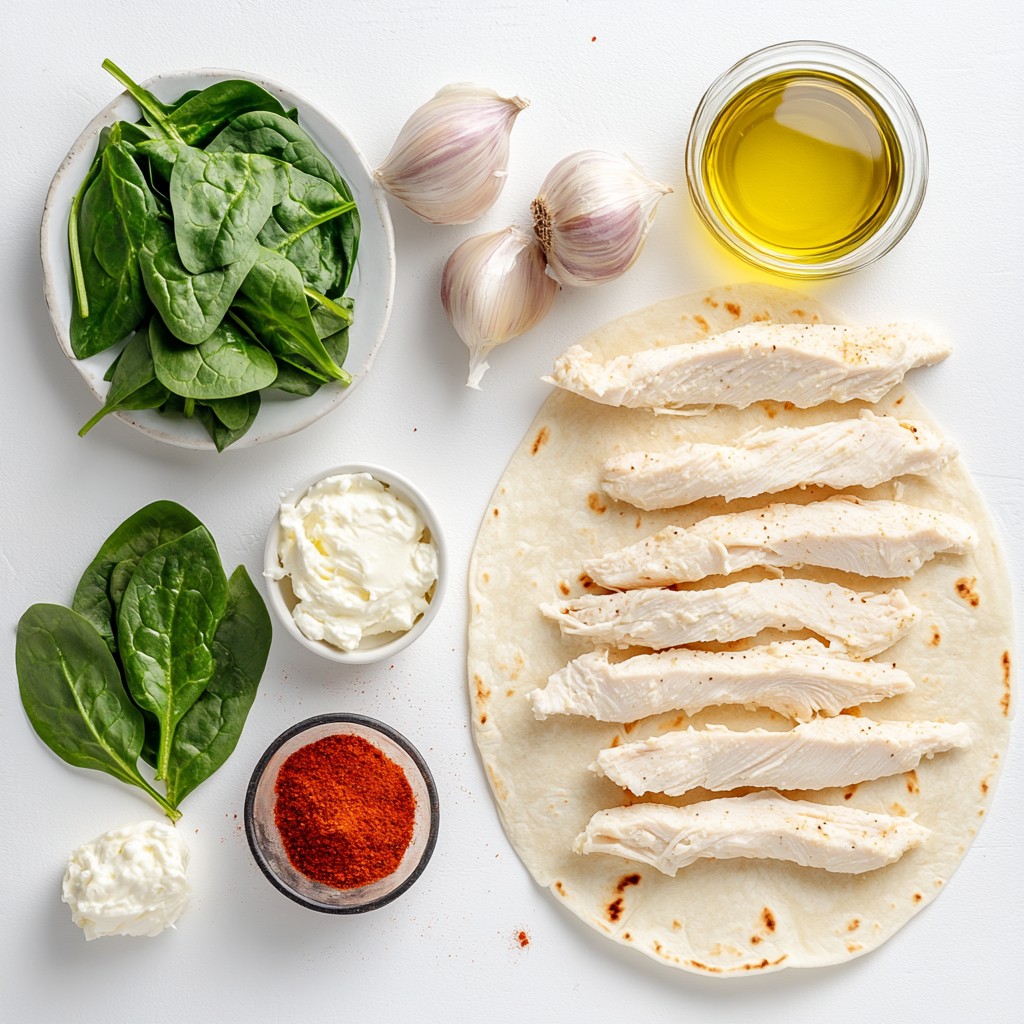
Full Ingredients List
To make Cheesy Garlic Chicken Wraps, gather these ingredients:
- 2 boneless, skinless chicken breasts, sliced into strips
- 1 cup shredded mozzarella cheese
- 1/2 cup cream cheese, softened
- 1 tablespoon garlic powder
- 1 teaspoon paprika
- Salt and pepper to taste
- 1 tablespoon olive oil
- 4 large flour tortillas
- 1 cup fresh spinach leaves
- 1/4 cup grated Parmesan cheese
These ingredients create a creamy, cheesy filling that everyone will love.
Optional Ingredients for Extra Flavor
You can enhance the flavor with these optional ingredients:
- Hot sauce for drizzling
- Chopped fresh herbs like parsley or basil
- Sliced jalapeños for heat
These additions let you customize your wraps to your taste.
Nutritional Information
Here’s a quick look at the nutritional aspects:
- Serving Size: 1 wrap
- Calories: Approximately 350
- Protein: 30g
- Carbohydrates: 30g
- Fat: 15g
This dish offers a balance of protein and carbs, making it a satisfying meal.
Step-by-Step Instructions
Preparation of the Chicken and Sauce
First, gather your ingredients. You need chicken, cream cheese, garlic powder, and spices. Slice the chicken into thin strips. In a bowl, mix the softened cream cheese, garlic powder, paprika, salt, and pepper. Stir well until smooth. This creamy sauce will make the chicken rich and flavorful.
Now, heat olive oil in a skillet over medium heat. Add the chicken strips and cook for 5-7 minutes. Make sure they turn golden brown and are cooked through. Next, lower the heat and add the cream cheese mixture to the skillet. Stir until the chicken is well coated in the creamy sauce and heated through.
Assembling the Wraps
Now it’s time to assemble your wraps. Lay a tortilla flat on a clean surface. Spoon a generous amount of the cheesy chicken mixture down the center of the tortilla. Make sure to leave some space on the edges. Next, add fresh spinach leaves on top of the chicken. This adds a nice crunch and color.
Sprinkle shredded mozzarella and grated Parmesan cheese over the spinach. The cheese will melt and create a gooey texture. Fold in the sides of the tortilla. Then, roll it up tightly from the bottom. This helps keep all the tasty filling inside.
Cooking the Wraps for Crispiness
To get that perfect crispy texture, return the skillet to the heat. Place the wraps seam-side down in the skillet. Cook for 2-3 minutes on each side. You want them to turn golden brown and crispy. Keep an eye on them to avoid burning. Once done, remove the wraps from the skillet and slice them in half. If you like a bit of heat, drizzle some hot sauce on top before serving. Enjoy your tasty creation!
Tips & Tricks
Best Practices for Flavor Enhancement
To make your cheesy garlic chicken wraps burst with flavor, use fresh garlic instead of garlic powder. Fresh garlic gives a stronger and richer taste. You can also add herbs like basil or oregano for more depth. If you love heat, try adding a sprinkle of red pepper flakes. This can really wake up the flavors.
Ensuring Perfectly Cooked Chicken
Cook the chicken over medium heat. This helps keep it juicy. Cut the chicken into thin strips for quick cooking. You should cook it until it’s no longer pink inside. Use a meat thermometer to check the temperature. The chicken should reach 165°F for safety. Always let the chicken rest for a few minutes before mixing it with the sauce. This keeps it tender and flavorful.
Recommended Cooking Equipment
For this recipe, you’ll need a large skillet. A non-stick skillet works best for easy cooking. You should also have a mixing bowl for the sauce. Use a spatula to mix and serve the wraps. A meat thermometer can help ensure your chicken is cooked just right. Lastly, have a sharp knife to slice the wraps after cooking, making them easier to eat.
Pro Tips
- Use Fresh Ingredients: Fresh spinach and high-quality cheese will elevate the flavor of your wraps significantly.
- Customize Your Spice: Adjust the garlic powder and paprika to your taste, or add other spices like cayenne pepper for extra heat.
- Perfectly Crispy Wraps: Make sure your skillet is hot enough before adding the wraps to ensure a golden, crispy exterior.
- Meal Prep Friendly: Prepare the chicken and cream cheese mixture ahead of time and store it in the fridge for quick assembly during busy weeknights.
Variations
Vegetarian Options
You can easily make these wraps vegetarian. Instead of chicken, use grilled veggies. Try bell peppers, zucchini, or mushrooms. Cook them until soft and flavorful. Mix them with the cream cheese and spices. You can also add beans for protein. Black beans or chickpeas work great. This keeps the dish filling and tasty.
Spicy Additions and Modifications
Want some heat? Add jalapeños or crushed red pepper. You can mix these into the cream cheese sauce. If you like a kick, drizzle hot sauce on top. For a smoky flavor, use chipotle powder instead of paprika. This gives the wraps a unique twist. Experiment with your favorite spicy ingredients.
Different Cheese Combinations
Cheese is key in these wraps. While mozzarella is great, you can try others. Pepper jack cheese adds spice. Cheddar cheese brings a sharp flavor. For a creamy touch, use goat cheese or feta. Mix and match cheeses for a unique taste. Each option adds a different layer of flavor to your wraps.
Storage Info
How to Store Leftovers
To keep your cheesy garlic chicken wraps fresh, store them in an airtight container. Make sure the wraps cool down first. They can last in the fridge for up to three days. If you want to keep them longer, freezing is a great option.
Reheating Instructions
When you're ready to eat your leftovers, you can reheat them easily. The best way is to use a skillet. Heat the skillet over medium-low heat. Place the wrap in the skillet and cook for 3-4 minutes on each side. This keeps the wrap crispy. You can also use a microwave, but this may make the wrap soft. Heat for 30 seconds to 1 minute, checking every 30 seconds.
Freezing the Wraps
Freezing is a smart way to save your wraps for later. First, wrap each one tightly in plastic wrap. Then, place them in a freezer-safe bag. They can stay in the freezer for up to two months. When you're ready to eat, thaw in the fridge overnight before reheating.
FAQs
What can I serve with Cheesy Garlic Chicken Wraps?
You can serve these wraps with a fresh salad. A classic Caesar salad pairs well. You might also enjoy a side of crispy fries. For a lighter option, try carrot sticks or cucumber slices. A creamy dip, like ranch or blue cheese, adds great flavor. You could even serve them with salsa or guacamole for a fun twist.
Can I prepare the wraps ahead of time?
Yes, you can make the wraps ahead of time. Prepare the chicken and sauce, then let them cool. Afterward, fill the tortillas and wrap them tightly. Store them in the fridge for up to 24 hours. When ready to eat, just cook them in a skillet until they are warm and crispy.
How do I make these wraps healthier?
To make these wraps healthier, use whole wheat tortillas. You can also add more fresh veggies, like bell peppers or zucchini. Substitute low-fat cream cheese for a lighter option. Instead of frying, try baking the wraps for a crispy texture. Finally, reduce the cheese or use a low-fat version to cut calories.
You learned how to make tasty Cheesy Garlic Chicken Wraps in this article. We covered all the ingredients, cooking steps, and tips to make them special. You can even try fun variations and find out how to store extras. Remember, cooking is about being creative and having fun. Enjoy experimenting with the recipes, and don’t hesitate to share your kitchen results. Happy cooking!