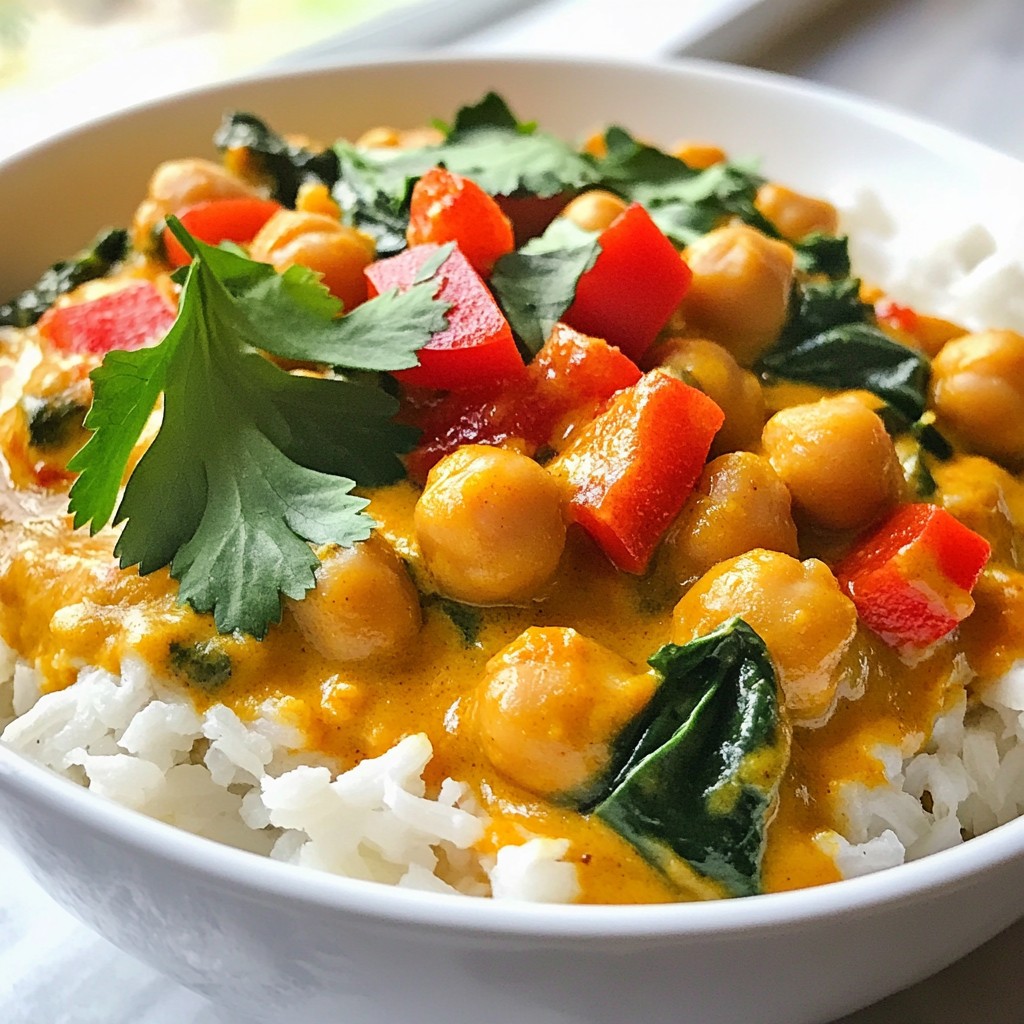
If you're craving a meal that’s both easy and packed with flavor, you’ve come to the right place! Coconut Curry Chickpea Bowls are not only quick to make, but they also blend hearty chickpeas with creamy coconut milk and zesty spices. Whether you're a seasoned cook or a kitchen newbie, this dish promises a satisfying and healthy meal. Let's dive into the ingredients and steps that will make your cooking experience enjoyable and rewarding!
Why I Love This Recipe
- Quick and Easy: This recipe takes only 30 minutes to prepare, making it perfect for busy weeknights.
- Flavorful and Satisfying: The combination of coconut milk and red curry paste creates a rich and satisfying dish that warms you up.
- Nutritious Ingredients: Chickpeas and spinach provide a healthy dose of protein and vitamins, making this bowl both delicious and nourishing.
- Customizable: You can easily adapt this recipe by adding your favorite vegetables or protein for a personal touch.
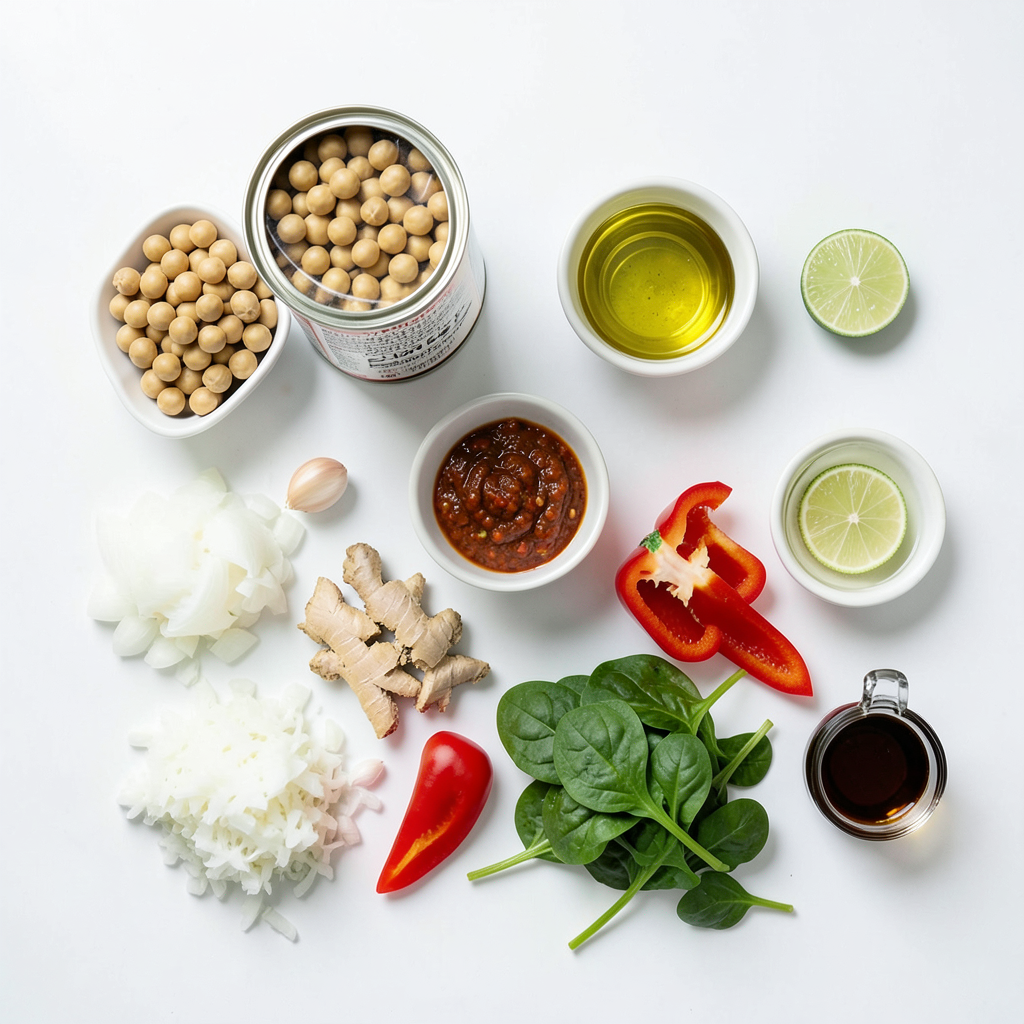
Ingredients
To make tasty coconut curry chickpea bowls, gather these ingredients:
- Chickpeas
- Coconut milk
- Red curry paste
- Olive oil
- Onion
- Garlic
- Ginger
- Red bell pepper
- Spinach
- Soy sauce
- Lime juice
- Rice or quinoa
- Fresh cilantro
- Salt and pepper
These ingredients work well together. Each one brings its own flavor. The chickpeas add protein and texture. Coconut milk gives the dish a creamy base. Red curry paste adds a rich spice. Olive oil helps cook the veggies and adds flavor.
Onion, garlic, and ginger make a great aroma. They form a flavorful base. The red bell pepper adds sweetness and color. Fresh spinach gives a nice green touch and nutrients. Soy sauce and lime juice balance the flavors. Finally, rice or quinoa serves as a hearty base. Fresh cilantro makes a bright garnish.
Using these ingredients will create a warm, comforting meal. You can find many of these items at your local grocery store. Enjoy the process of cooking and savor the delicious results!
Step-by-Step Instructions
Preparation Steps
- Heat the olive oil
Start by adding 1 tablespoon of olive oil to a large skillet. Heat it over medium heat.
- Sauté the onion
Add 1 diced onion to the skillet. Sauté for 3-4 minutes until it turns soft and clear.
- Add garlic and ginger
Next, mix in 2 minced garlic cloves and 1 inch of grated ginger. Cook for 1-2 minutes until you smell their aroma.
- Mix in red curry paste
Stir in 1 tablespoon of red curry paste. Cook for another minute to let the flavors bloom.
- Pour in coconut milk
Now pour 1 can (14 oz) of coconut milk into the skillet. Stir well to combine it with the onion and curry paste.
- Add chickpeas and bell pepper
Add 1 can (15 oz) of drained and rinsed chickpeas and 1 sliced red bell pepper. Bring the mix to a gentle simmer. Cook for 10-15 minutes until the bell pepper is soft.
- Stir in spinach, soy sauce, and lime juice
Toss in 2 cups of fresh spinach, 2 tablespoons of soy sauce, and 1 tablespoon of lime juice. Cook for a few more minutes until the spinach wilts.
- Season and serve
Finally, taste the curry and add salt and pepper as needed. Serve the chickpea curry over cooked rice or quinoa, garnished with fresh cilantro.
This dish is simple and packed with flavor. Each step builds on the last to create a warm and inviting meal. Enjoy!
Tips & Tricks
Enhancing Flavor
- Tips for perfect sautéing: Start with a hot skillet. Add olive oil and let it heat. Then, add the onion. Cook until it turns soft and clear. This brings out the natural sweetness of the onion.
- Adjusting curry spice levels: If you love spice, add more red curry paste. For milder flavor, use less. You can also add a pinch of sugar. This balances the heat and makes the dish more rounded.
- Best practices for seasoning: Always taste your dish as you cook. Add salt and pepper little by little. This helps you find the right balance. Lime juice adds fresh flavor and brightness, so don't skip it!
Cooking Techniques
- How to achieve the right consistency: When you add coconut milk, stir well. The mixture should be creamy but not too thick. If it gets thick, add a splash of water or broth to loosen it.
- Techniques for perfecting chickpeas: Use canned chickpeas for ease. Rinse them well to remove excess salt. This keeps the dish from becoming too salty. If you want a firmer bite, cook them a bit less.
- Cooking rice or quinoa tips: If cooking rice, use a 2:1 water-to-rice ratio. For quinoa, use a 2:1 water-to-quinoa ratio. Rinse quinoa before cooking to remove bitterness. This makes it taste better! Let your grains sit covered for a few minutes after cooking. This helps them fluff up nicely.
Pro Tips
- Use Full-Fat Coconut Milk: For a richer and creamier curry, opt for full-fat coconut milk instead of light versions.
- Add More Vegetables: Feel free to incorporate other vegetables like zucchini or carrots for added nutrition and texture.
- Spice Level Adjustments: If you prefer a spicier dish, add more red curry paste or some chili flakes to the mix.
- Fresh Herbs for Garnish: Besides cilantro, try garnishing with fresh basil or mint for a refreshing twist.
Variations
Ingredient Substitutions
You can switch chickpeas for other proteins. Tofu or lentils work well. They absorb flavor nicely. You can also mix in different veggies. Try carrots, zucchini, or broccoli for a new twist. If you want a lighter dish, use low-fat coconut milk. It cuts calories but keeps the creamy taste.
Dietary Modifications
This recipe is vegan and gluten-free as is. For nut allergies, check your soy sauce. Use a nut-free brand if needed. If you're cooking for kids, you can lower the spice. Start with less red curry paste. You can add more as needed for adults.
Storage Info
Refrigeration Guidelines
To store leftovers, let the dish cool first. Place it in an airtight container. You can keep it in the fridge for up to three days. Make sure to label it with the date for easy tracking.
Recommended storage containers include glass containers or BPA-free plastic ones. These keep the flavors fresh and allow for easy reheating.
Freezing Instructions
You can freeze portions of this dish for later. Use freezer-safe containers or bags. Divide the curry into single servings for easy use. It can last in the freezer for about three months.
When you're ready to eat, thaw the curry overnight in the fridge. Reheat it on the stove over low heat. Stir it often to help maintain the creamy texture. You can also add a splash of coconut milk if it seems too thick.
FAQs
Can I make this dish ahead of time?
Yes, you can prepare this dish ahead of time. Make it up to two days in advance. Store it in the fridge in an airtight container. When you're ready to eat, just reheat it on the stove or in the microwave. The flavors will blend nicely overnight.
How can I add more protein?
To boost the protein in this dish, consider adding cooked chicken, shrimp, or tofu. You can also mix in lentils or edamame. These options will add texture and flavor while making your meal more filling.
What sides pair well with coconut curry chickpeas?
Coconut curry chickpeas go well with rice or quinoa as a base. You can also serve them with a crisp salad or steamed veggies. Naan or pita bread makes a great side too. These options help soak up the delicious sauce.
Is it possible to make this recipe spicy?
Absolutely! To add heat, use more red curry paste or add chili flakes. You can also slice fresh chili peppers into the dish while cooking. Adjust the spice level based on your taste. Start with a little and add more as needed.
Can I use canned coconut milk or cream?
Yes, using canned coconut milk works perfectly. It adds richness and creaminess to the dish. Coconut cream is also an option if you want a thicker sauce. Just remember to stir it well before adding it to the skillet.
This blog post covered a delicious coconut curry chickpea recipe. You learned about the key ingredients, step-by-step cooking, and tips for great flavor. I shared ways to adapt the dish for different diets and preferences. Storing and reheating tips ensure you enjoy leftovers too.
You can easily make this dish your own. Experiment with flavors and ingredients. Enjoy the cooking process and the tasty results! Happy cooking!