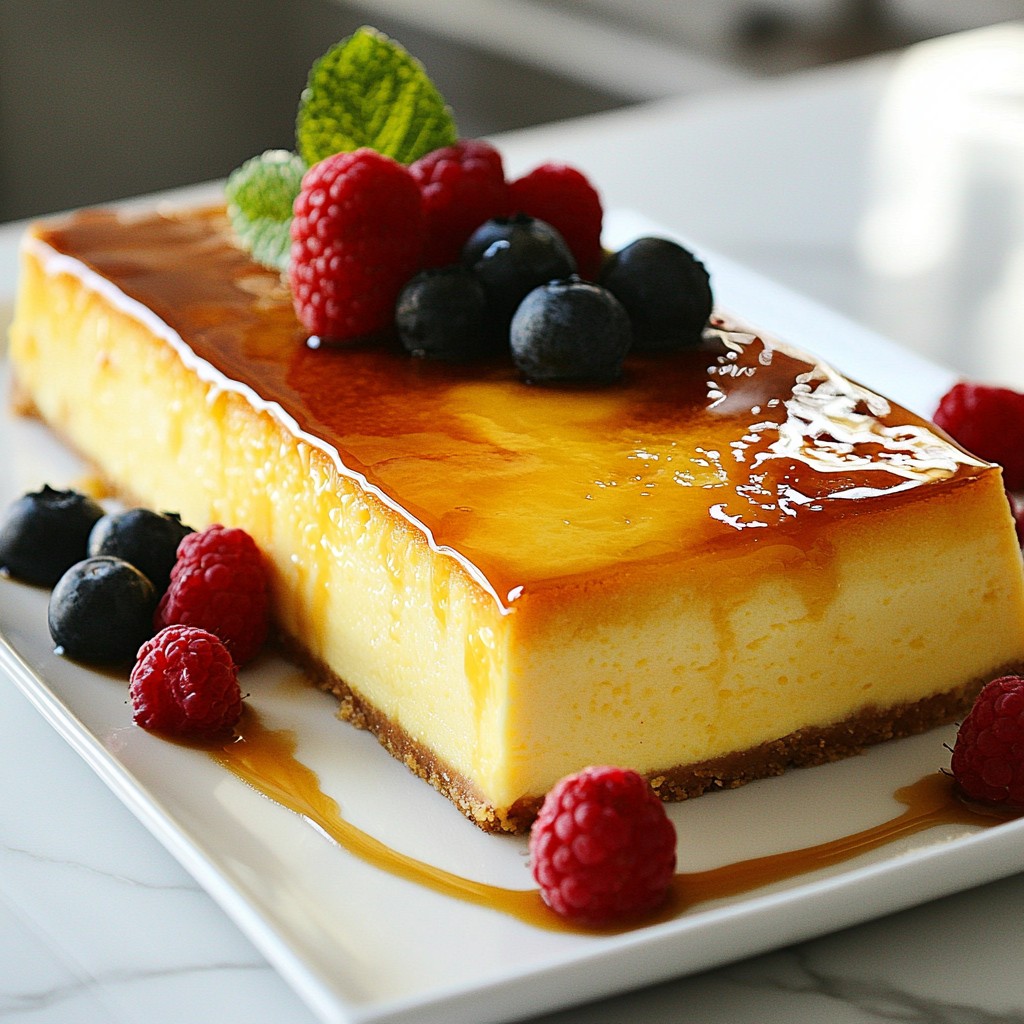
Are you ready to impress with a stunning loaf pan burnt Basque cheesecake? This rich, creamy delight is a showstopper that will leave your guests asking for seconds. With just a few simple ingredients like cream cheese, sugar, and eggs, you’ll create a dessert that strikes a perfect balance between sweet and savory. Let’s dive into this easy recipe that guarantees a delicious treat every time!
Why I Love This Recipe
- Rich and Creamy Texture: This cheesecake has a wonderfully smooth and creamy consistency that melts in your mouth.
- Unique Flavor Profile: The burnt top adds a delightful caramelized flavor that perfectly complements the rich creaminess.
- Simple Ingredients: Made with easy-to-find ingredients, this recipe is accessible for bakers of all skill levels.
- Impressive Presentation: The rustic look of the burnt top makes it a stunning centerpiece for any dessert table.
Ingredients
Main Ingredients
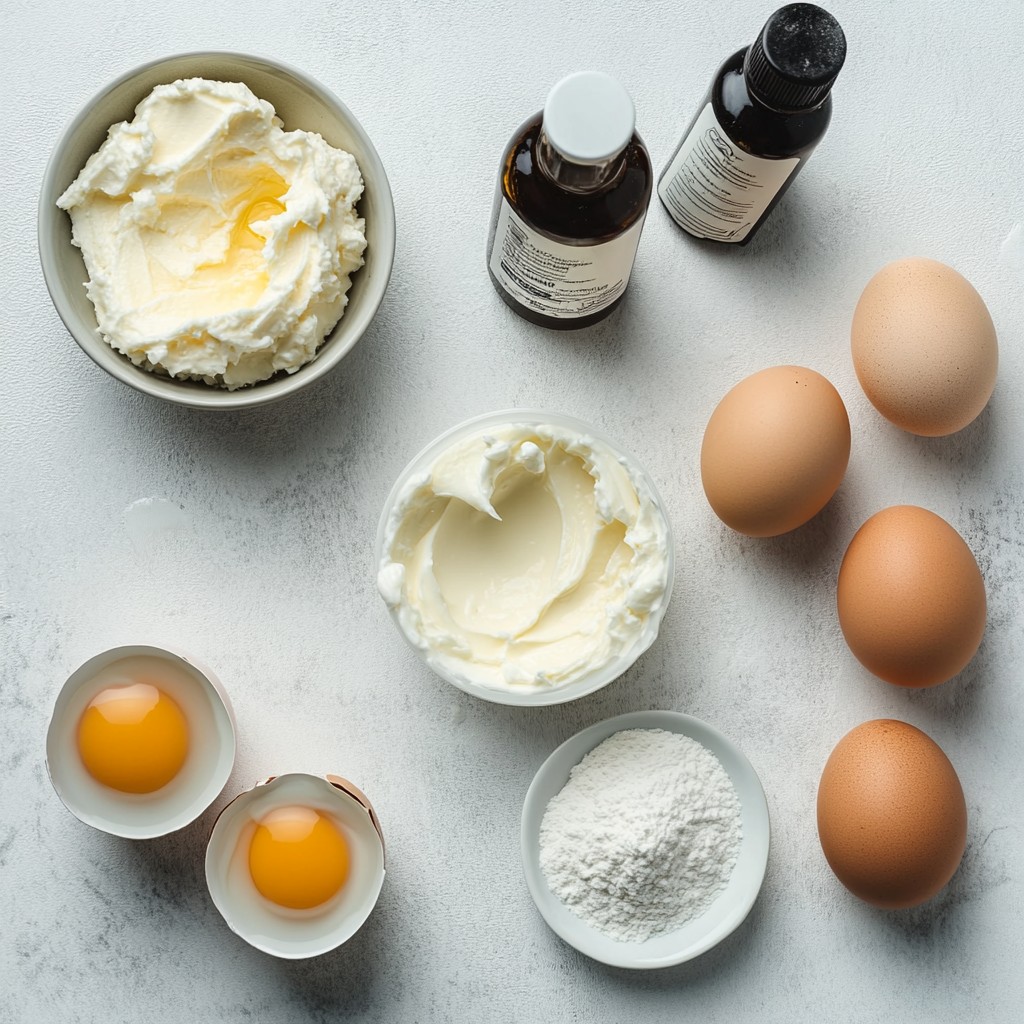
- 2 cups cream cheese, softened
- 1 cup granulated sugar
- 4 large eggs
- 1 cup heavy cream
Additional Ingredients
- 1 teaspoon vanilla extract
- 1/4 cup all-purpose flour
- 1/4 teaspoon salt
Measurements and Substitutions
For this recipe, you need precise measurements. Here are the recommended amounts:
- Cream cheese: 2 cups helps create a rich texture.
- Granulated sugar: 1 cup balances the cream cheese's tang.
- Eggs: 4 large eggs bind the ingredients well.
- Heavy cream: 1 cup adds richness and flavor.
You can make some substitutions:
- For cream cheese, use mascarpone for a different taste.
- Swap granulated sugar with brown sugar for a deeper flavor.
- Use egg substitutes for a vegan version, like flax eggs.
- Replace heavy cream with coconut cream for a dairy-free option.
Each ingredient plays a key role in crafting the perfect loaf pan burnt Basque cheesecake. The cream cheese gives it that creamy base, while the heavy cream adds richness. The sugar balances the flavors, and eggs provide structure. Each element works together to create a dessert that is smooth and delicious.
Step-by-Step Instructions
Preparation Steps
1. Preheat your oven to 400°F (200°C). This high heat gets that lovely burnt top.
2. Line a 9 x 5-inch loaf pan with parchment paper. Let the paper hang over the edges. This helps you lift the cheesecake out later.
Mixing the Batter
1. In a large bowl, beat 2 cups of softened cream cheese with 1 cup of granulated sugar. Mix until smooth, about 2-3 minutes.
2. Add 4 large eggs, one at a time. Mix well after each egg. Scrape down the bowl as needed.
3. Pour in 1 cup of heavy cream and 1 teaspoon of vanilla extract. Mix until everything is combined.
4. Sift in 1/4 cup of all-purpose flour and add 1/4 teaspoon of salt. Gently mix until smooth. Be careful not to overmix!
Baking and Cooling
1. Pour the cheesecake mixture into the prepared loaf pan. Smooth the top with a spatula.
2. Bake in the preheated oven for 50-60 minutes. Look for a golden brown top and edges that are set. The center should still wobble a bit.
3. Remove the cheesecake from the oven. Let it cool in the pan for at least 30 minutes at room temperature. Then, refrigerate for at least 4 hours or overnight for the best texture.
4. Carefully lift the cheesecake out of the loaf pan using the parchment paper. Slice with a hot knife for clean edges. Serve it chilled.
Tips & Tricks
Baking Tips
- Achieving the perfect burnt top: To get that stunning burnt top, bake the cheesecake at 400°F (200°C). This high heat cooks the top quickly, giving it a beautiful brown color. Keep an eye on it, as every oven is different. You want it dark and crispy, but not blackened.
- Oven temperature considerations: Always preheat your oven. A hot oven helps the cheesecake rise and set properly. If your oven runs cool, the cheesecake might not develop that lovely burnt crust. Use an oven thermometer if you're unsure.
Mixing Tips
- Preventing overmixing: When mixing the batter, stop as soon as you see no lumps. Overmixing can add air, which leads to cracks in your cheesecake. Just a few gentle stirs after adding the flour will keep it smooth.
- Ensuring a smooth batter: Make sure your cream cheese is softened well. This will help it blend easily with the sugar. Mix for just 2-3 minutes until creamy. Scrape the bowl sides often to ensure even mixing.
Slicing Suggestions
- Tools for clean slices: Use a hot knife for slicing. Dip your knife in hot water, wipe it clean, and slice through the cheesecake. This will give you nice, clean edges for each piece.
- Serving temperature for optimal taste: Serve the cheesecake chilled. A cold slice brings out the creamy texture and rich flavor. Let it sit for a few minutes at room temperature before serving for the best taste.
Pro Tips
- Use Room Temperature Ingredients: Ensuring that all your ingredients, especially cream cheese and eggs, are at room temperature will help achieve a smooth batter and prevent lumps.
- Don’t Overmix: Once you add the flour, mix just until combined. Overmixing can lead to a denser cheesecake, which is not the desired texture for a Basque cheesecake.
- Cool Gradually: Allow the cheesecake to cool in the pan before refrigerating. This gradual cooling helps it set properly and avoids cracking.
- Perfect Slicing: For clean slices, dip your knife in hot water and wipe it dry before cutting. This technique will help maintain the beautiful, creamy edges of each slice.
Variations
Flavor Variations
You can change the taste of your burnt Basque cheesecake with simple tweaks. Adding citrus zest brings a fresh pop to the rich cream. Just a teaspoon of lemon or orange zest can brighten the flavors. You can also mix in some chocolate or caramel. Melted chocolate gives a rich, deep taste. Caramel adds a sweet and buttery touch. Both options turn your cheesecake into a special treat.
Serving Suggestions
This cheesecake pairs well with fresh fruits or sauces. Berries like strawberries or raspberries add a nice tartness. A drizzle of berry sauce can enhance the flavor even more. Serving it with coffee or tea makes for a perfect dessert. The rich creaminess of the cheesecake balances well with the warmth of the drink.
Dietary Variants
You can make this cheesecake gluten-free. Just swap all-purpose flour for a gluten-free blend. This keeps the texture nice while making it safe for those with gluten issues. If you want a dairy-free option, use vegan cream cheese and coconut cream. These swaps make the cheesecake creamy and delicious without dairy.
Storage Info
Storing the Cheesecake
To keep your loaf pan burnt Basque cheesecake fresh, store it in the fridge. Use an airtight container or cover it tightly with plastic wrap. This helps prevent it from drying out. You can keep it in the fridge for up to five days. After that, it may lose flavor and texture.
Reheating Tips
If you have leftover cheesecake, you can gently reheat it. Preheat your oven to 300°F (150°C). Place the cheesecake in the oven for about 10 minutes. This warms it up without drying it out. Serve it with fresh berries or a drizzle of chocolate for added flavor.
Freezing the Cheesecake
You can freeze the cheesecake if you want to keep it longer. First, let it cool completely. Wrap it tightly in plastic wrap and then in aluminum foil. This keeps it safe from freezer burn. You can freeze it for up to three months. When you’re ready to eat, move it to the fridge to thaw overnight. Enjoy it chilled for the best taste.
FAQs
What makes Basque cheesecake different?
Basque cheesecake stands out because of its burnt top. This burnt crust gives it a rich, caramel flavor and a unique look. The inside is creamy and smooth, contrasting with the crust. The cheesecake is baked at a high temperature, which creates this special texture. It is less sweet than other cheesecakes, allowing the cheese flavor to shine. The combination of burnt top and creamy center makes it a delight for the senses.
Can I use a different pan?
Yes, you can use other pans to make this cheesecake. A round cake pan works well if you do not have a loaf pan. Just adjust the baking time since different pans can affect how it cooks. A springform pan is also a great option. If using another pan, remember to line it with parchment paper for easy removal. However, the loaf pan gives the cheesecake its classic shape and style.
How long does leftover cheesecake last?
Leftover cheesecake can last in the fridge for up to five days. Make sure to wrap it well or store it in an airtight container. This helps keep the cheesecake fresh and tasty. If you want to keep it longer, you can freeze it. When frozen, the cheesecake stays good for about two months. Just let it thaw in the fridge before serving for the best taste and texture.
In this post, we explored how to make a delicious Basque cheesecake. We discussed the key ingredients, from cream cheese to eggs, and important measurement tips. You learned step-by-step instructions for mixing and baking, plus helpful tips for success. I shared various flavor variations and ways to store or reheat your cheesecake.
Remember, you can customize this dessert to fit your taste. Enjoy your baking journey and savor each bite of your tasty creation!