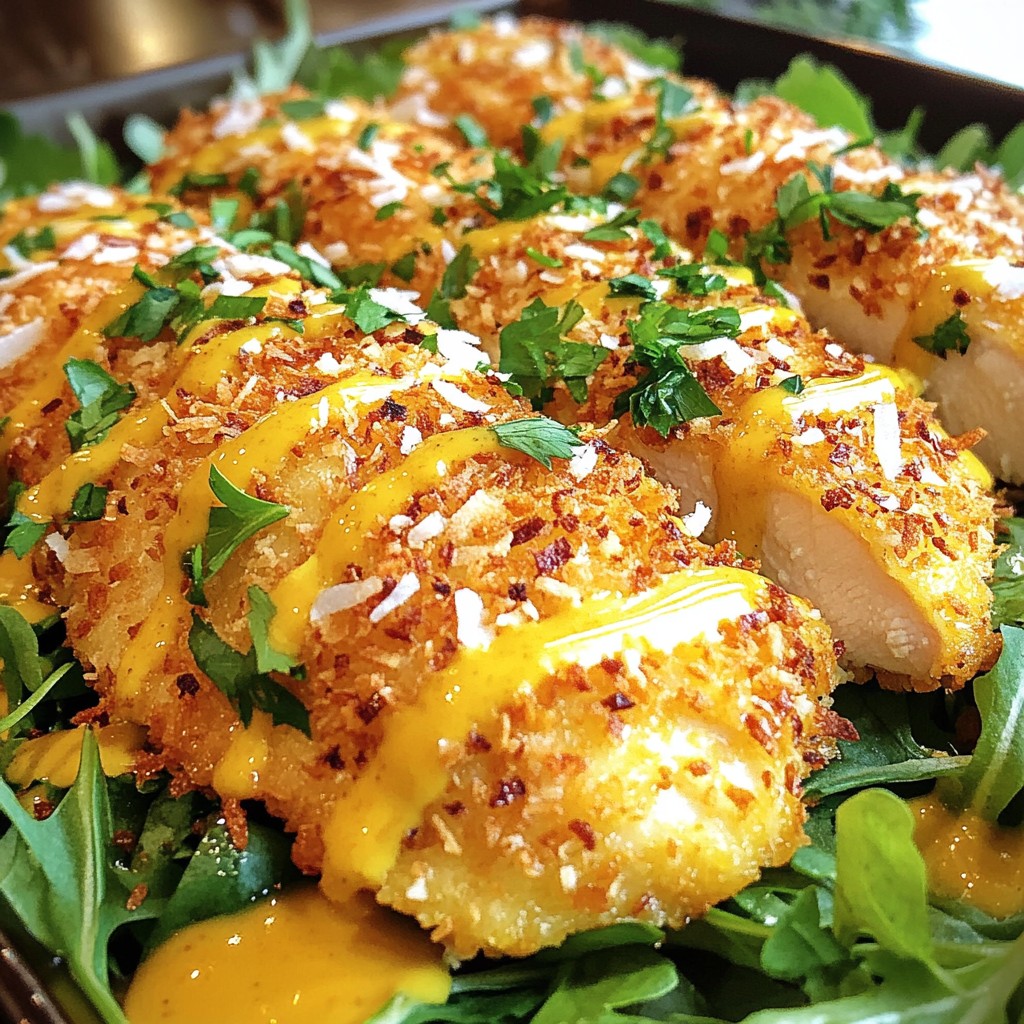
Looking to impress at your next meal? Try my delicious Malibu Chicken with Honey Mustard! This dish is easy to make and bursting with flavor, perfect for any occasion. With chicken breasts coated in coconut and panko, paired with a tangy honey mustard sauce, it's a treat your taste buds will love. Join me as I guide you through the simple steps to create this crowd-pleaser at home!
Why I Love This Recipe
- Tropical Flavor: The combination of coconut and honey mustard brings a sweet and savory taste that transports you to the beach.
- Crispy Texture: The panko breadcrumbs and shredded coconut create a delightful crunch on the outside, making each bite satisfying.
- Easy to Make: This recipe is simple and quick, perfect for busy weeknights or impressing guests without much effort.
- Versatile Dish: Serve it with a salad, rice, or your favorite side dishes for a meal that suits any occasion.
Ingredients
Main Ingredients
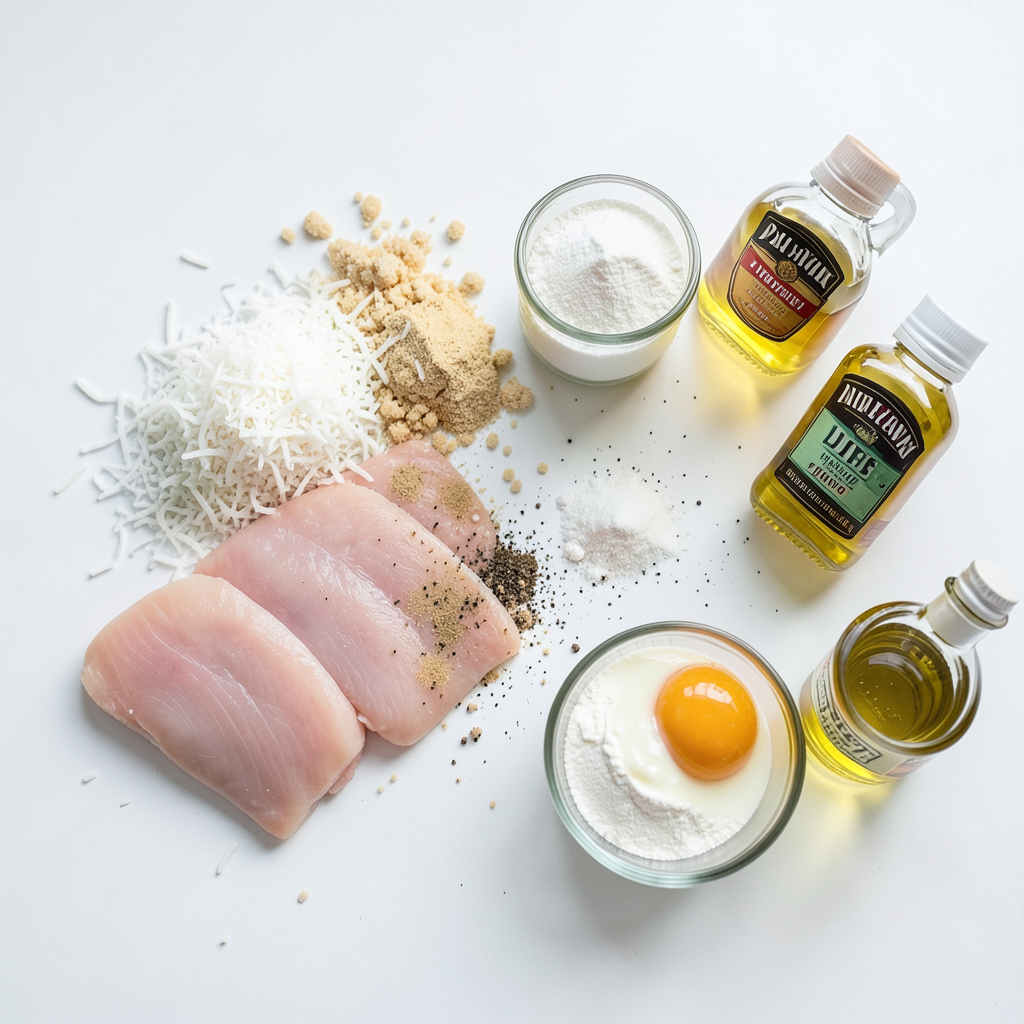
- 4 boneless, skinless chicken breasts
- 1 cup shredded coconut
- 1 cup panko breadcrumbs
- 1/4 cup honey
- 2 tablespoons Dijon mustard
- 1 tablespoon apple cider vinegar
The main parts of Malibu Chicken are chicken, coconut, and panko. These create a nice crunch. The honey mustard sauce adds sweetness and tang. This dish brings together flavors that make each bite tasty.
Seasonings and Coatings
- 1/2 cup flour
- 2 large eggs, beaten
- 1 teaspoon garlic powder
- 1 teaspoon onion powder
- Salt and pepper to taste
For the coating, flour helps the chicken stick. Eggs add moisture and richness. Garlic and onion powder give a nice flavor kick. Salt and pepper balance everything out. This mix makes the chicken even better.
Optional Add-Ons
- Additional spices or herbs
You can spice things up with extra herbs or spices. Try paprika for a smoky taste. Or, add Italian seasoning for a fresh twist. These add-ons let you make this dish your own.
Step-by-Step Instructions
Preparation Steps
1. First, preheat your oven to 375°F (190°C). This helps cook the chicken evenly.
2. Line a baking sheet with parchment paper. This keeps the chicken from sticking.
3. In a shallow dish, mix the flour, garlic powder, onion powder, salt, and pepper. This will be your first coating.
4. In another shallow dish, beat the eggs until smooth. This will help the coating stick.
5. In a third dish, combine the shredded coconut and panko breadcrumbs. This gives a nice crunch to your chicken.
Coating the Chicken
1. Take each chicken breast and dip it into the flour mixture first. Make sure it’s evenly coated.
2. Next, dip the chicken in the beaten eggs. This helps the coconut-panko stick well.
3. Finally, coat the chicken breast with the coconut-panko mixture. Press lightly to ensure it sticks.
4. Place each coated chicken breast on the prepared baking sheet.
Baking Process
1. Drizzle olive oil over the top of each chicken piece. This will help with browning.
2. Bake the chicken in the preheated oven for 25-30 minutes.
3. Check that the chicken turns golden brown and reaches an internal temperature of 165°F (74°C).
4. When done, remove the chicken from the oven and let it rest for a few minutes. This keeps it juicy.
5. Drizzle the honey mustard sauce over the chicken before serving, or serve it on the side for dipping.
Tips & Tricks
Cooking Tips
To get that perfect browning and texture, start with dry chicken. Pat your chicken breasts with a paper towel. This helps the coating stick well. When you coat the chicken, press the coconut and panko mixture firmly. This gives a nice crunch when cooked. Drizzling olive oil on top before baking adds flavor and helps with browning. Bake the chicken until golden brown and cooked through. You want an internal temperature of 165°F (74°C).
Serving Suggestions
Malibu Chicken pairs well with many sides. Try serving it on a bed of mixed greens for freshness. Rice is also a great choice for soaking up the honey mustard. Roasted vegetables add color and nutrition to your plate. You can serve a light salad on the side for extra crunch.
Variations for Cooking Methods
You can bake or fry Malibu Chicken. Baking is easier and healthier. Frying gives the chicken a crispy crust but requires more oil. If you choose to fry, heat oil in a pan. Cook the chicken for about 5-7 minutes on each side. Both methods yield tasty results, so choose what you prefer!
Pro Tips
- Coating Consistency: Ensure the chicken is evenly coated with the flour, egg, and coconut-panko mixture to achieve a crispy texture.
- Resting Time: Allow the chicken to rest for a few minutes after baking to retain its juices and enhance flavor.
- Honey Mustard Variations: Experiment with different mustards or add spices like paprika for a unique twist on the honey mustard sauce.
- Serving Suggestions: Pair the Malibu Chicken with tropical fruits like mango or pineapple for a refreshing contrast to the savory dish.
Storage Info
Storing Leftovers
To keep your Malibu Chicken fresh, place leftovers in an airtight container. Store it in the fridge. It will last for about 3 to 4 days. Make sure to let it cool before sealing the container. This helps avoid moisture buildup. Keep the honey mustard sauce separate to preserve its flavor.
Freezing Options
If you want to save Malibu Chicken for later, freezing is a great choice. First, wrap each piece in plastic wrap. Then, place them in a freezer bag. Remove as much air as you can. This helps prevent freezer burn. You can freeze the chicken for up to 3 months. To reheat, simply thaw it overnight in the fridge. Then, bake it in the oven at 375°F (190°C) until heated through.
Storing Honey Mustard Sauce
For the honey mustard sauce, store it in a sealed jar or container. It can last up to 2 weeks in the fridge. If you want to keep it longer, consider freezing it. Just pour it into ice cube trays. Once frozen, transfer the cubes to a freezer bag. This way, you can use small amounts when needed.
Variations
Flavor Variations
You can spice up Malibu Chicken with fun marinades. Try a lime marinade for a zesty twist. Mix lime juice, garlic, and cilantro for fresh flavor. You can also use a teriyaki sauce for a sweet and savory taste. Just marinate the chicken for at least one hour before coating. This adds depth and keeps the chicken juicy.
Dietary Adjustments
For those on a gluten-free diet, use gluten-free breadcrumbs. Almond flour can also replace regular flour for coating. If you want a low-calorie option, skip the coconut. Instead, use a light dusting of spices on the chicken. This keeps the dish flavorful without added calories.
Southern-style Twists
To give this dish a Southern flair, add spices like paprika and cayenne pepper. You can also serve it with a side of coleslaw or cornbread. This adds a nice crunch and complements the chicken well. Another idea is to make a spicy honey mustard sauce with hot sauce. It gives a kick that pairs perfectly with the chicken.
FAQs
How do you know when the chicken is fully cooked?
To check if the chicken is done, use a meat thermometer. The safe internal temperature is 165°F (74°C). You can also look for clear juices. If the juices run clear when you cut into the chicken, it is ready. The meat should not be pink inside. Properly cooked chicken will feel firm to the touch.
Can Malibu Chicken be made ahead of time?
Yes, you can prepare Malibu Chicken ahead of time. Coat the chicken and store it in the fridge. Keep it in an airtight container for up to 24 hours. You can also bake it ahead and reheat it later. To store leftovers, place them in a container in the fridge. They will stay fresh for about 3 days.
What to serve with Malibu Chicken?
Malibu Chicken pairs well with many sides. Here are some great options:
- Mixed greens: A fresh salad adds crunch and flavor.
- Rice: White or brown rice absorbs the honey mustard sauce well.
- Roasted veggies: Carrots, broccoli, or bell peppers make a colorful plate.
- Potatoes: Mashed, baked, or fried potatoes are always a hit.
Each of these sides complements the chicken's flavors perfectly. Enjoy!
In this blog post, we explored making delicious Malibu Chicken. We covered key ingredients like chicken breasts, coconut, and honey mustard. I shared step-by-step instructions for preparation and baking. You learned tips for perfect texture and serving ideas. We discussed storage methods and flavor variations, offering options for everyone.
With this easy recipe, you can enjoy a tasty meal any day. Try different flavors or cooking methods to make it your own. Happy cooking!