Are you ready to dive into a world of sweet, gooey goodness? In this post, I’ll show you how to make Marshmallow Swirl Fudge that is both decadent and easy to whip up. With just a few simple ingredients and step-by-step guidance, you'll create a treat that’s perfect for any occasion. Say goodbye to complicated recipes and hello to deliciousness—let's get started!
Why I Love This Recipe
- Decadent Flavor: This fudge combines the rich taste of chocolate with the sweet, fluffy texture of marshmallow, making every bite an indulgent treat.
- Easy to Make: With just a few simple ingredients and steps, this recipe is perfect for both novice and experienced bakers alike.
- Customizable: Add your favorite nuts or experiment with different flavorings to make this fudge uniquely yours.
- Perfect for Sharing: Cut into squares, this fudge is an ideal treat to share at parties, holidays, or simply as a delightful gift for friends and family.
Ingredients
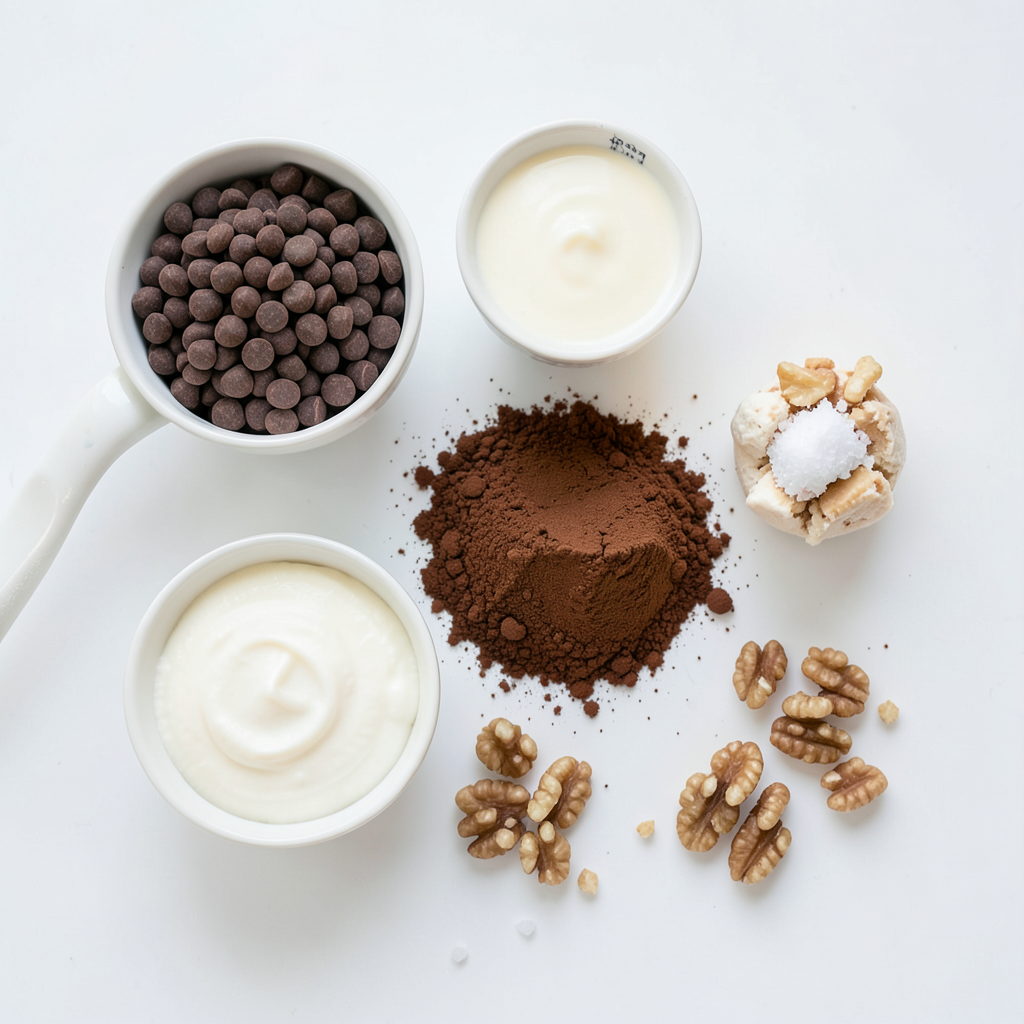
List of Ingredients
- 2 cups semi-sweet chocolate chips
- 1 cup sweetened condensed milk
- 1/2 cup unsweetened cocoa powder
- 1 teaspoon vanilla extract
- 1 cup marshmallow fluff
- 1/2 cup chopped nuts (optional)
- 1/2 teaspoon sea salt
Gathering these ingredients is the first step to making this marshmallow swirl fudge. You will need two cups of semi-sweet chocolate chips. These chocolate chips bring rich flavor and smooth texture to the fudge. Next, grab one cup of sweetened condensed milk. This thick milk helps bind the fudge and adds sweetness.
You will also need half a cup of unsweetened cocoa powder. This gives the fudge a deep chocolate taste. Don't forget one teaspoon of vanilla extract for that warm, inviting flavor. The marshmallow fluff is key; you need one cup for those delightful swirls. If you like crunch, add half a cup of chopped nuts, like walnuts or pecans. Finally, you will need half a teaspoon of sea salt. This salt enhances all the sweet flavors.
Make sure to have these ingredients ready before you start. Each one plays an important role in creating your delicious treat. The combination of flavors and textures will make your fudge a hit!
Step-by-Step Instructions
Preparation Steps
- Prepare Your Pan: Start by lining an 8x8 inch baking dish with parchment paper. Leave some paper hanging over the sides. This helps you lift the fudge out later. Lightly grease the paper with cooking spray. This step makes removal easy.
- Melt the Chocolate: Grab a medium saucepan and set it on low heat. Add 2 cups of semi-sweet chocolate chips and 1 cup of sweetened condensed milk. Stir them often until the chocolate melts and the mix is smooth. This should take just a few minutes.
- Add Cocoa and Vanilla: Once the mixture is smooth, take it off the heat. Sift in 1/2 cup of unsweetened cocoa powder. Then sprinkle in 1/2 teaspoon of sea salt. Stir until everything blends well. Finally, add 1 teaspoon of vanilla extract. Mix it until combined.
Mixing and Pouring
- Incorporate the Marshmallow Fluff: Now it’s time for the fun part! Add 1 cup of marshmallow fluff to your chocolate mix. Use a spatula to gently fold it in. Be careful not to overmix. You want to see ribbons of fluff in your fudge.
- Add Nuts (Optional): If you like nuts, fold in 1/2 cup of chopped nuts, such as walnuts or pecans. This adds a nice crunch and extra flavor.
- Transfer to Pan: Pour your fudge mixture into the prepared baking dish. Spread it evenly with your spatula. Smooth out the top so it looks nice.
Chilling and Serving
- Chill to Firm Up: Place the fudge in the fridge for at least 2 hours. This helps it set firm.
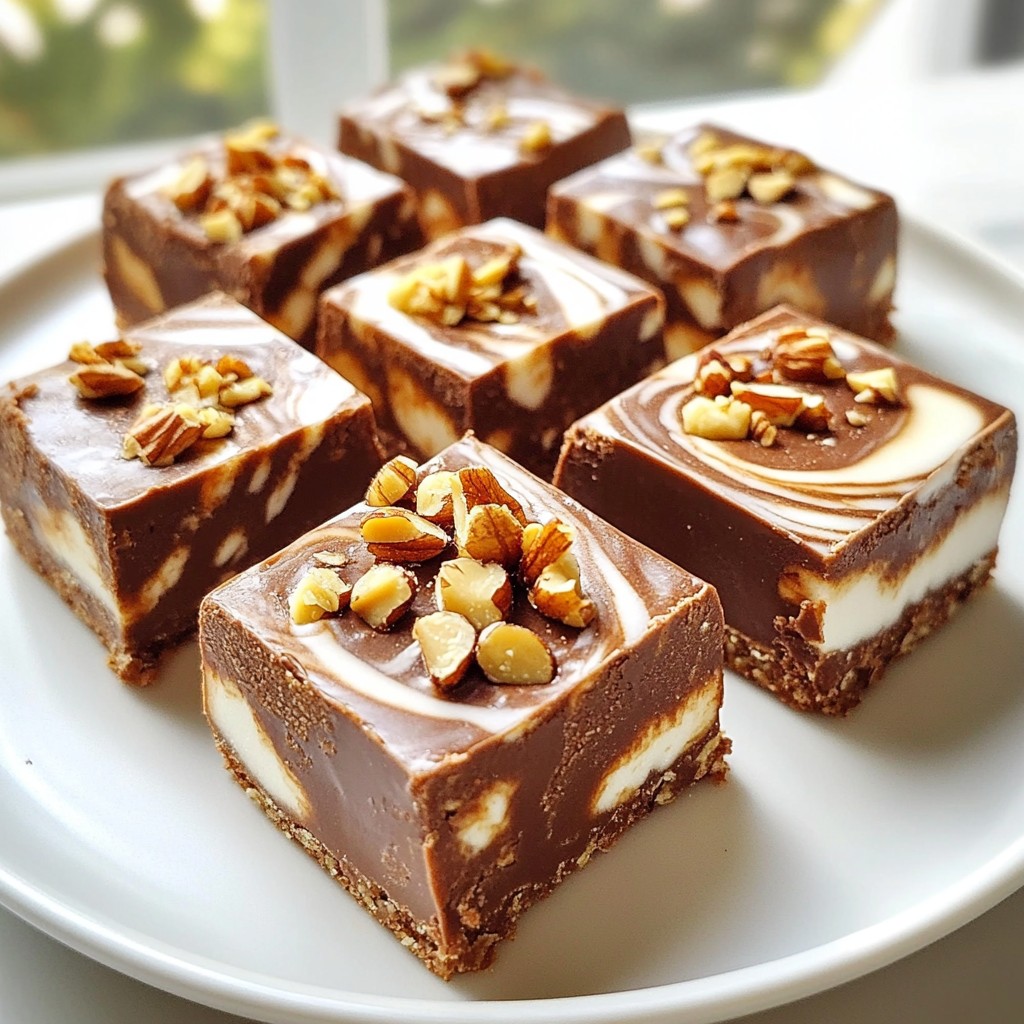
- Cut and Serve: Once it’s set, lift the fudge out using the parchment paper. Cut it into squares. Arrange the squares on a platter and enjoy your sweet treat!
Tips & Tricks
Cooking Tips
- Ensuring a Smooth Mixture
Start by melting your chocolate chips and sweetened condensed milk together. Use low heat and stir constantly. This helps to avoid any lumps. If the mixture is thick, it can lead to grainy fudge. The goal is a creamy, smooth blend.
- Swirling Technique for Marshmallow Fluff
When adding marshmallow fluff, use a spatula to fold it in gently. You want to create beautiful swirls without completely mixing it in. This gives the fudge a fun look. Don't overwork it; the ribbons of fluff make it special.
Presentation Tips
- Best Ways to Serve
For serving, cut the fudge into neat squares. Use a colorful platter to make the fudge pop. This adds a fun touch to any gathering. You can also arrange the squares in stacks for a nice display.
- Visual Enhancements for Fudge
Drizzle some melted chocolate on top for a shiny finish. Sprinkle extra chopped nuts for a crunchy contrast. These small touches make the fudge not just tasty but also eye-catching. Your guests will love the look and taste!
Pro Tips
- Tip for a Smooth Finish: Ensure that the chocolate is melted over low heat to prevent it from seizing and to achieve a silky texture.
- Tip for Perfect Swirls: When folding in the marshmallow fluff, do it gently to maintain the beautiful ribbons throughout the fudge.
- Tip for Easy Cutting: For cleaner cuts, allow the fudge to sit at room temperature for a few minutes after removing it from the refrigerator before slicing.
- Tip for Flavor Variations: Experiment with different types of nuts or add a sprinkle of sea salt on top before refrigerating for added flavor contrast.
Variations
Ingredient Variations
Nut-Free Option If you want a nut-free treat, just leave out the chopped nuts. The fudge will still taste rich and creamy. You can also add a pinch of sea salt for extra flavor.
Flavor Enhancements You can play with flavors too! Try adding a few drops of mint or almond extract. This change gives the fudge a unique taste. Just remember to keep the total liquid amount the same.
Dietary Modifications
Vegan Marshmallow Fudge To make this fudge vegan, use dairy-free chocolate chips and a vegan marshmallow fluff. The sweetened condensed milk can be swapped for coconut cream. This option keeps all the creaminess.
Gluten-Free Fudge Options Good news! The fudge is naturally gluten-free. Just double-check your ingredients. Make sure your chocolate chips and marshmallow fluff are gluten-free to stay safe. This way, everyone can enjoy this sweet treat!
Storage Info
How to Store
To keep your marshmallow swirl fudge fresh, store it in an airtight container. This way, it stays soft and tasty. Place parchment paper between layers of fudge to avoid sticking. Always keep it in a cool, dry place. A cupboard works well, but the fridge is fine too. Just be sure to let it sit at room temp before serving. This helps regain its smooth texture.
Freezing Instructions
You can freeze marshmallow swirl fudge if you want to save some for later. First, cut the fudge into squares. Wrap each piece tightly in plastic wrap. Then place them in a freezer-safe bag or container. Make sure to label the bag with the date. You can freeze the fudge for up to three months. When ready to enjoy, let it thaw in the fridge overnight. This keeps it creamy and delicious.
FAQs
Common Questions
How do I know when the fudge is set? The fudge is set when it feels firm to the touch and holds its shape. After chilling for at least two hours, check the edges. They should pull away from the pan slightly. If they do, it’s ready!
Can I use other types of chocolate? Yes, you can use dark or milk chocolate instead of semi-sweet. Each type will change the taste a bit. Dark chocolate gives a richer flavor, while milk chocolate is sweeter.
What can I substitute for sweetened condensed milk? If you need a substitute, try using coconut cream. It will make the fudge dairy-free and keep it creamy. You can also mix milk with sugar and simmer it down until thick.
How long does the fudge last? The fudge lasts about one week in the fridge. To keep it fresh, store it in an airtight container. If you want to save it longer, freeze it!
Can I make this fudge in advance? Yes! You can make this fudge a few days ahead of time. It tastes even better after sitting for a day. Just keep it in the fridge until you are ready to serve.
In this post, we covered how to make delicious marshmallow swirl fudge. We listed key ingredients and provided step-by-step instructions, from melting chocolate to chilling the fudge. I shared tips to ensure a smooth texture and beautiful presentation. We explored fun variations to suit your taste and dietary needs. Finally, I detailed storage and freezing options to keep your fudge fresh.
Making fudge is simple and fun. Enjoy your sweet creations!