Are you ready to indulge in a cheesy treat? My Mini Hawaiian Roll Grilled Cheese recipe takes comfort food to a new level. With only a few simple ingredients, you can create a melty, gooey delight that will be a hit at any gathering. Perfect for kids and adults alike, these mini sandwiches are quick and easy to make. Let’s dive into the tasty details!
Why I Love This Recipe
- Quick and Easy: This recipe can be prepared in just 20 minutes, making it perfect for a quick meal or snack.
- Deliciously Cheesy: The combination of cheddar and Swiss cheese creates a rich and creamy flavor that everyone will love.
- Perfect for Sharing: These mini sandwiches are ideal for parties or gatherings, allowing guests to enjoy bite-sized portions.
- Customizable: You can easily add other ingredients like ham or veggies to personalize each sandwich to your taste.
Ingredients
List of Ingredients
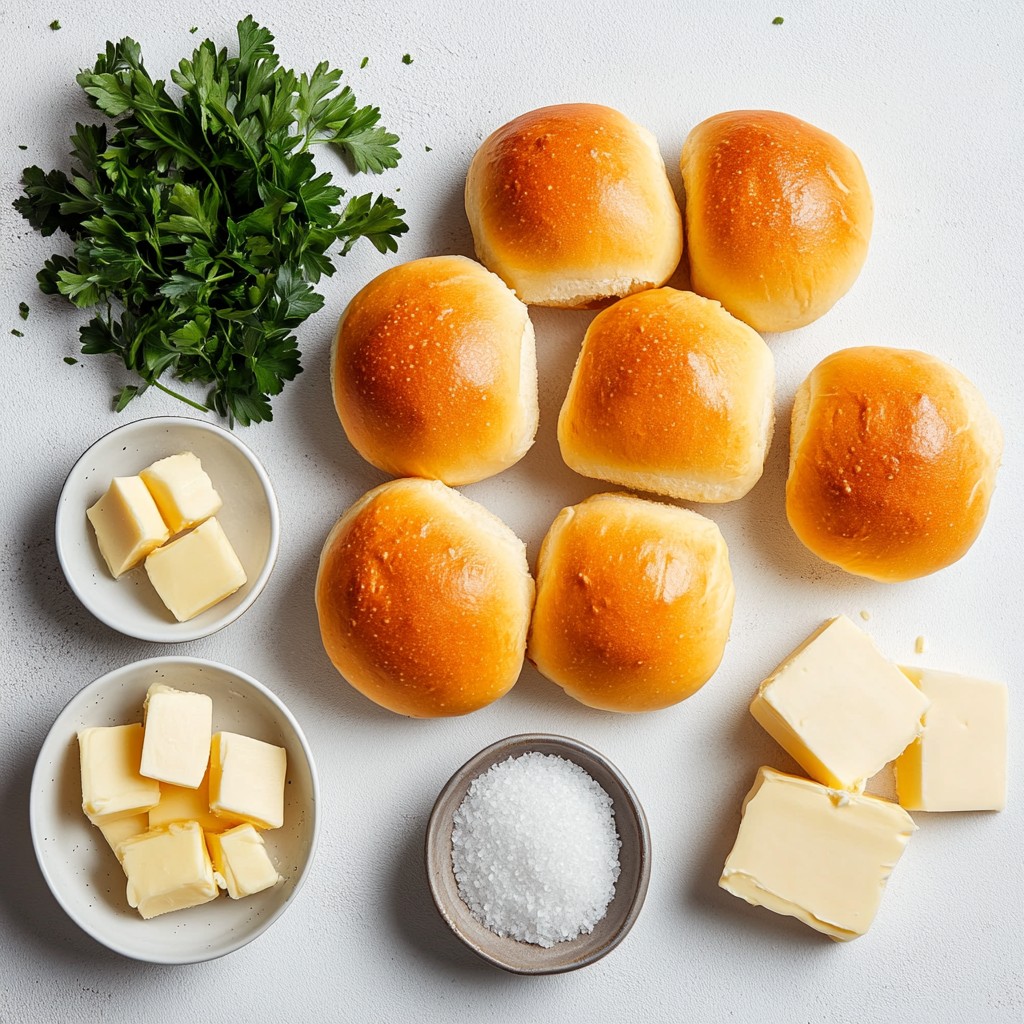
- 12 mini Hawaiian rolls
- 6 slices of cheddar cheese
- 6 slices of Swiss cheese
- 4 tablespoons unsalted butter, softened
- 1 tablespoon garlic powder
- 1 tablespoon fresh parsley, chopped (optional)
- Pinch of salt
Gathering the right ingredients helps make this dish special. The mini Hawaiian rolls give a sweet and soft touch. They are perfect for holding all that melty cheese. I like to use both cheddar and Swiss cheese. The cheddar adds sharpness, while the Swiss brings creaminess.
Butter is key for that golden crust. I use unsalted butter for better control of salt. Garlic powder adds a nice flavor punch. If you want a fresh touch, add chopped parsley. It makes the sandwiches look pretty too!
Make sure to check your pantry for these items. Having everything ready helps you cook faster. This way, you can enjoy your cheesy delight sooner!
Step-by-Step Instructions
Preparation Overview
1. Preheat the skillet or griddle: Start by heating your skillet or griddle over medium heat. This will help cook the sandwiches evenly.
2. Slicing the Hawaiian rolls: Take your mini Hawaiian rolls and slice each one in half. Make sure to create a top and bottom for each mini sandwich.
3. Assembling the sandwiches: Spread 1/2 tablespoon of softened butter on the inside of each roll half. This adds great flavor and helps with browning.
Cooking Process
1. Buttering the rolls: Mix the remaining softened butter with garlic powder, salt, and chopped parsley in a small bowl. Spread this garlic butter mixture on the outside of each sandwich.
2. Layering cheese: On the bottom half of each roll, place one slice of cheddar cheese and one slice of Swiss cheese. This combo gives a nice, melty effect.
3. Cooking and grilling instructions: Place the sandwiches on the hot skillet. Grill for 3-4 minutes on each side. Look for a golden crust and melted cheese. When done, remove them and let them cool slightly. Cut each sandwich in half for easy eating.
Tips & Tricks
Achieving Perfect Grilled Cheese
To get the best grilled cheese, start with butter. Spread soft butter on the inside of each roll half. This gives a nice crisp when you grill it. Use about half a tablespoon for each roll.
For the outside, mix butter with garlic powder, salt, and parsley. Spread this mix on the outside of your sandwiches. It adds great flavor and a golden color.
Heat is key for even cooking. Use medium heat to avoid burning. If it gets too hot, the bread will brown before the cheese melts. Grill for 3-4 minutes on each side. You want a nice golden crust and melted cheese.
Cheese Pairings
Cheese choice makes a big difference. I love using cheddar and Swiss together. They melt well and add great flavor. You can also try mozzarella or pepper jack for a twist.
Want to add more? Consider ham or even pineapple for a sweet touch. Layer them in with the cheese for extra flavor. These fun additions make each bite even better.
Pro Tips
- Perfectly Melted Cheese: Use a lid on the skillet while grilling to help trap heat and ensure the cheese melts evenly.
- Flavor Variations: Experiment with different cheese combinations like gouda or pepper jack for a unique twist on the classic grilled cheese.
- Golden Brown Finish: Keep an eye on the heat; too high can burn the bread before the cheese melts. Medium heat is ideal for a perfect golden crust.
- Herb Infusion: Add fresh or dried herbs like oregano or basil to the garlic butter for an extra layer of flavor in your sandwiches.
Variations
Flavor Enhancements
You can make your Mini Hawaiian Roll Grilled Cheese even better with some fun flavors.
- Spicy options: If you like heat, add sliced jalapeños inside the sandwich. They add a nice kick. Just place a few slices on top of the cheese before closing the sandwich.
- Sweet additions: Want a sweet twist? Try adding a slice of pineapple. It pairs well with the cheese. Place it right on the cheese before grilling.
These simple changes will make your grilled cheese unique and tasty.
Alternative Breads
You don’t have to stick with Hawaiian rolls. You can mix it up!
- Other types of rolls or bread: Try using soft brioche or sourdough. Both add great flavor and texture. Just make sure they are the right size for grilling.
- Gluten-free options: If you need gluten-free bread, look for gluten-free rolls. Many brands offer tasty options. They work just as well for grilling.
Experimenting with different breads can lead to new favorites. Enjoy the fun of creating your perfect grilled cheese!
Storage Info
Storing Leftovers
To keep your mini Hawaiian roll grilled cheese fresh, follow these steps:
- Let the sandwiches cool completely.
- Place them in an airtight container.
- Store them in the fridge for up to three days.
Reheating grilled cheese can be tricky. For the best texture:
- Preheat your skillet over low heat.
- Add a tiny bit of butter to the pan.
- Place the sandwich in the pan and warm it for about 2-3 minutes on each side.
This method helps the cheese melt and the bread crisp up again.
Freezing Options
If you want to save some grilled cheese for later, freezing is a great option:
- Wrap each sandwich tightly in plastic wrap.
- Place the wrapped sandwiches in a freezer bag.
- Store them in the freezer for up to one month.
When you're ready to eat:
- Take a sandwich out and unwrap it.
- Let it sit in the fridge overnight to defrost.
- Reheat in a skillet as mentioned above for the best results.
This way, you can enjoy your tasty mini Hawaiian roll grilled cheese anytime!
FAQs
Common Questions
Can I use different types of cheese? Yes, you can use different cheeses. Try mozzarella for a mild taste. Pepper jack adds a spicy kick. You can mix and match to find your favorite combo.
How do I make these sandwiches ahead of time? You can prepare the sandwiches in advance. Assemble them and wrap each one in plastic. Store them in the fridge for up to one day. When ready, grill them straight from the fridge.
What are some serving suggestions for Mini Hawaiian Roll Grilled Cheese? These sandwiches pair well with tomato soup. Try serving them with a fresh salad. You can also add a side of fruit for a sweet touch. Enjoy them at parties or casual get-togethers.
In this blog post, we explored how to make delightful mini Hawaiian roll grilled cheese sandwiches. We covered key ingredients, step-by-step instructions, and tips for perfect results. You learned about cheese pairings, flavor variations, and storage options.
Grilled cheese is simple to make and fun to customize. With practice, you can create delicious versions that everyone will love. Enjoy experimenting with flavors and sharing these treats with friends and family. Happy cooking!