If you love easy and delicious treats, you’ll adore these No-Bake Biscoff Truffles. With just a handful of ingredients, you can whip up these tasty bites in no time. I’ll guide you through each step, from mixing the ingredients to perfecting the chocolate dip. Whether you’re a beginner or a seasoned pro, this simple recipe lets you create a delightful snack that will impress everyone. Let’s get started!
Why I Love This Recipe
- Easy to Make: This recipe requires no baking, making it a quick and simple treat to prepare.
- Decadent Flavor: The combination of Biscoff cookies and spread gives these truffles a rich, caramelized flavor that is hard to resist.
- Perfect for Any Occasion: These truffles are great for parties, gatherings, or just a sweet treat at home.
- Customizable: You can easily adapt the recipe by rolling them in different coatings, like cocoa powder or crushed cookies.
Ingredients
Comprehensive list of ingredients
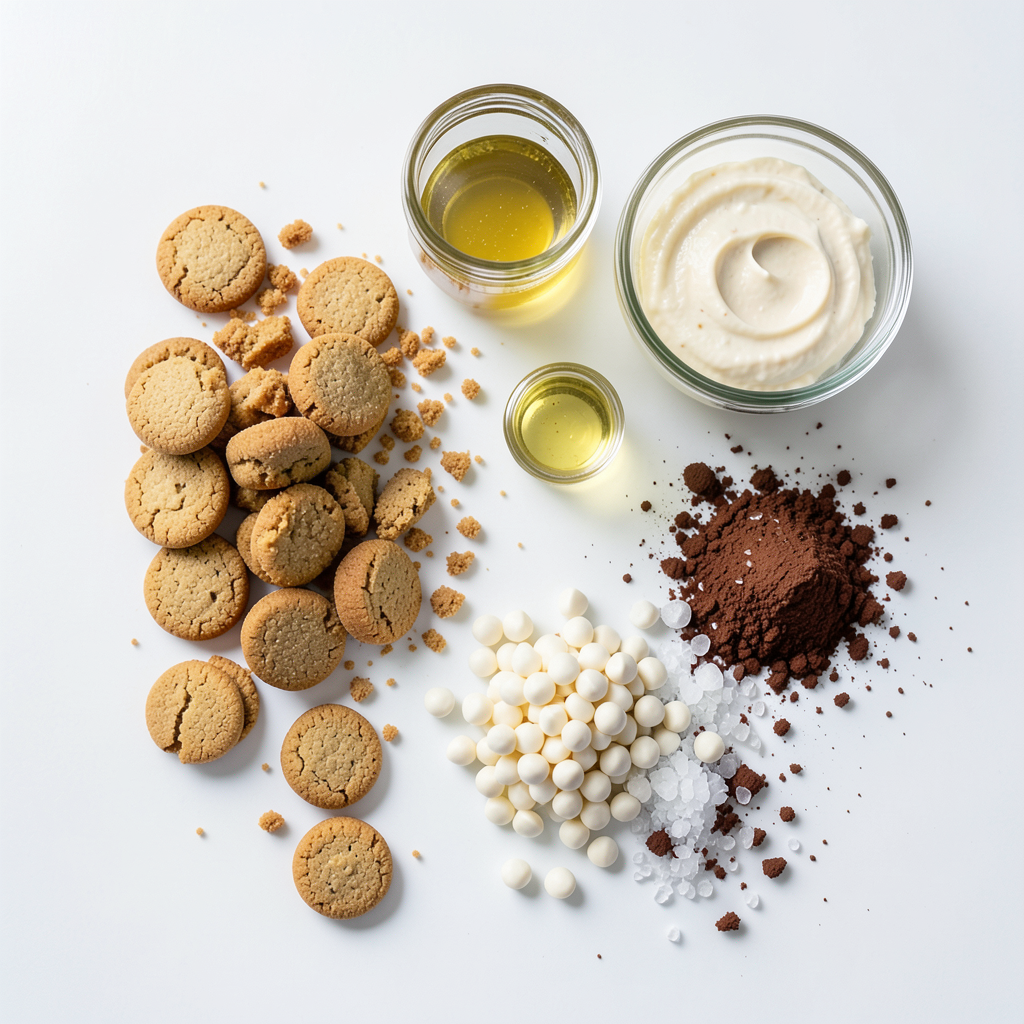
To make No-Bake Biscoff Truffles, you will need:
- 1 cup Biscoff cookies, crushed into fine crumbs
- 1/2 cup cream cheese, softened
- 1/4 cup Biscoff spread
- 1/2 teaspoon vanilla extract
- 1/2 cup white chocolate chips, melted
- A pinch of sea salt
- Optional: Cocoa powder or crushed Biscoff cookies for rolling
Importance of each ingredient
Each ingredient plays a key role. The Biscoff cookies give a unique flavor and crunch. Cream cheese adds richness and helps bind the mixture. Biscoff spread enhances the cookie flavor while adding creaminess. Vanilla extract brings warmth and depth. White chocolate coats the truffles, adding sweetness and a lovely finish. Sea salt balances the sweetness, making every bite better. The optional cocoa powder or crushed cookies add texture and a fun look.
Substitutions for common allergens
If you have allergies, there are easy swaps. Use dairy-free cream cheese for a dairy-free option. You can substitute the white chocolate with dairy-free chocolate chips. Gluten-free Biscoff cookies are available, so you can still enjoy these truffles. For nut allergies, make sure to check the spread and cookies for any hidden nuts.
Step-by-Step Instructions
Detailed mixing instructions
Start by gathering your ingredients. You need crushed Biscoff cookies, cream cheese, Biscoff spread, vanilla extract, and a pinch of sea salt. In a mixing bowl, combine the crushed cookies, cream cheese, Biscoff spread, and vanilla extract. Use your hands or a spatula to mix everything together. Keep mixing until it looks smooth and well-blended. This step is key to a creamy texture. Finally, add a pinch of sea salt to boost the flavor. Mix it in well.
Tips for rolling perfect truffles
Now it's time to roll the truffles. Scoop out small portions of the mixture. Each piece should be about one inch wide. Using your hands, roll them into balls. This part can be fun! Make sure each ball is smooth and round. If the mixture sticks to your hands, wet them slightly with water. Place the rolled truffles on a baking sheet lined with parchment paper. This will help prevent sticking.
Guidelines for chocolate dipping
After rolling, chill the truffles in the fridge for about 30 minutes. This helps them firm up. Once chilled, melt your white chocolate chips in a microwave-safe bowl. Dip each truffle into the melted chocolate, covering it completely. Let any excess chocolate drip off. Place the dipped truffles back on the parchment paper. For extra flair, roll some in cocoa powder or crushed Biscoff cookies. Allow the chocolate to set either at room temperature or in the fridge for about 15 minutes. Enjoy your delicious creations!
Tips & Tricks
How to achieve the best texture
To get the best texture for your truffles, mix the ingredients well. Use a spatula or your hands. Ensure the cream cheese is soft for smooth mixing. Aim for a thick, sticky mixture that holds together well. If too dry, add a little more Biscoff spread. If too wet, add more crushed cookies.
Common mistakes to avoid
One common mistake is not chilling the truffles long enough. They need about 30 minutes in the fridge to firm up. Another mistake is not rolling them tightly. If they are too loose, they will not hold their shape. Lastly, watch the chocolate. If it’s too hot, it can melt the truffles. Let it cool slightly before dipping.
Enhancing flavor and presentation
To enhance flavor, add a pinch of sea salt. It balances the sweetness. For a fun twist, roll some truffles in cocoa powder or crushed Biscoff cookies. This adds texture and flavor. For presentation, use a decorative platter. Drizzling extra melted Biscoff spread on top makes them look fancy. These small touches make your truffles stand out!
Pro Tips
- Chilling is Key: Ensure you refrigerate the truffles for at least 30 minutes to help them firm up before dipping in chocolate.
- Perfecting the Dip: Use a fork to dip the truffles in melted white chocolate for an even coating and to avoid messy fingers.
- Flavor Variations: Experiment with different types of chocolate or toppings like crushed nuts or sprinkles to create unique flavor profiles.
- Storage Tips: Store the truffles in an airtight container in the fridge for up to a week to maintain freshness.
Variations
Adding different toppings
You can have fun with toppings. Instead of just cocoa powder or crushed cookies, try chopped nuts or sprinkles. You can also use crushed pretzels for a salty twist. Drizzling melted chocolate on top adds a nice touch. Each topping gives a new taste and look to your truffles.
Flavor variations with different spreads
While Biscoff spread is great, you can switch it up. Try peanut butter or Nutella for a rich flavor. Almond butter gives a nutty taste. For a fruity twist, use strawberry or raspberry spread. Each spread changes the taste and makes each truffle unique.
Incorporating other mix-ins
Mix-ins can change the texture and flavor. Add mini chocolate chips for extra chocolate. Shredded coconut gives a tropical vibe. You can even fold in dried fruit for a chewy texture. Think about what you like and have fun creating your own version of these truffles!
Storage Info
Best practices for storing truffles
To keep your no-bake Biscoff truffles fresh, use an airtight container. Make sure the container is clean and dry. Layer parchment paper between truffles. This keeps them from sticking together. Store them in the fridge for best results. Avoid placing them near strong-smelling foods. The truffles can absorb those odors.
Shelf life in the refrigerator
When stored properly, these Biscoff truffles last about one week in the fridge. After this time, they might lose their fresh taste. If you see any signs of spoilage, like mold or off smells, throw them away. Always check before enjoying your treats.
Freezing instructions for long-term storage
If you want to keep your truffles longer, freezing is a great option. First, place the truffles in a single layer on a baking sheet. Freeze them for about an hour until firm. After that, transfer them to an airtight container or freezer bag. Label the container with the date. These truffles can stay fresh for up to three months in the freezer. When ready to eat, thaw them in the fridge for a few hours. Enjoy your tasty truffles without worry!
FAQs
How to make No-Bake Biscoff Truffles ahead of time?
You can make these truffles a day ahead. Just prepare them as the recipe states. After rolling them into balls, place them in the fridge. They will firm up nicely. You can dip them in chocolate the next day. This way, they stay fresh and tasty.
Can I use low-fat cream cheese?
Yes, you can use low-fat cream cheese. It will still work well in this recipe. The texture might be a bit different but still tasty. Just make sure it is softened. This helps it mix smoothly with the other ingredients.
What to do if the mixture is too crumbly?
If your mixture is crumbly, don’t worry. Just add a little more cream cheese or Biscoff spread. Start with a tablespoon and mix it in. This will help bring the mixture together. It should be smooth enough to roll into balls.
This blog post covered how to make delicious No-Bake Biscoff Truffles. We looked at the key ingredients and their importance. I provided step-by-step instructions and helpful tips for making perfect truffles. We explored variations and creative ideas for storage. I hope these insights inspire you to try making your own truffles. With practice, you will avoid common mistakes and enjoy tasty treats. Enjoy the process and have fun experimenting!