Are you craving a sweet treat but short on time? Look no further! These No Bake Peanut Butter Bars are easy to whip up and so delicious. With simple ingredients you probably already have, you can create a delightful snack that satisfies your cravings. I’ll walk you through each step and share tips to customize your bars. Get ready to enjoy a tasty treat that’s quick, easy, and no baking required!
Why I Love This Recipe
- Quick and Easy: This recipe takes just 15 minutes to prepare, making it a perfect treat for busy days.
- Healthy Ingredients: Made with natural peanut butter, oats, and almond flour, these bars are a nutritious option for snacks.
- No Baking Required: There’s no need to heat up the oven, which is ideal for warm weather or quick cravings.
- Customizable: Feel free to swap out ingredients, like using different nut butters or sweeteners, to suit your taste.
Ingredients
Key Ingredients for No Bake Peanut Butter Bars
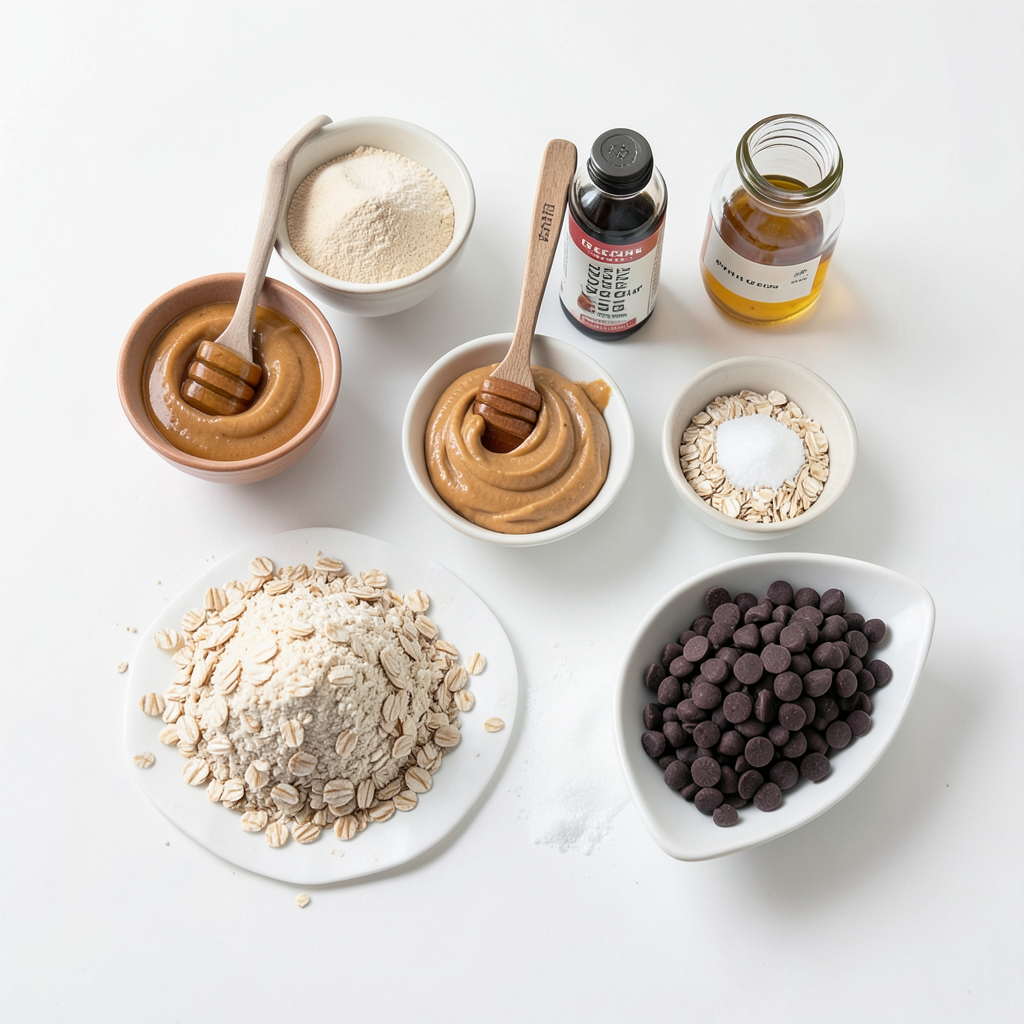
To make these tasty bars, you need a few key ingredients. Here’s what you will use:
- 1 cup natural peanut butter
- 1/2 cup honey or maple syrup
- 2 cups rolled oats
- 1/2 cup almond flour
- 1 teaspoon vanilla extract
- 1/4 teaspoon salt
- 1/2 cup dark chocolate chips
- 2 tablespoons coconut oil
Each ingredient plays a role. The peanut butter gives a creamy texture and rich taste. Honey or maple syrup adds sweetness. Rolled oats provide a hearty base. Almond flour offers a nutty flavor, while vanilla adds warmth. Salt balances the sweetness.
Optional Ingredients for Customization
You can customize your bars with these optional ingredients:
- Chopped nuts for crunch
- Dried fruits like cranberries or raisins
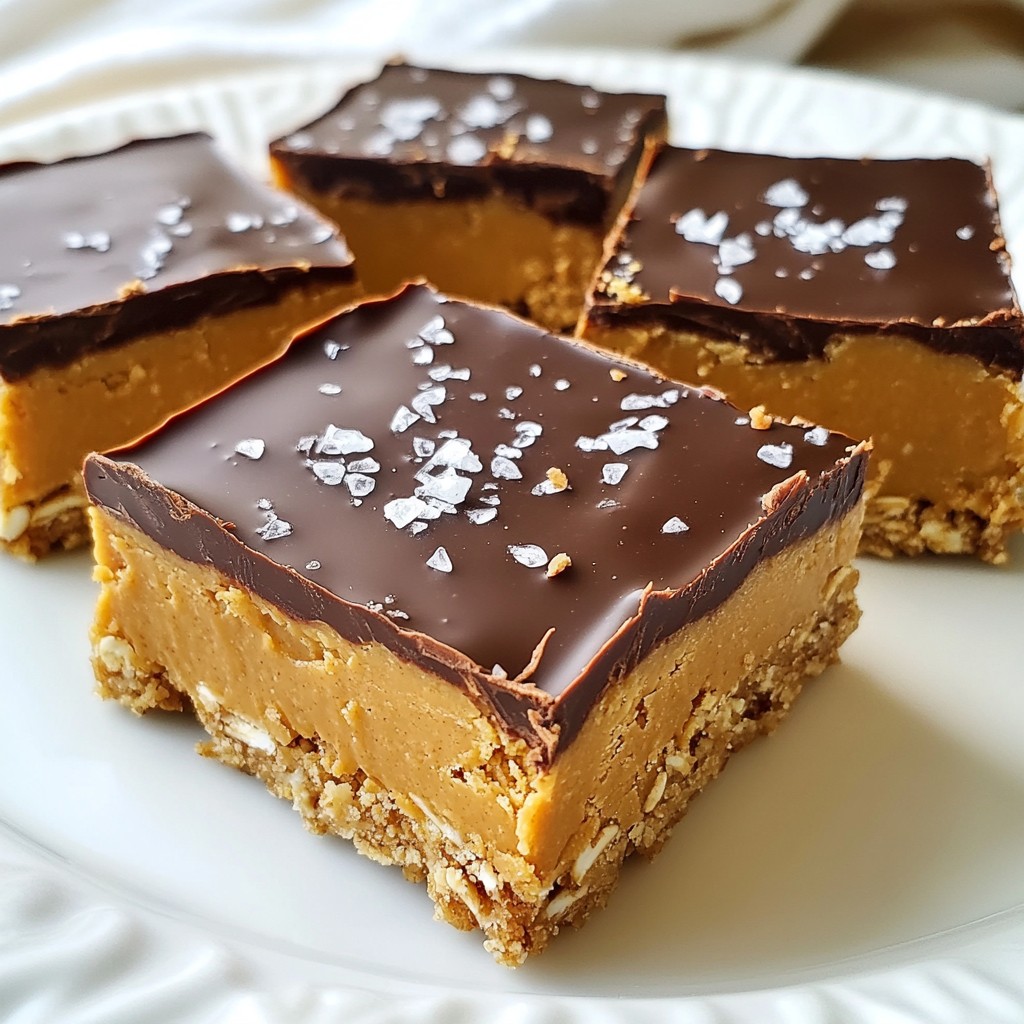
- A sprinkle of sea salt on top
These additions can change the flavor and texture. It’s fun to mix and match according to your taste!
Ingredient Substitutions
You might not have every ingredient at home. Here are some easy swaps:
- Use sunflower seed butter instead of peanut butter for nut-free bars.
- Swap honey with agave syrup for a vegan option.
- Use quick oats if you don’t have rolled oats.
These substitutions keep the recipe flexible while still tasting great!
Step-by-Step Instructions
Preparation of Peanut Butter Mixture
To start, grab a large mixing bowl. Add 1 cup of natural peanut butter and 1/2 cup of honey or maple syrup. Mix them together until they blend well. This step is key to getting a smooth base. Next, stir in 2 cups of rolled oats and 1/2 cup of almond flour. Then add 1 teaspoon of vanilla extract and 1/4 teaspoon of salt. Mix until a dough forms. It should be thick but still sticky.
Assembling the Bars
Now, take an 8x8 inch baking dish and line it with parchment paper. Leave some paper hanging over the sides. This makes it easy to lift the bars out later. Pour the peanut butter mixture into the dish. Press it down firmly and evenly. Use your hands or a spatula for this. The more you press, the denser the bars will be. Make sure the top is smooth for the next layer.
Melting and Adding the Chocolate Layer
In a small saucepan, add 1/2 cup of dark chocolate chips and 2 tablespoons of coconut oil. Heat them over low heat, stirring often. Keep mixing until the chocolate is melted and smooth. Once melted, pour the chocolate over the peanut butter layer. Use a spatula to spread it evenly. Chill the dish in the fridge for at least 1-2 hours. This time allows the bars to set. When they are firm, lift them out using the parchment paper. Cut them into squares or rectangles, and enjoy your tasty treat!
Tips & Tricks
Perfecting the Texture of the Bars
To get the right texture, mix the peanut butter and honey well. This step is key for a smooth base. If your mix is too dry, add a bit more honey. If it’s too wet, add more oats. The goal is a dough-like feel. After pressing it into the dish, make sure it’s even. A firm press helps the bars hold together.
How to Cut Bars Cleanly
Cutting these bars can be tricky, but I have a few tips. Use a sharp knife and wipe it between cuts. This keeps the edges clean. For neater squares, chill the bars in the fridge first. They will firm up and make cutting easier. If you want fun shapes, use cookie cutters!
Serving Suggestions
These bars taste amazing on their own, but you can dress them up. Serve them on a plate with a sprinkle of sea salt. A few crushed nuts on top add crunch. Pair them with a cold glass of almond milk for a perfect snack. You can also add fresh fruit on the side for a fresh touch.
Pro Tips
- Use Room Temperature Peanut Butter: This helps in mixing the ingredients smoothly and ensures a consistent texture throughout the bars.
- Chill Before Cutting: Allow the bars to set well in the refrigerator before cutting them to prevent crumbling and to achieve clean edges.
- Experiment with Add-Ins: Feel free to add your favorite mix-ins like dried fruits, seeds, or shredded coconut for an extra flavor boost.
- Store Properly: Keep the bars in an airtight container in the fridge for up to a week, or freeze them for longer storage.
Variations
Different Flavors and Add-Ins
You can change the flavor of your no bake peanut butter bars. Try adding shredded coconut or chopped nuts. You can also mix in dried fruit, like raisins or cranberries. For a fun twist, swap some peanut butter for almond butter. This gives the bars a new taste without changing the base recipe.
Alternative Sweeteners
If you want less sugar, try using different sweeteners. You can use agave syrup instead of honey or maple syrup. Stevia or monk fruit sweetener can work too. Just adjust the amount to taste. Each sweetener can change the flavor a bit, so experiment to find what you like best.
Vegan and Gluten-Free Options
Making these bars vegan is easy! Just use maple syrup for the sweetener and dairy-free chocolate chips. For a gluten-free version, use certified gluten-free oats and almond flour. This way, everyone can enjoy these tasty treats, no matter their diet!
Storage Info
Best Practices for Storing No Bake Peanut Butter Bars
To keep your no bake peanut butter bars fresh, store them in an airtight container. This helps them stay soft and tasty. You can place a piece of parchment paper between layers to avoid sticking. Try to keep them away from heat and sunlight. This keeps the chocolate layer from melting.
How Long They Last in the Fridge or Freezer
In the fridge, these bars last about one week. If you want them to last longer, freeze them. They can stay fresh in the freezer for up to three months. Just make sure to wrap them well in plastic wrap before freezing.
Reheating or Softening Tips
If your bars are too hard, you can soften them easily. Let them sit at room temperature for about ten minutes. If you need to warm them, use the microwave. Heat them in short bursts of ten seconds. This way, you avoid melting them too much.
FAQs
Can I use crunchy peanut butter instead of creamy?
Yes, you can use crunchy peanut butter. It adds a nice texture to your bars. The bits of peanuts give an extra crunch. This change makes them fun to eat. Just mix it the same way as creamy peanut butter.
How do I know when the bars are set?
You can tell the bars are set when they feel firm to the touch. After chilling for 1-2 hours, check the edges. If they pull away from the sides, they are ready. You can also press gently in the middle. If it holds its shape, they are good to go!
Can I add protein powder to the recipe?
Yes, adding protein powder is a great idea! It boosts the nutrition. Just replace some of the almond flour with protein powder. Start with 1/4 cup and adjust as you like. Mix well to keep the bars thick and tasty.
What’s the best way to serve these bars?
Serve the bars chilled for the best taste. You can stack them neatly on a plate. Garnish with a sprinkle of sea salt or crushed nuts for added flair. Pair them with a glass of cold almond milk for a perfect snack!
You now have a clear path to make tasty no-bake peanut butter bars. We've covered key ingredients and fun ways to change them up. You learned how to prepare, layer, and serve these treats. The tips shared will help you cut and store the bars with ease. Remember, you can customize flavors and make them suit your needs. With all this, creating your own bars is simple and fun. Now, it’s time for you to get baking and enjoy your homemade snacks!