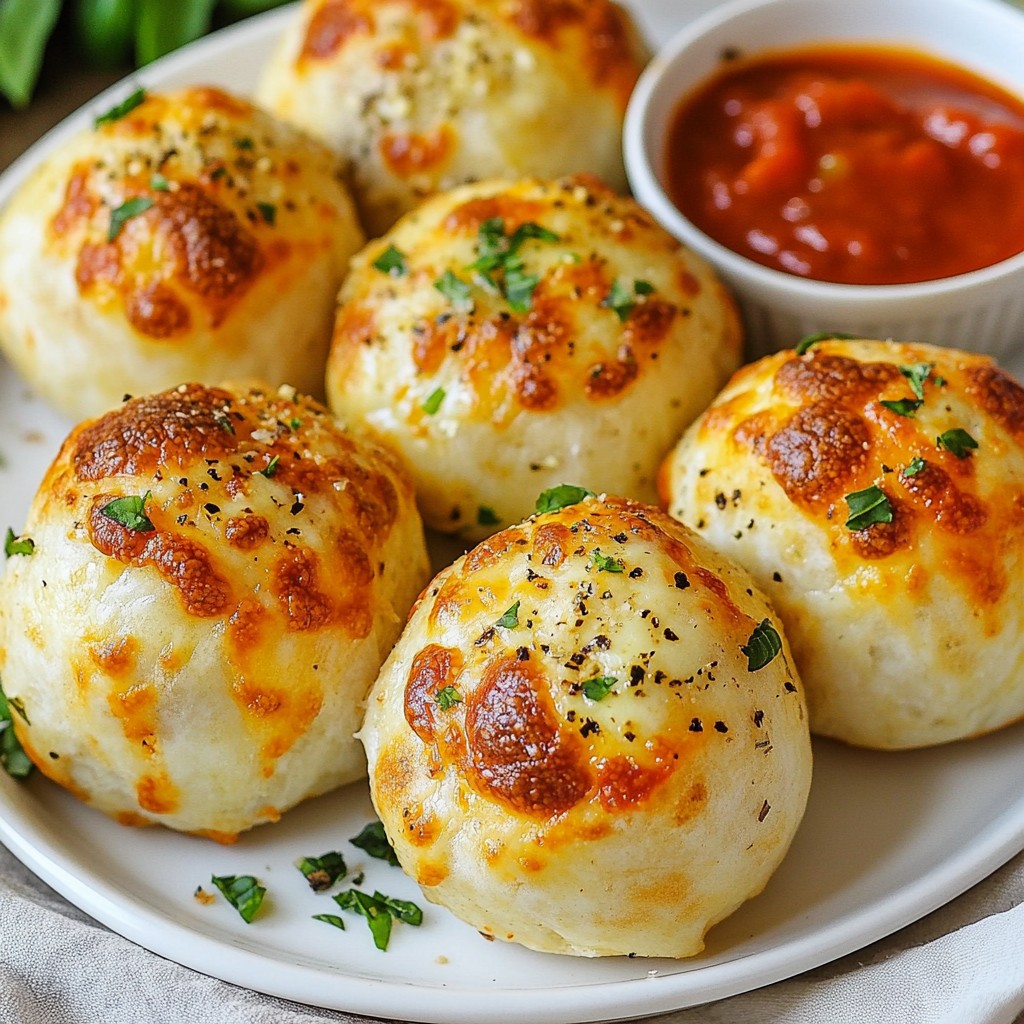
Looking for a fun, easy snack? You’ll love pizza bombs! These tasty bites are packed with cheesy goodness and endless filling options. Perfect for game day, movie nights, or a quick lunch, pizza bombs are a hit for all ages. In this post, I’ll share simple steps, tips, and fun variations to make your pizza bombs a new favorite. Let’s dive into the delicious world of pizza bombs!
Why I Love This Recipe
- Comfort Food: These pizza bombs are the ultimate comfort food, combining all your favorite pizza flavors in a fun, bite-sized treat.
- Customizable: You can easily customize the filling with your choice of meats, veggies, or cheeses, making it perfect for everyone.
- Easy to Make: With just a few simple steps, you can whip up these delicious snacks in no time, making them great for any occasion.
- Perfect for Sharing: These pizza bombs are easy to share and are a hit at parties, gatherings, or family game nights.
Ingredients
List of Essential Ingredients
To make your pizza bombs, you need a few key items:
- 1 package of refrigerated pizza dough (about 16 oz)
- 1 cup mozzarella cheese, shredded
- 1/2 cup pepperoni slices (or your choice of deli meats/vegetables)
- 1/4 cup green bell pepper, finely chopped
- 1/4 cup black olives, sliced
- 1 teaspoon Italian seasoning
- 1 teaspoon garlic powder
- 1 tablespoon olive oil
- Marinara sauce, for dipping
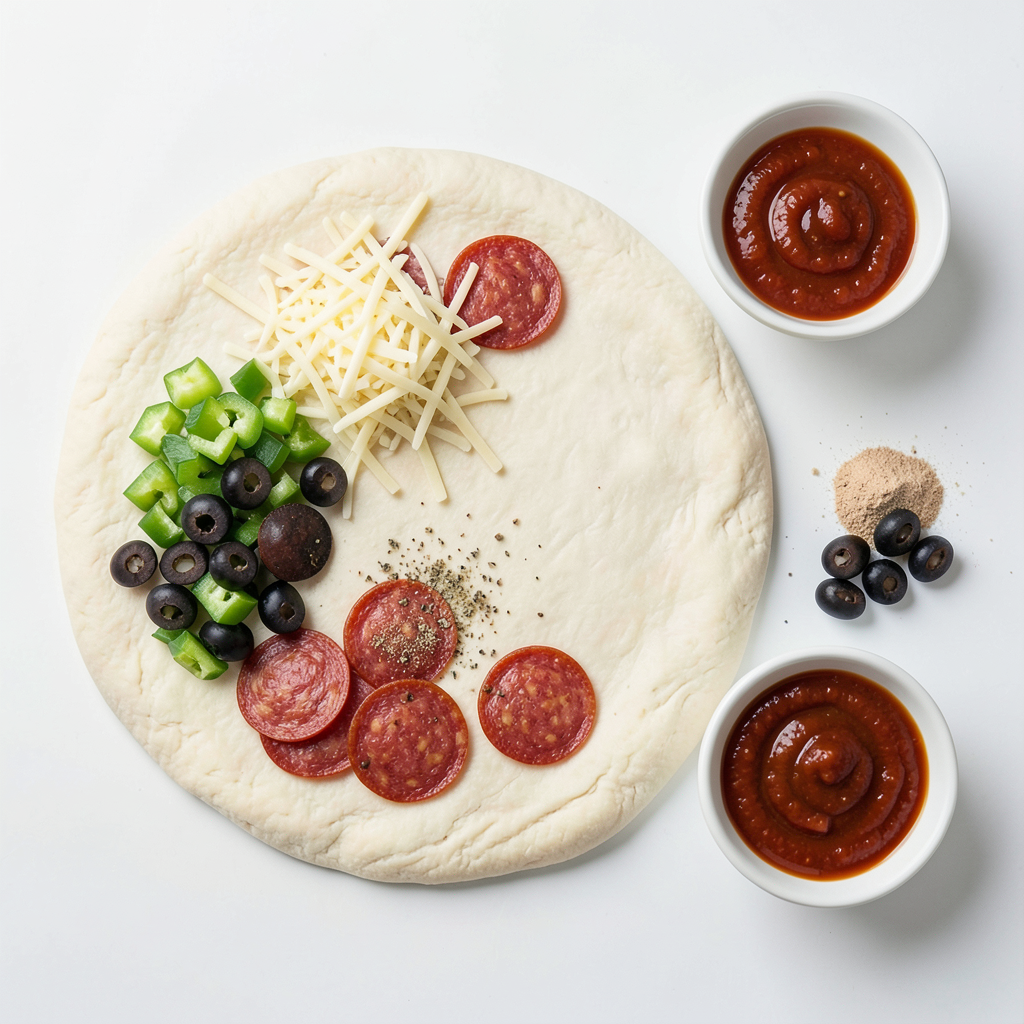
These ingredients create a tasty base for your pizza bombs. The dough holds everything together. The cheese melts and becomes gooey. The pepperoni adds a nice savory flavor. The veggies bring freshness and crunch.
Optional Ingredients for Customization
You can change things up by using these optional ingredients:
- Cooked sausage or diced ham
- Spinach or mushrooms
- Different cheeses like cheddar or provolone
- Hot sauce for a spicy kick
Feel free to mix and match to suit your tastes. This makes each batch unique. You can even make a few different kinds for a party!
Tips for Selecting Fresh Ingredients
When picking out your ingredients, look for these tips:
- Choose pizza dough that is fresh and not near its expiration date.
- Pick mozzarella cheese that is soft and moist for the best melt.
- Select pepperoni that looks bright and well-colored.
- Fresh veggies should be firm, bright, and free from bruises.
Fresh ingredients make a big difference in taste. Always check labels and ask questions at the store if you need help. Your pizza bombs will shine with the best flavors!
Step-by-Step Instructions
Preparation Steps
1. First, preheat your oven to 375°F (190°C). This helps the pizza bombs bake evenly.
2. Next, grease a baking sheet lightly or line it with parchment paper. This makes cleanup easy.
3. Now, roll out the pizza dough on a clean surface. Aim for about ¼ inch thick.
4. Cut the dough into squares that are 4x4 inches. You need enough room for filling.
5. In a bowl, mix the shredded mozzarella cheese, pepperoni, green bell pepper, and black olives.
6. Add the Italian seasoning and garlic powder to the bowl. Mix everything well for great flavor.
7. Take a generous tablespoon of the cheese mixture and place it in the center of each dough square.
8. Carefully fold the corners of the dough over the filling. Pinch the edges to seal tightly.
Baking Instructions
9. Place the sealed pizza bombs seam-side down on your prepared baking sheet.
10. Brush the tops with olive oil to get a nice golden color when baking.
11. Bake in the oven for 15-18 minutes. Look for a golden brown finish.
12. Remove the baking sheet from the oven and let the pizza bombs cool slightly.
Serving Suggestions
Serve the warm pizza bombs with marinara sauce on the side for dipping. For a nice touch, arrange them on a large platter. Garnish with fresh basil leaves for color. Enjoy your tasty snack!
Tips & Tricks
How to Perfect Your Pizza Bombs
To make the best pizza bombs, start with fresh dough. Roll the dough thin, about ¼ inch. This helps them cook evenly. Fill each square with a generous amount of the cheese mix. Don’t overfill, or they might burst. Seal them well by pinching the edges tight. Brushing with olive oil gives a nice golden color. Bake until they are puffy and brown, around 15-18 minutes.
Common Mistakes to Avoid
Avoid using too much filling. If you do, the bombs won’t seal well. Make sure to fold the dough corners over the filling properly. Not sealing them can lead to messy baking. Do not skip the olive oil brush. It adds flavor and color. Lastly, keep an eye on the baking time. Ovens can vary, so check them often.
Best Tools for Making Pizza Bombs
Use a good rolling pin for even dough. A sharp knife or pizza cutter works best for cutting squares. A baking sheet lined with parchment paper makes cleanup easier. Tongs are handy for flipping the pizza bombs. Lastly, use small bowls for your marinara sauce for dipping. These tools make the whole process smoother and more fun!
Pro Tips
- Seal Them Well: Ensure that the edges of the dough are tightly sealed to prevent any filling from leaking out during baking.
- Customize Fillings: Feel free to experiment with different fillings like vegetables or other meats. Just ensure they are chopped small enough to fit.
- Serve Immediately: These pizza bombs are best enjoyed warm right out of the oven for the ultimate cheesy experience.
- Extra Flavor: For added flavor, sprinkle some grated Parmesan cheese on top before baking for a deliciously cheesy crust.
Variations
Vegetarian Pizza Bombs
To make vegetarian pizza bombs, skip the pepperoni. Use extra veggies instead. I like to add mushrooms, spinach, or artichokes. You can also use a mix of your favorite cheeses. Goat cheese or feta adds a nice twist. The Italian seasoning still works great with these flavors.
Gluten-Free Pizza Bombs
For gluten-free pizza bombs, look for gluten-free pizza dough. Many grocery stores sell it in the freezer section. Make sure to check the label to ensure it is truly gluten-free. You can fill these with mozzarella and any fresh veggies. This way, you create a fun snack that everyone can enjoy.
Spicy Pizza Bombs
Want some heat? Try spicy pizza bombs! Add jalapeños or red pepper flakes to the cheese mix. You can also use spicy sausage or pepperoni. If you want more flavor, consider adding a dash of hot sauce inside. This adds a kick that spice lovers will enjoy.
Storage Info
How to Store Leftover Pizza Bombs
To store leftover pizza bombs, let them cool first. Place them in an airtight container. You can store them in the fridge for up to three days. This keeps them fresh and tasty. Label the container with the date so you won't forget.
Reheating Instructions
When you're ready to enjoy your pizza bombs again, preheat your oven to 350°F (175°C). Place the pizza bombs on a baking sheet. Heat them for about 10-12 minutes. This warms them up nicely without making them soggy. You can also use a microwave, but they may lose some crispiness.
Freezing Pizza Bombs for Later
If you want to save pizza bombs for a longer time, freezing is a great option. Once cooled, wrap each pizza bomb in plastic wrap. Then place them in a freezer-safe bag. They can last for up to three months in the freezer. To enjoy them later, just thaw in the fridge overnight and reheat as mentioned.
FAQs
What is the origin of pizza bombs?
Pizza bombs come from Italy. They are a fun twist on classic pizza. You can find similar snacks in many Italian-American places. People love to fill dough with cheese and meat. These tasty bites are easy to share and eat.
Can I use different fillings for pizza bombs?
Yes! The best part of pizza bombs is you can customize them. Feel free to use any cheese you like. You can add veggies or different meats, too. Try mushrooms, spinach, or even cooked sausage. The sky is the limit! Get creative and make your own flavors.
How long can pizza bombs be stored in the fridge?
You can store pizza bombs in the fridge for about three days. Make sure to keep them in an airtight container. This keeps them fresh. When you're ready to eat, just reheat them in the oven or microwave. Enjoy your tasty snack anytime!
You've learned all about making pizza bombs, from essential ingredients to creative variations. We covered how to prepare and bake them, plus tips for perfection. Remember to pick fresh ingredients for the best taste. Avoid common mistakes, and use the right tools for success. Enjoy experimenting with different fillings and storing leftovers. With these skills, you're ready to make delicious pizza bombs that everyone will love. Get in the kitchen and have fun!