Are you ready for a quick and tasty meal? Today, I’ll show you how to make Quick Turkey Turkey Ham and Cheese Quesadillas. This simple dish combines turkey, ham, and gooey cheese for a flavor-packed delight. Whether you’re in a rush or just want something delicious, these quesadillas are perfect. Trust me, after trying this recipe, they’ll become a family favorite! Let's dive into the easy steps to create them.
Why I Love This Recipe
- Quick and Easy: This recipe comes together in just 20 minutes, making it perfect for busy weeknights.
- Versatile Filling: The combination of turkey, ham, and cheeses creates a deliciously rich flavor that can be customized with your favorite ingredients.
- Kid-Friendly: Quesadillas are always a hit with kids, and this recipe is no exception—perfect for picky eaters!
- Perfect for Leftovers: A great way to use up leftover turkey, this dish transforms simple ingredients into a satisfying meal.
Ingredients
List of Ingredients
- 2 large tortillas
- 1 cup cooked turkey, shredded
- ½ cup turkey ham, chopped
- 1 cup shredded mozzarella cheese
- ½ cup sharp cheddar cheese, shredded
- 1 small bell pepper, diced
- 1 small red onion, finely chopped
- 2 tablespoons olive oil
- 1 teaspoon taco seasoning
- Salt and pepper to taste
- Fresh cilantro for garnish (optional)
Making Quick Turkey Ham and Cheese Quesadillas is simple and fun. You need just a few ingredients. Each one adds flavor and texture.
You start with two large tortillas. They hold everything together. Next, you have shredded cooked turkey. It gives protein and a great taste. Then, add chopped turkey ham for extra flavor.
Cheese is key! I like using mozzarella and sharp cheddar. They melt well and taste amazing. A small bell pepper and red onion add crunch and color.
Don't forget the olive oil! It helps cook the quesadilla and keeps it from sticking. Taco seasoning adds a nice kick. You can adjust salt and pepper to your taste.
Finally, fresh cilantro is optional. It brightens the dish and looks pretty. Use these ingredients to create a tasty meal.
Step-by-Step Instructions
Preparation of Filling
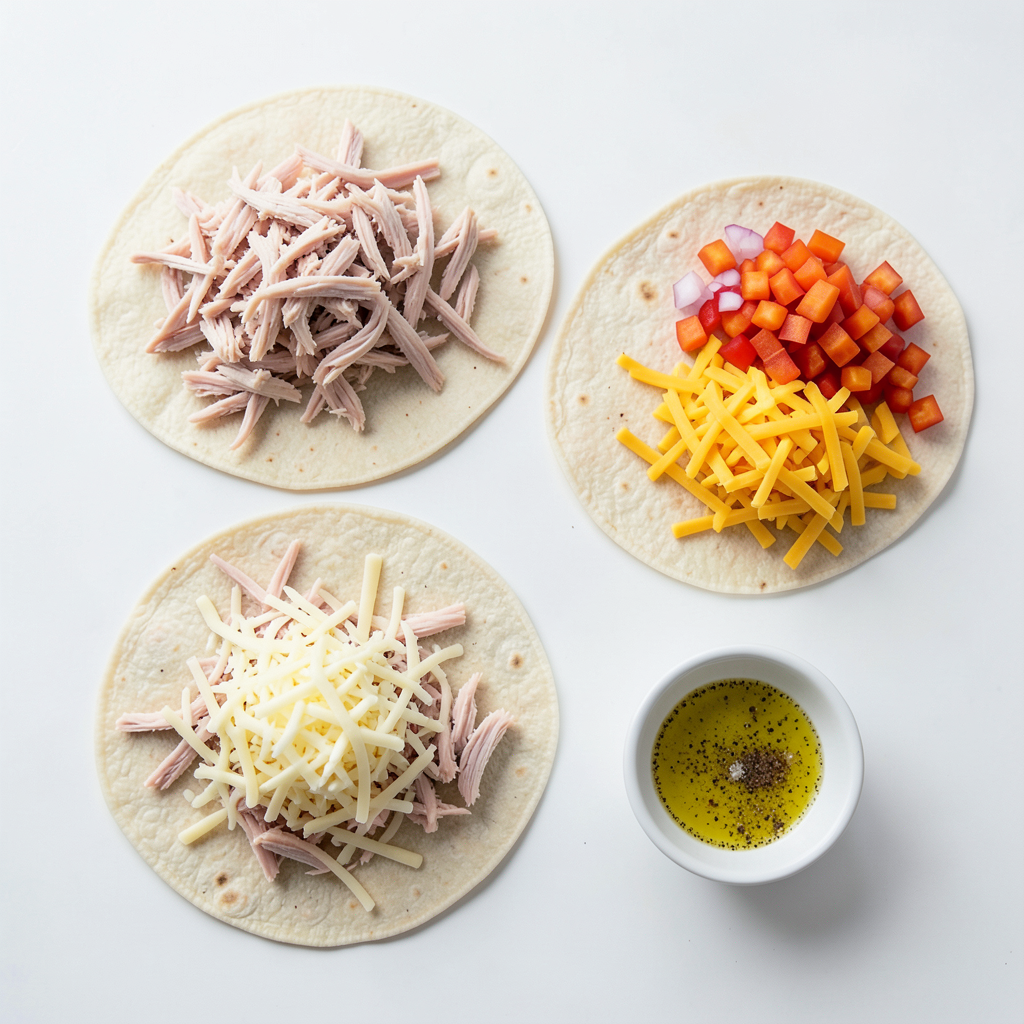
Start by mixing the filling. In a bowl, combine these key ingredients:
- 1 cup cooked turkey, shredded
- ½ cup turkey ham, chopped
- 1 cup shredded mozzarella cheese
- ½ cup sharp cheddar cheese, shredded
- 1 small bell pepper, diced
- 1 small red onion, finely chopped
Next, season the mix. Add 1 teaspoon taco seasoning, salt, and pepper to taste. Stir until everything blends well. This mix gives your quesadillas flavor and texture.
Cooking the Quesadillas
Now, let’s cook! Heat 2 tablespoons of olive oil in a skillet over medium heat.
- Place one tortilla in the skillet. Spread half of the turkey mix evenly on top.
- Carefully add the second tortilla on top. Press down gently with a spatula.
Cook for about 3-4 minutes. Look for a golden brown color on the bottom. Then, flip the quesadilla. Cook the other side for another 3-4 minutes. The cheese should melt, and both sides will be crispy.
Serving Suggestions
Once cooked, remove the quesadilla from the skillet. Let it cool for a minute. Then, cut it into wedges for easy serving.
You can garnish with fresh cilantro if you like. For sides, consider salsa, guacamole, or a light salad. These add freshness and balance your meal perfectly.
Tips & Tricks
Best Practices for Perfect Quesadillas
To make the best quesadillas, spread your filling evenly. This way, each bite has the same great taste. Use a spatula to help press down the tortilla. This will help the filling stick and melt the cheese better.
For a crispy texture, use medium heat. If the heat is too low, the quesadilla can get soggy. A hot skillet gives you that nice crunch. Use just enough olive oil to coat the pan. Too much oil can make things greasy.
Adjusting Flavor
You can change the spice level to fit your taste. Add more taco seasoning for heat. If you prefer milder flavors, use less. You can also add diced jalapeños for a kick.
When it comes to cheese, feel free to switch things up. Try pepper jack for spice or gouda for a smoky taste. Mixing cheeses can give your quesadillas a unique flavor.
Quick Cooking Hacks
You can also cook quesadillas on the grill or in the oven. For the grill, use foil to keep everything together. Bake in the oven at 400°F for about 10 minutes. This method is great for making several at once.
To save time, prep your filling ahead. You can mix the turkey, ham, and veggies earlier in the day. Store it in the fridge until you’re ready to cook. This way, you can have a tasty meal in no time.
Pro Tips
- Use Fresh Ingredients: For the best flavor, use fresh vegetables and high-quality cheeses. This will enhance the overall taste of your quesadillas.
- Customize Your Fillings: Feel free to experiment with other ingredients like black beans, corn, or different types of cheese to suit your taste preferences.
- Control the Heat: Adjust the cooking time based on your stove's heat settings to avoid burning the tortillas. Medium heat works best for a crispy exterior.
- Serve with Dips: Pair your quesadillas with salsa, guacamole, or sour cream for added flavor and a delicious dipping experience.
Variations
Alternative Ingredients
You can change the turkey ham to another protein. Chicken or ham works well. For a plant-based option, try black beans or sautéed mushrooms. These options keep the quesadilla tasty and filling.
Flavor Enhancements
Want more flavor? Add spices like cumin or paprika for a kick. Fresh herbs like cilantro or parsley can brighten your dish. You can also use dips, such as salsa or guacamole, to enhance the taste. These little changes make each bite exciting.
Seasonal Variations
Using seasonal vegetables can make this dish fresh. In summer, try zucchini or corn. In fall, add spinach or roasted squash. For holidays, use cranberry sauce or sweet potatoes to give a festive touch. Adapting the recipe makes it special for any occasion.
Storage Info
Storing Leftovers
To keep your quesadillas fresh, follow these steps:
- Cool them down: Let the quesadillas cool at room temperature for about 10 minutes.
- Wrap tightly: Use plastic wrap or aluminum foil to wrap each quesadilla. This prevents them from drying out.
- Use containers: Place the wrapped quesadillas in an airtight container. Glass or plastic containers both work well.
This method keeps your quesadillas tasty for about 3 days in the fridge.
Reheating Instructions
To enjoy your quesadillas again, reheating them properly is key.
- Skillet method: Heat a non-stick skillet over medium heat. Place the quesadilla in the skillet. Cook for 2-3 minutes on each side until crispy and warm.
- Microwave method: Place the quesadilla on a microwave-safe plate. Cover it with a damp paper towel. Heat for 30 seconds, then check. Repeat if needed.
Both methods keep the texture nice. The skillet adds crispness, while the microwave is quick and easy.
FAQs
How do I make quesadillas crispy?
To make quesadillas crispy, you need a few tips. First, use enough olive oil. A good amount helps create a nice crust. Heat the skillet before adding the quesadilla. This step ensures that the tortilla starts to crisp right away. Press down on the quesadilla with a spatula while it cooks. This helps the filling stick and the outside to crisp up. Finally, make sure you don't rush the cooking time. Let each side brown well for the best crunch.
Can I make these quesadillas ahead of time?
Yes, you can make these quesadillas ahead of time. Prepare the filling and keep it in the fridge. You can assemble the quesadillas later. Cook them fresh when you’re ready to eat. If you want to reheat them, use a skillet for a few minutes. This method keeps them crispy. You can also microwave them, but the crispiness will be lost.
What is the best cheese for quesadillas?
For quesadillas, cheese is key! I recommend using a mix of mozzarella and sharp cheddar. Mozzarella melts well and adds stretch. Sharp cheddar gives a nice flavor. Other good options include Monterey Jack or pepper jack for heat. You can blend cheeses for a unique taste. Just remember, the more cheese, the better!
You now know how to make delicious turkey quesadillas. You learned about the key ingredients, step-by-step instructions, and helpful tips. Remember to customize your quesadillas with your favorite fillings and flavors. Don’t shy away from making extras; they store well and reheat nicely. Enjoy a tasty meal that's easy to prepare and fun to share. Get cooking and impress everyone with your skills!