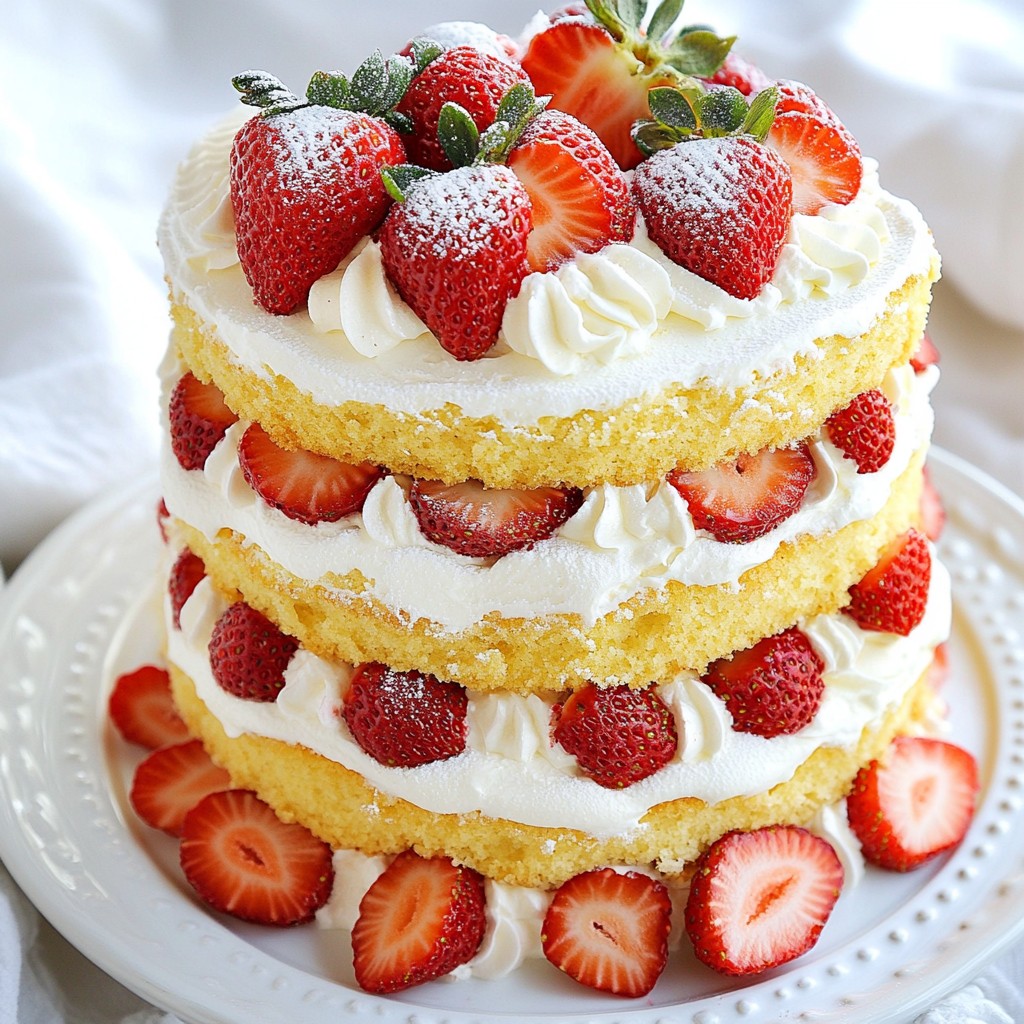
Are you ready to wow your friends and family with a Strawberry Shortcake Layer Cake? This delicious and simple recipe brings together fresh strawberries and light whipped cream for a delightful treat. I’ll guide you step-by-step, from picking the best strawberries to creating that perfect whipped cream. Whether you’re a baking pro or a beginner, this cake is sure to impress! Let’s get started on this sweet journey!
Why I Love This Recipe
- Deliciously Fresh: This cake combines the sweetness of strawberries with the lightness of whipped cream, making it a refreshing dessert for any occasion.
- Layered Elegance: The three layers of fluffy cake and vibrant strawberries create a stunning presentation that impresses guests.
- Easy to Customize: You can easily modify the recipe by adding different fruits or flavors to suit your taste preferences.
- Perfect for Celebrations: This strawberry shortcake layer cake is ideal for birthdays, anniversaries, or any special gathering.
Ingredients
List of Ingredients
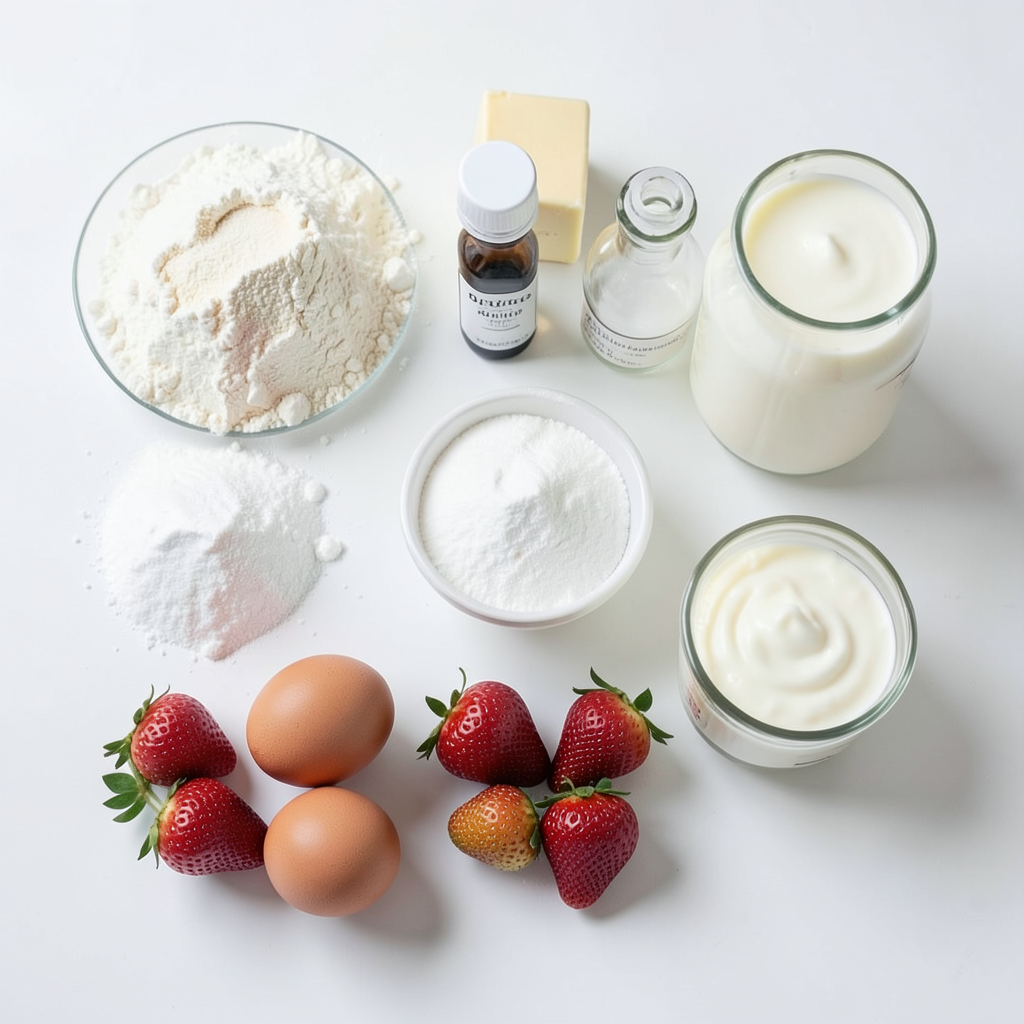
To make a delicious Strawberry Shortcake Layer Cake, you will need the following ingredients:
- 2 cups all-purpose flour
- 1 cup granulated sugar
- 1/2 cup unsalted butter, softened
- 1 cup whole milk
- 3 1/2 teaspoons baking powder
- 1 teaspoon vanilla extract
- 1/2 teaspoon salt
- 4 large eggs
- 2 cups fresh strawberries, hulled and sliced
- 1 tablespoon sugar (for strawberries)
- 2 cups heavy whipping cream
- 1/4 cup powdered sugar
- 1 teaspoon vanilla extract (for whipped cream)
Measurements and Substitutions
When measuring flour, spoon it into the cup and level it off. Don’t pack it down. For sugar, granulated works best. If you want to reduce sugar, try using less in the cake and the whipped cream.
You can swap unsalted butter with salted butter. Just omit the added salt in the recipe. Whole milk adds creaminess but can be replaced with almond milk or oat milk for a lighter version.
Tips for Selecting Fresh Strawberries
Fresh strawberries make your cake shine! Look for berries that are bright red and firm. Avoid any with soft spots or dull skin. I like to buy organic strawberries when I can. They taste better and are grown with fewer chemicals.
When you get home, wash them gently and remove the green tops. Store them in the fridge, but try to use them within a few days for the best flavor. If they are in season, you’ll taste the difference!
Step-by-Step Instructions
Preparing the Strawberries
To make the strawberries shine, start by hulling and slicing them. Place the sliced strawberries in a bowl. Add 1 tablespoon of sugar to the bowl and stir gently. Let them sit for about 30 minutes. This draws out the sweet juice and makes them tasty. You can use these sweetened strawberries later in the cake.
Instructions for Cake Batter Preparation
Now, let's make the cake batter. First, preheat your oven to 350°F (175°C). Grease and flour three 8-inch round cake pans. In a large mixing bowl, beat 1/2 cup of softened butter and 1 cup of granulated sugar. Mix until light and fluffy. Next, add 4 large eggs, one at a time, mixing well after each. Stir in 1 teaspoon of vanilla extract.
In another bowl, whisk together 2 cups of all-purpose flour, 3 1/2 teaspoons of baking powder, and 1/2 teaspoon of salt. Gradually add the dry mix to the butter mix. Alternate with 1 cup of whole milk. Start and end with the flour mix. Mix until just combined. Divide the batter evenly among the three pans.
Bake in the preheated oven for 25-30 minutes. Check for doneness by inserting a toothpick in the center. If it comes out clean, the cakes are ready. Let the cakes cool in their pans for 10 minutes. Then, transfer them to wire racks to cool completely.
Assembling and Decorating the Cake
Once the cakes are cool, it's time to assemble. Place one cake layer on a serving plate. Spread a layer of whipped cream on top. Then, add a layer of your sweetened strawberries. Place the second cake layer on top and repeat the process. Add whipped cream and strawberries again.
Finally, place the last cake layer on top. Cover the entire cake with the remaining whipped cream. For a beautiful touch, decorate with extra strawberry slices on top. Refrigerate the cake for at least 30 minutes before serving. This helps the layers set and makes each slice perfect.
Tips & Tricks
Best Practices for Baking the Cake
To bake the best strawberry shortcake layer cake, follow these steps:
- Use Room Temperature Ingredients: Ensure your butter, eggs, and milk are at room temperature. This helps the batter mix better.
- Grease and Flour Pans: Always grease and flour your cake pans well. This prevents sticking and ensures easy removal.
- Mixing Technique: Beat the butter and sugar until light and fluffy. This helps create a soft cake.
- Don’t Overmix: When adding dry ingredients, mix until just combined. Overmixing can lead to a dense cake.
How to Achieve Perfect Whipped Cream
Whipped cream can elevate your cake. Here’s how to get it right:
- Chill Your Tools: Chill the mixing bowl and beaters before whipping cream. Cold tools help the cream whip faster.
- Use Heavy Cream: Always use heavy whipping cream for the best results. It whips up thicker and holds its shape.
- Add Powdered Sugar: Adding powdered sugar gives sweetness and helps the cream stay firm.
- Watch for Soft Peaks: Beat the cream until you see soft peaks. This means it’s ready for your cake.
Decorating Tips for Presentation
Make your cake look as good as it tastes with these tips:
- Layer the Strawberries: When assembling, layer fresh strawberries between the cake and cream. This adds color and flavor.
- Smooth the Cream: Spread whipped cream evenly over the cake for a clean look. Use a spatula for best results.
- Add a Dusting: Finish with a sprinkle of powdered sugar on top. It adds a touch of elegance.
- Use Fresh Berries: Top the cake with whole strawberries for a fresh and inviting look.
Pro Tips
- Use Fresh Strawberries: Ensure that you use ripe, fresh strawberries for the best flavor. They should be bright red and firm to the touch.
- Room Temperature Ingredients: For a better rise and texture, make sure your eggs and milk are at room temperature before mixing them into your batter.
- Cool Cakes Completely: Allow the cake layers to cool completely before assembling the cake. This prevents the whipped cream from melting and ensures clean layers.
- Chill the Whipped Cream: For better stability, chill your mixing bowl and beaters before whipping the cream. This helps achieve firmer peaks.
Variations
Gluten-Free Strawberry Shortcake Layer Cake
You can make a gluten-free version of this cake. Use gluten-free flour instead of all-purpose flour. Many brands work well in cakes. Make sure to check the package for the right amount to use. Follow the rest of the recipe as is. The taste and texture will still be rich and fluffy.
Vegan Version of the Cake
To create a vegan version, you can swap out the eggs and butter. Use flax eggs instead of real eggs. Mix 1 tablespoon of ground flaxseed with 3 tablespoons of water. Let it sit for about 5 minutes to thicken. For the butter, use coconut oil or a vegan butter substitute. You can also use almond or soy milk instead of whole milk. The cake will still be moist and delicious.
Flavor Variations (Lemon, Chocolate, etc.)
You can add different flavors to this cake, too. For a lemon twist, add lemon zest and juice to the cake batter. This will give it a bright, fresh taste. If you prefer chocolate, swap half of the flour for cocoa powder. This will create a rich chocolate version. You can also add flavor extracts, like almond or coconut, to change things up. Each variation brings a new fun twist to this classic dessert.
Storage Info
How to Store Leftover Cake
To store leftover cake, keep it in the fridge. Place it in an airtight container. This helps the cake stay moist and fresh. You can also cover it tightly with plastic wrap. If you want to keep it longer, follow the freezing steps below.
Freezing the Cake Layers
You can freeze the cake layers for later use. First, let the layers cool completely. Then wrap each layer tightly in plastic wrap. Place the wrapped layers in a freezer bag. Label the bag with the date. They can last up to three months in the freezer.
Best Practices for Maintaining Freshness
To maintain freshness, avoid exposing the cake to air. Always keep it covered. If you plan to eat it within a few days, the fridge works great. For longer storage, use the freezer method. When ready to serve, let it thaw in the fridge overnight. This keeps the cake tasty and moist.
FAQs
Can I make this cake in advance?
Yes, you can make the cake in advance. Bake the layers and let them cool. Wrap each layer in plastic wrap and store them in the fridge for up to two days. If you want to keep them longer, you can freeze the baked layers for up to three months. When ready to serve, thaw the layers in the fridge, then assemble the cake. This makes hosting easier!
What can I substitute for heavy cream?
If you do not have heavy cream, there are great substitutes. You can use coconut cream for a dairy-free option. Another choice is to mix milk and butter. For every cup of heavy cream, mix 3/4 cup milk with 1/4 cup melted butter. This will give you a similar texture, but the flavor may vary slightly.
How do I ensure my cake layers are even?
To ensure even cake layers, use a kitchen scale. Weigh your batter before dividing it among the pans. This way, each layer will be the same weight. Also, make sure to spread the batter evenly in each pan. A spatula works well for this. Finally, bake the layers on the same oven rack to help them bake evenly.
This blog post covered all you need to know for a tasty strawberry shortcake layer cake. We talked about choosing fresh strawberries, making cake batter, and perfecting whipped cream. I shared tips for baking, decorating, and even special versions like gluten-free or vegan. Remember, cake storage matters too!
With these insights, you'll create a cake that impresses everyone. Enjoy baking and sharing this delightful dessert!