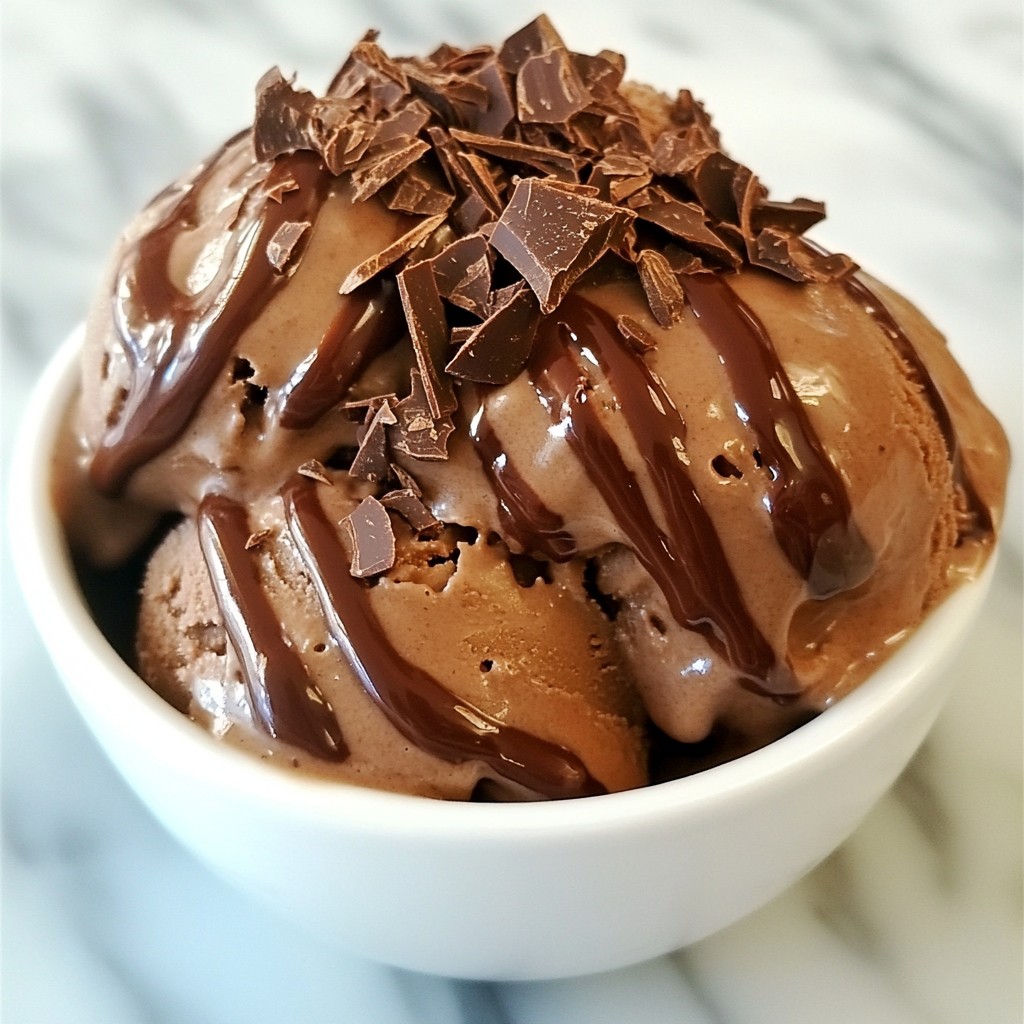
Indulge your taste buds with my Ultra Creamy Chocolate Ice Cream recipe! This rich treat combines basic ingredients like whole milk, heavy cream, and cocoa powder to create a smooth, velvety dessert. With simple steps, you’ll learn to mix, chill, and churn your way to ice cream bliss. Follow along to explore unique variations and expert tips. Get ready, because soon you’ll savor the ultimate chocolate experience!
Why I Love This Recipe
- Decadent Chocolate Flavor: This ice cream is rich and indulgent, perfectly satisfying any chocolate cravings.
- Ultra Creamy Texture: The combination of whole milk and heavy cream creates an irresistibly smooth and creamy treat.
- Customizable Swirls: Add chocolate syrup for delightful swirls, making every scoop a unique experience.
- Easy to Make: This recipe requires minimal effort and time, giving you delicious homemade ice cream with just a few steps.
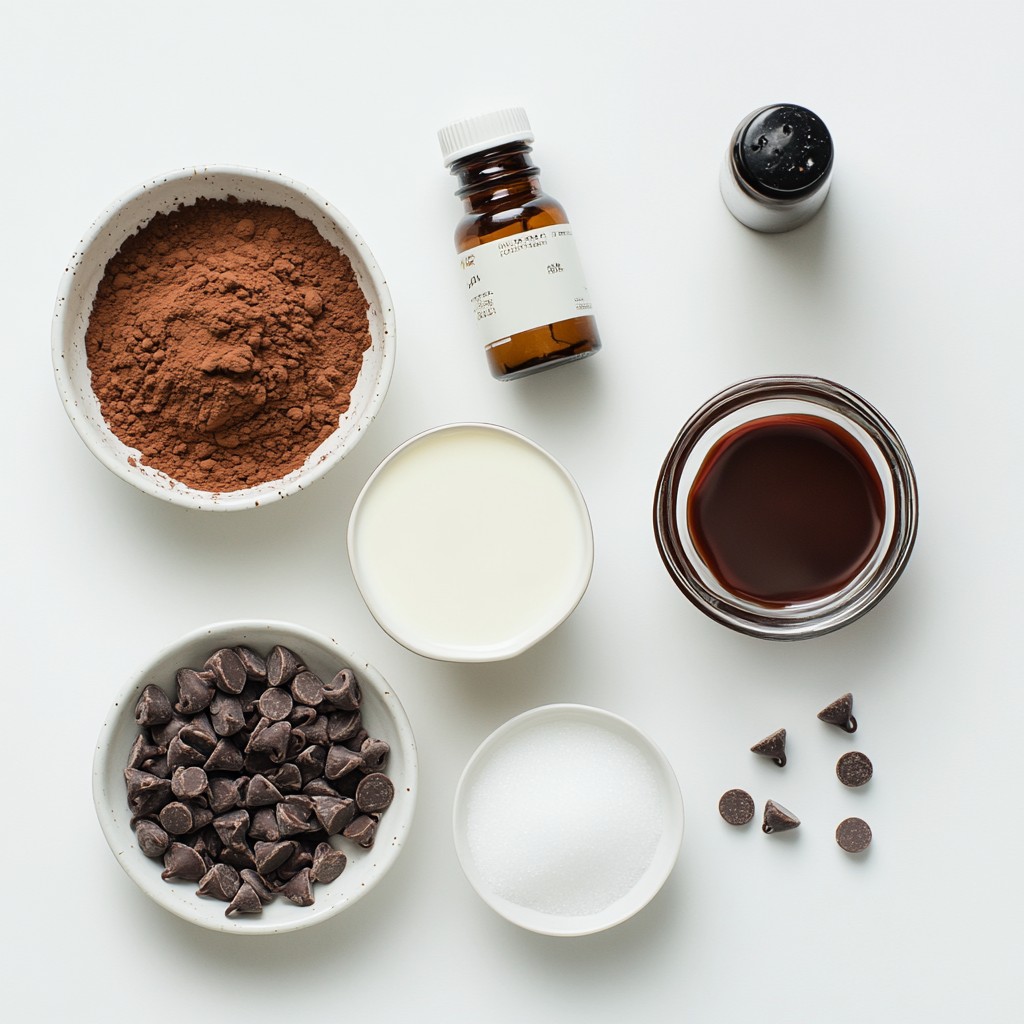
Ingredients
To make ultra creamy chocolate ice cream, gather these key ingredients:
- 1 cup whole milk
- 2 cups heavy cream
- 3/4 cup granulated sugar
- 2/3 cup unsweetened cocoa powder
- 1 teaspoon pure vanilla extract
- 1/2 teaspoon salt
- 1 cup semi-sweet chocolate chips (optional for a richer flavor)
- 1/2 cup chocolate syrup (for swirls, optional)
Each ingredient plays an important role. Whole milk adds body, while heavy cream gives that rich texture. Sugar sweetens the mix, and cocoa powder adds deep chocolate flavor. Vanilla extract enhances the taste, and salt balances sweetness.
If you want a richer ice cream, consider adding semi-sweet chocolate chips. They melt into the mix, making it even creamier. For a fun twist, use chocolate syrup to create beautiful swirls. This not only adds flavor but also makes your ice cream look fancy.
Make sure all ingredients are fresh. Using high-quality cocoa powder can elevate your dessert. This simple list creates an indulgent treat sure to impress family and friends.
Step-by-Step Instructions
Preparing the Chocolate Base
- In a medium saucepan, combine:
- 1 cup whole milk
- 3/4 cup granulated sugar
- 2/3 cup unsweetened cocoa powder
- 1/2 teaspoon salt
First, whisk these ingredients over medium heat. Keep stirring until the mixture warms up and the sugar and cocoa dissolve. Be careful not to let it boil.
Mixing in Cream and Flavor
- After removing the pan from heat, stir in:
- 2 cups heavy cream
- 1 teaspoon pure vanilla extract
Mix well until everything blends together. If you want a richer taste, add 1 cup of semi-sweet chocolate chips. Stir until they melt completely into the mix.
Cooling and Churning
Next, let your mixture cool to room temperature. Cover it and put it in the fridge for at least 2 hours. This chilling step is key for creamy ice cream.
Once chilled, pour the mixture into your ice cream maker. Churn according to your machine’s instructions. This usually takes about 20 to 25 minutes until it thickens and softens.
Freezing and Serving
After churning, transfer the ice cream to an airtight container. Freeze it for at least 4 hours, or until firm.
When you’re ready to serve, let the ice cream sit at room temperature for a few minutes. This makes it easier to scoop. Enjoy your ultra creamy chocolate ice cream in bowls, drizzled with extra chocolate syrup and topped with chocolate shavings or nuts for added texture!
Tips & Tricks
Achieving Ultra Creaminess
To make your ice cream super creamy, use heavy cream. This cream has a high fat content that gives your ice cream its rich texture. It makes each bite smooth and indulgent. When mixing your ingredients, chill them properly. After heating the milk and cocoa, let the mixture cool. This helps the ice cream churn better.
Common Mistakes to Avoid
One common mistake is overheating the mixture. If you let it boil, it can change the texture. Always heat just until warm. Another mistake is skipping the refrigeration step. Cooling the mixture is key. It helps the flavors blend and improves the final ice cream.
Enhancing Flavor
Using quality cocoa powder is essential. It impacts the chocolate taste greatly. Aim for a rich, dark cocoa for the best results. You can also enhance flavor by adding mix-ins. Chocolate chips give a nice texture and extra chocolate flavor. Swirl in some chocolate syrup for even more fun!
Pro Tips
- Use High-Quality Ingredients: For the best flavor and creaminess, opt for high-quality cocoa powder and real vanilla extract.
- Chill Your Mixture: Ensure that your ice cream base is thoroughly chilled before churning to achieve a smoother texture.
- Experiment with Mix-Ins: Feel free to add your favorite mix-ins like nuts, marshmallows, or other candies for added flavor and texture.
- Store Properly: To maintain the ice cream's texture, store it in an airtight container and press plastic wrap directly onto the surface before sealing.
Variations
Vegan Option
You can easily make this ice cream vegan. Substitute the whole milk and heavy cream with plant-based options. Use almond milk, coconut milk, or oat milk. For the cream, choose coconut cream for a rich taste.
When it comes to chocolate, some great brands are Enjoy Life and Alter Eco. They offer dairy-free chocolate that works well in this recipe.
Different Flavor Additions
To mix things up, try mint chocolate chip. Add a few drops of mint extract to the base before churning. It gives a refreshing twist.
You can also enhance the flavor with coffee or mocha. Just mix in a tablespoon of instant coffee or espresso powder. This addition deepens the chocolate flavor and adds a nice kick.
Serving Suggestions
Pair this ice cream with warm brownies or a slice of chocolate cake. The contrast in temperature and texture makes every bite special.
For toppings, think crushed nuts, chocolate shavings, or sprinkles. A drizzle of caramel or extra chocolate syrup adds more fun. Get creative and enjoy your delicious treat!
Storage Info
How to Store Ice Cream
To keep your ultra creamy chocolate ice cream fresh, use an airtight container. This helps prevent ice crystals from forming. Choose a container that fits your ice cream snugly. If there’s too much air, the ice cream can lose its creamy texture. Before sealing, press a piece of plastic wrap directly on the surface of the ice cream. This extra layer guards against freezer burn.
When freezing, set your ice cream in the coldest part of the freezer. It’s best to store it at 0°F or lower. Avoid placing it near the door. Frequent opening can change the temperature and affect texture.
Shelf Life
Homemade ice cream can last about two to three weeks in the freezer. After this time, it may lose flavor and texture. Signs of spoilage include ice crystals forming on top and a grainy texture. If it smells off or has changed color, it’s time to toss it. Always trust your nose and eyes!
Reviving Ice Cream Texture
If your ice cream has frozen hard, don’t worry! To soften it, leave it at room temperature for about 5 to 10 minutes. This helps bring back its creamy texture. Scoop some out and let it sit in a bowl. This method works better than microwaving, which can make it icy.
To avoid an icy texture, ensure your ice cream is well churned. Proper churning incorporates air, which helps keep it smooth. Also, make sure to follow the chilling instructions before you churn. This prevents large ice crystals from forming. Enjoy your rich treat!
FAQs
What is the best type of cocoa powder for ice cream?
The best cocoa powder for ice cream brings rich flavor and color. You can use unsweetened cocoa powder for a deep chocolate taste. Look for brands known for their quality, like Valrhona or Ghirardelli. They have different processing methods, which affect the flavor and color. Dutch-processed cocoa is milder and gives a smoother taste. Natural cocoa powder is more intense and can add a nice bite. Experiment with both to find what you like best!
Can I make this recipe without an ice cream maker?
Yes, you can still make this ice cream without an ice cream maker! Use a simple method called the freeze-and-stir technique. After chilling your mixture, pour it into a shallow dish. Place it in the freezer for about 30 minutes. When you see ice crystals forming around the edges, stir the mixture with a fork. Repeat this process every 30 minutes for about 2-3 hours. This method helps create a creamy texture without a machine.
How can I make my chocolate ice cream richer?
To make your chocolate ice cream richer, there are a few great options. First, use more heavy cream instead of milk. This adds fat, which makes it creamier. You can also add semi-sweet chocolate chips to the base. Melt them in the warm mixture for a deeper flavor. Another option is to stir in a few tablespoons of chocolate syrup. This adds sweetness and a nice swirl. Lastly, try adding a pinch of espresso powder to enhance the chocolate taste!
We’ve covered everything you need to know to make the perfect chocolate ice cream. From selecting quality ingredients to mastering the churning process, each step is crucial. You learned about variations, tips for creaminess, and how to store your treats properly. Remember, attention to detail makes all the difference. Whether you prefer classic flavors or unique twists, homemade ice cream offers a world of delight. Enjoy creating and sharing your delicious creations!