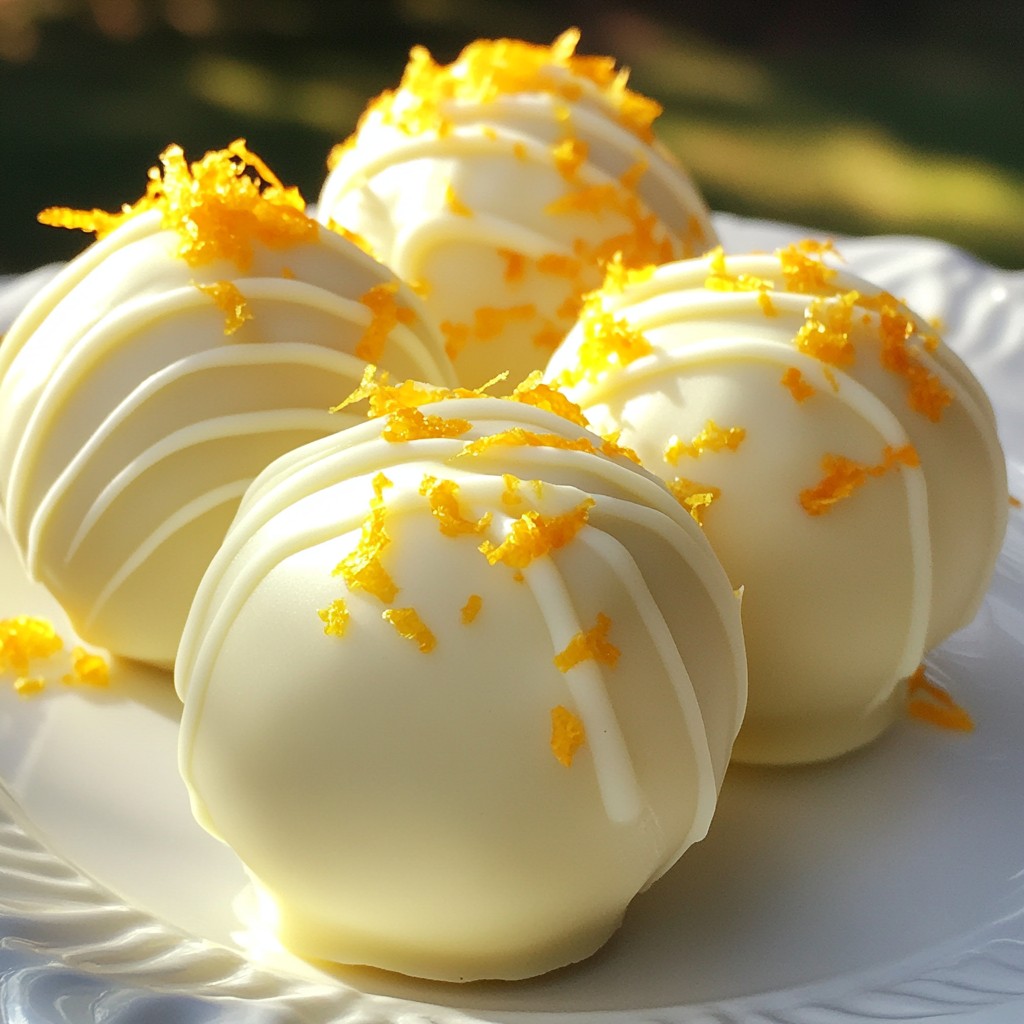
If you love sweet treats, you must try White Chocolate Orange Creamsicle Truffles. These delights mix creamy white chocolate with zesty orange for a burst of flavor. I’ll guide you through each step, from selecting quality ingredients to perfecting the coating. Whether for a party or a personal snack, these truffles are sure to impress. Let’s dive into this easy and fun recipe!
Why I Love This Recipe
- Delicious Flavor Combination: The mix of creamy white chocolate and zesty orange creates a refreshing and indulgent treat that’s perfect for any occasion.
- Easy to Make: This recipe is straightforward with simple steps, making it accessible for both beginners and experienced bakers.
- Perfect for Gift Giving: The truffles are beautifully presented, making them an excellent homemade gift for friends and family.
- Customizable: Feel free to experiment with different flavors or coatings, adding your personal touch to these delightful treats.
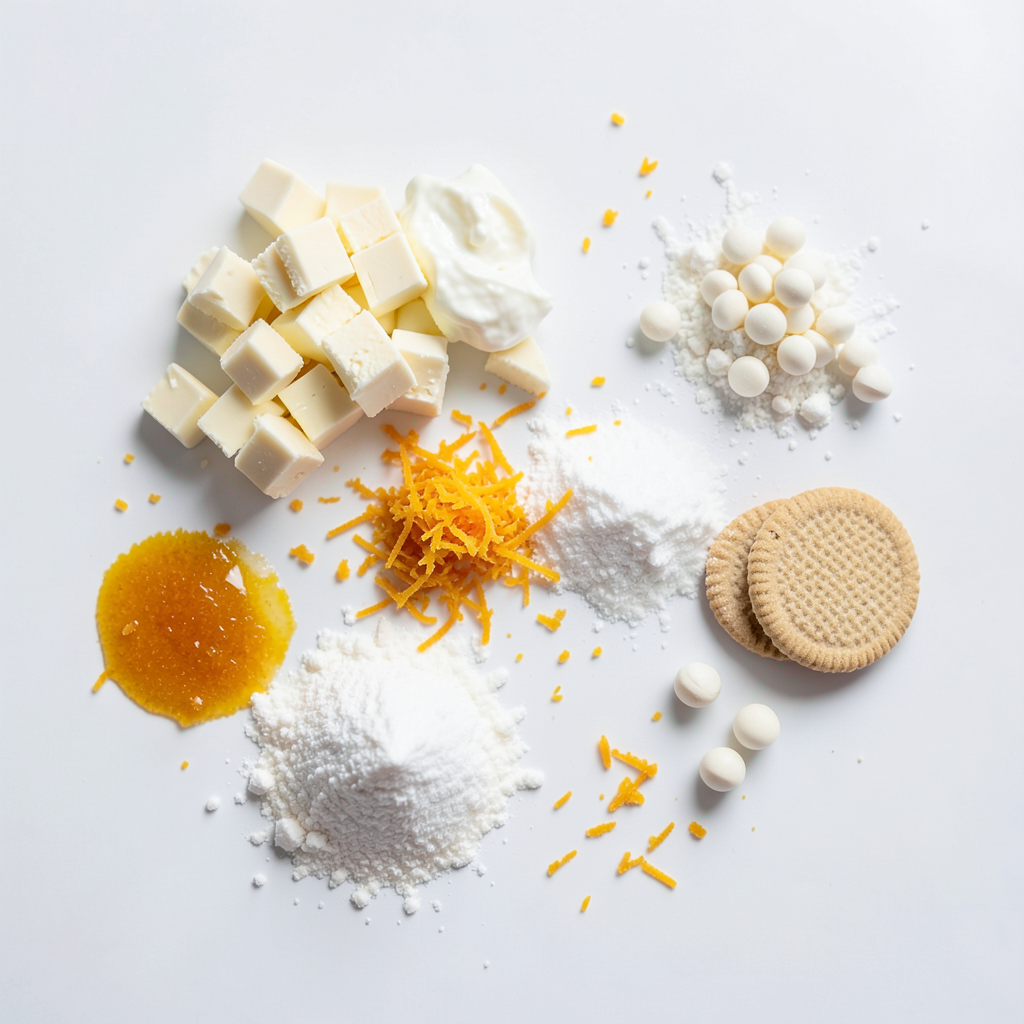
Ingredients
Main Ingredients List
- 8 oz white chocolate, chopped
- ½ cup heavy cream
- 1 tbsp orange zest (finely grated)
- 1 tsp orange extract
- 1 cup crushed vanilla wafers
- ½ cup powdered sugar
- Pinch of salt
- 1 cup white chocolate chips (for coating)
- Extra orange zest (for garnish)
Tips for Selecting Quality Ingredients
Choosing the best white chocolate When I pick white chocolate, I look for high cocoa butter content. This gives a smooth texture and rich flavor. Brands with pure ingredients make the best truffles.
Importance of fresh orange zest Fresh orange zest makes a big difference. It adds bright, natural flavor. Avoid dried zest, as it lacks the punch that fresh zest brings to your truffles.
Tips for selecting heavy cream Always choose heavy cream with at least 36% fat. This cream whips well and gives a rich taste. Check the date to ensure freshness for the best results.
Step-by-Step Instructions
Preparing the Chocolate Mixture
1. Start by heating the heavy cream in a small saucepan over medium heat. Watch carefully as it warms. You want it to simmer, not boil.
2. Once the cream simmers, remove it from the heat. Add the chopped white chocolate right away. Let it sit for about two minutes. This helps the chocolate melt perfectly.
3. After two minutes, stir the mixture until it is smooth. Then, add the orange zest and orange extract. Mix these in well to blend the flavors.
Forming and Coating the Truffles
1. Cover the bowl with plastic wrap and place it in the fridge. Chill it for about two hours. This step helps the mixture firm up so you can scoop it easily.
2. Once the mixture is firm, use a melon baller or a spoon to scoop small amounts. Roll these portions into balls with your hands.
3. In a separate bowl, mix the crushed vanilla wafers, powdered sugar, and a pinch of salt. This will be your coating.
4. Roll each truffle ball in the wafer mixture until it is fully coated. Then, place them on a baking sheet lined with parchment paper.
5. Now, melt the white chocolate chips in a microwave-safe bowl. Do this in 30-second intervals. Stir each time until smooth.
6. Dip each truffle into the melted white chocolate using a fork. Let any extra chocolate drip off before returning the truffles to the baking sheet.
Final Touches
1. While the dipped truffles are still wet, sprinkle a bit of extra orange zest on top. This adds a nice touch and bright flavor.
2. Refrigerate the truffles for at least 30 minutes. This helps the chocolate coating set well. Enjoy the process and the delightful smell of orange and chocolate!
Tips & Tricks
Achieving the Perfect Texture
To get the best texture for your truffles, chilling time is key. After mixing the chocolate and cream, let it chill for two hours. This helps the mixture firm up. If you scoop too soon, your truffles will be too soft to roll.
For smoother rolling, keep your hands slightly wet. This will help prevent the mixture from sticking to your hands. If needed, you can use a spoon to help form the balls.
Common Mistakes to Avoid
One big mistake is overheating the chocolate. When you heat the cream, take it off the heat just as it starts to simmer. This keeps the chocolate from seizing up.
Another mistake is not using enough orange zest. The zest adds a burst of flavor. Use at least one tablespoon for the best taste. A little extra zest can also give your truffles a nice touch.
Presentation Ideas
Get creative when serving your truffles! You can place them in a decorative box or on a colorful platter. Garnish with more orange zest for a pop of color.
For packaging, consider using small treat bags tied with ribbon. This makes them a great gift. You can also use cupcake liners for a fun touch. These ideas make your truffles look as good as they taste!
Pro Tips
- Chill for Better Texture: Refrigerate the truffle mixture for the full 2 hours to ensure a firm texture, making it easier to scoop and roll.
- Use Quality Chocolate: Choose high-quality white chocolate for a smoother melt and richer flavor in your truffles.
- Garnish with Fresh Zest: For an extra burst of flavor, use fresh orange zest as a garnish right before serving to enhance the citrus aroma.
- Experiment with Coatings: Try rolling the truffles in crushed nuts or coconut flakes in addition to vanilla wafers for a unique twist on texture and taste.
Variations
Alternative Flavor Combinations
You can make these truffles even more fun with different flavors. Try adding some extracts. Vanilla or almond extract can add depth. Just a little goes a long way.
You can also mix in nuts or dried fruits. Chopped almonds or walnuts give a nice crunch. Dried cranberries or apricots add a sweet twist. This makes your truffles unique and tasty.
Dietary Adaptations
If you follow a vegan diet, you can use vegan white chocolate. Many brands offer great options. This change keeps the truffles creamy and sweet.
For gluten-free diets, swap the vanilla wafers with gluten-free options. Look for gluten-free cookies or crackers. They work well and keep the texture just right.
Seasonal Twists
Seasonal flavors can make your truffles festive. For winter holidays, add peppermint extract or ground cinnamon. These spices bring warmth and cheer.
For spring or summer parties, think about fresh fruit flavors. You could use lemon or lime zest instead of orange. This adds a bright, fresh taste to your truffles.
These variations let you explore and enjoy new flavors with your truffles!
Storage Info
Best Storage Practices
Store your White Chocolate Orange Creamsicle Truffles in the refrigerator. Use an airtight container to keep them fresh. This helps maintain their creamy texture and bright flavor. If you want them to last longer, you can wrap each truffle in plastic wrap. This method keeps them safe from moisture and strong scents.
Freezing Truffles
To freeze your truffles, place them on a baking sheet in a single layer. Leave some space between each one. Once they are firm, transfer them to a freezer-safe bag or container. When you want to enjoy them, take out the desired amount and let them thaw in the fridge. This helps keep the texture smooth and tasty. Avoid thawing them at room temperature, as that can make them too soft.
Shelf Life of Truffles
If stored properly in the fridge, these truffles can last about one week. In the freezer, they can stay good for up to three months. Look for signs that they are past their prime, like a change in smell or texture. If they feel dry or look discolored, it’s best to toss them. Enjoying them fresh will always give you the best flavor!
FAQs
How do I make my truffles creamier?
To make your truffles creamier, adjust the cream ratio. You can try using more heavy cream. The current recipe uses ½ cup. Adding a little extra can help. This change makes the truffle filling softer and richer.
- Tip: Start with ⅔ cup of cream.
- Mix well: Stir until smooth after adding the chocolate.
- Chill: Ensure you chill the mixture long enough. This helps with texture.
Can I make these truffles in advance?
Yes, you can make these truffles ahead of time. They store well and save you time. Prepare them up to a week in advance.
- Storing: Keep them in an airtight container in the fridge.
- Freezing: You can freeze them for up to three months. Just wrap them well.
- Thawing: When ready, let them sit at room temperature for a bit.
What toppings can I use instead of orange zest?
If you want to change the topping, there are many options. Here are a few ideas to try instead of orange zest:
- Coconut flakes: They add a nice crunch.
- Crushed nuts: Almonds or pistachios work well.
- Chocolate shavings: Dark or milk chocolate can add richness.
- Sprinkles: Fun and colorful, they make the truffles pop.
Feel free to mix and match these toppings for a fun twist!
These orange chocolate truffles are easy to make and delightfully tasty. We discussed key ingredients like white chocolate and fresh orange zest. Following the steps ensures perfect texture and flavor. Remember to store them properly for the best shelf life.
Experiment with flavors and variations to suit your taste. Enjoy making these truffles for yourself or as gifts. They are sure to impress anyone who tries them. Now, gather your ingredients and get started!