
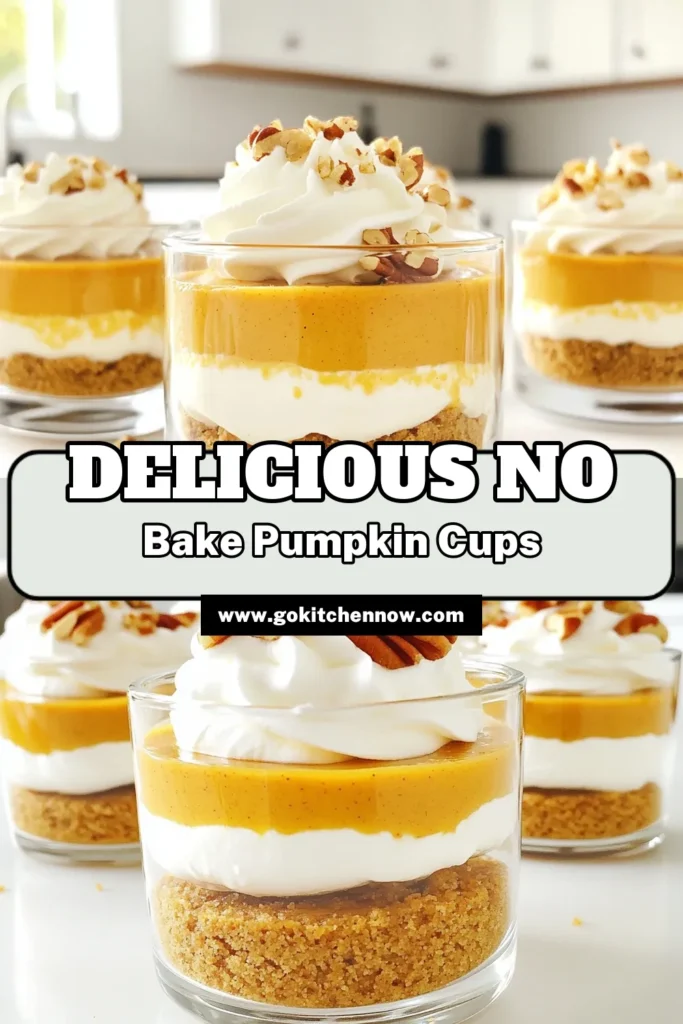
Are you ready to dive into a sweet treat that’s both simple and scrumptious? These No-Bake Pumpkin Cheesecake Cups are your answer! Perfect for any occasion, they combine creamy cheesecake with the warm flavors of pumpkin. In this blog, I’ll guide you through each step, share handy tips, and offer fun variations. Let’s create a dessert that will leave everyone wanting more!
Ingredients
Required Ingredients List
To make No-Bake Pumpkin Cheesecake Cups, gather these key ingredients:
– 1 cup graham cracker crumbs
– 4 tablespoons unsalted butter, melted
– 1 cup cream cheese, softened
– 1 cup canned pumpkin puree
– ½ cup powdered sugar
– 1 teaspoon vanilla extract
– 1 teaspoon pumpkin pie spice
– 1 cup whipped cream (plus extra for topping)
– ¼ cup toasted pecans or walnuts (for garnish)
These ingredients create a tasty treat. The graham cracker crumbs give a nice crunch. The cream cheese and pumpkin blend together to make it smooth and creamy.
Optional Ingredients and Substitutions
You can tweak the recipe with these optional ingredients:
– Use ginger snap cookies instead of graham crackers for a spicy twist.
– Swap out the cream cheese for mascarpone for a different flavor.
– Replace walnuts with chocolate shavings for a sweet touch.
These changes keep it fun and interesting. Feel free to experiment with flavors that you enjoy!
Tools and Equipment Needed
To prepare these cups, you will need:
– Medium bowl
– Large mixing bowl
– Hand mixer or stand mixer
– Serving cups or small glasses
– Spatula for folding
Having the right tools makes this process easy. With these items, you can create your delicious dessert with ease.
Step-by-Step Instructions
Preparation of the Crust
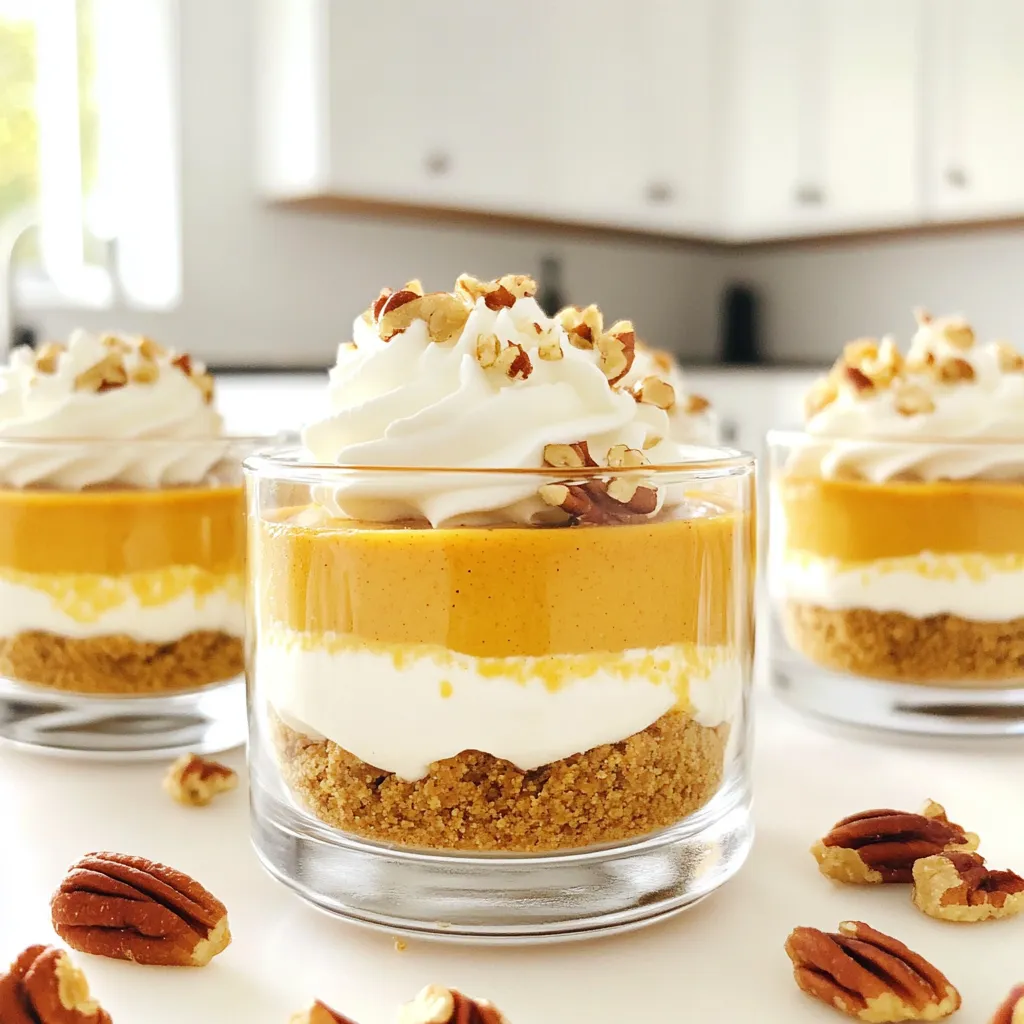
To start, grab a medium bowl. Add 1 cup of graham cracker crumbs and 4 tablespoons of melted unsalted butter. Mix the crumbs until they look like wet sand. This ensures they stick together well. Next, take your serving cups or small glasses. Spoon the crumb mixture into the bottom of each cup. Press down firmly to form a nice base. A solid crust is key for the cups.
Making the Pumpkin Cheesecake Filling
Now, let’s move on to the filling. In a large mixing bowl, add 1 cup of softened cream cheese. Beat it with a hand mixer until smooth. This step is vital for a creamy texture. Then, mix in 1 cup of canned pumpkin puree, ½ cup of powdered sugar, 1 teaspoon of vanilla extract, and 1 teaspoon of pumpkin pie spice. Beat these ingredients until well combined. This mixture should be smooth and flavorful. Finally, gently fold in 1 cup of whipped cream. This will make your filling light and airy.
Assembling the Cheesecake Cups
It’s time to assemble! Layer the pumpkin cheesecake filling on top of your crust in each cup. Fill each cup to the top, leaving no space. The layers will create a beautiful look. Once you finish, the cups should be full of rich flavor and texture.
Chilling Time and Setting
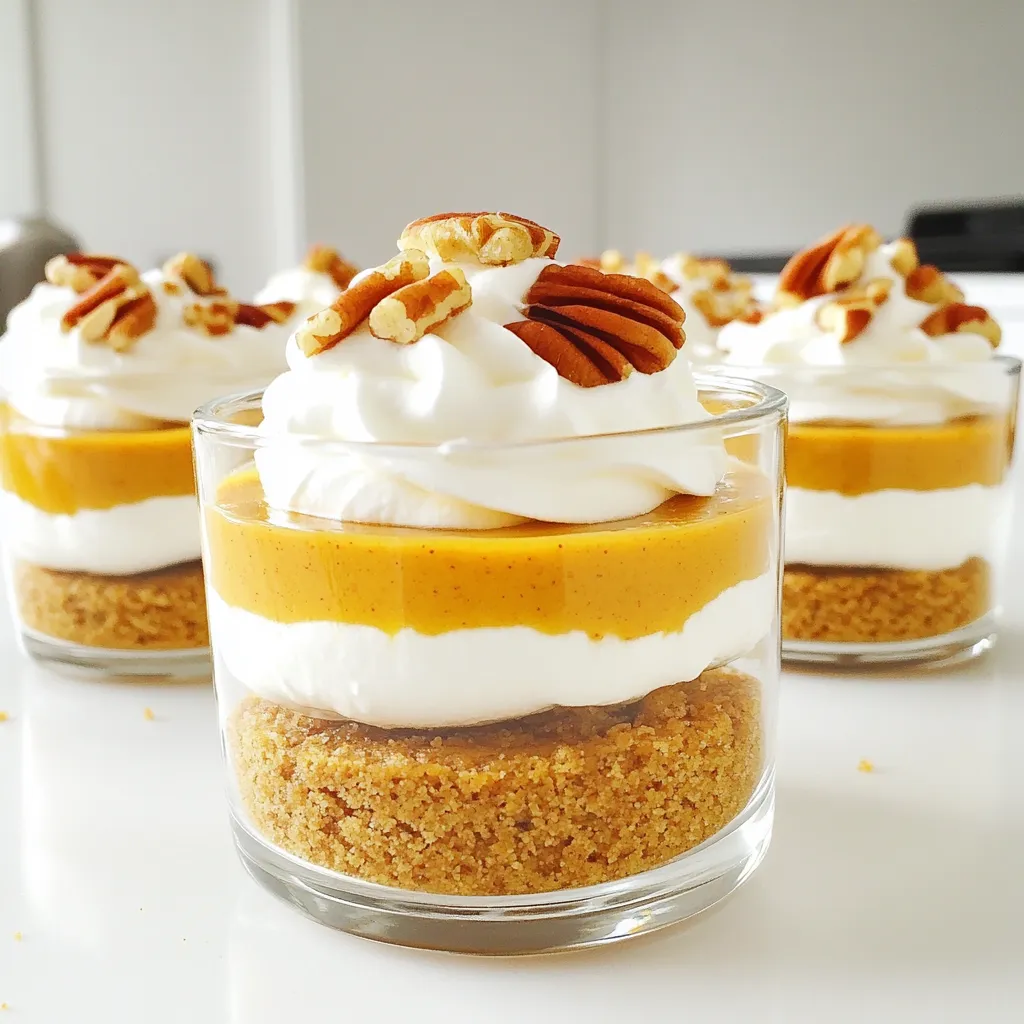
Place the assembled cups in the refrigerator. Let them chill for at least 2 to 3 hours. This time allows the cheesecake to set properly. The cool temperature helps the flavors meld together. Before serving, top each cup with a dollop of whipped cream. Sprinkle with toasted pecans or walnuts for that extra crunch. Enjoy your delicious no-bake pumpkin cheesecake cups!
Tips & Tricks
How to Achieve the Perfect Creamy Texture
To get a creamy texture, use softened cream cheese. It blends better than cold cream cheese. Mix it until smooth before adding other ingredients. Next, fold in the whipped cream gently. This keeps the mixture light and fluffy. The right mixing technique makes a big difference in texture.
Preventing Sogginess in the Crust
To avoid a soggy crust, ensure your graham cracker crumbs are well coated with butter. Press the crumbs firmly into the bottom of your cups. This helps form a solid base. Let the cups chill for a few hours. This will help the crust firm up even more.
Serving Suggestions and Presentation Ideas
Serve your cheesecake cups on a wooden board for a rustic look. You can also use colorful platters for a fun touch. Add a drizzle of honey or caramel sauce on top. Finish with a dollop of whipped cream and a sprinkle of toasted nuts. These small details make your dessert pop and impress your guests.
Variations
Flavor Variations for the Cheesecake Filling
You can change the taste of your pumpkin cheesecake cups easily. Want a spicier kick? Add more pumpkin pie spice. For a sweeter touch, try adding maple syrup or brown sugar. You could also use chocolate or caramel sauce for a fun twist. If you love fruit, mix in some apple or pear puree. Each variation brings a new flavor to enjoy.
Alternative Crust Options
While graham cracker crusts are classic, you have many options. Use crushed Oreos for a chocolatey base. Almond flour or crushed nuts can make a gluten-free crust. For a more vibrant flavor, try gingersnap cookies. Each crust choice adds a unique taste and texture to your cups.
Garnish and Topping Ideas
Garnishing your cheesecake cups can enhance the look and flavor. Here are some fun ideas:
– Whipped cream: A dollop on top is always a hit.
– Nuts: Sprinkle toasted pecans or walnuts for crunch.
– Spices: A light dusting of cinnamon adds warmth.
– Caramel drizzle: This adds sweetness and beauty.
– Chocolate shavings: Great for a rich touch.
Get creative with your toppings! They make each cup a delight to the eyes and taste buds.
Storage Info
Best Practices for Storing Leftovers
To keep your no-bake pumpkin cheesecake cups fresh, store them in the fridge. Use an airtight container to avoid absorbing any odors. If you have several cups, layer them with parchment paper. This will keep them from sticking together. Always place the cups in the back of the fridge, where it’s coldest.
How Long the Cheesecake Cups Last in the Fridge
These cheesecake cups can last about 3 to 5 days in the fridge. Make sure to check for any signs of spoilage before enjoying. If they look or smell off, it’s best to toss them. Enjoy them while they are fresh for the best taste and texture!
Freezing Instructions
You can freeze these cheesecake cups if you want to save them for later. First, let the cups chill in the fridge for a few hours. Then, cover them tightly with plastic wrap and foil. They can last up to 2 months in the freezer. When ready to eat, transfer them to the fridge for a few hours to thaw. Enjoy them cold for a refreshing treat!
FAQs
Can I use fresh pumpkin instead of canned?
Yes, you can use fresh pumpkin. Start with a small pumpkin. Roast it until soft, then scoop out the flesh. Blend it until smooth. This gives a fresher taste. Just make sure to remove excess water for the best texture.
What can I substitute for cream cheese?
If you want a cream cheese substitute, use Greek yogurt or silken tofu. They both add creaminess. Greek yogurt adds a tangy flavor. Silken tofu makes it dairy-free. Blend the tofu until smooth for the best results.
How do I make this recipe dairy-free?
To make this recipe dairy-free, use dairy-free cream cheese. You can also use whipped coconut cream instead of regular whipped cream. These swaps keep the taste delicious while making it suitable for a dairy-free diet.
Can I prepare these cups in advance?
Yes, you can prepare these cups ahead of time. Make them a day before your event. Store them in the fridge until you’re ready to serve. This allows the flavors to meld, making them even tastier!
You now have all you need to make tasty pumpkin cheesecake cups. We covered the key ingredients, steps, and tips to get that creamy texture. With fun variations and storage tips, you can keep these treats fresh and tasty. Feel free to experiment with flavors and garnishes. Enjoy sharing these cups with friends and family during the fall, or any time you crave something special. With these details, you’re ready to create a delightful dessert that everyone will love.
